In my last blog post I came to the realization that I’d been fitting my bras wrong for essentially my entire life. Cool. I detailed a lot of the fit adjustments I decided to make in that post (and why I thought I needed them), so I recommend checking it out if you need more context for anything that comes up in this post.
Ok, so I’ve already made the Ruby Bra before in Part 1 and Part 2 of this Adventures in Bra Sewing series, so the pattern had already been pretty tweaked to fit me in the band area. So for this version I did the following:
- I re-drafted the cup pattern, blending between the 5.25″ BCD of the size I had been using and the 6.00″ BDC which is the maximum for the pattern
- I use my draft for the “narrowest full band” based on the Craftsy classes I watched previously (basically, you make the band just wide enough for the wires and the elastic. I got a bit chicken-ish here and had an extra quarter inch but I think it was nice with the lace)
- I tried adding padding to my back hook
- I decided to make a fabric strap to emphasize the lace detail
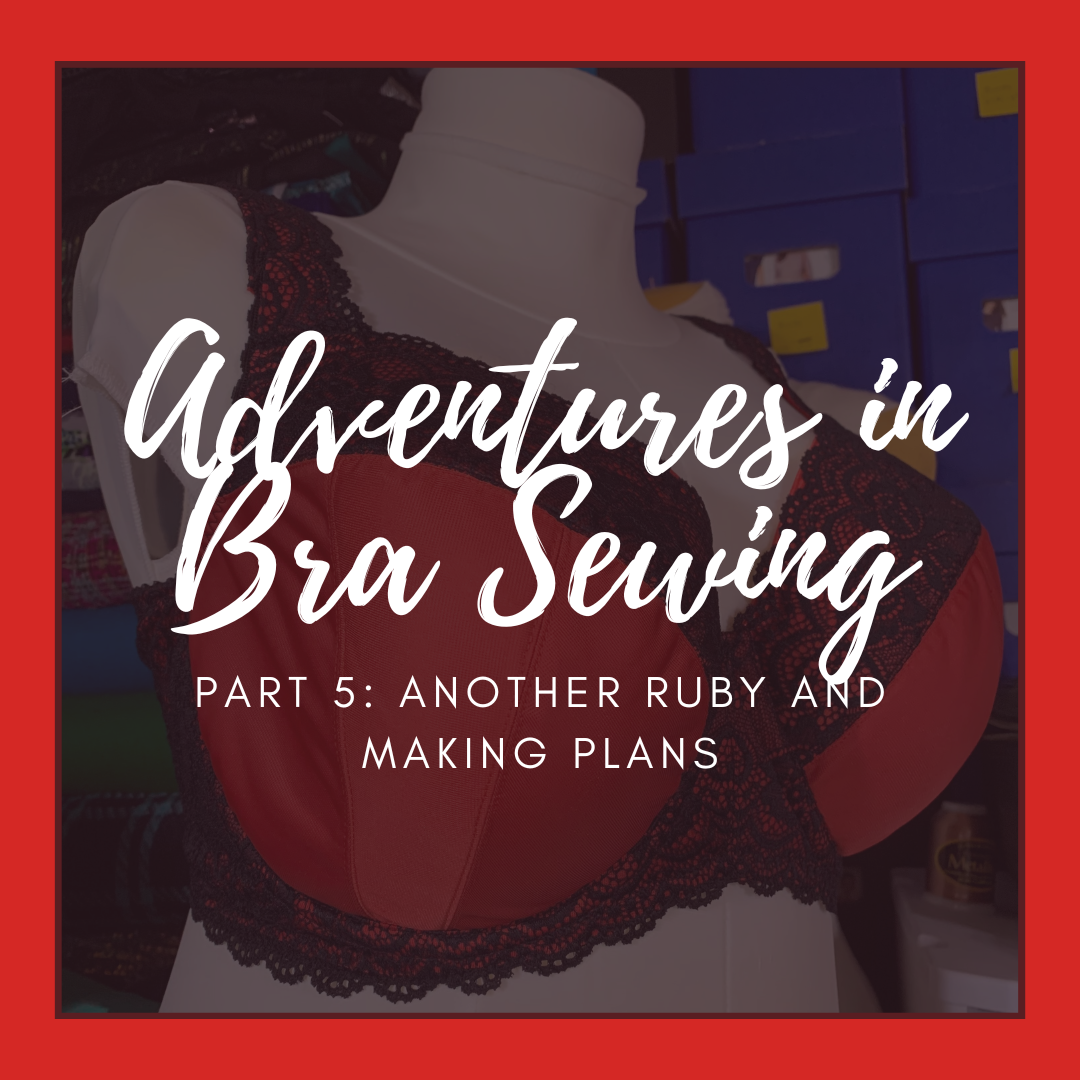
I’m happy to report that all of these changes went well. Overall I’m very pleased with the finished Ruby Bra, which I think really lives up to its name with this iteration:
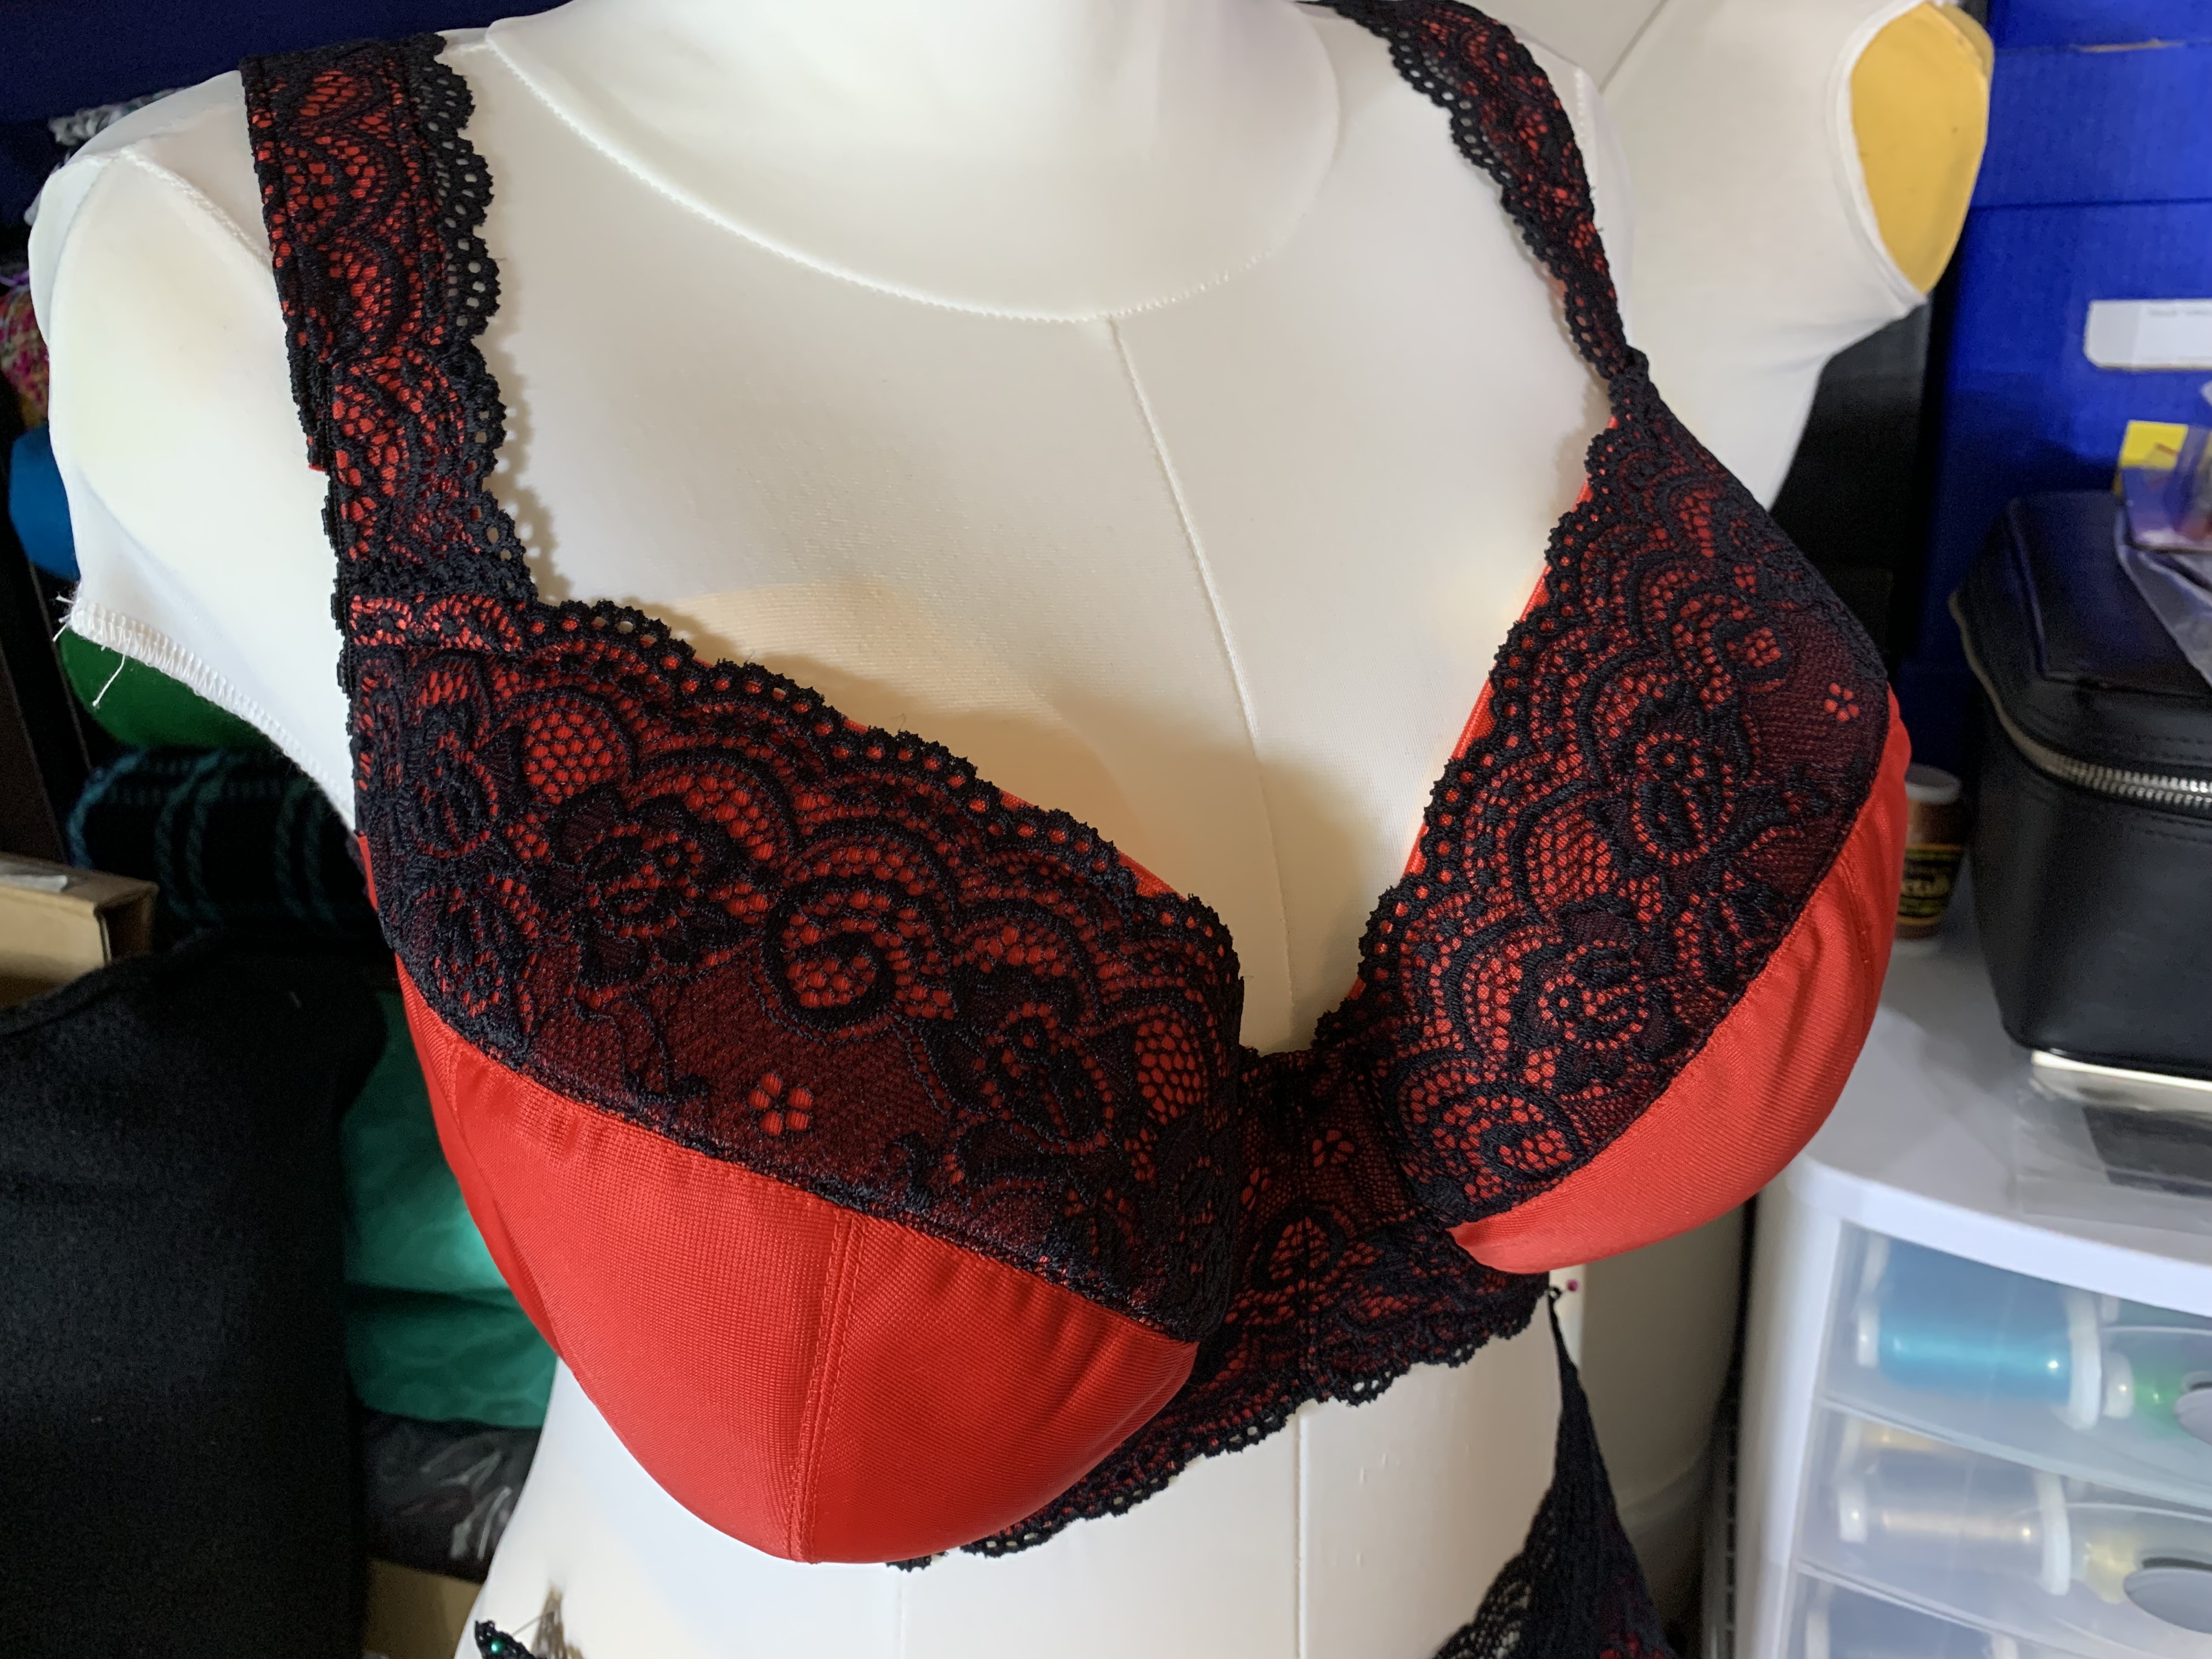

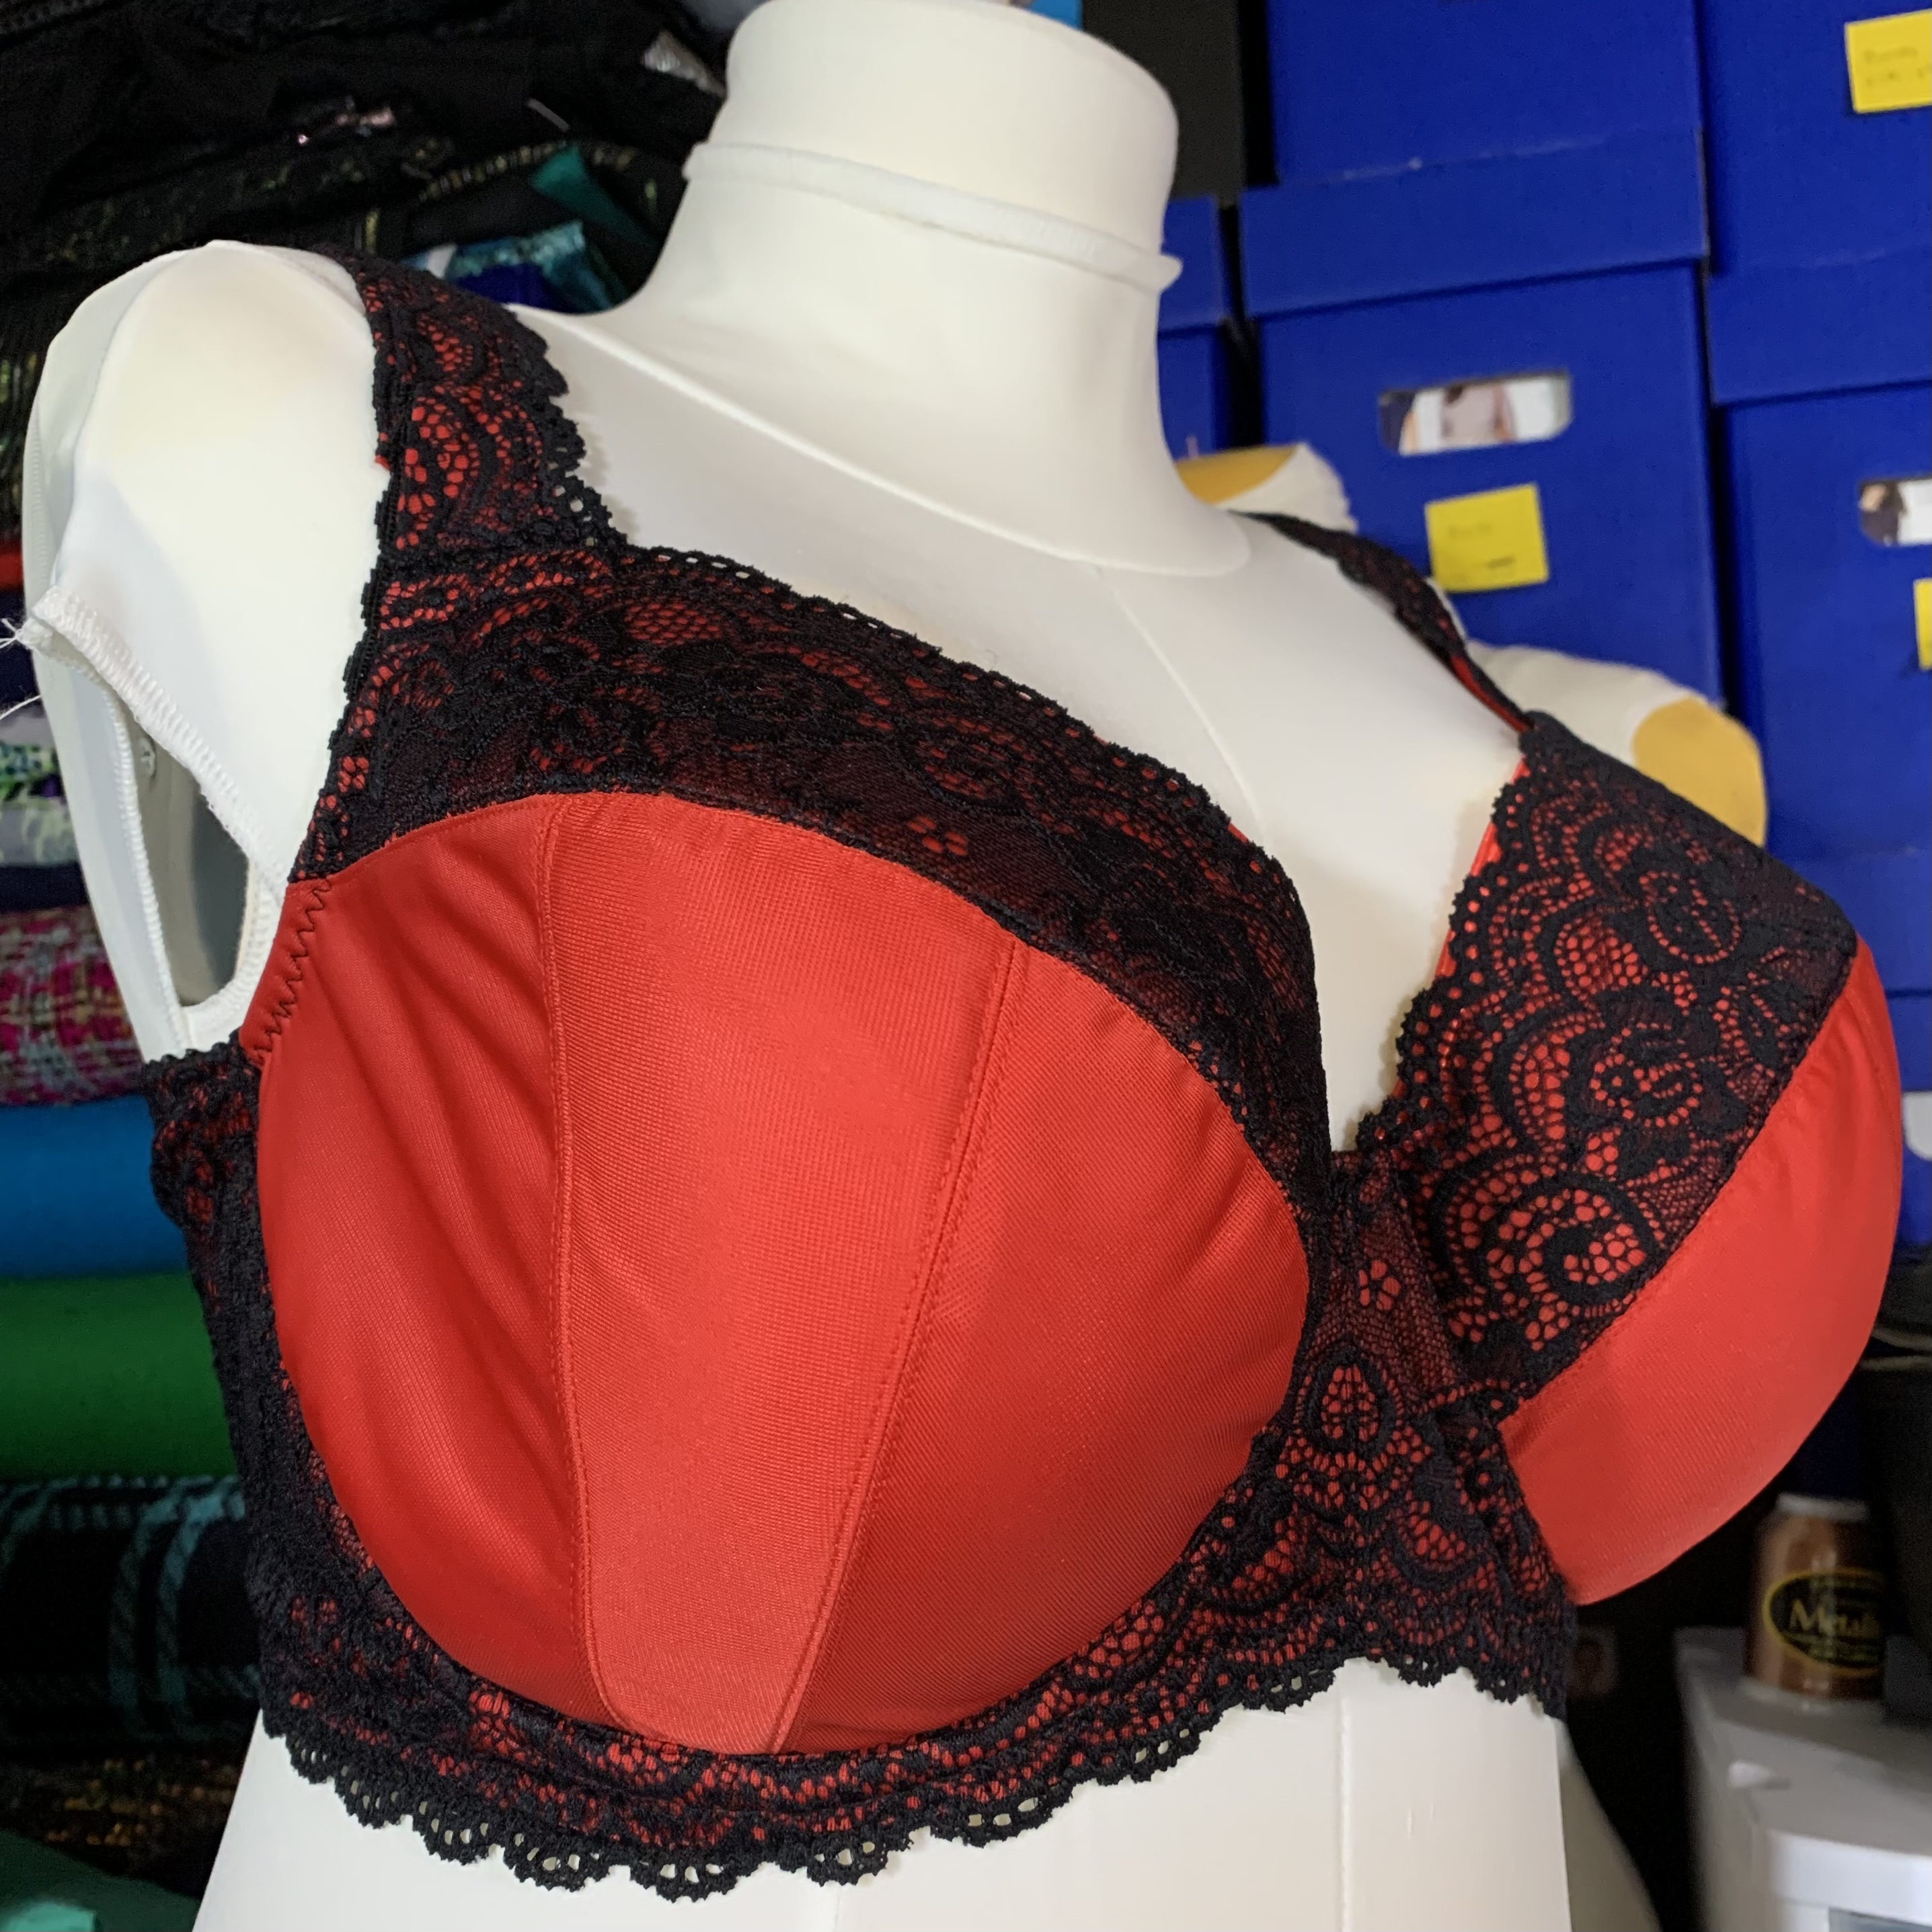
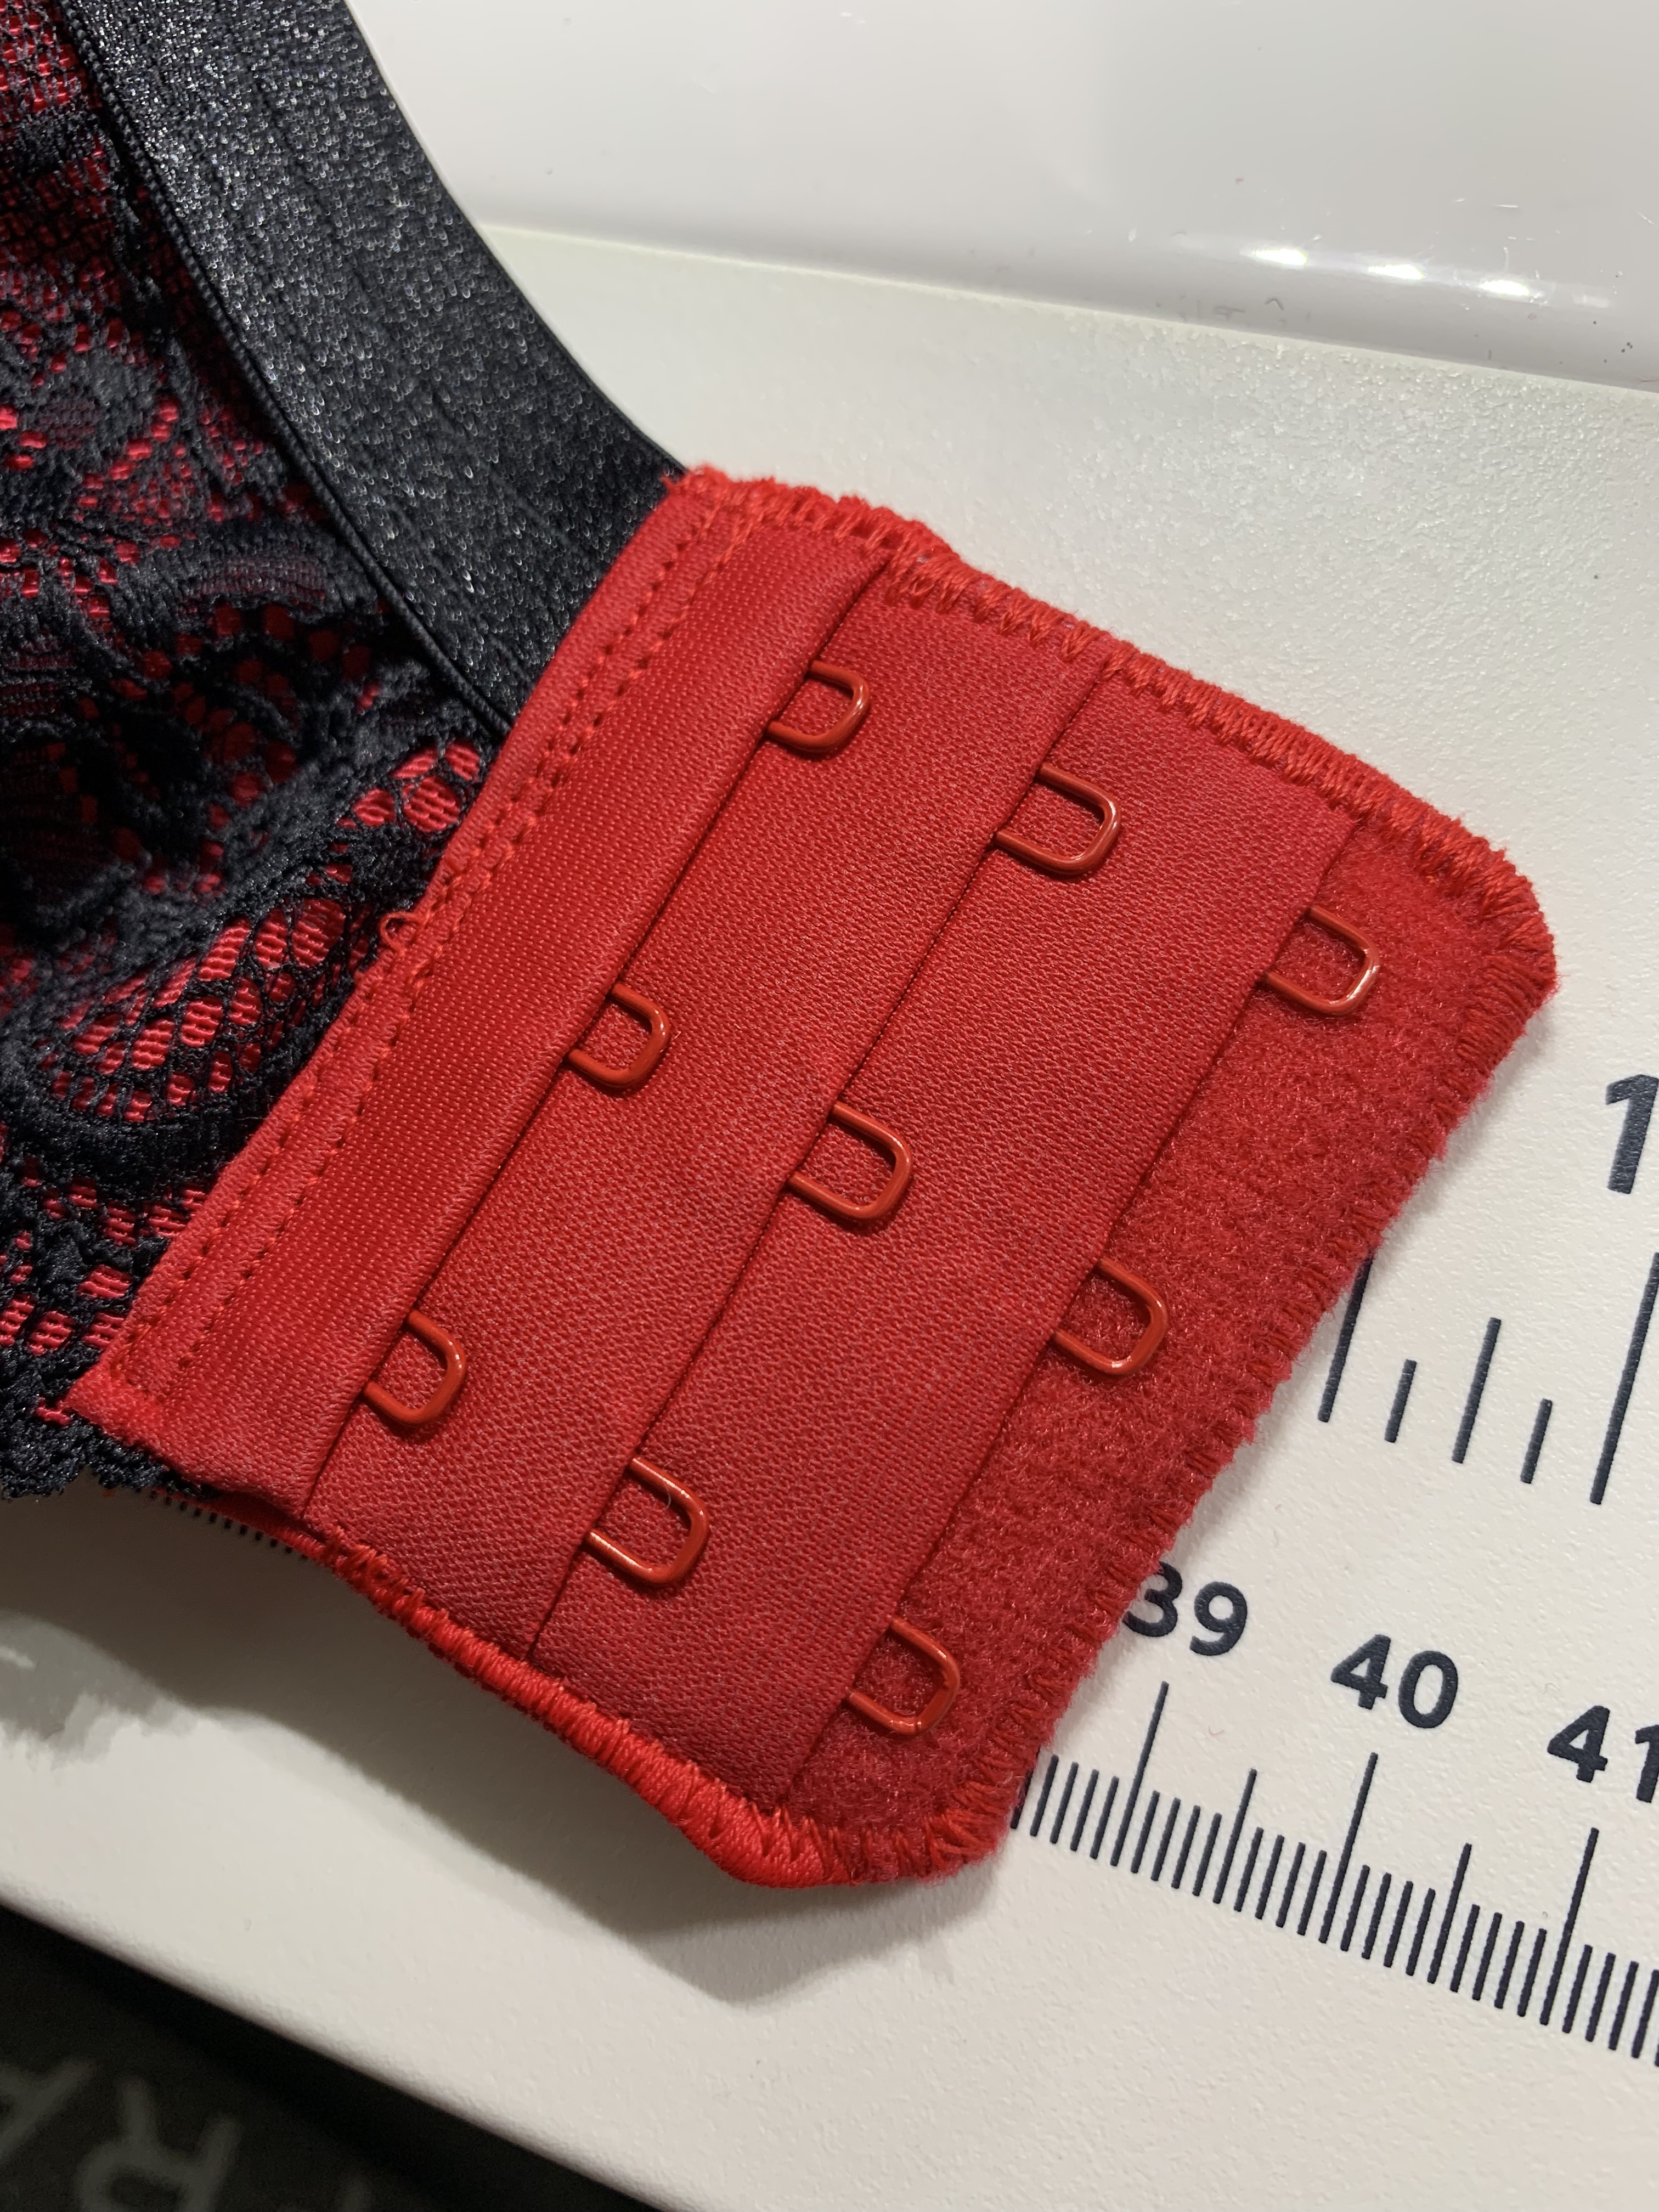
Here’s a look at some of the details:


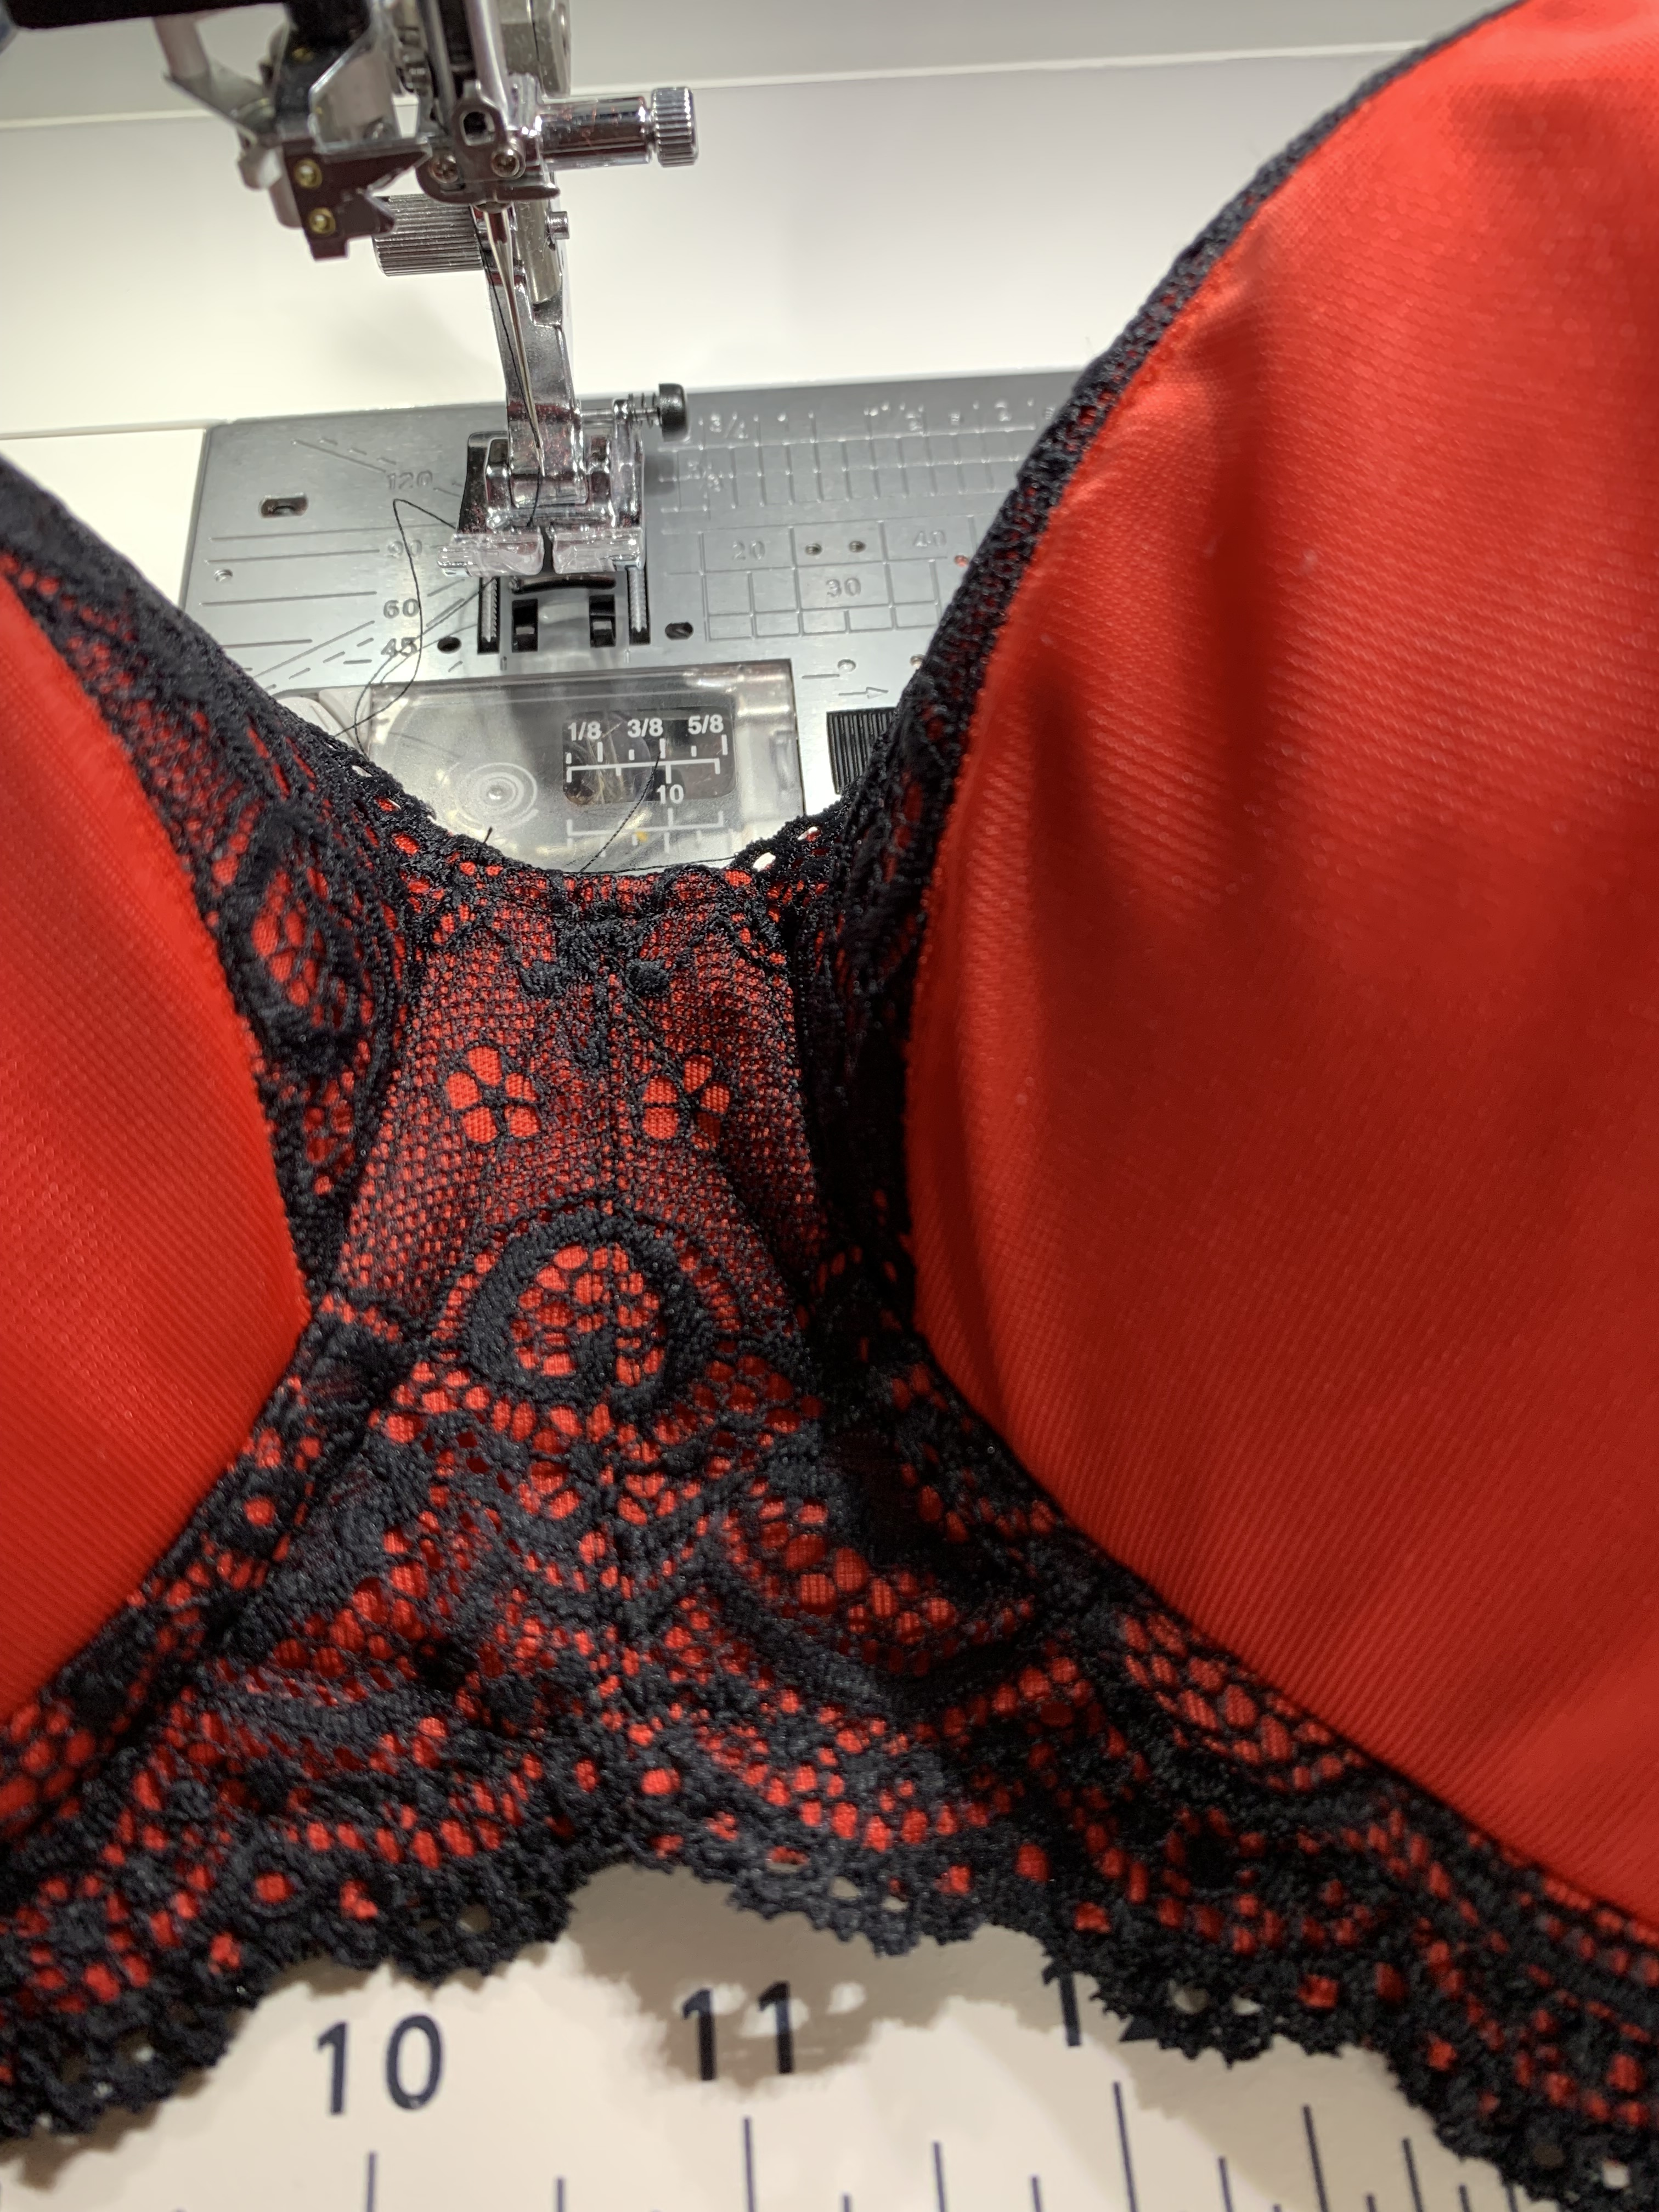
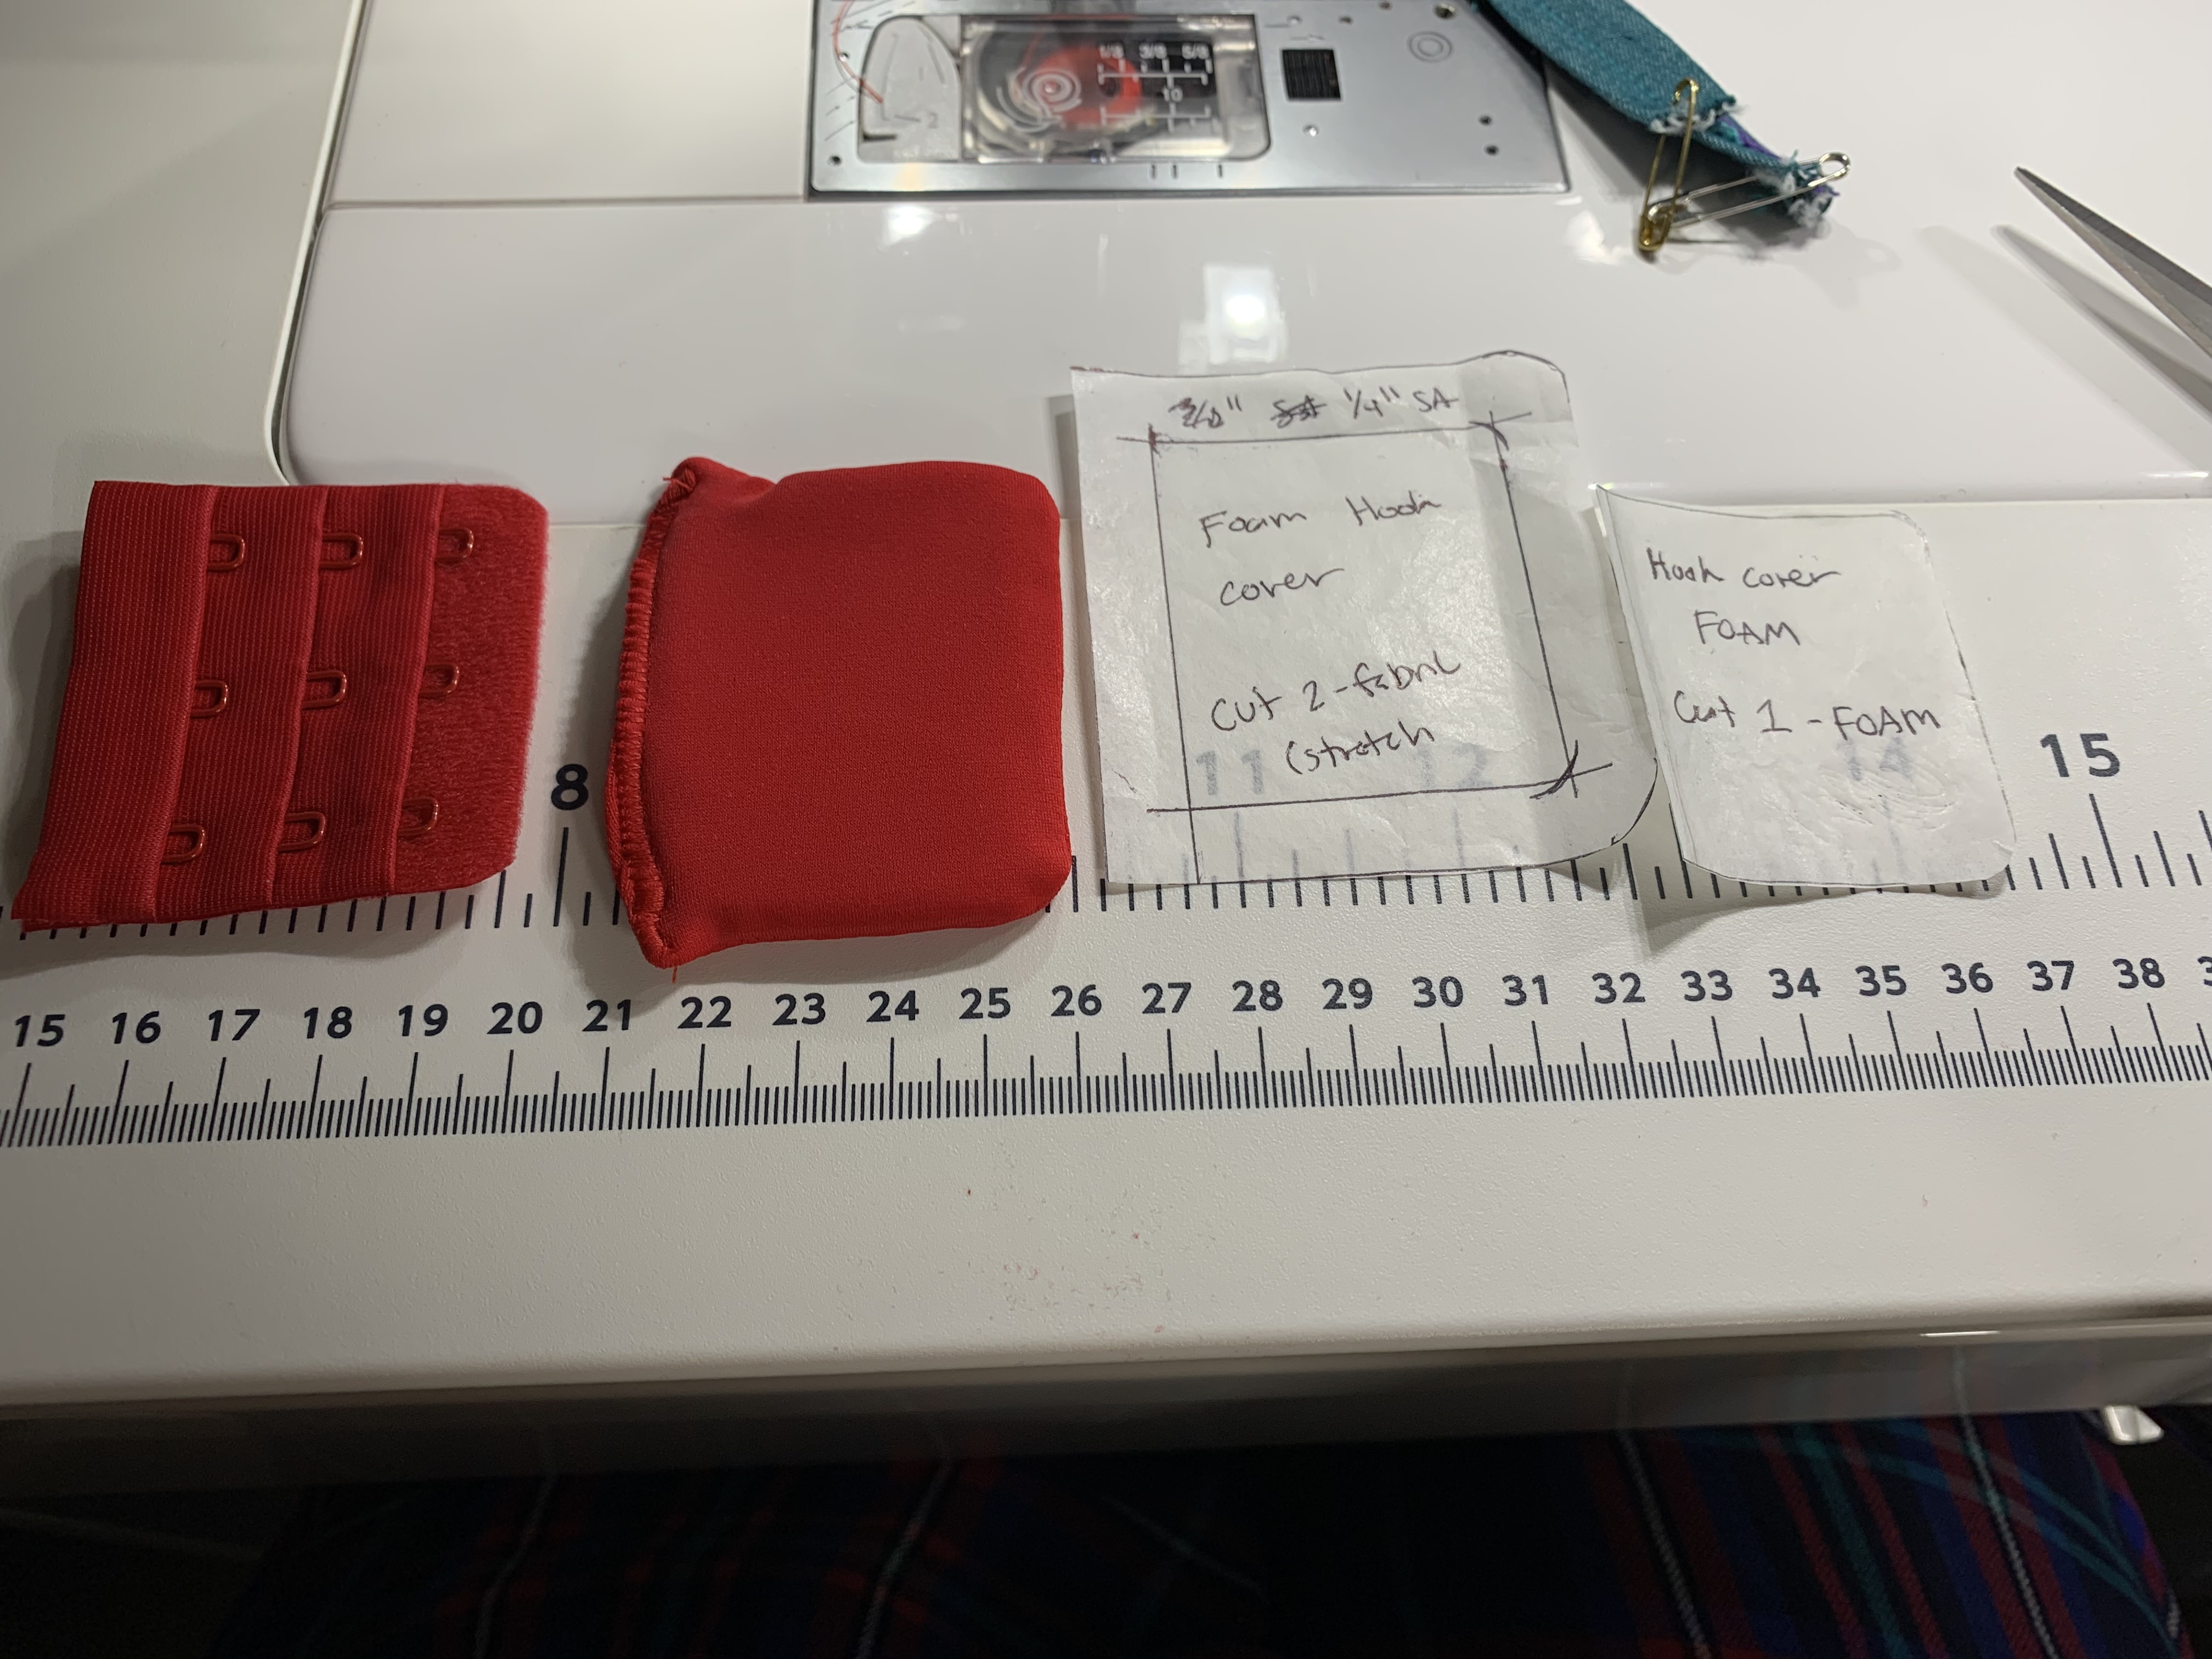
One of the things I’ve been hating about self-made bras are the scratchy areas at the edges of the eye tab. I’ve seen a lot of suggestions to add a bit of foam there, and it’s a feature I love in my current RTW bras. So I cut a bit of foam, made a cover, and zig-zagged it onto the back of the hook attachment. It’s not the neatest bit of sewing but I think it turned out pretty good for a first time experiment! And I love how it feels on. I think next time I need to also do a bit more zig-zagging over the edges of the hook portion to smooth that bit out too. Here’s how it looks:

One thing I did for this bra was use the self-drafted pattern from the Craftsy classes to make a few options for a matching set. I think I need to make a few tiny tweaks to the fit but overall I’m pretty much ready to toss out all of my current ill-fitting undies with all my current ill-fitting bras. Here’s what I made:

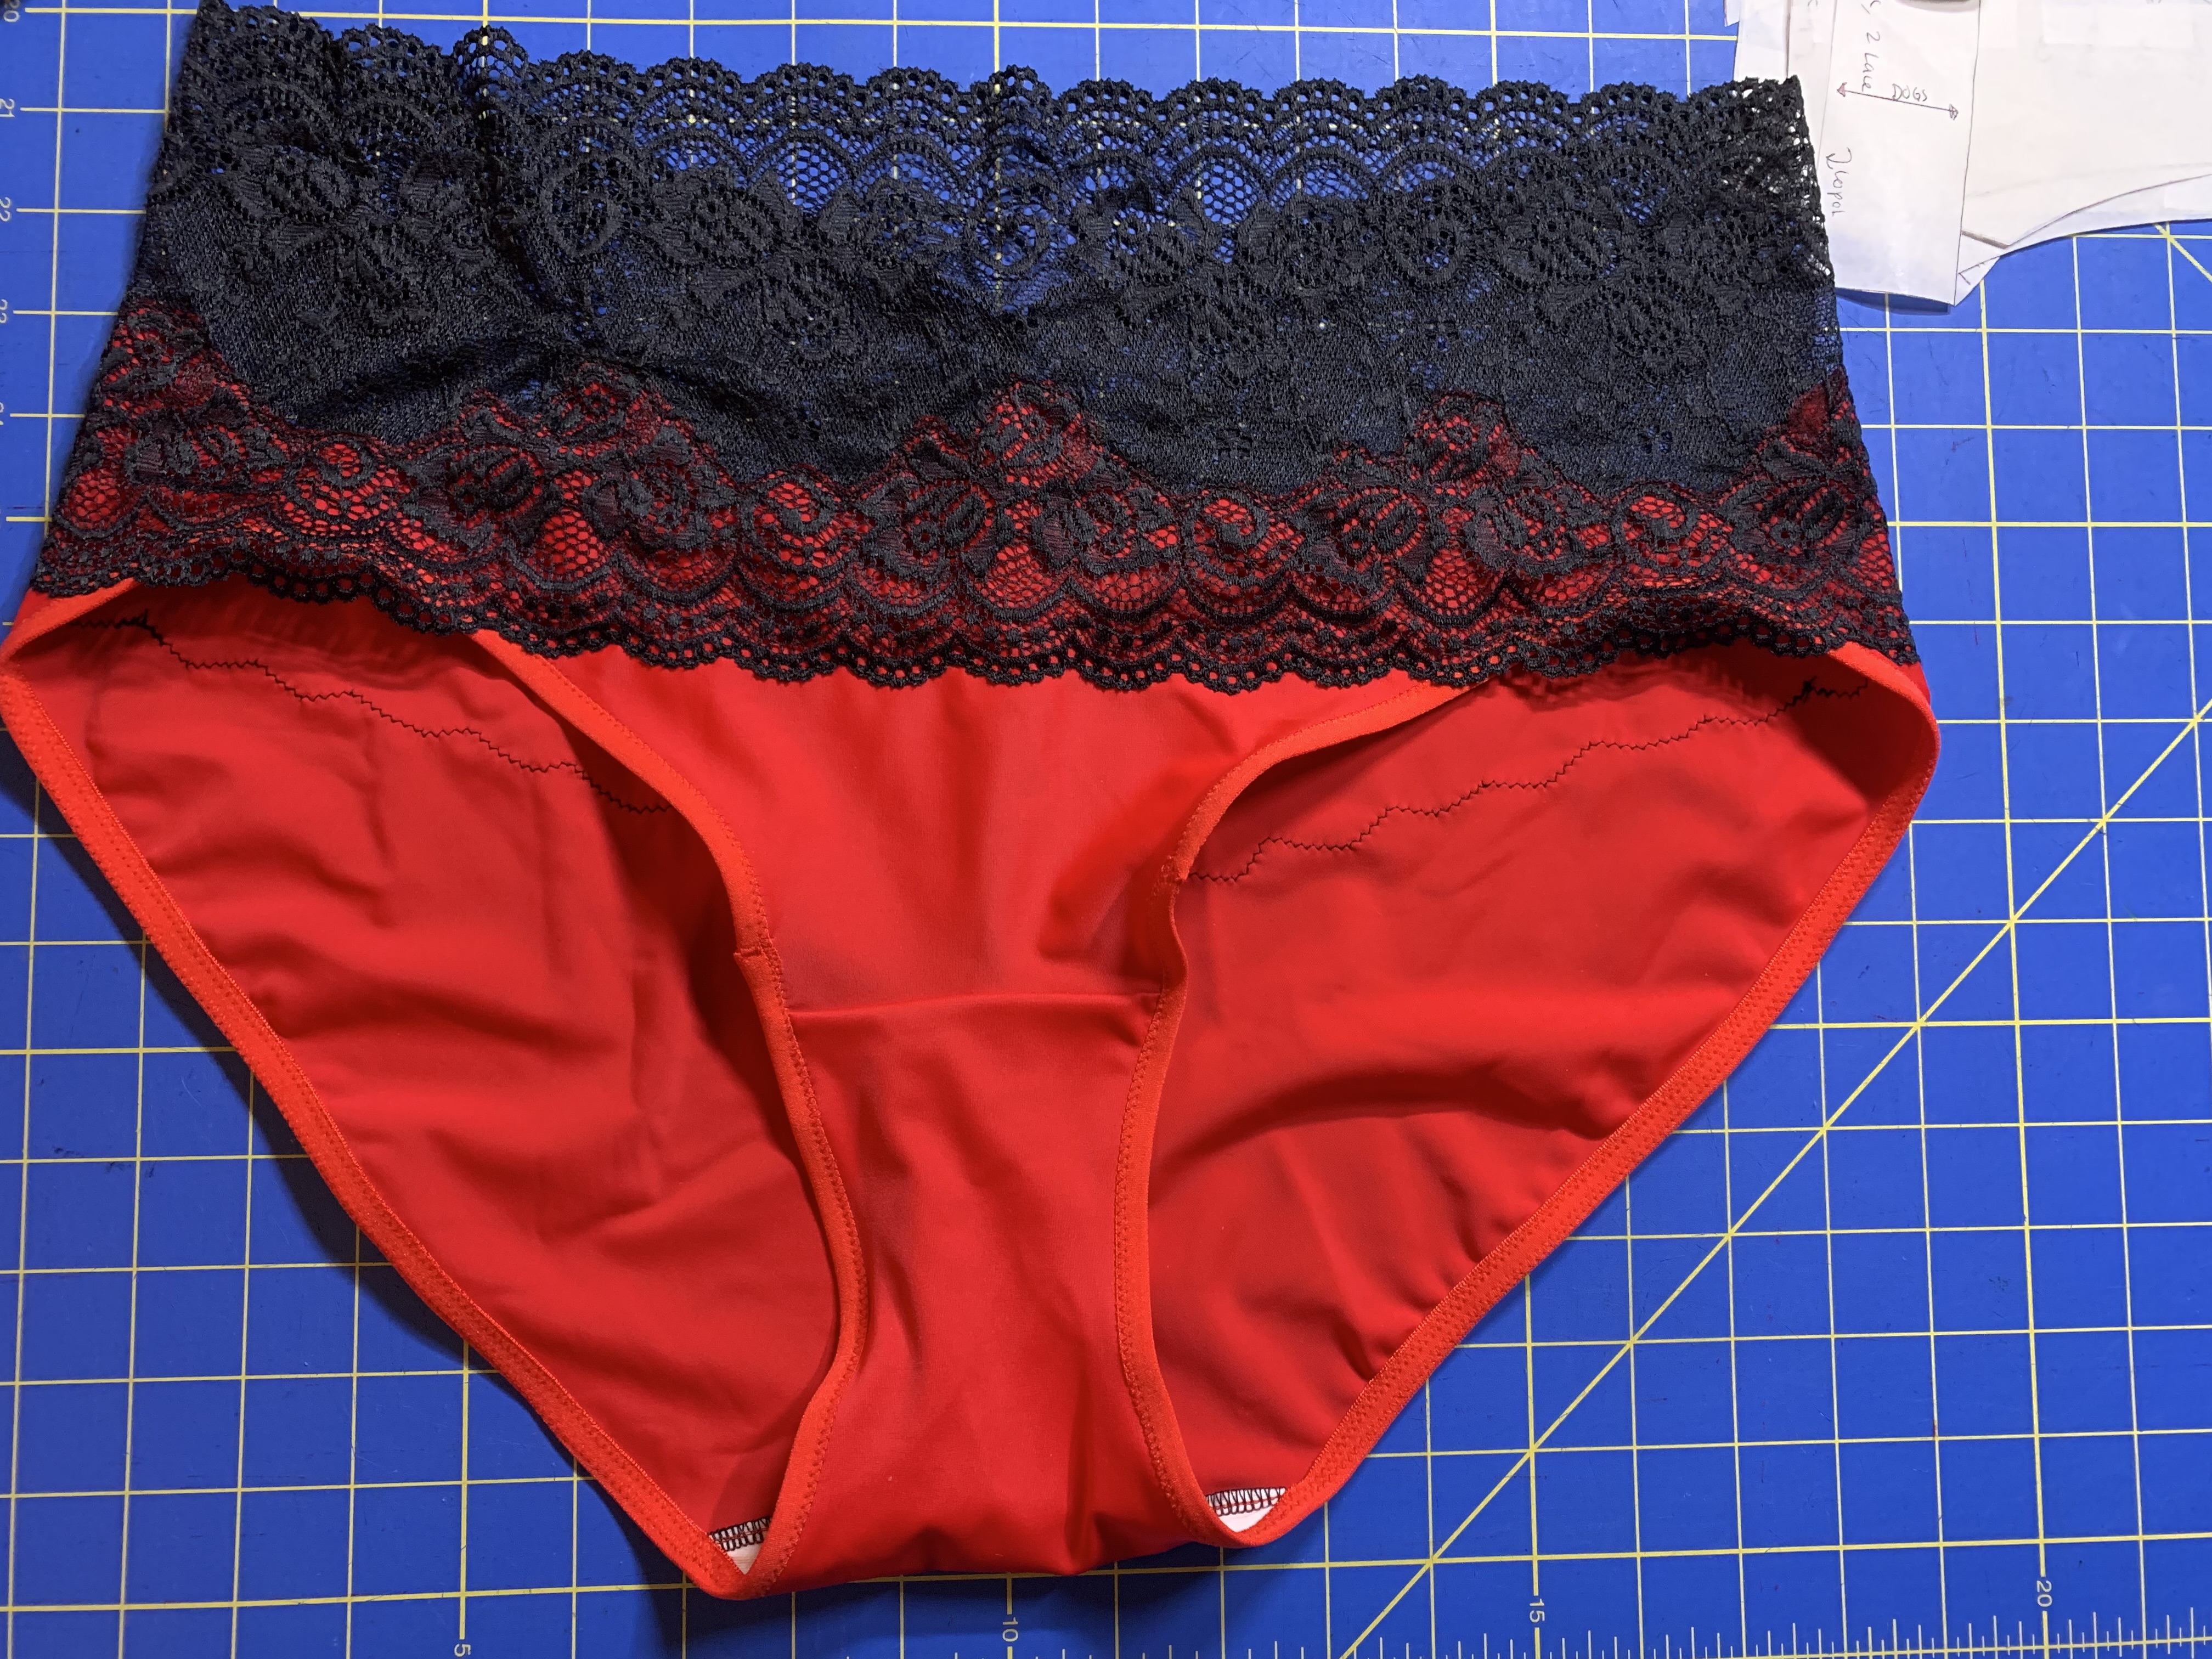

Overall I’m really happy with how it looks!


Generally speaking, I would say that I’m really happy I went ahead and made this bra using the alterations I did. I don’t think the fit is perfect but it is so significantly better than what I’ve had up to this point that I’m really pleased to have something to wear while I move forward with my future bra pattern experiments. I also love the foam addition to the hook – this is a must for all of my self-made bras moving forward! I also really love the narrow band. I think that the narrower bands are still more comfortable for me right now, and I’m still dying to try a Gothic Arch front because I think that shape will make a lot of impact on the comfort factor.
While I’m really pleased with the results, there are few things I’m not totally loving though. The first is the cup shape. It’s a lot easier to see with the expanded size, but the cup is definitely wider and flatter than my boob. While the added volume was necessary, I think this is still not really “me” shaped. When I’m at my fullest volume it’s not as noticeable, but when I’m a bit less puffy, there is definitely a lot more room in the upper cup than I would like, and the wire line is still a bit wide. After wearing it for a few days the top of the cups are quite obviously not correctly shaped. There is too much volume towards the side and not enough coverage towards the front. It pushes the strap too far out; were the volume not pushing the cup more forward it would definitely be too wide. So, even though not having a smushed folded up under-boob is definitely a move in the right direction, the fit still leaves a lot to be desired.
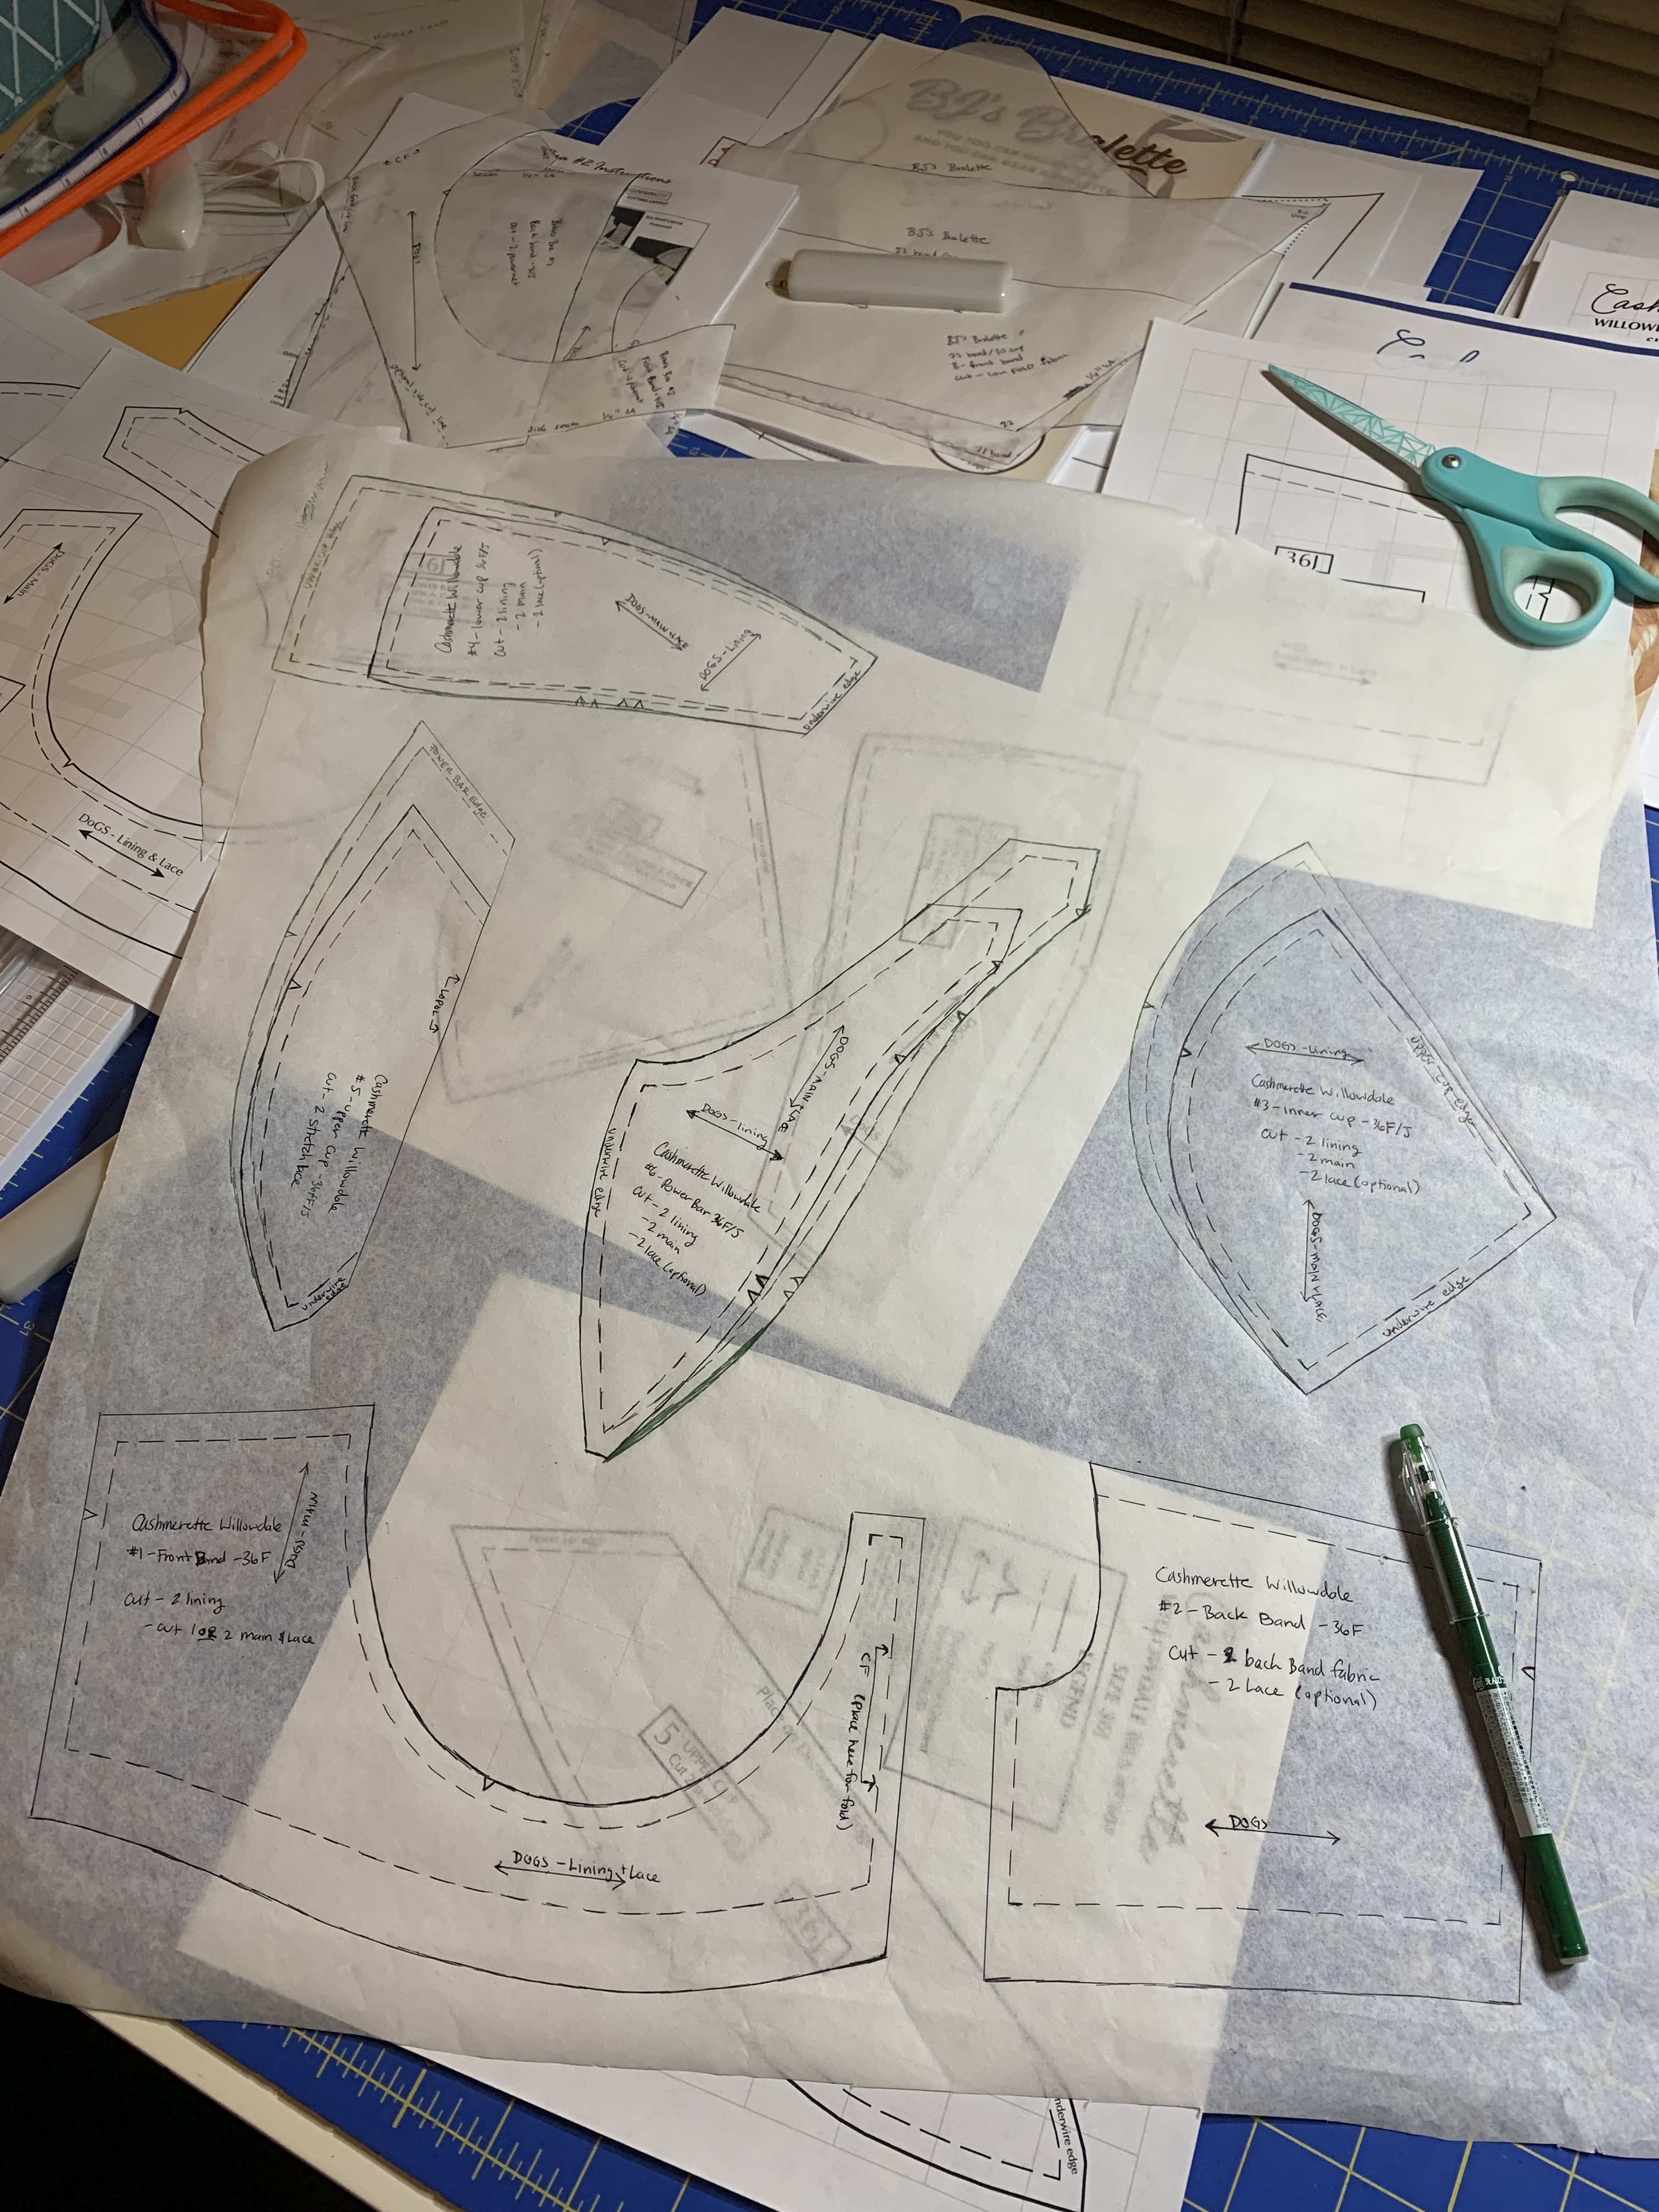
So, where do I go from here? I’ve been watching a lot of costubers on YouTube and they all emphasize that having the correct period undergarments is important before making outer garments. I think the same must be true of sewing a modern wardrobe, so I’ve decided I’m on a quest to make a well fitting bra before I turn back to my other sewing projects. And while I could play around more with the Ruby, I think it’s time to branch out and try different patterns and to experiment with different bands and look at different cup shapes. There were coupons as part of the Bra Bee that I recently attended, so I made use of those and ordered two patterns that were recommended in one of the sessions as being better for more narrow, rounder shapes (the Cashmerette Willowdale and the Bravo Bra #2). I also got some other “fun” styles to try later, after I get a decent base pattern and can use it to help with pattern modifications (aka I’m going to frankenpattern designs). I also want to try some wire-free and bralette patterns too, just to experiment and play with techniques. I fully anticipate that a correctly fitted wired bra will be my go-to, but I am also willing to embrace this as my era of experimentation and dabble outside of my comfort zone. After having made four bras I feel like I have a pretty solid foundation of construction skills at this point, and I think that playing around with all the design variation tutorials also helped me feel more comfortable with the pattern drafting side of things. But I think that before moving forward with design, I really need to find the right fit.
I’m going to do the next bit “right” in that I’m going to make a fitting band and sample cups and test all this out with some different wire styles I ordered before I make another fully wearable bra. I had resisted this step originally because I thought my first bra fit well enough, but now I’m ready to be more particular.
So while this post had the flashy red shiny new object, my guess is that the next several posts are all going to be about testing different patterns and making alternations and more theoretical stuff. Which is fun, but not full of super photogenic eye candy. So I hope you enjoyed all the bright pictures in this post!
One final thing before I sign off – I got a new boobie ham! I ordered it from the Bias Bespoke Etsy shop and I’m really happy with it. I haven’t been pressing a lot of my bra sewing (I’m wary of low melting points with these materials) but in watching some of the lace classes I think that this will be super helpful if I ever want to play with rigid lace cups or do need to press seams.

So I have a lot to do but I think I’m on the right track and I’m super excited to see where my bra sewing adventures lead next!

I have been reading (and enjoying) your blog for years and I don’t think I’ve ever left a comment but today I just have to say wow. Just wow. I am so impressed with your focus on this project, attention to detail, willingness to experiment and share your process, depthful exploration of alternatives, and just plain hard work. Bra-making isn’t my path but you inspire me to get things right and never give up in my own sewing journey. I have massive admiration for your creative process and lasting appreciation for the effort it takes to share it here. Thank you, and wow.
LikeLiked by 1 person
Thank you! Your comment is so nice and means a lot.
LikeLike
I am definitely here for bra fitting geekery! One thing I am going to try is sewing up a bra without foam in the cups. I have realized that the foam in both my RTW and home-sewn bras covers up a multitude of fitting problems, so I want to try a double layer of sheer cup lining to see what that tells me. (This might not work for all sizes, of course.) Unrelatedly, I found a great source for hook-and-eye tape, in case you’re looking for a bargain: Wawak sells it by the roll, and it comes out way, way cheaper than what bra supply places charge for 2 or 3 hook pre-made pieces. Something like $16 for 5 yards. And it’s nylon so it can be dyed.
LikeLiked by 1 person
Awesome! Thanks for the tip on the hooks. I also just bought a ton of undyed sheer cup lining from Bra Builders… it’s what I’m going to use for all my fit muslins, and I figure it’ll be good to actually line things with after that. I’m also realizing foam covers up a lot of fit sins (probably why I’ve preferred it) but I’m where you are… ready to start over from the beginning to see how good I can make things fit before I go crazy with design and style features.
LikeLiked by 1 person
Wow, what a beautiful and sexy set of lingerie – bet you feel like a million bucks when you wear them!
LikeLiked by 1 person