Ok, so, I’ve made it back into the sewing room in much less time than I anticipated. Mostly because on a bit of whim I decided to sign up for the International Bra Sewing Bee online webinar/conference. It was a bit of a last minute decision, but I do have to give a shout out to CarolynF who recommended it in a comment way back when I put up my first post about bra sewing last year. The Bee was a bit of overwhelm at first but I’ve already learned so much! I’m really happy I went in for extended access because I’m still watching videos and exploring resources, and learning from some of the pre-recorded classes and sew alongs that I didn’t have time for during the live portion of the event. I’m wishing a bit that I’d gotten the “Vault” access package because there were so many classes where presenters referenced last year’s classes, but that’s ok. I’m pretty sure I will be signing up again next year and (based on how much I enjoyed everything from this year) I will try to budget to splurge on the all access pass for next year.
Anyway, so, the immediate effect of the conference was inspiration – my first thought was I really want to sew another bra, now! I had a lot of supplies and patterns from my previous adventures (you can read about them in Part 1, Part 2, and Part 3 of this Adventures in Bra Sewing series) so I spent a wonderful Friday evening after work pulling things out and generally making a good crafty mess.
I was finally at the point of making design decision and settling on styles, colors, and materials and ready to cut out when everything went to chaos because I was listening to a fit clinic webinar where I suddenly had the lightbulb realization that OMG my bras don’t actually fit!
I will say that Monica of Bravo Bella Bras was an amazing presenter and I learned so much in her sessions (well, I’m still learning – I’ve been going back to review sessions and some of her online classes about how to make fit alterations and “sister sizing” have explained so much!), but it also made me go back and try on every bra I’ve made thus far and really evaluate the fit. Ironically, over the past few months, I’ve continually gone back to my first bra as being the most comfortable, but I couldn’t figure out why. I’d made so many fit adjustments to the bands in the second and third bra attempts that it didn’t make sense why the first bra had become my “comfy enough to wear it on a plane for 20+ hours” default choice. At first I thought it was material choice, because I really like the foam padding I used in that bra, but what I’m realizing now is that it’s because it had the largest band, even when wearing it on the tightest hook. Which isn’t to say I’ve made the bands in my second two bras too small (I haven’t, because I can even close them on the tightest hook), but it’s that the cups are actually too small! Crazy, right? You’d think if the cups were too small it would be obvious, but it wasn’t. At least, not to me. I mean, I knew something was off because my bras were still not super comfortable, but my self-made bras were still all much better fits than my ready to wear, so I wasn’t looking too hard for a solution because I didn’t even realize I had a problem. Which means that everything that follows has come out of a few crazy days of thinking way too much about the geometry and physics of boobs. So if the rest of this seems a bit all over it’s because nothing that’s in the rest of this post was stuff I was thinking about until I learned about breast root trace and the idea of doing an FBA on a bra cup pattern approximately 3 days ago.
Ok, so, a few things I should probably point out as to why I didn’t think I had a fit problem. Firstly is that my primary introduction to bra sewing was the Beverly Johnson series of courses on Craftsy. I honestly think these courses are great, however, I now realize that they are very lacking in presenting the relationship between wire size and cup volume in terms of “fit”. One thing that is very clear in these courses is that in bra sewing, the wire line is god. You can make all the fit and style adjustments you want as long as you do not mess with the wire line. EVER. Which, honestly, makes a lot of sense because changing the the wire line means changing wires, which I (erroneously) thought meant changing cup sizes. Secondly, I will say that I totally lucked into using the correct wire line on the two Ruby bras I have made (using the 46WL wire from Gigi’s Bra Supply) which have always felt about right, whereas the more I’ve worn the Freja, the 48WL I used there has felt a bit too big (poking me under the arm). However, I will say that in none of my bras have my boobs ever actually sat in the cups right. I poked and prodded and thought about it a bit, because I knew something was wrong, but I assumed it was all band issues since the wire seemed right and (again, erroneously), I thought wire line equated to cup size since in the PUG (Pin-up Girls) patterns the wire line/cup size/BCD (bottom cup depth) were linked. Thirdly, I don’t think I’ve ever had a bra that fit right. I’ve always sort of smushed my boobs into bras based on wire fit and band fit, so having weird boob folds and smushage was just “normal” to me because it’s how I fit into all of my bras. Probably it is also why I’ve traditionally preferred foam bras – I needed something with structure to force things into the “proper” shape! Hence the continual irony of when people tell you to use your “best fitting bra” to determine fit… if your best fitting bra doesn’t fit, neither will the one you base on it!
Ok, so, moving on. In the fit clinic webinars Monica of Bravo Bella Bras continually referred to doing a breast root trace – while bending horizontal without wearing a bra you use a wire to map the area the bra wire should follow. Of course, being me, I did a bit of additional internet research and found an article arguing that this might lead to over-fitting your wires and suggested doing the same process but standing up and sort of holding up the breast tissue. To do this I ordered the recommended Nite Ize gear ties, but then realized I was a dumb and could just use the flex ruler I already owned. Ah, well. I’m never going to not want more sewing gadgets. Anyway, in the name of science I did both methods (bending and standing), and you can see in the image below that the bending over method (top wire) is significantly smaller than the standing up version (bottom wire). I also tried the bending over method with a flex ruler instead of a flex wire (middle) and it seemed to give the a shape that was pretty close to the top wire but not quite as close-fit. It also happens to line up extremely well with the 46WL wire that I’ve used in both my Ruby Bras! Like I said, I think I really just lucked out on the initial wire line situation. Since I used the 48 wire in my Freja, I know it’s a bit too big (but matches pretty well with the standing up measurement wire). And, since I had originally ordered a wire fitting kit from Gigi’s, I happened to have some size 44 wires I could hold up to my boobs for comparison. The are pretty close in the size to the bending over fitting wire, but holding them up they just feel kind of tight. For those with more bra making experience than I, I will point out that these are rigid wires. Possibly if I was testing on a flexible wire the smaller size might have felt better.

So, what did we learn from this experiment? First: the bending over breast root trace is the better method because the standing up produces something way too big. Second: I really did luck into using the correct wire size right out of the gate! Probably this is why I could get away with wearing my first bras even though (as we’ve established) the fit isn’t correct. Third: the wire line really is god, in that if you have the correct wires you can adjust outwards and make everything else work from there.
Ok, so, if my band fit was correct, and my wire line was correct, then what is causing my fit issue?
Projection. So, this is where we get to the bit about bra sewing that is really not covered in the Craftsy classes, which is is the idea of breast projection. The idea of cup volume isn’t new to me, but, again, I always associated cup volume with wire size, which is incorrect. Since we’ve established my wire size is roughly correct, that means that I need to find some other way to adjust the cup volume. I would go into more detail, but the Hugs for Your Jugs blog has an excellent article about projection vs. omega shaped breasts which illustrates this so well that I’m just going to point you there. If you really want to understand they why and the what of what I do next for pattern manipulation at this point, you should just go read it now and come back when you are finished. Don’t worry, I can wait.
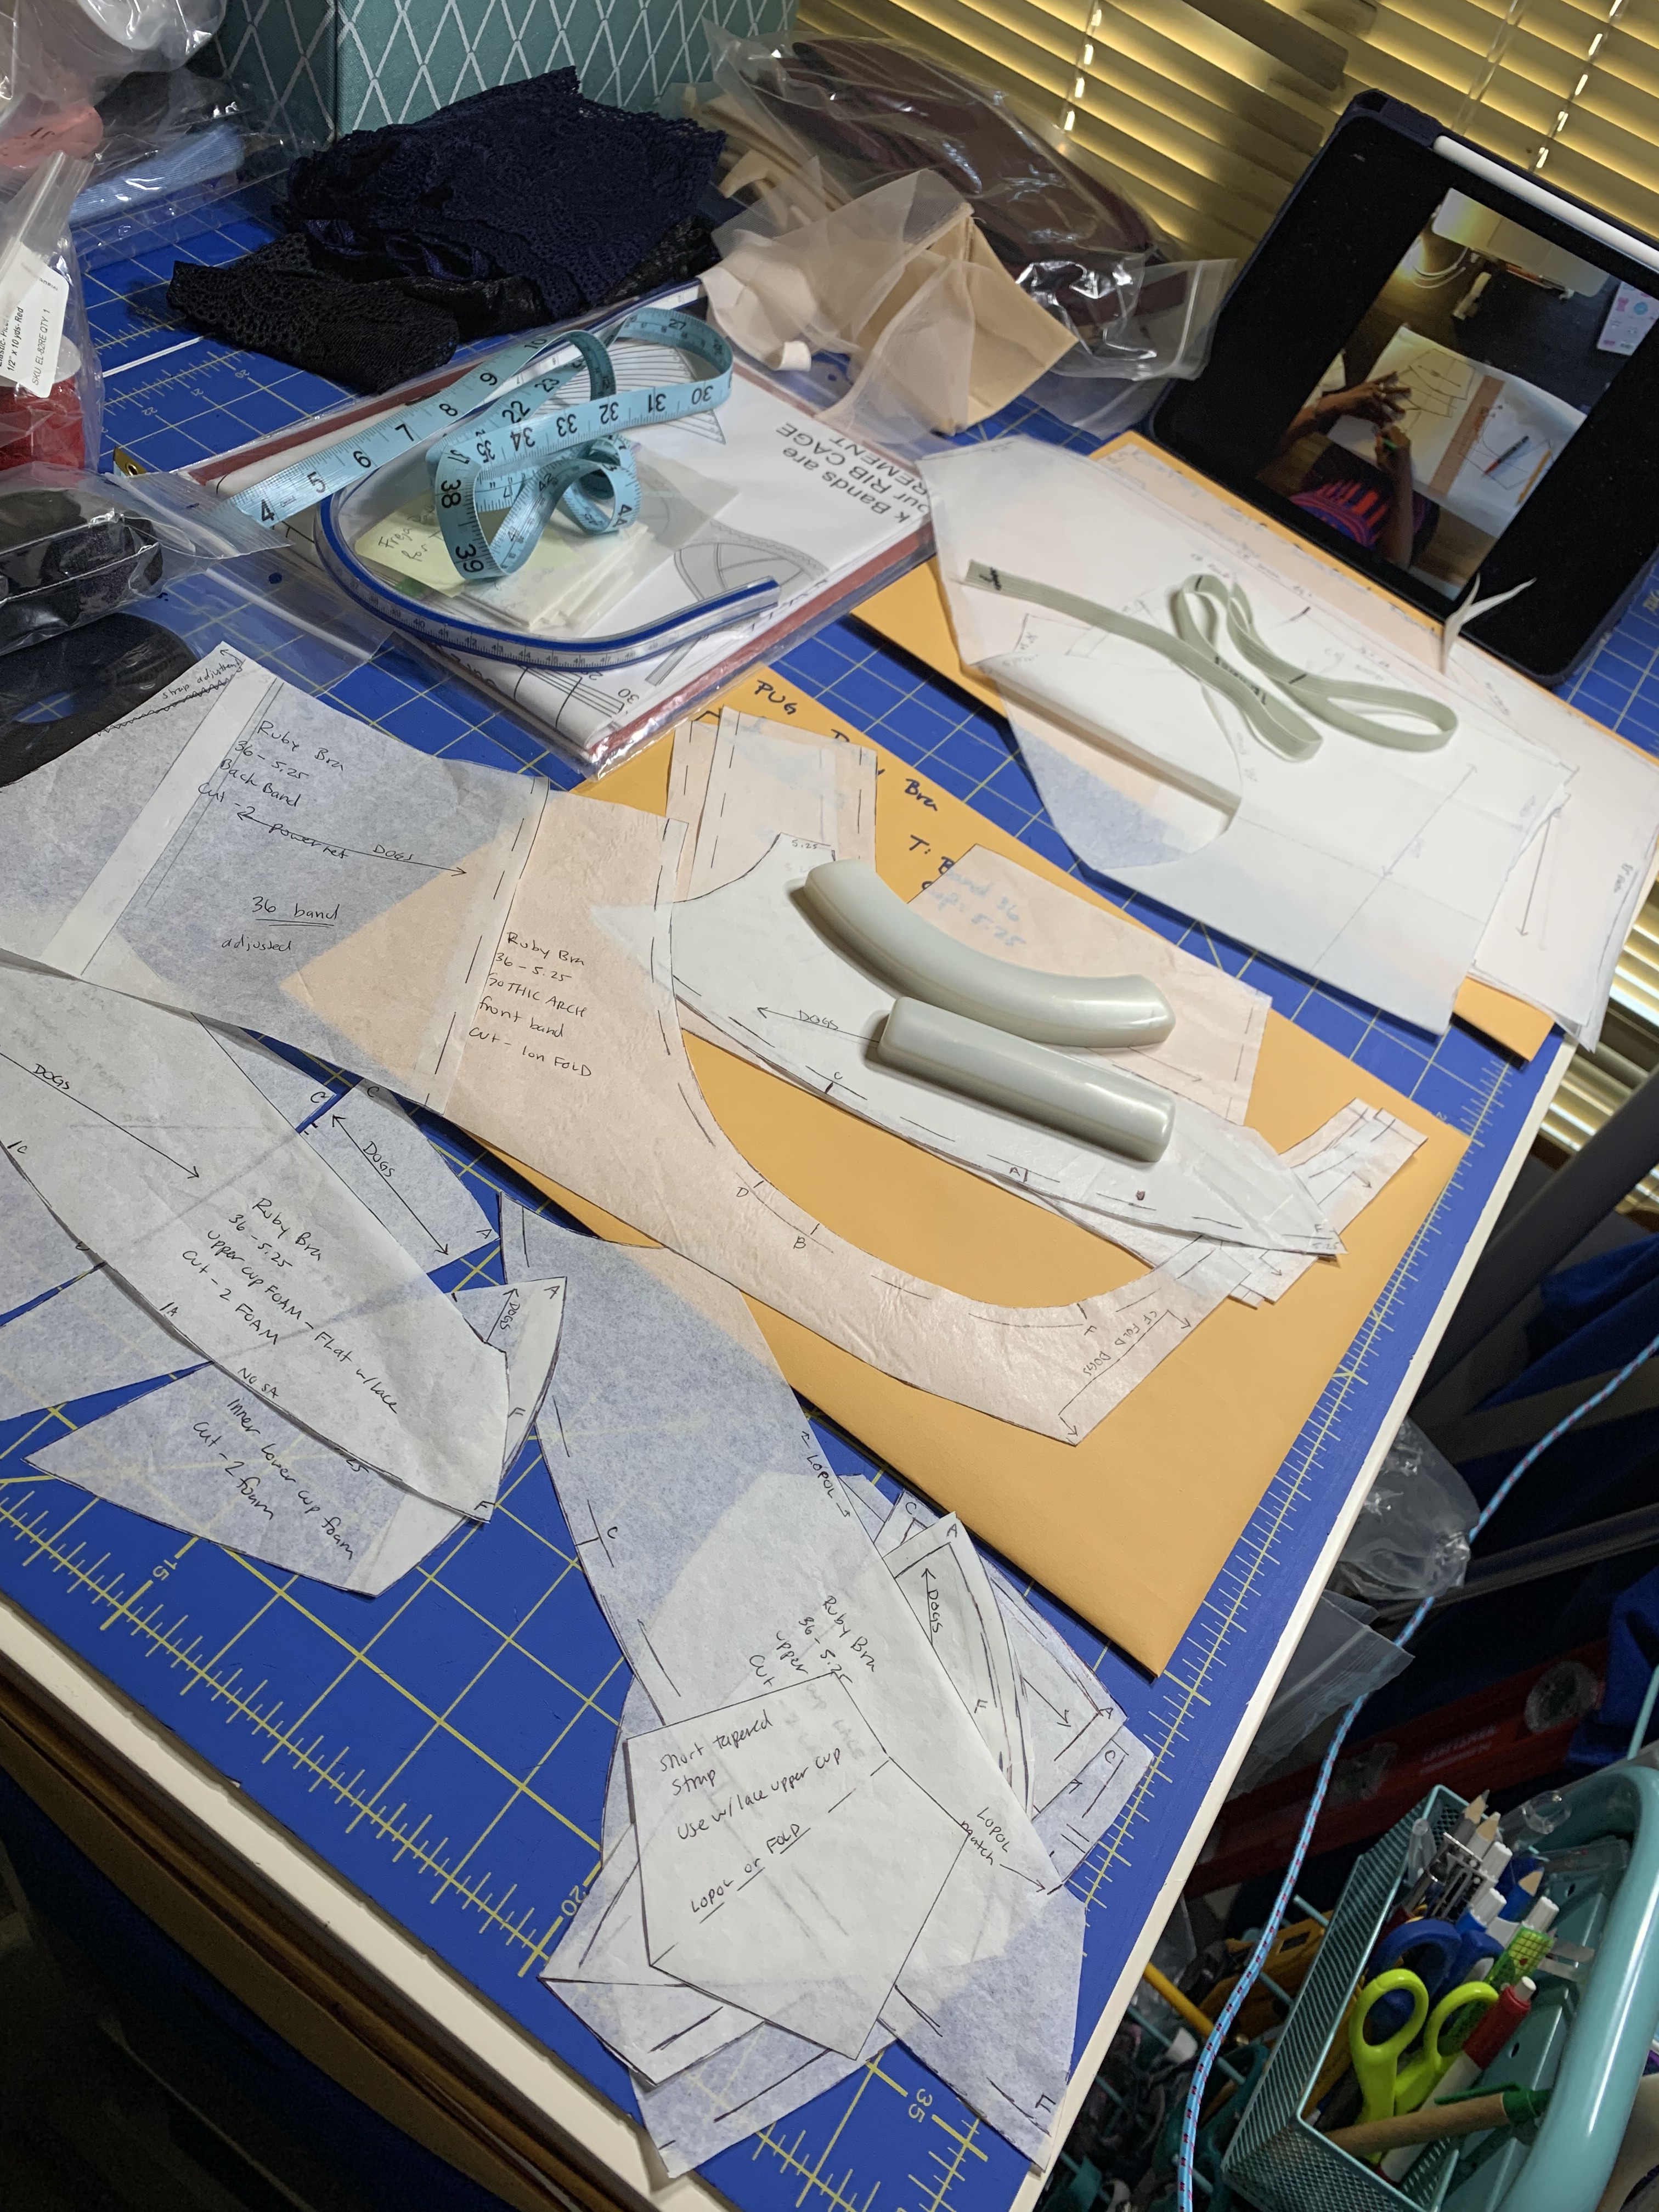
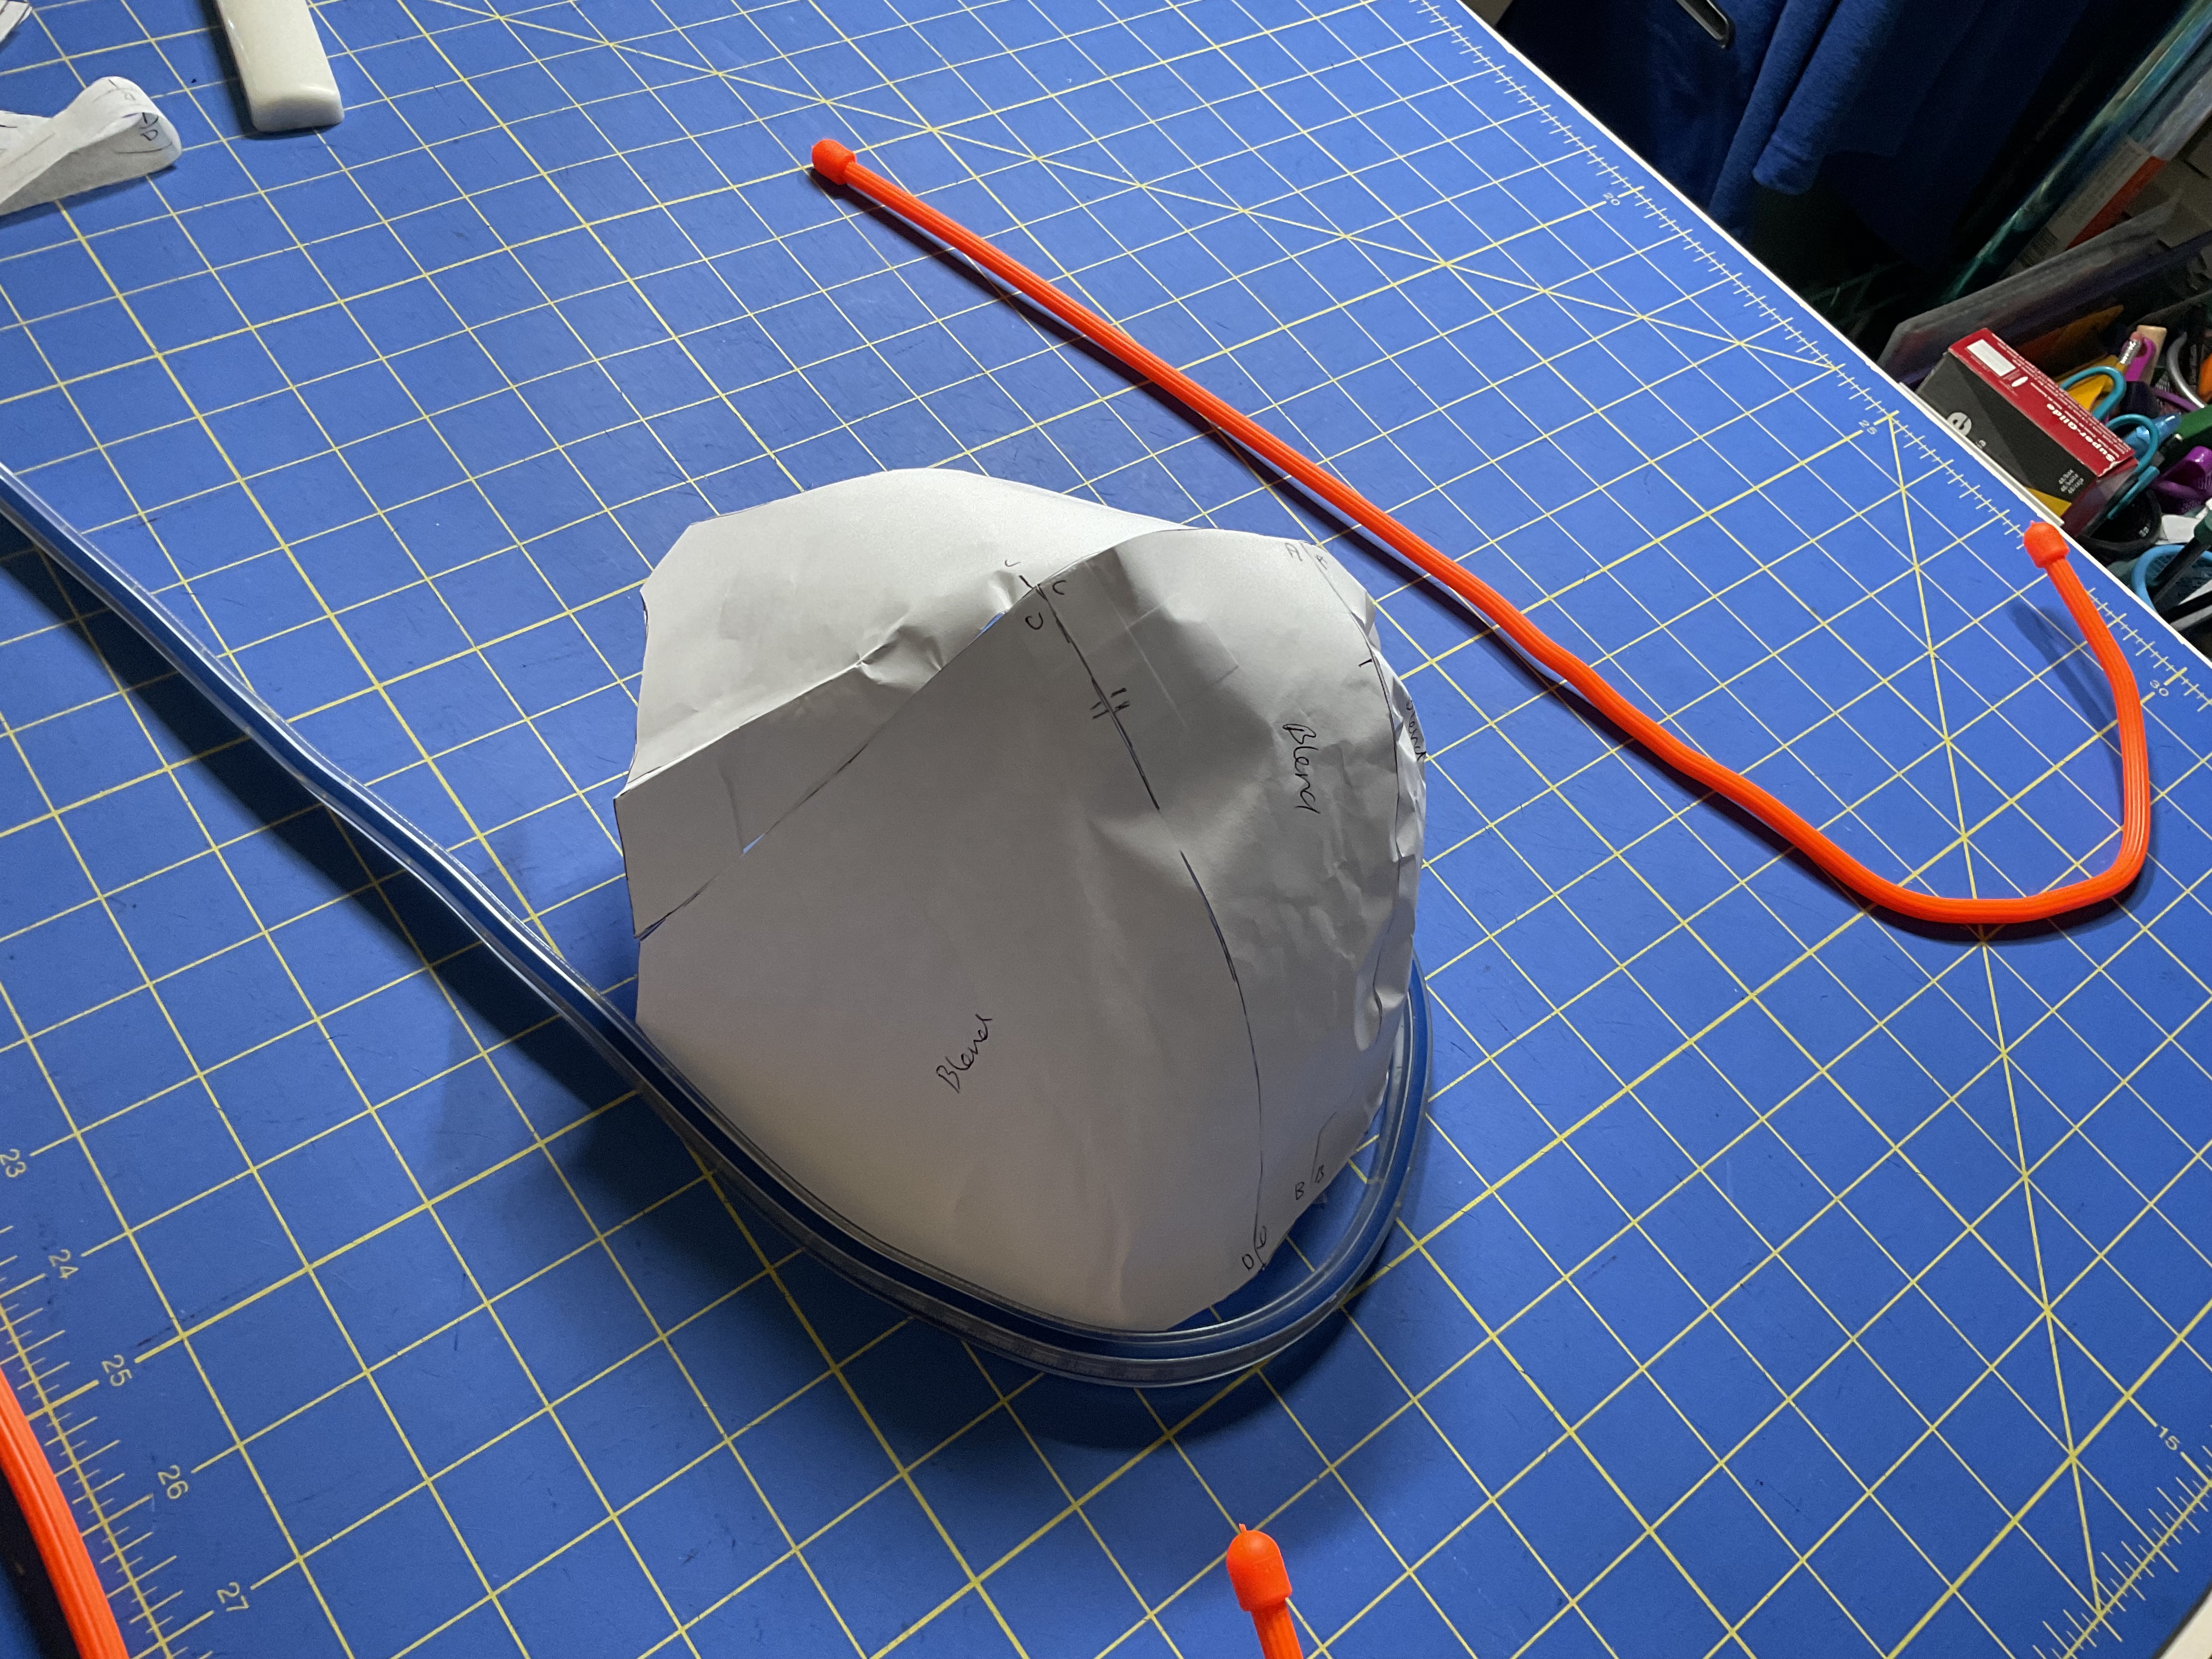
Ok, good. Now we are all caught up on breast projection and boob shaping. Excellent. While I could go on about my own personal realizations about shaping needs, suffice to say that that article pretty much hit my needs spot on. So I basically followed the blog’s suggestion for the omega adjustment by blending together pattern sizes to keep the 5.25″ BCD wire line, but blended it with the largest BCD option on the pattern (6.00″ BCD) to get the needed projection. Probably this is not exactly the same as doing an FBA on a bra cup (which I learned how to do in a different Bee class after I made this adjustment), but it was the first thing I saw that made sense, so I went with it. Because I do my research (aka, I spend too much time reading internet blog posts), I also found this helpful article about underarm shaping with the omega adjustment so I realized I wanted a way to test that before cutting everything out to sew up a new bra. I also really wanted to visualize the shape of the cup to make sure I wasn’t going to end up with Madonna cone boobs. While I could have sewn up a test cup I was too impatient for that, so I made sample cups of the old and new patterns out of paper. In the below images you can see the results from several different vantage points.
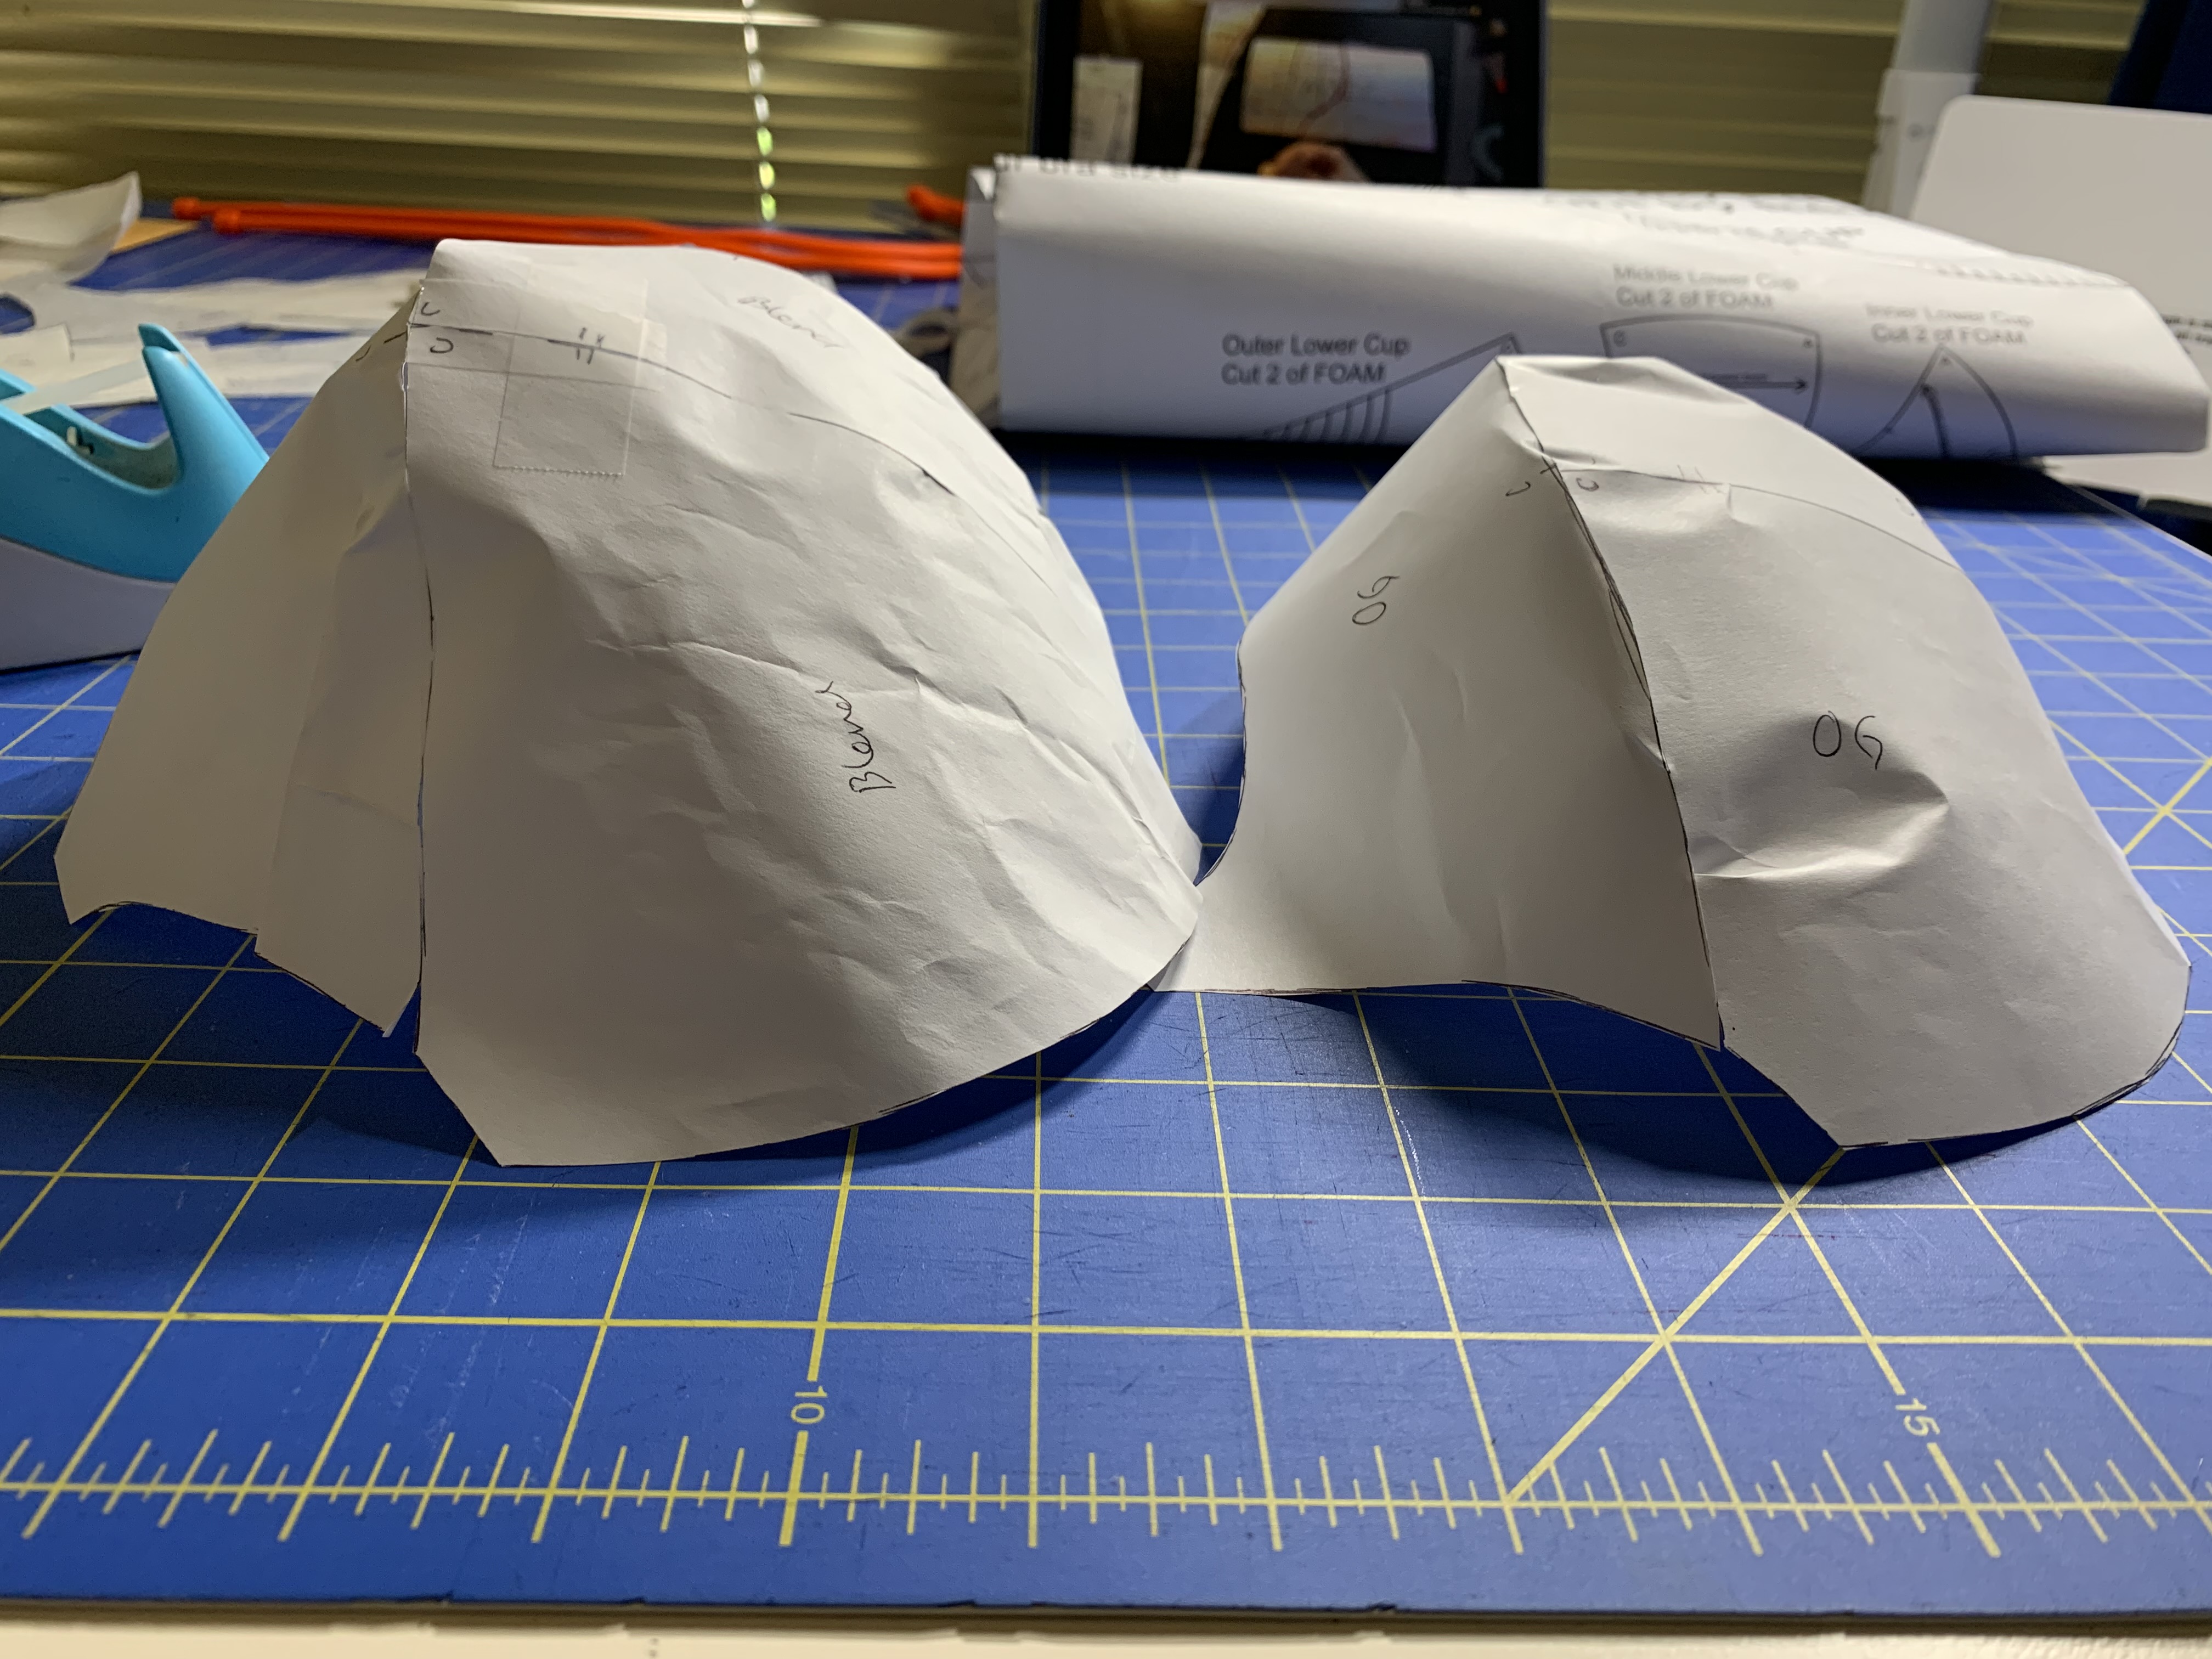
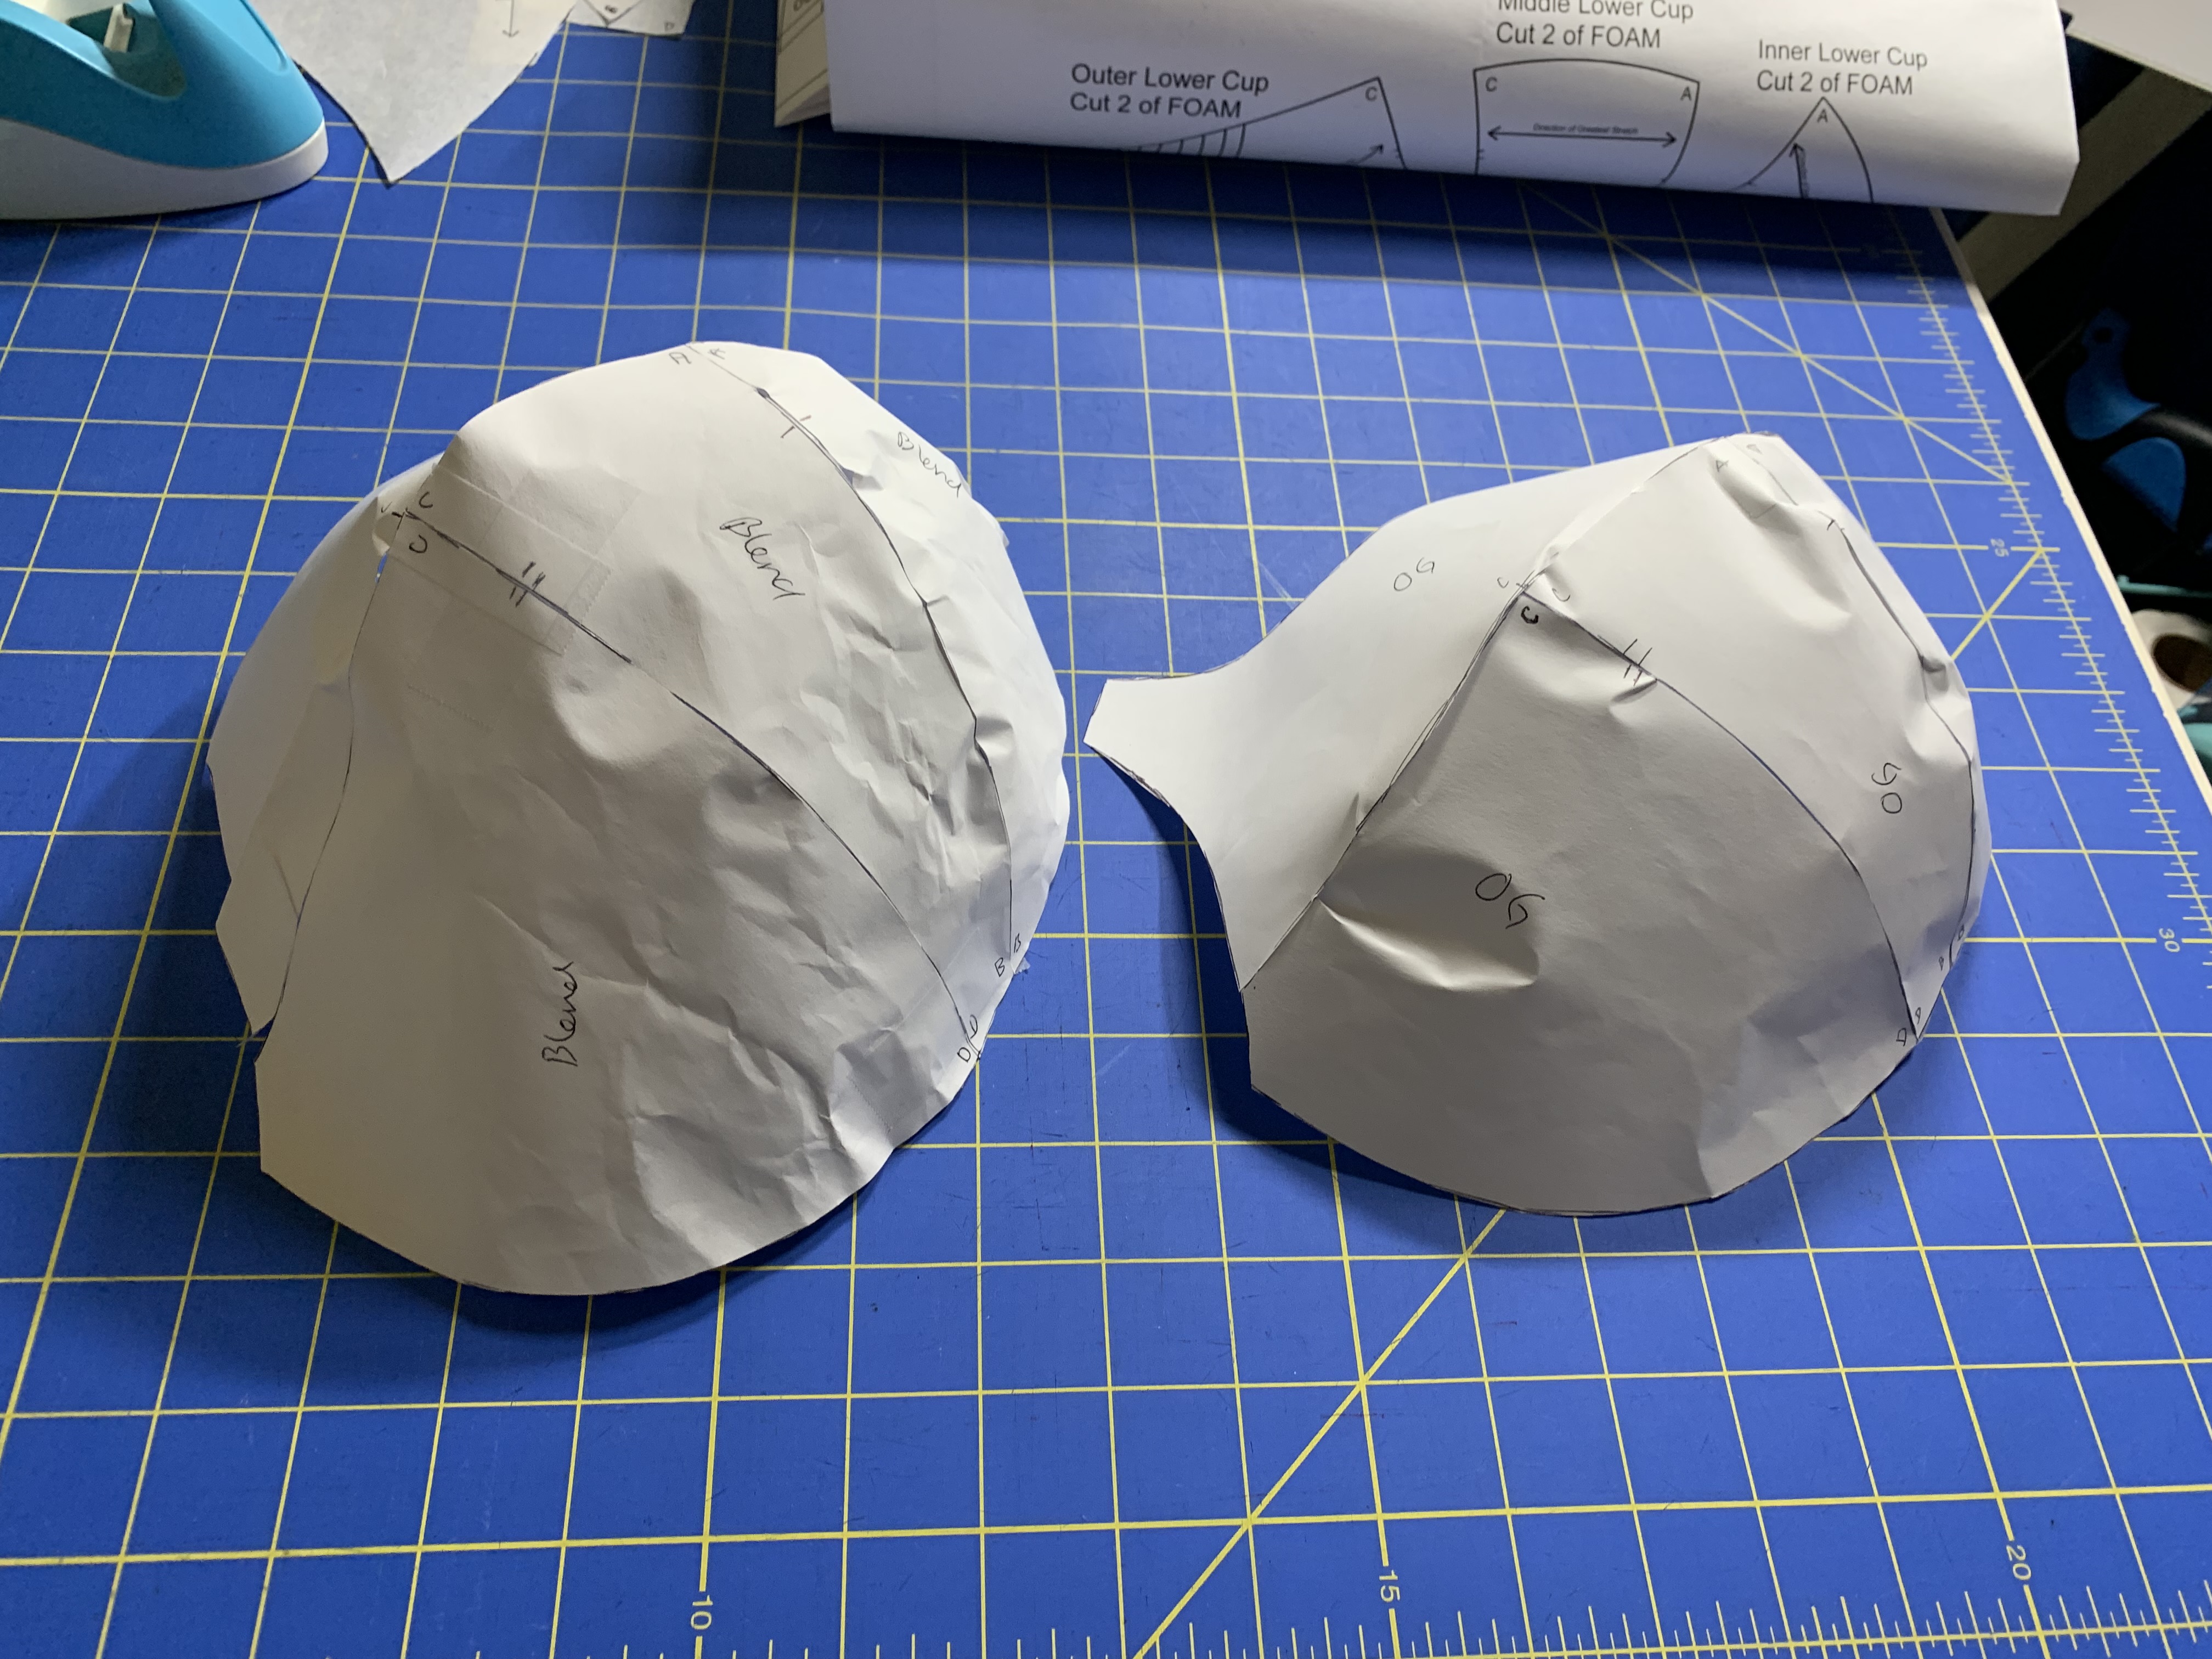
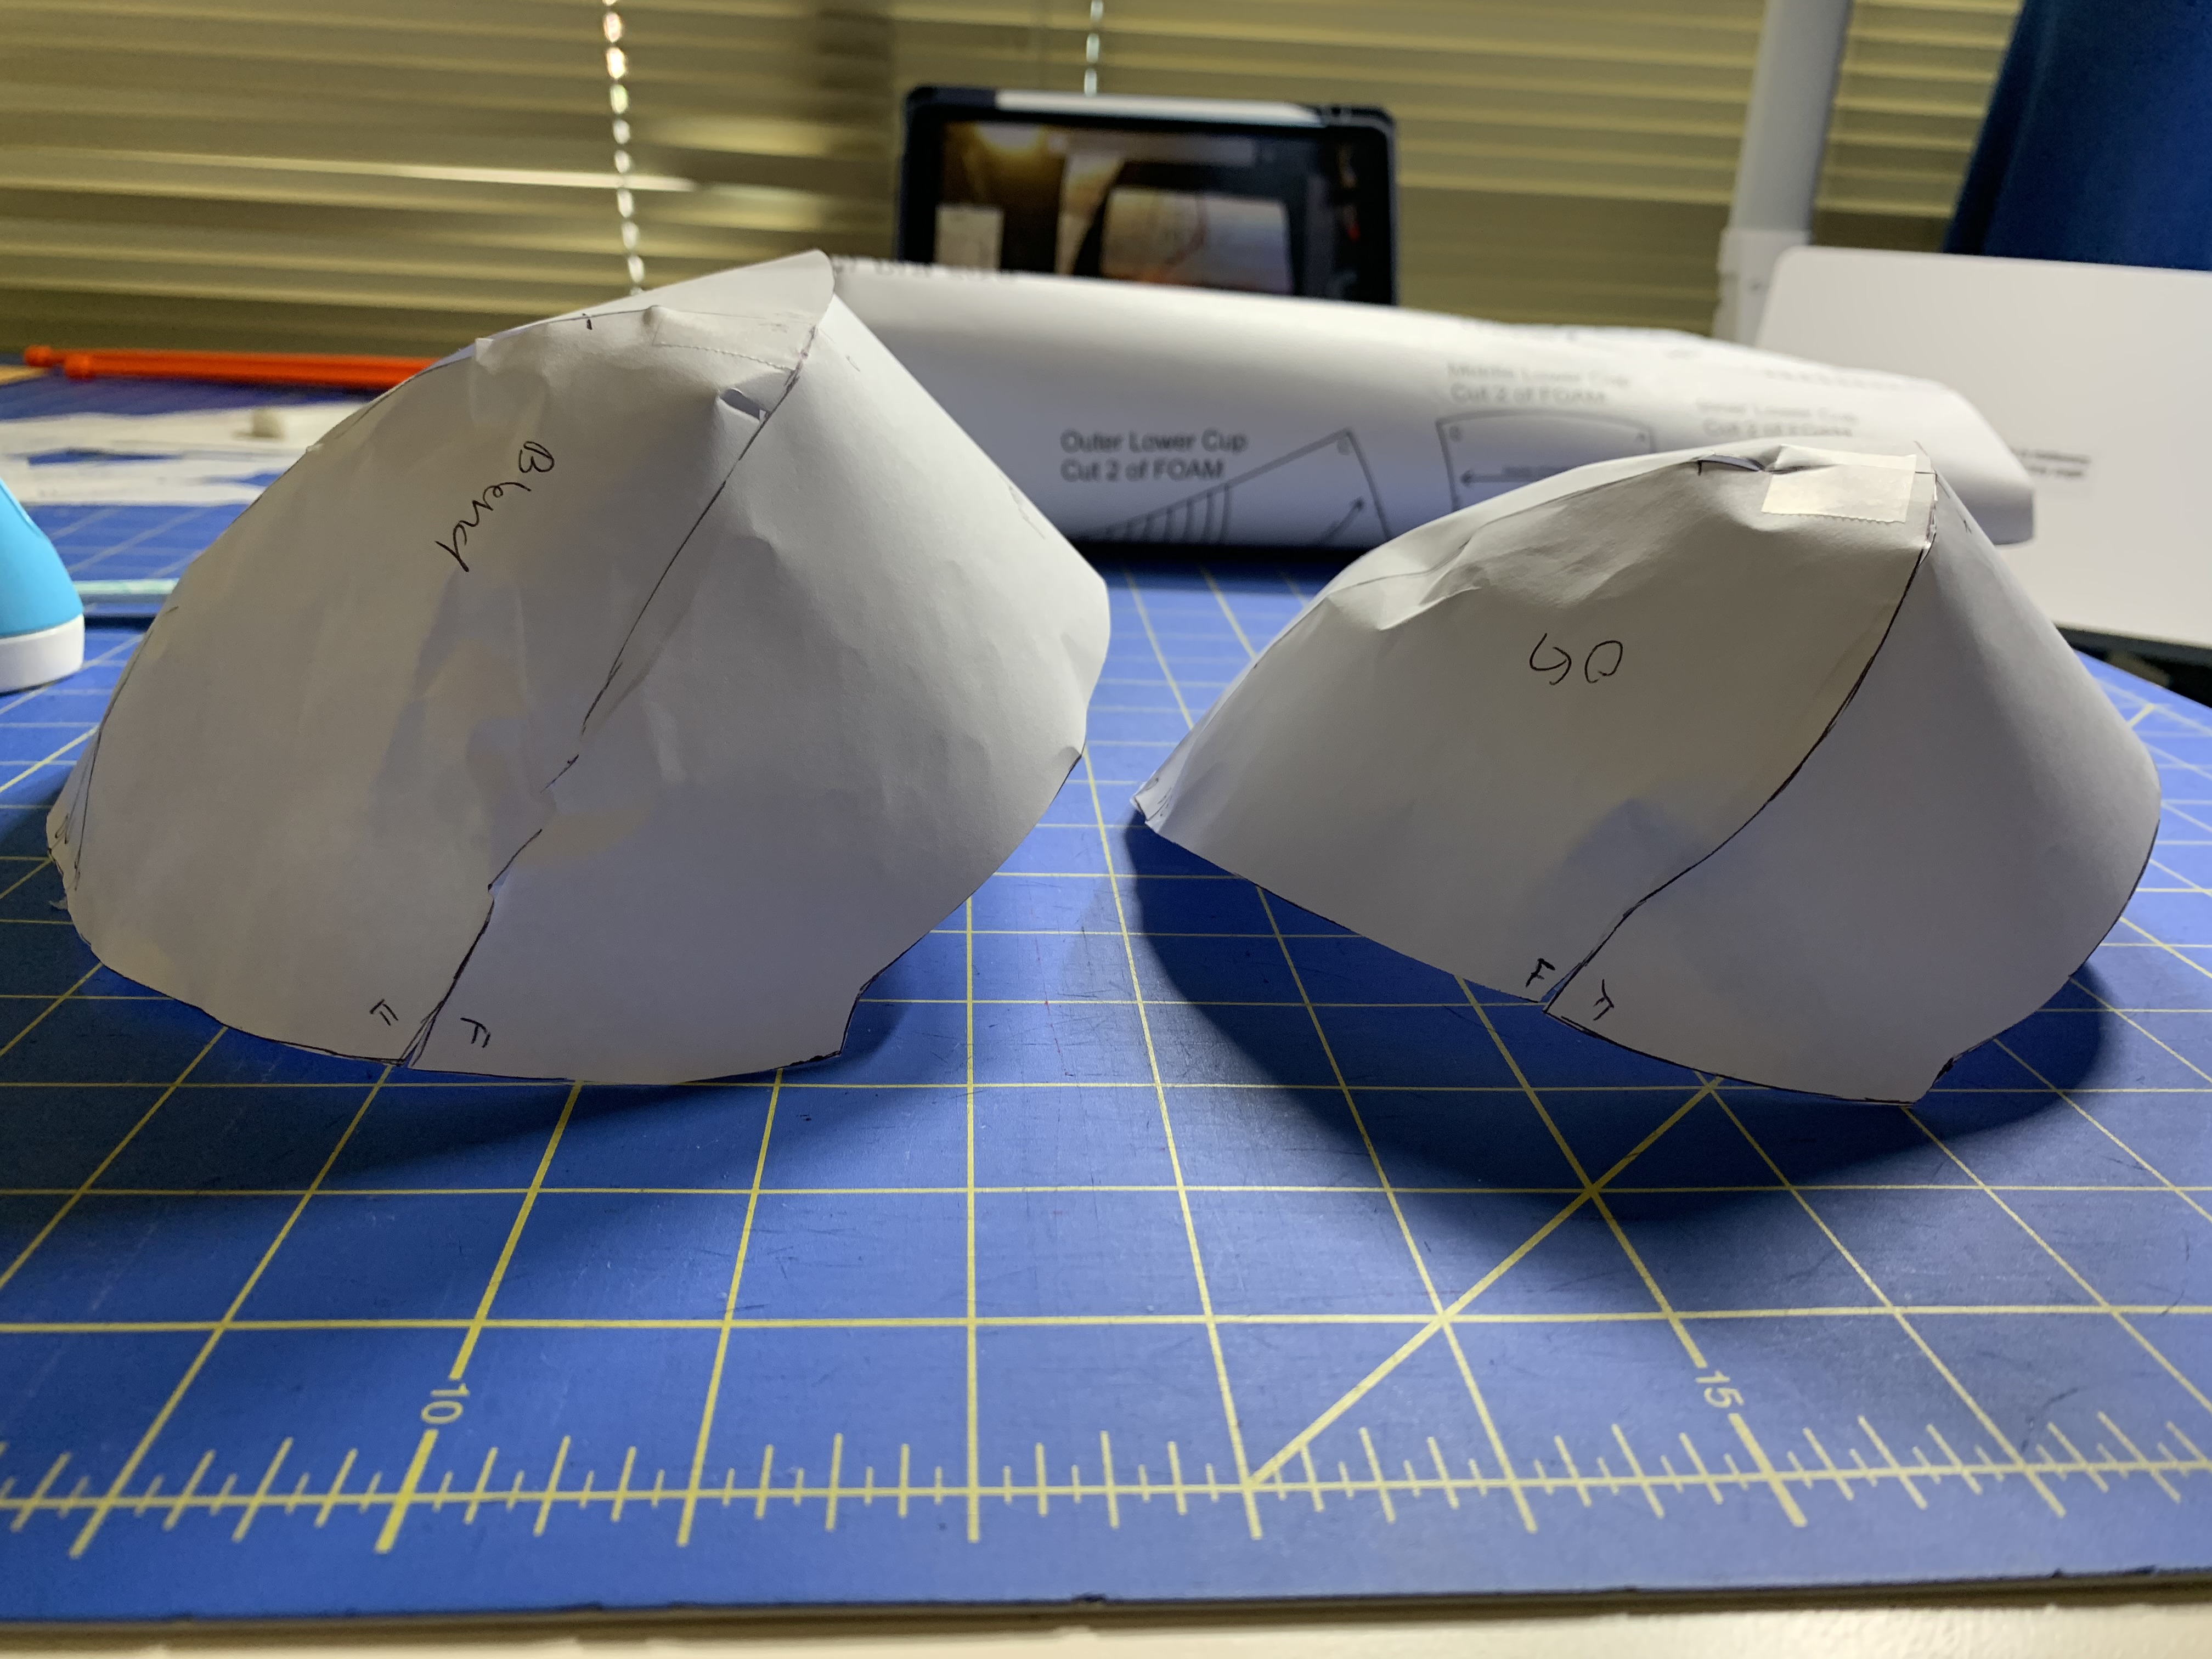
Clearly the cup on the left (new draft) has a much larger volume than the cup on the right (original draft). However, happily, you can see that the general shape of the cup is preserved, which is what we were going for. Huzzah! I did end up needing to take a dart at the under arm, but it was honestly much smaller than I expected (possibly because I had already done upper cup manipulation on my starting pattern previously).
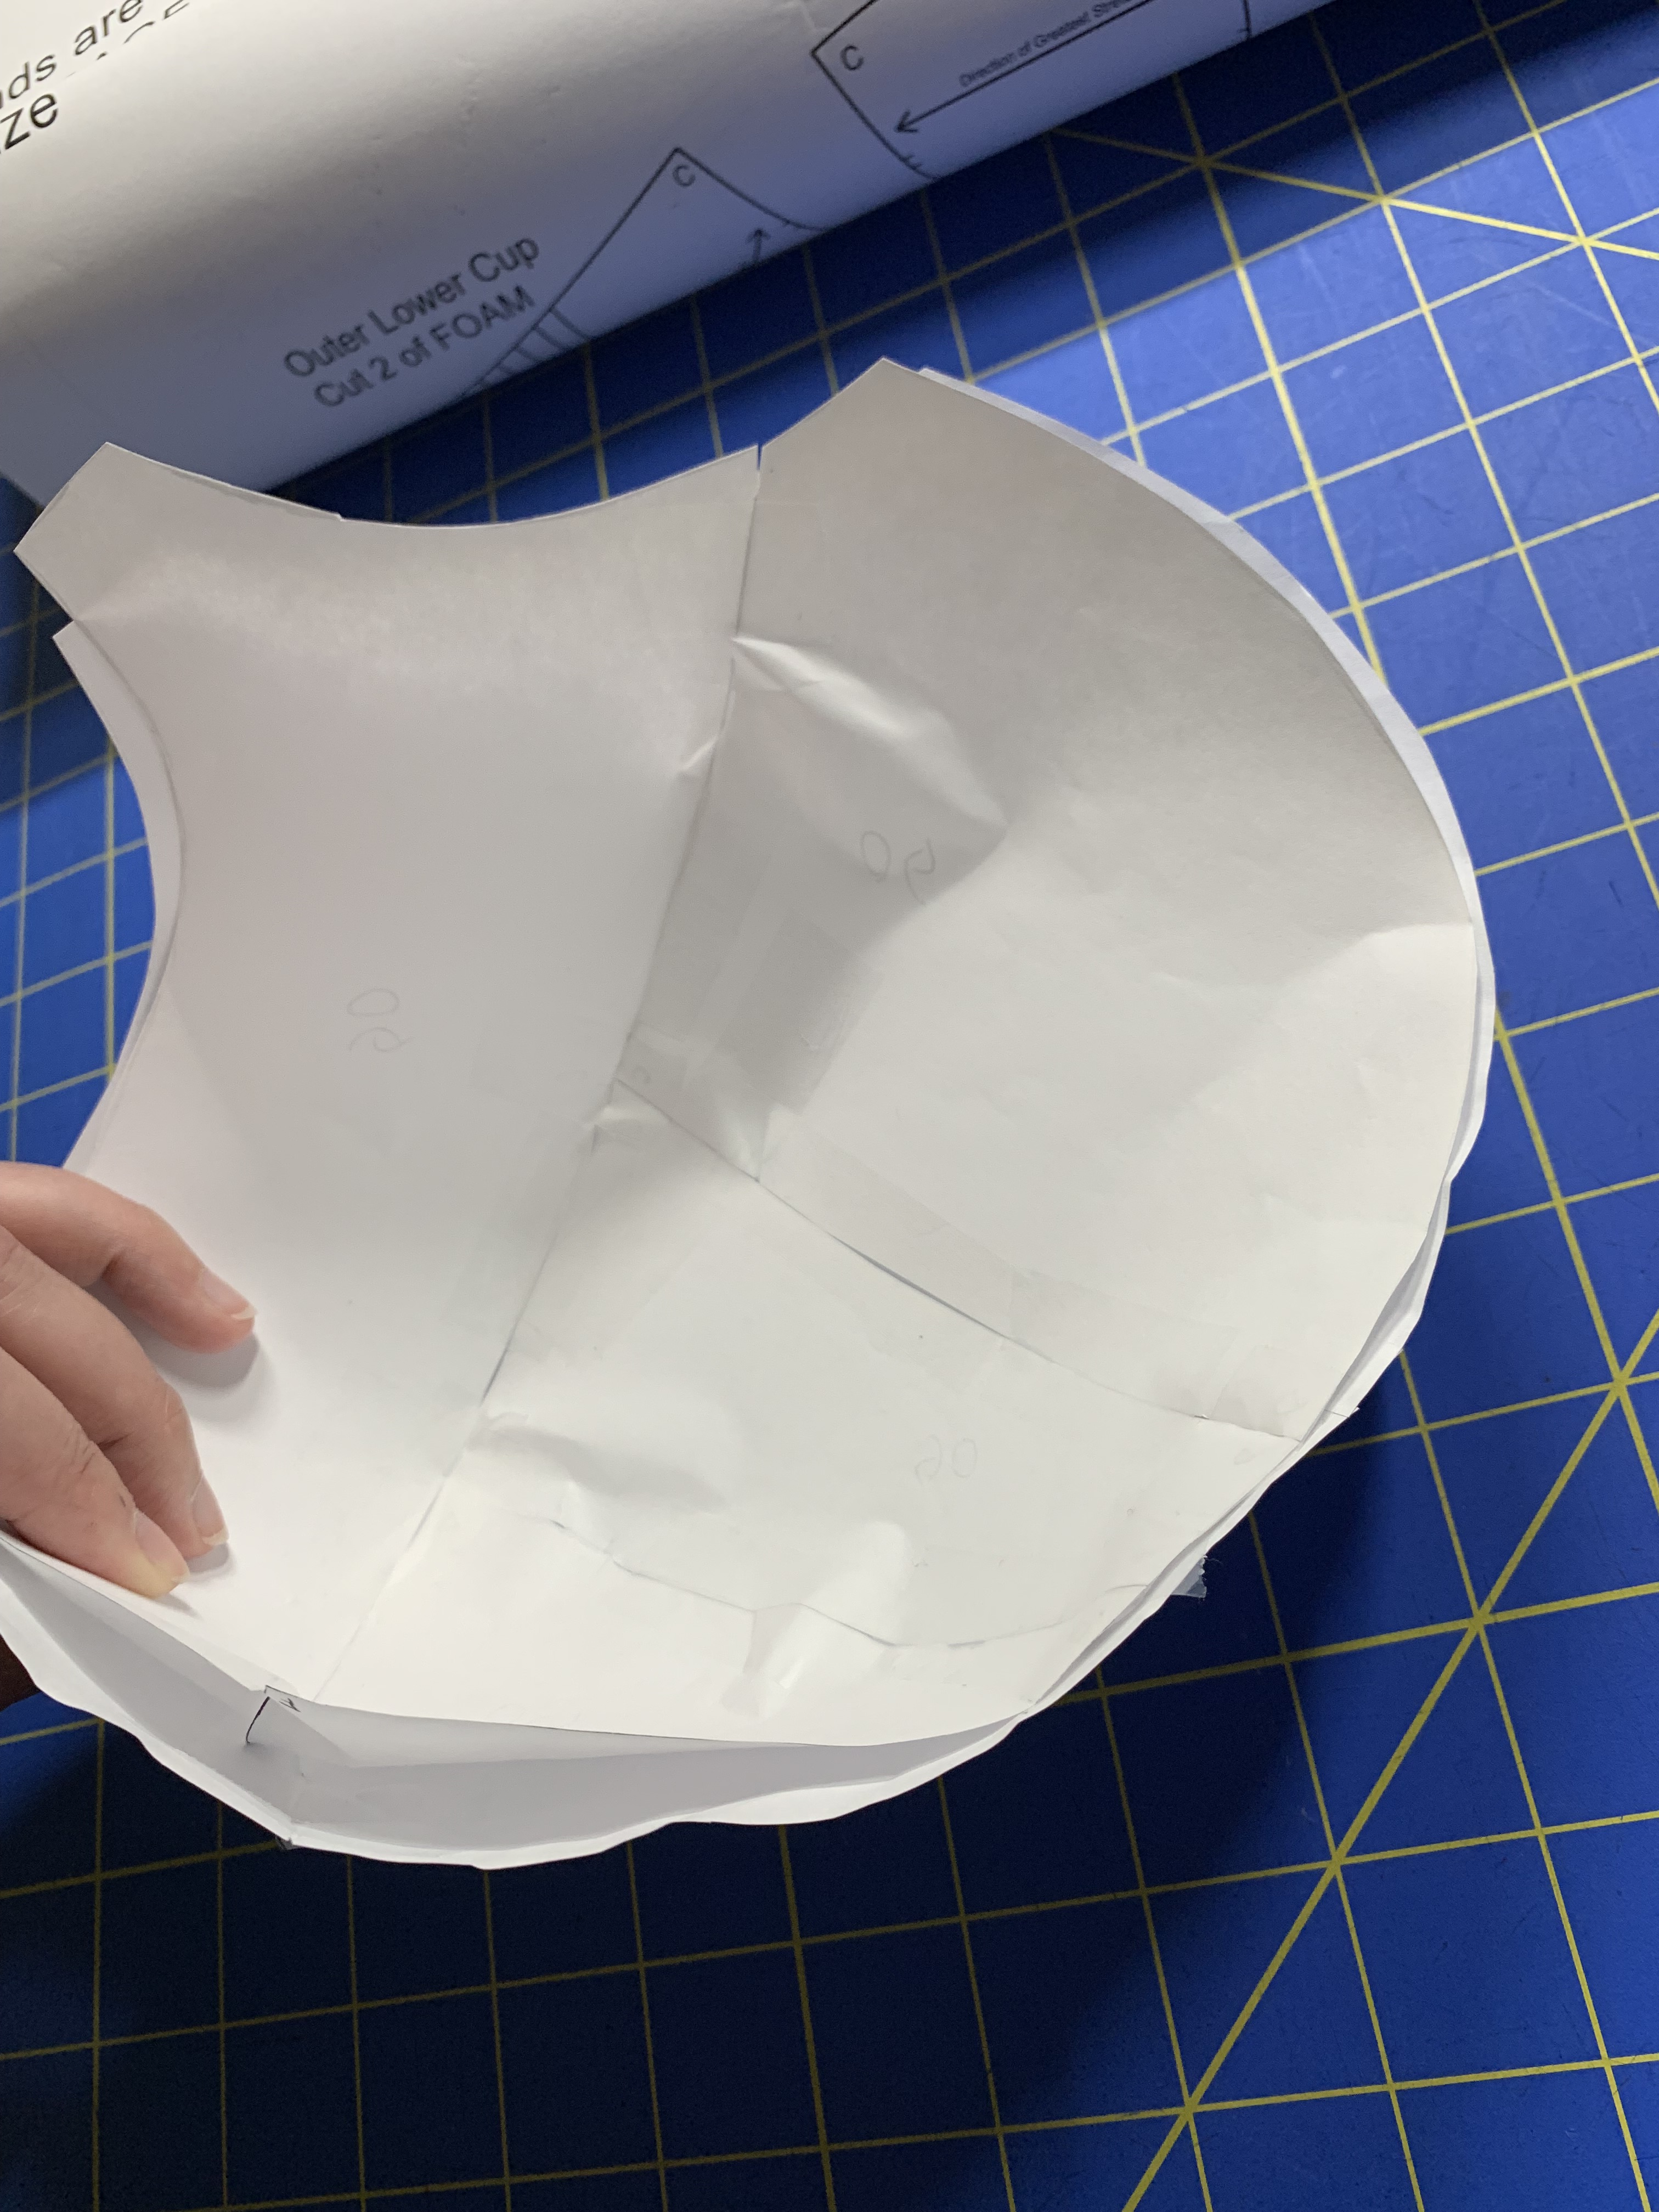
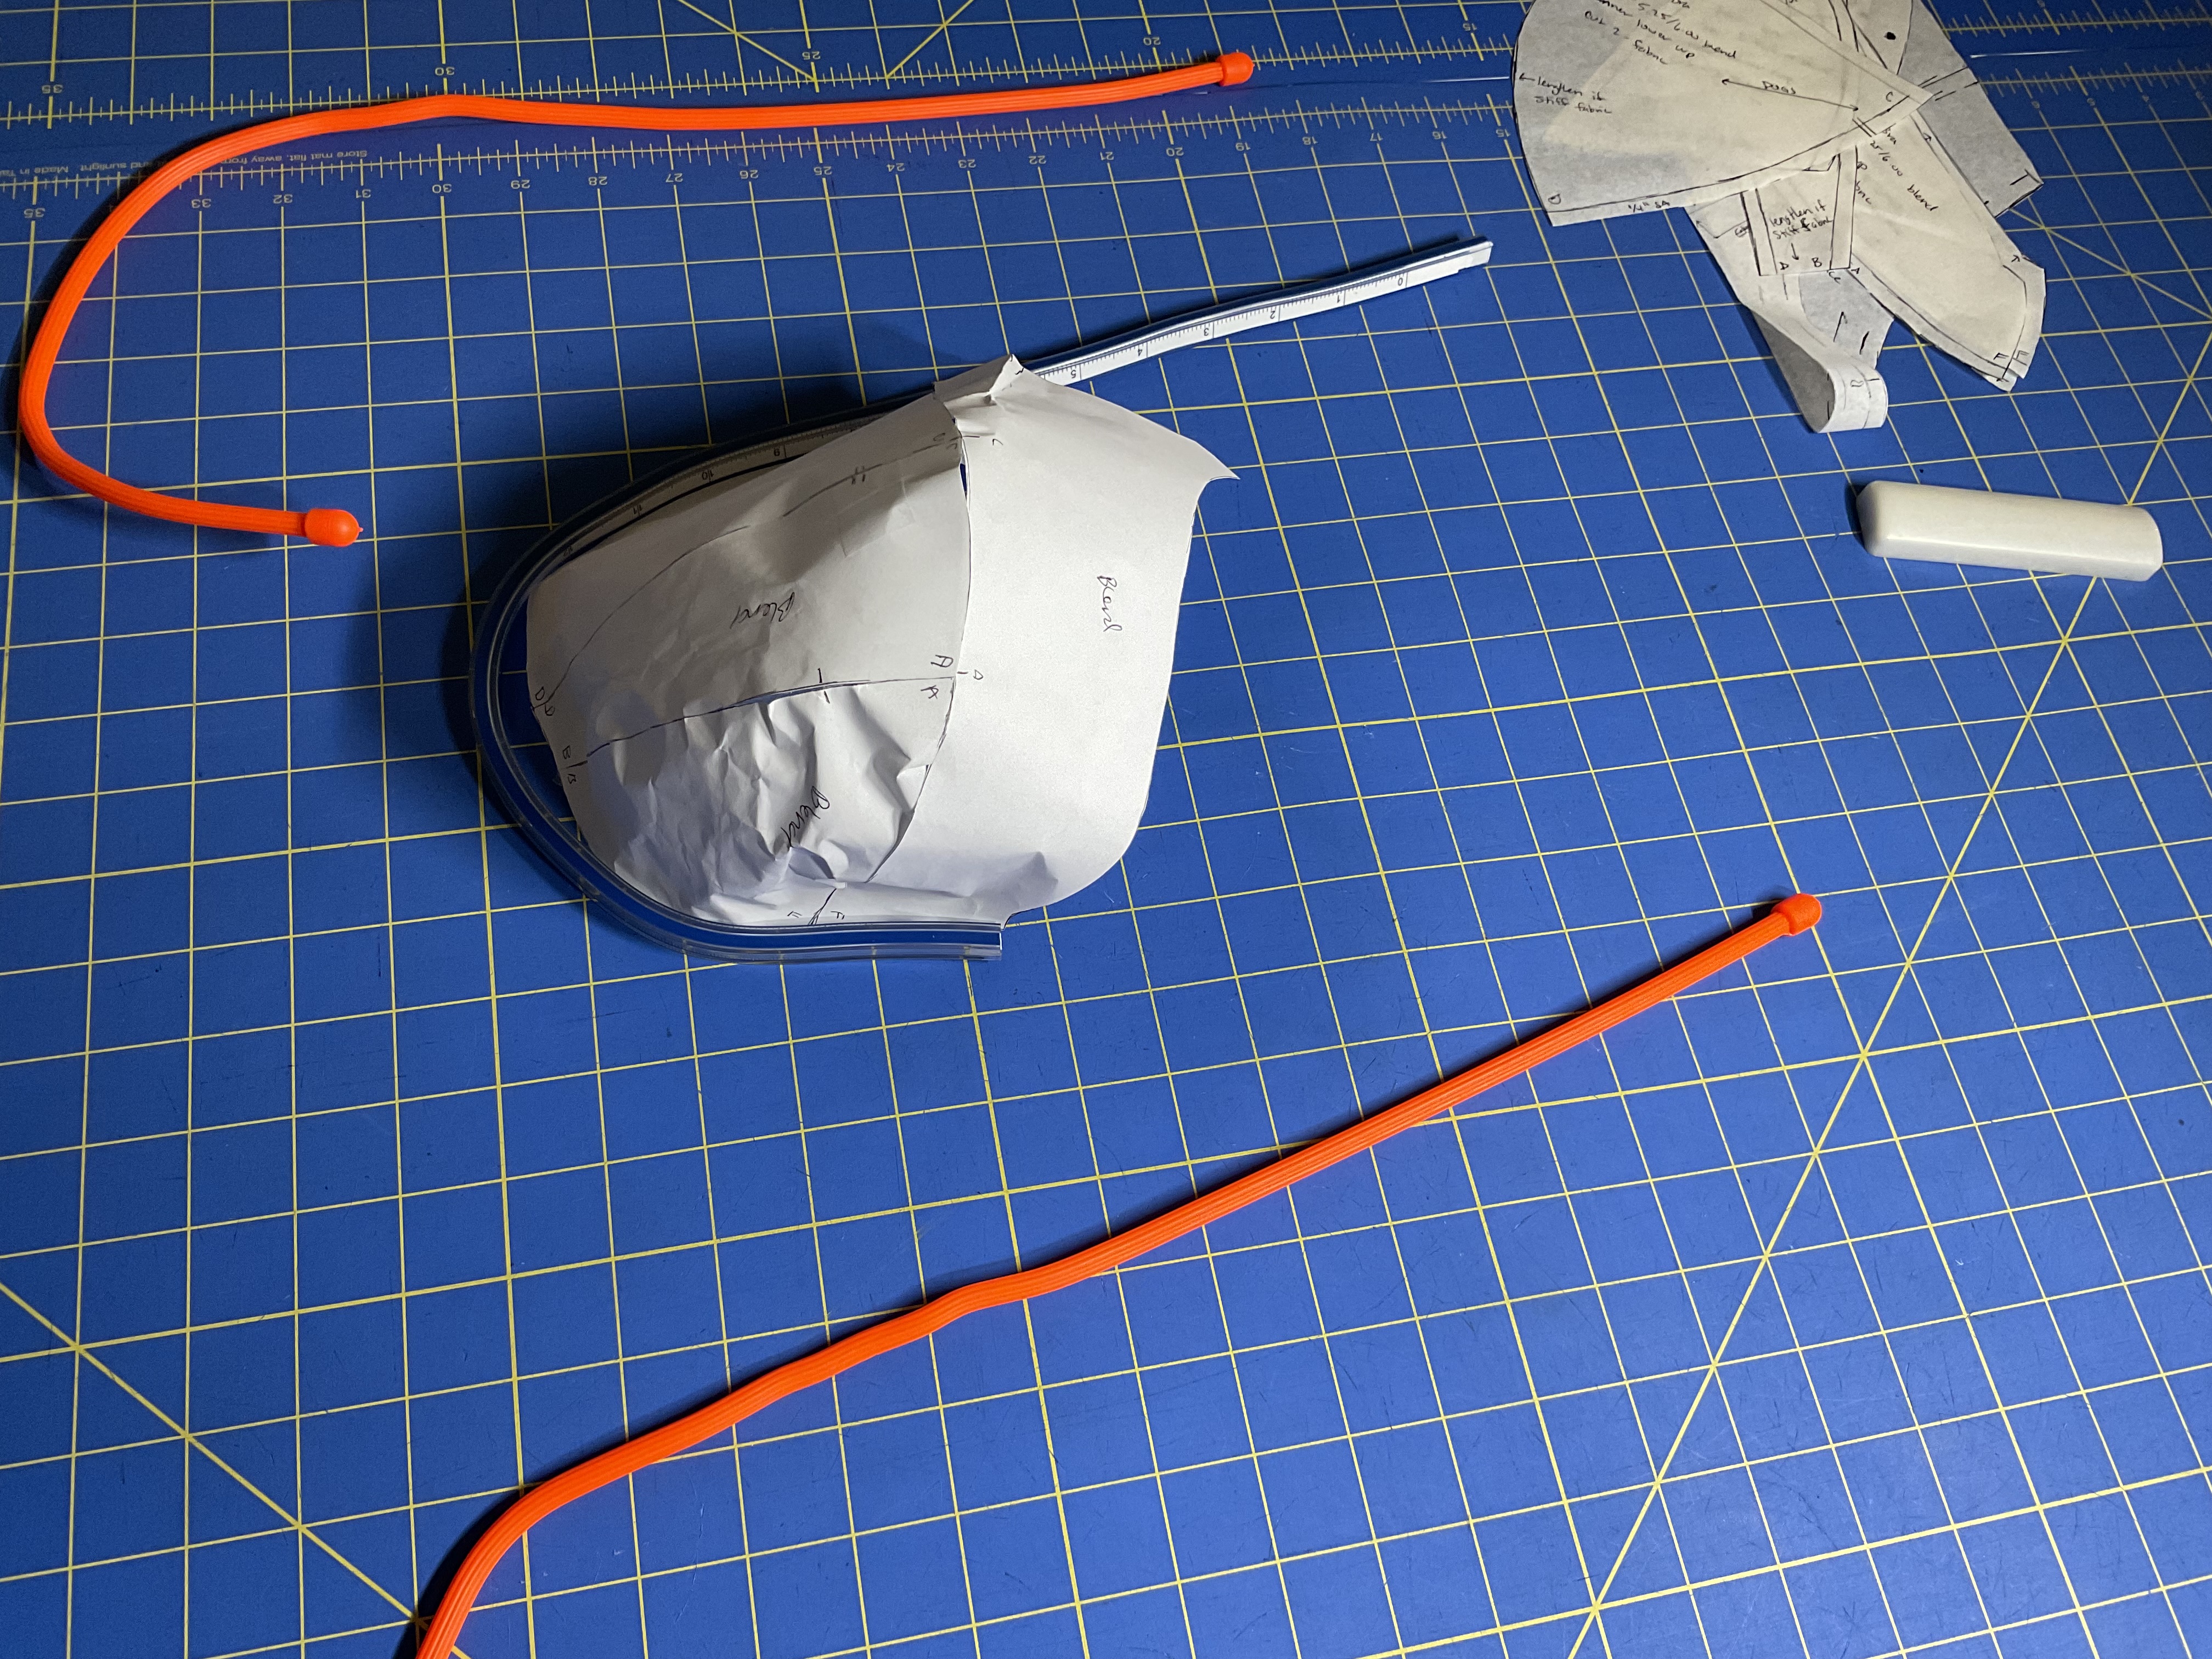
Also, even though it looks a lot wider, when I held the cups up inside each other it was clear the wire lines matched up almost exactly, because I did not adjust the wire line, only the volume/projection. It was hard to get them to photograph because the larger cup wanted to pop open, but walking the wire line it really is exactly the same:
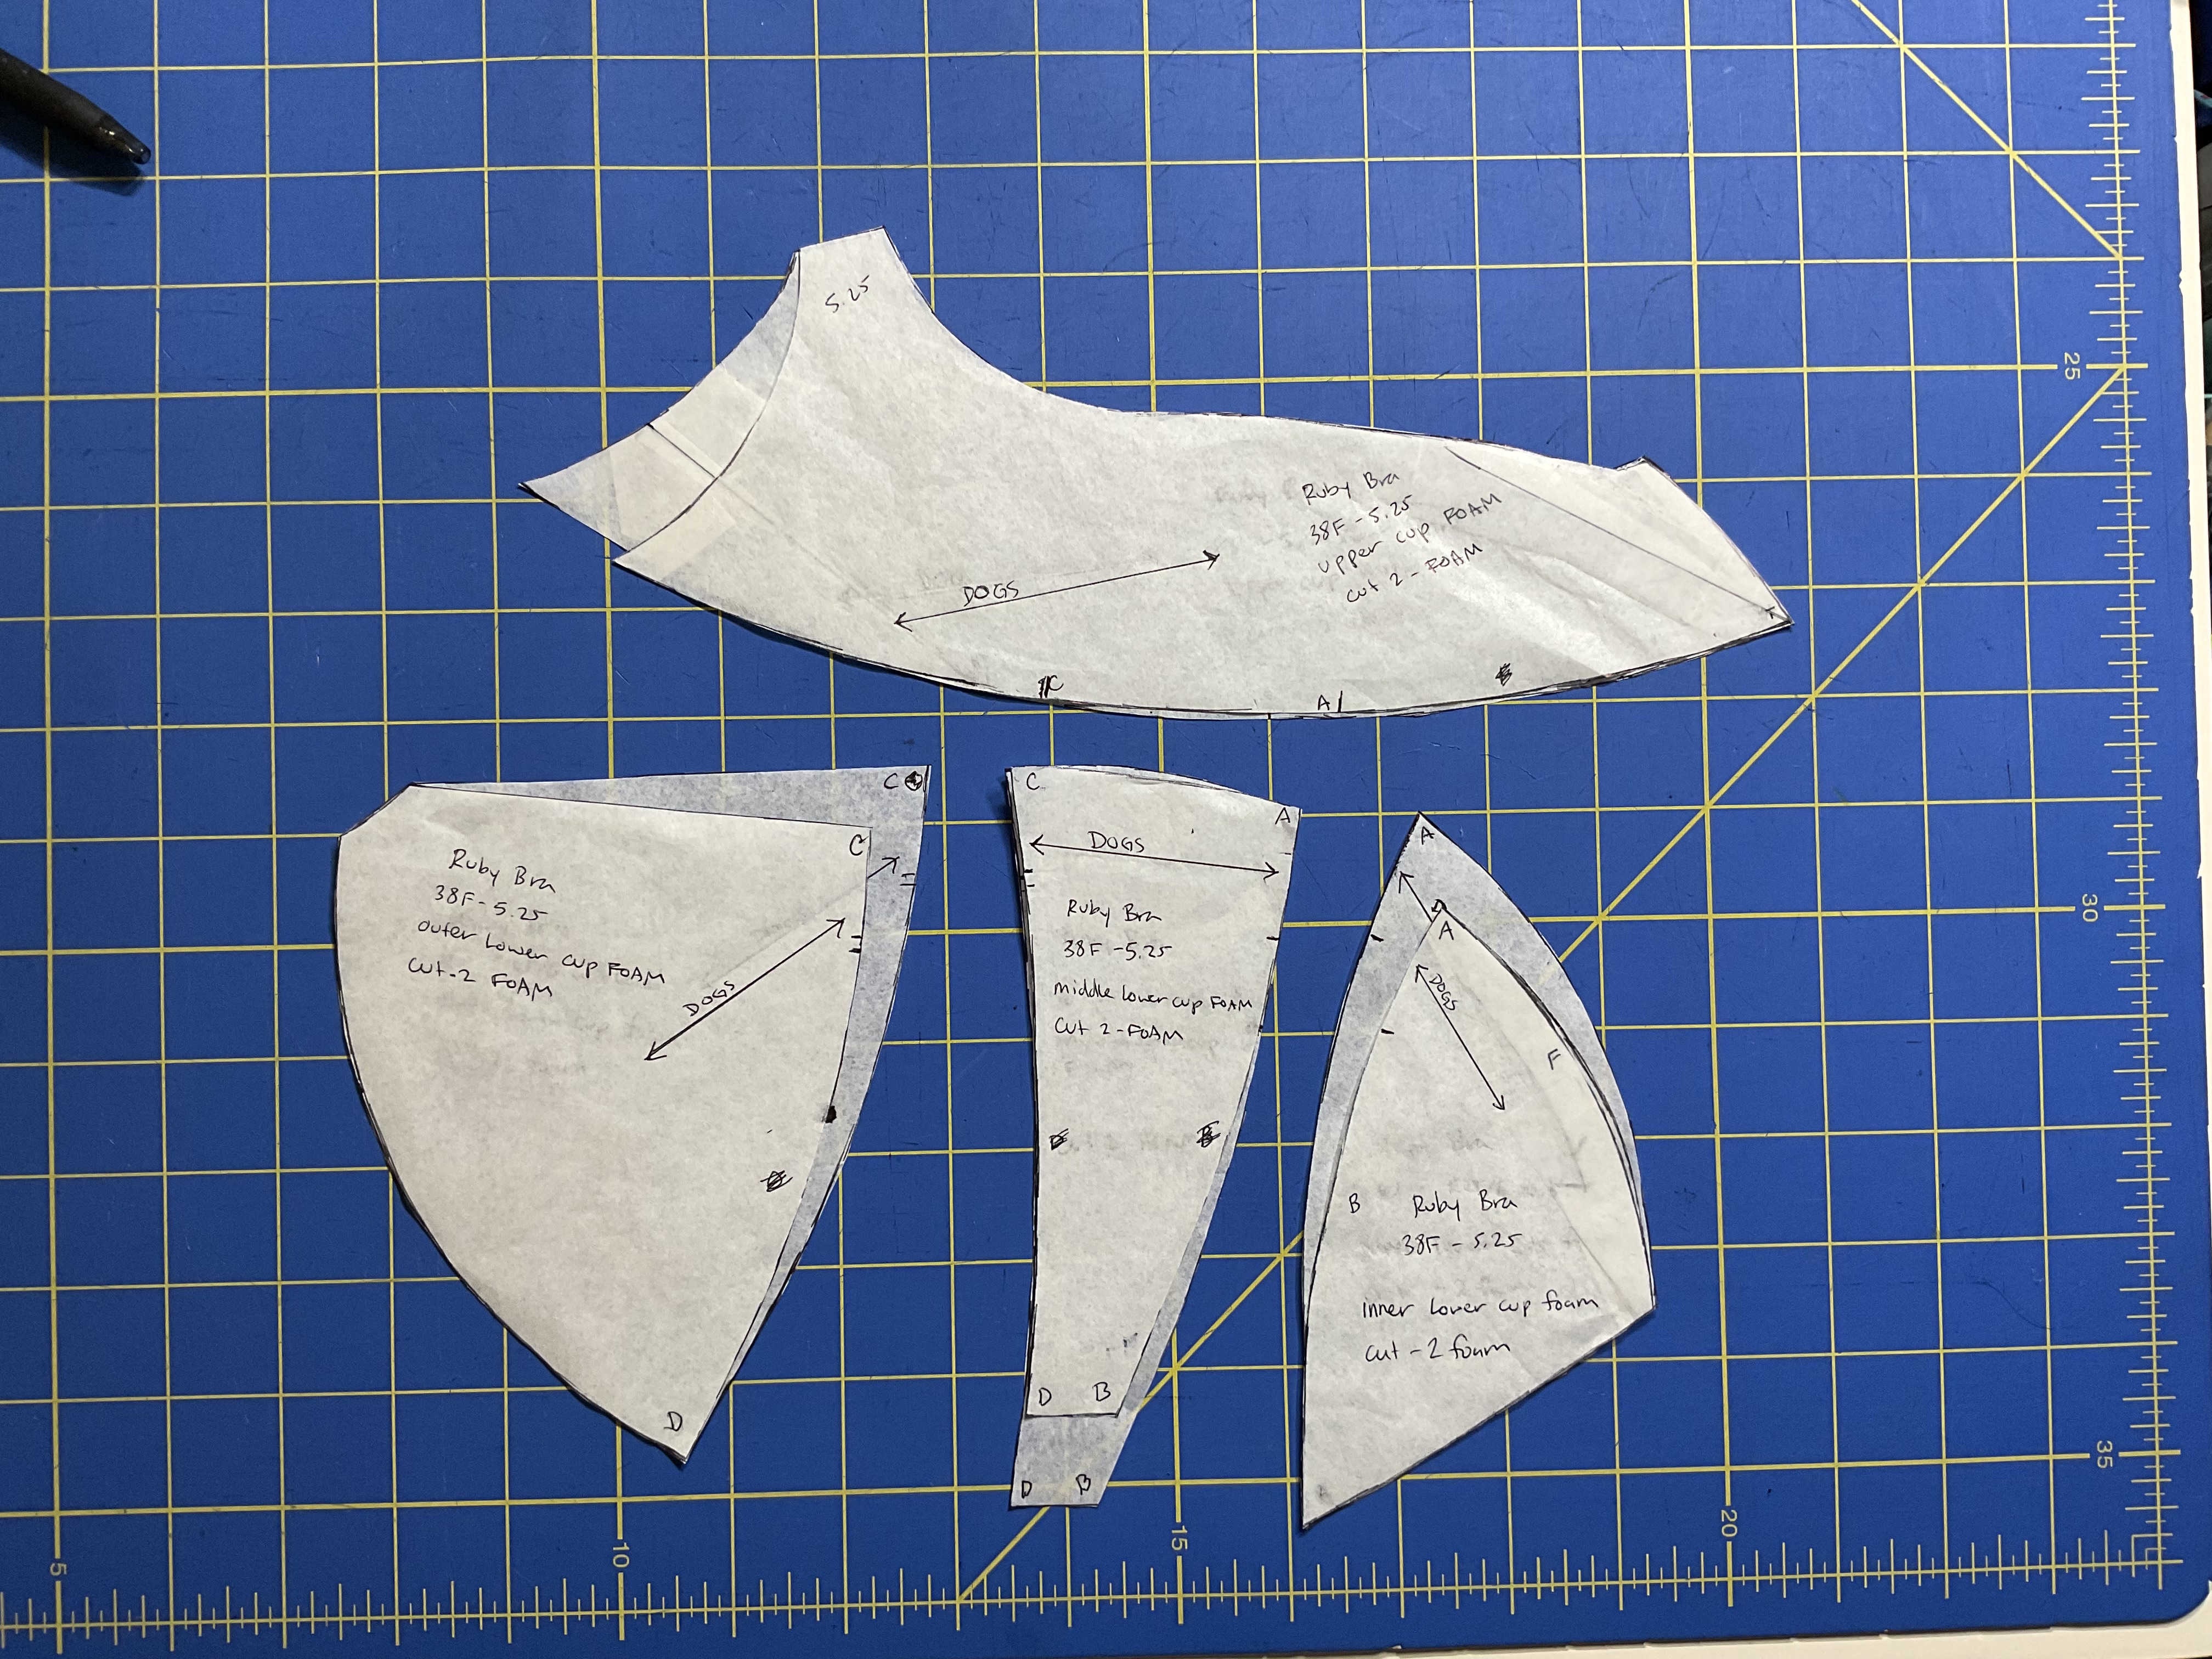
Below you can see the original pattern pieces layered on my new pieces. It’s interesting to see how/where the extra sizing of the pattern was added to increase the volume of the cup.
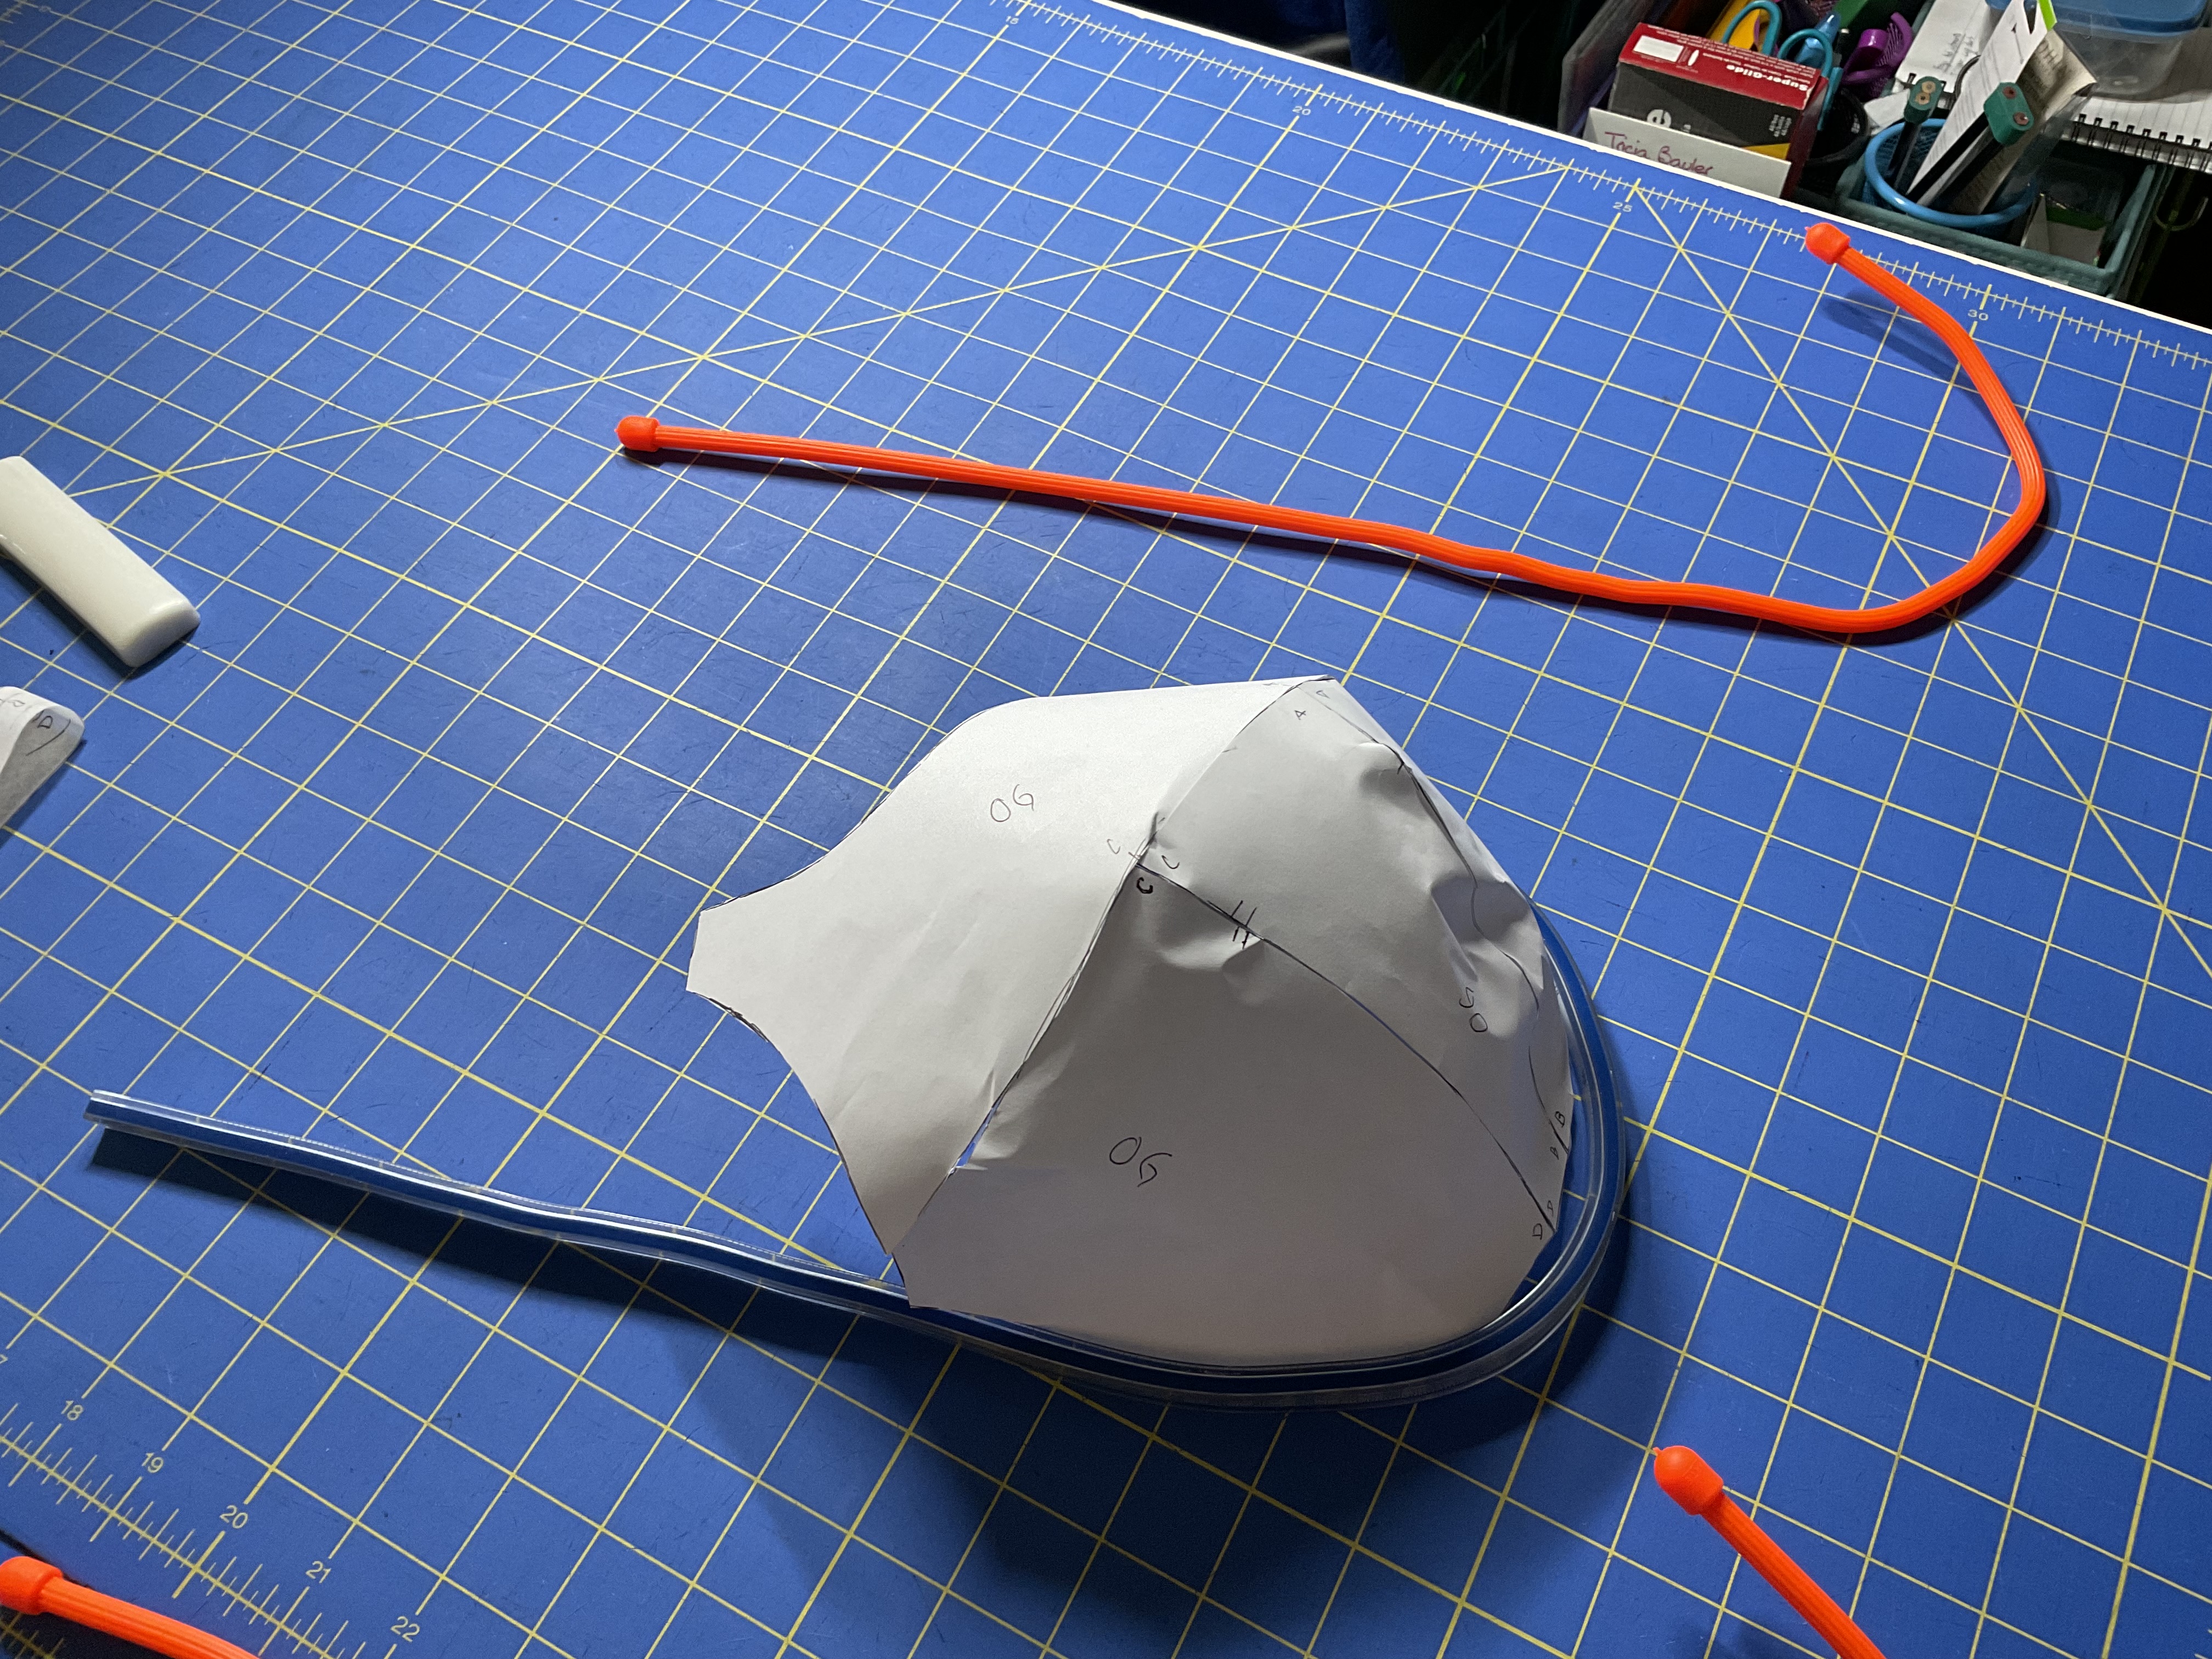
And, as one final test, I tried placing the paper cups inside the breast root trace wire, just to confirm to myself that it was all going to fit together. The original draft is on the left and photos of the new draft are to the right. I think the difference is the least clear in these photos, but in real life it really did make the additional volume of the new cup draft so much more apparent.
So, now that I’m in possession of a new cup draft and a completely new perspective on bra cup sizing and fitting, what’s next? Bra #4 of course! I’ve already cut out my next version of the Ruby since I think the rest of the fit has really been pretty nailed down on that pattern, and I’m excited to test out the theory that adding cup volume will also add comfort and improve the fit. Should I be making a test bra first? Probably, but, again, this will be my third iteration and I know already that it has been “wearable” even though I also know the cup fit on the first two was decidedly not correct.
On top of that (and this might be entirely psychological) I’ve now decided that I hate all my bras because I can really see (and feel) exactly how they don’t actually fit. So I’m excited to see how this experiment goes and move on from there. I feel like I’ve had my mind totally blown open by the idea of finding the correct wire line and fitting everything else out from there. I’m totally going to fall down the rabbit hole of drafting my own bra band sooner or later (probably sooner), and I’ve also fallen down the rabbit holes of wire spring theory, discussions about rigid vs flexible wire, and center band shape. Classes about fitting and minimizers and sports bras have also convinced me I need to make my own sports bras once I get a better fit. Added to that I’ve seen further discussion about best bra cup patterns for rounded vs oval shapes, and hearing a lot of people’s opinions at the Bra Bee about best patterns for different shapes, preferences, and needs was also super helpful. I’m not going to say that I’ve been convinced I need to try the Cashmerette Willowdale bra, but don’t be surprised if it shows up on the blog here soon either. I think it will be very interesting to compare pattern sizing between brands, as well as cup shaping. Of course, I still need to test out all of these adjustments and see how they work in an actual bra, so stay tuned for more adventures in bra making coming soon!

Yay! Looking forward to the next one.
I attended the bra bee too (I’ve done all of them so far) and really enjoyed reading about your experience. I was in doubt whether I wanted to attend again because I’ve heard most things before, but am glad I did. The whole experience is just so inspiring :-).
LikeLiked by 1 person
Glad to see that you’re back in the thick of things. I’m looking forward to your next endeavors! Enjoy…
LikeLiked by 1 person
How interesting! I have heard so many good things about the Bra Bee, i must make time to attend next year. And also budget time to make the bras after as I know it will be so inspiring! The link to the hugs for your jugs article was so interesting, thank you for sharing!
LikeLiked by 1 person
Have you looked at Emerald Erin’s store? She carries a variety of underwires, and specifically has omega ones. You can get a sizing kit that’s 3 sizes. I got a sizing kit from Bra Builders before I found her shop, and it was overkill, everything from 32A or whatever to the biggest size they carry. Useful but pricey compared to just getting 3 sizes for under $5 from EE. Also, in case you haven’t stumbled upon it, LizSews’ YouTube channel is a treasure trove of information on bras that I found surprisingly comprehensive. Much of what you mention about sizing is covered there, and I like that she discusses a variety of sources for supplies, and her information is not tied to specific patterns.
LikeLiked by 1 person
I’ve looked at Emerald Erin but I haven’t ordered anything from there yet. Probably I need to look around at different wire options some more. I know the fit kid I got from Gigi’s also only had 3 sizes of wires and that was great. I definitely feel like I am pretty good on wire sizing generally; I may just need to look at different wire styles to see if I like something better though. And I just found Liz Sews this past weekend… definitely a great resource I need to check out some more!
LikeLiked by 1 person
I’m enjoying following your bra sewing adventures! Thanks for posting.
LikeLiked by 1 person
I enjoy reading about your approach. Thanks for taking time to write and publish your adventures in bra sewing.
LikeLiked by 1 person
This is really getting me interested in sewing bras again. I took Beverly Johnson’s class in Ontario a few years ago and was hooked! Since then, my weight has changed and I’ve not gone back to adjusting the first draft or trying something new. Thanks so much for sharing your insight, links, and info about the Bra Bee. I think I’ll look into this next summer.
LikeLiked by 1 person
It sounds like their next Bee will be in April 2024. One interesting thing I learned in the Bee is that while cup sizes and back band sizes can fluctuate (a lot) often the front band/breast root trace stays pretty consistent so if you already have a front band that fits well it (hopefully) won’t be too much effort to adjust the back band size. Adjusting cup volume seems more yucky but that’s also what I’m working on now so if I find anything cool or helpful I should be posting about it soon!
LikeLike