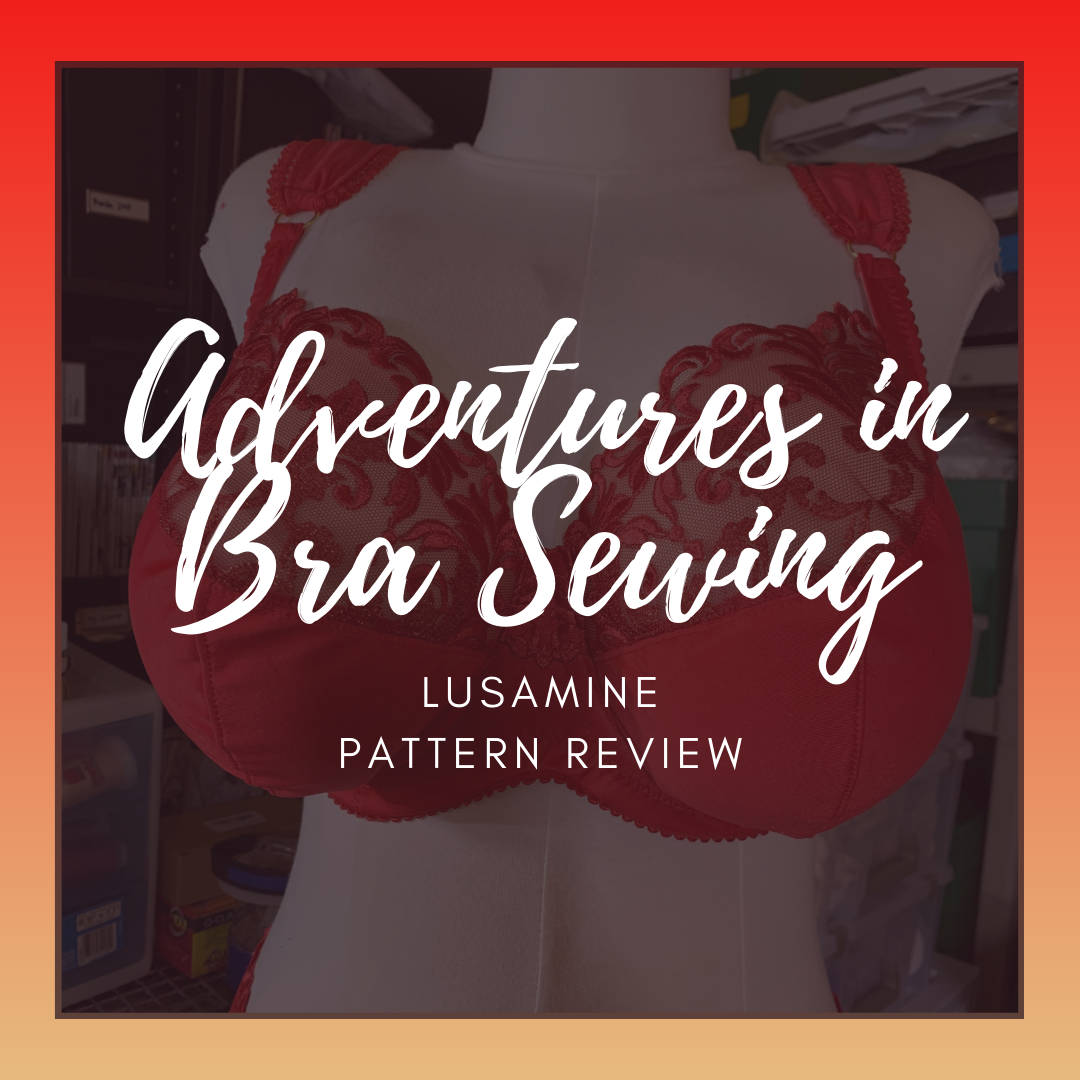
As part of this year’s Bra Sewing Bee, I wanted to make some fitting bands, test out some new patterns, and see if I could achieve a better fitting bra. Although I feel like I’m really close on fit with with some of my combination self-drafted bands and cups, I thought it might be worth playing with some patterns to see if I could get something a bit better and resolve some of the minor fitting issues I’ve been having. Previously I reviewed the La Bella Coppia Josey Bra, and today we can look at the other pattern I decided to try – the Lusamine by LilyPADesigns.
I decided to pick up the Lusamine because it kept coming up as a highly recommended pattern for anyone with small roots and lots of projection or who had to make omega adjustments to patterns, which describes my fitting issues exactly. My problem is that I wasn’t entirely sure where to start because the Lusamine comes in three size ranges: A-DD, DD-GG, and GG-KK. When I was purchasing the pattern I bought the GG-KK sizing because it was before I had any decently fitting bras, so I was going off of bra-less measurements, and I’ve lost a few cup sizes since then so I probably would buy the DD-GG if I had to start over.

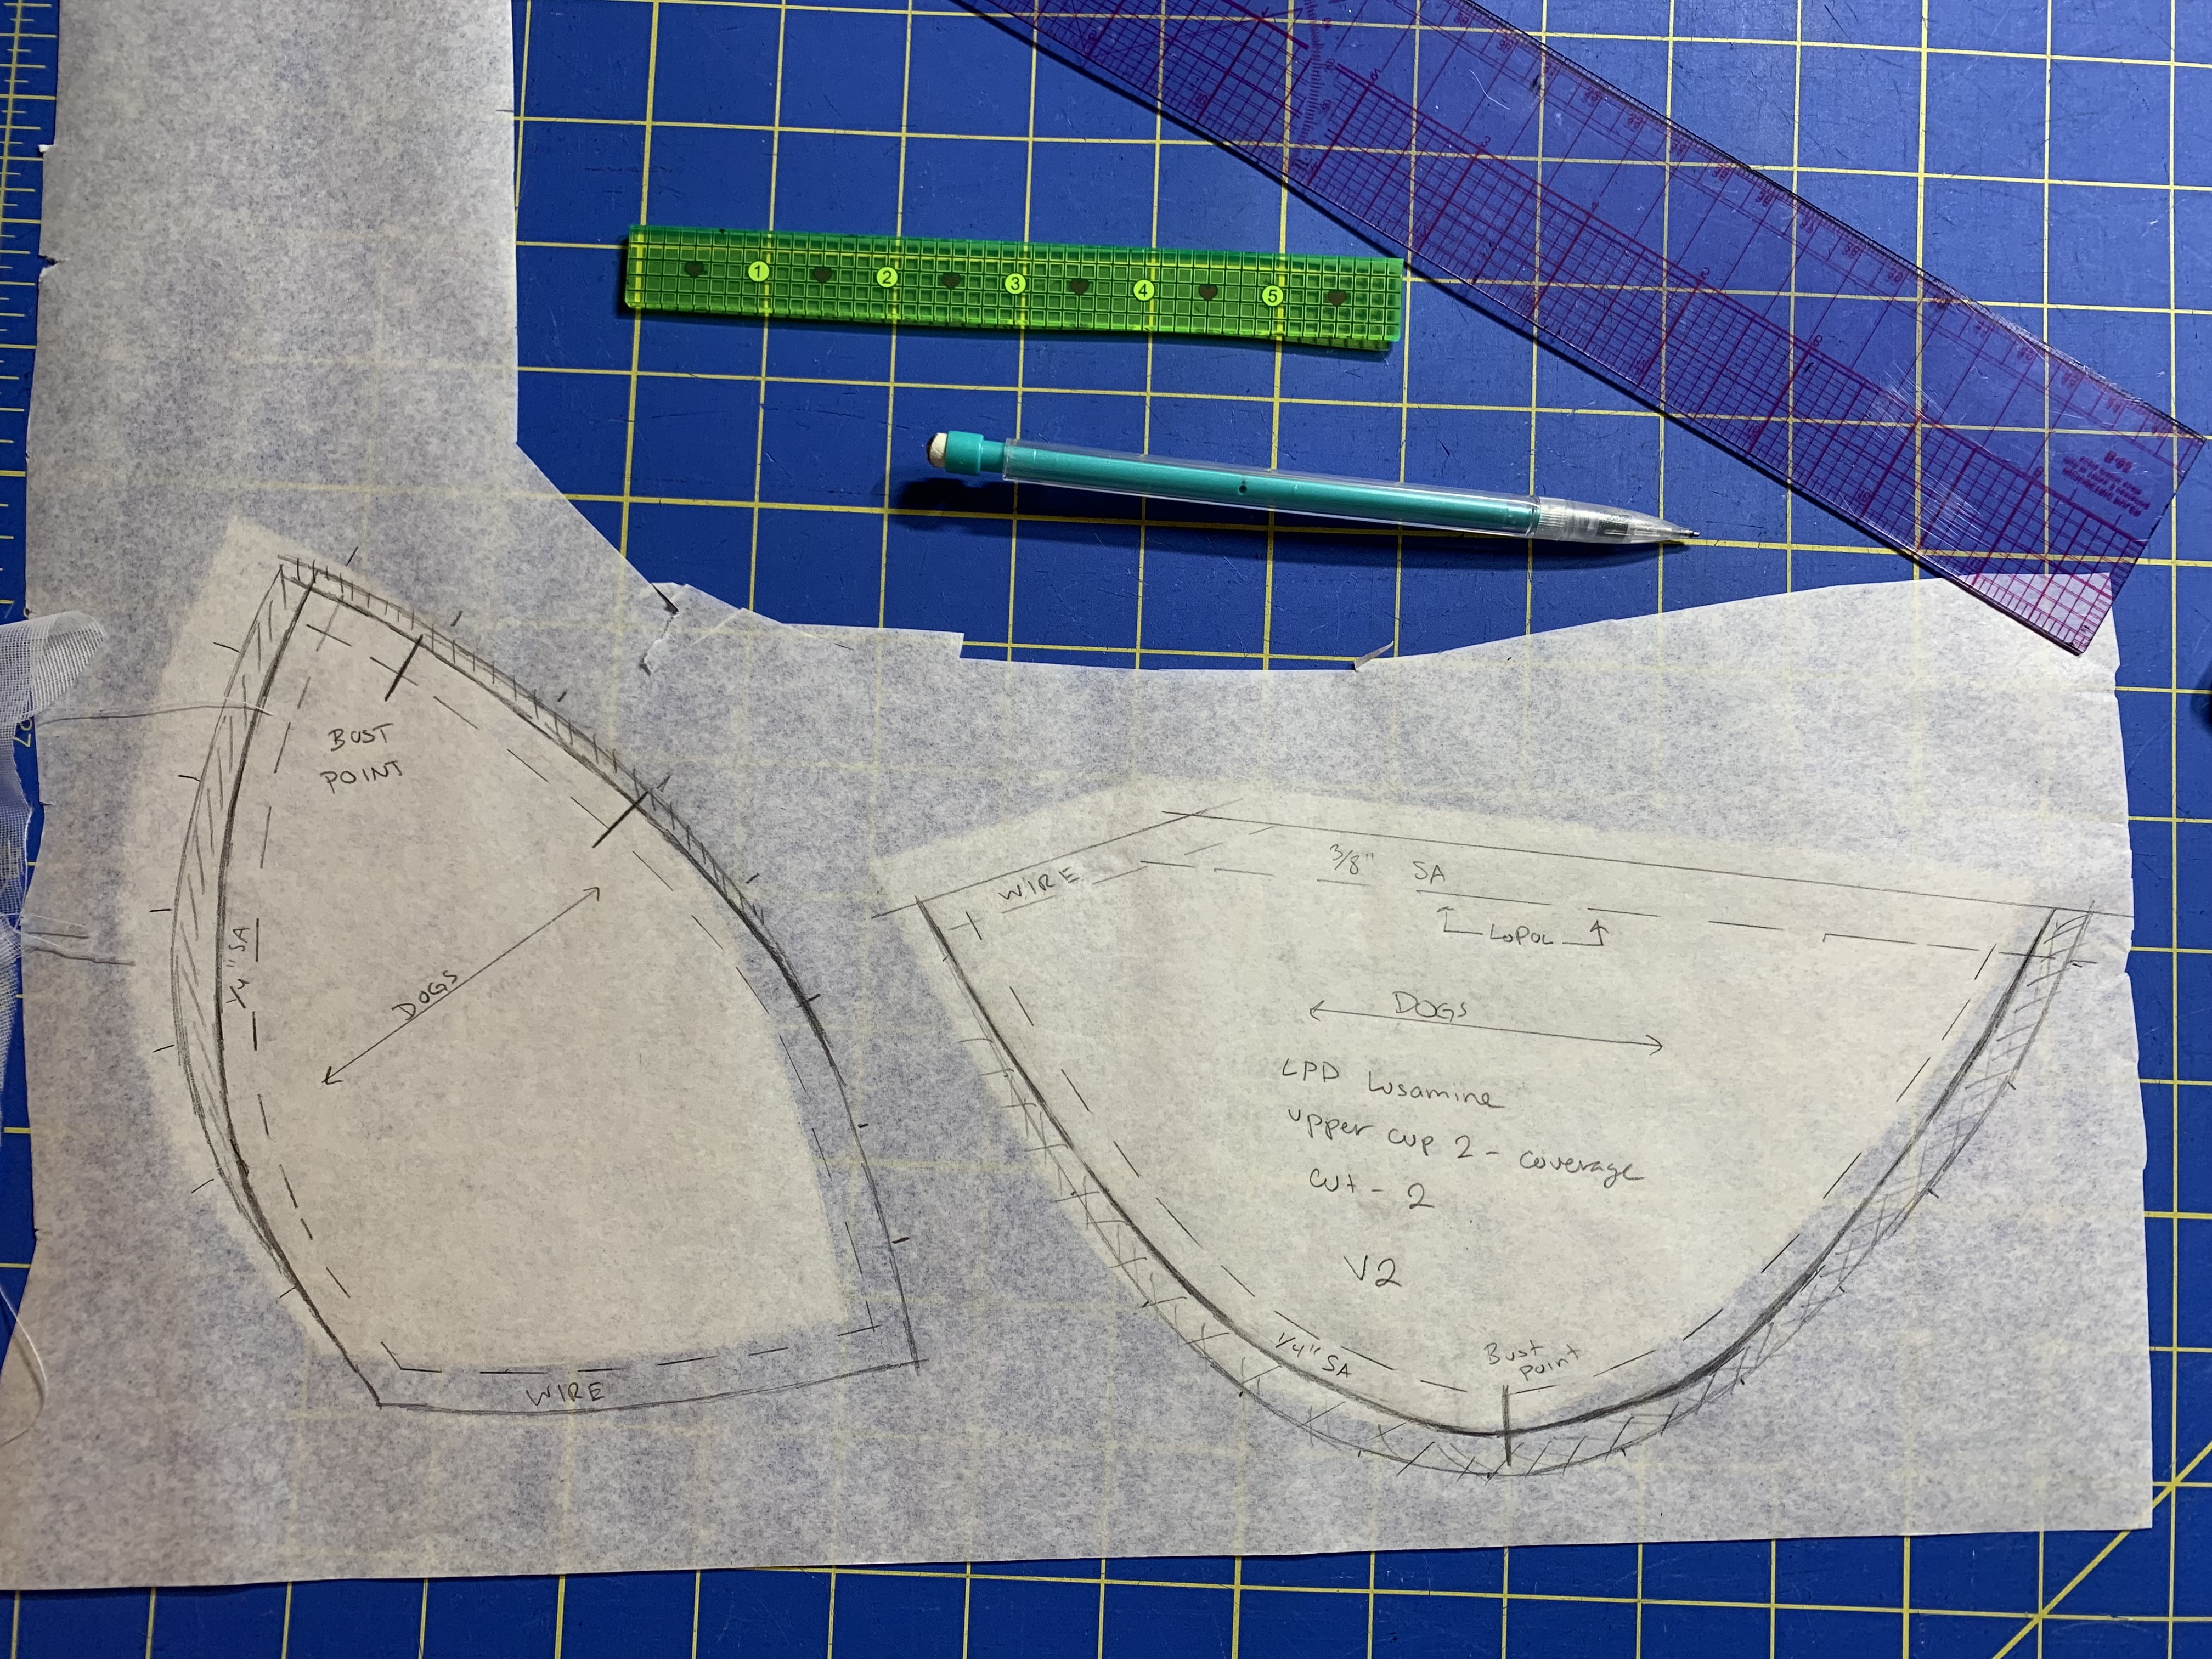
Because the Lusamine is designed for projected shapes, the pattern pieces seem a bit wild. I made a paper cup (right below) to see how it would look and it’s definitely different than most of the other cups I’ve tried.

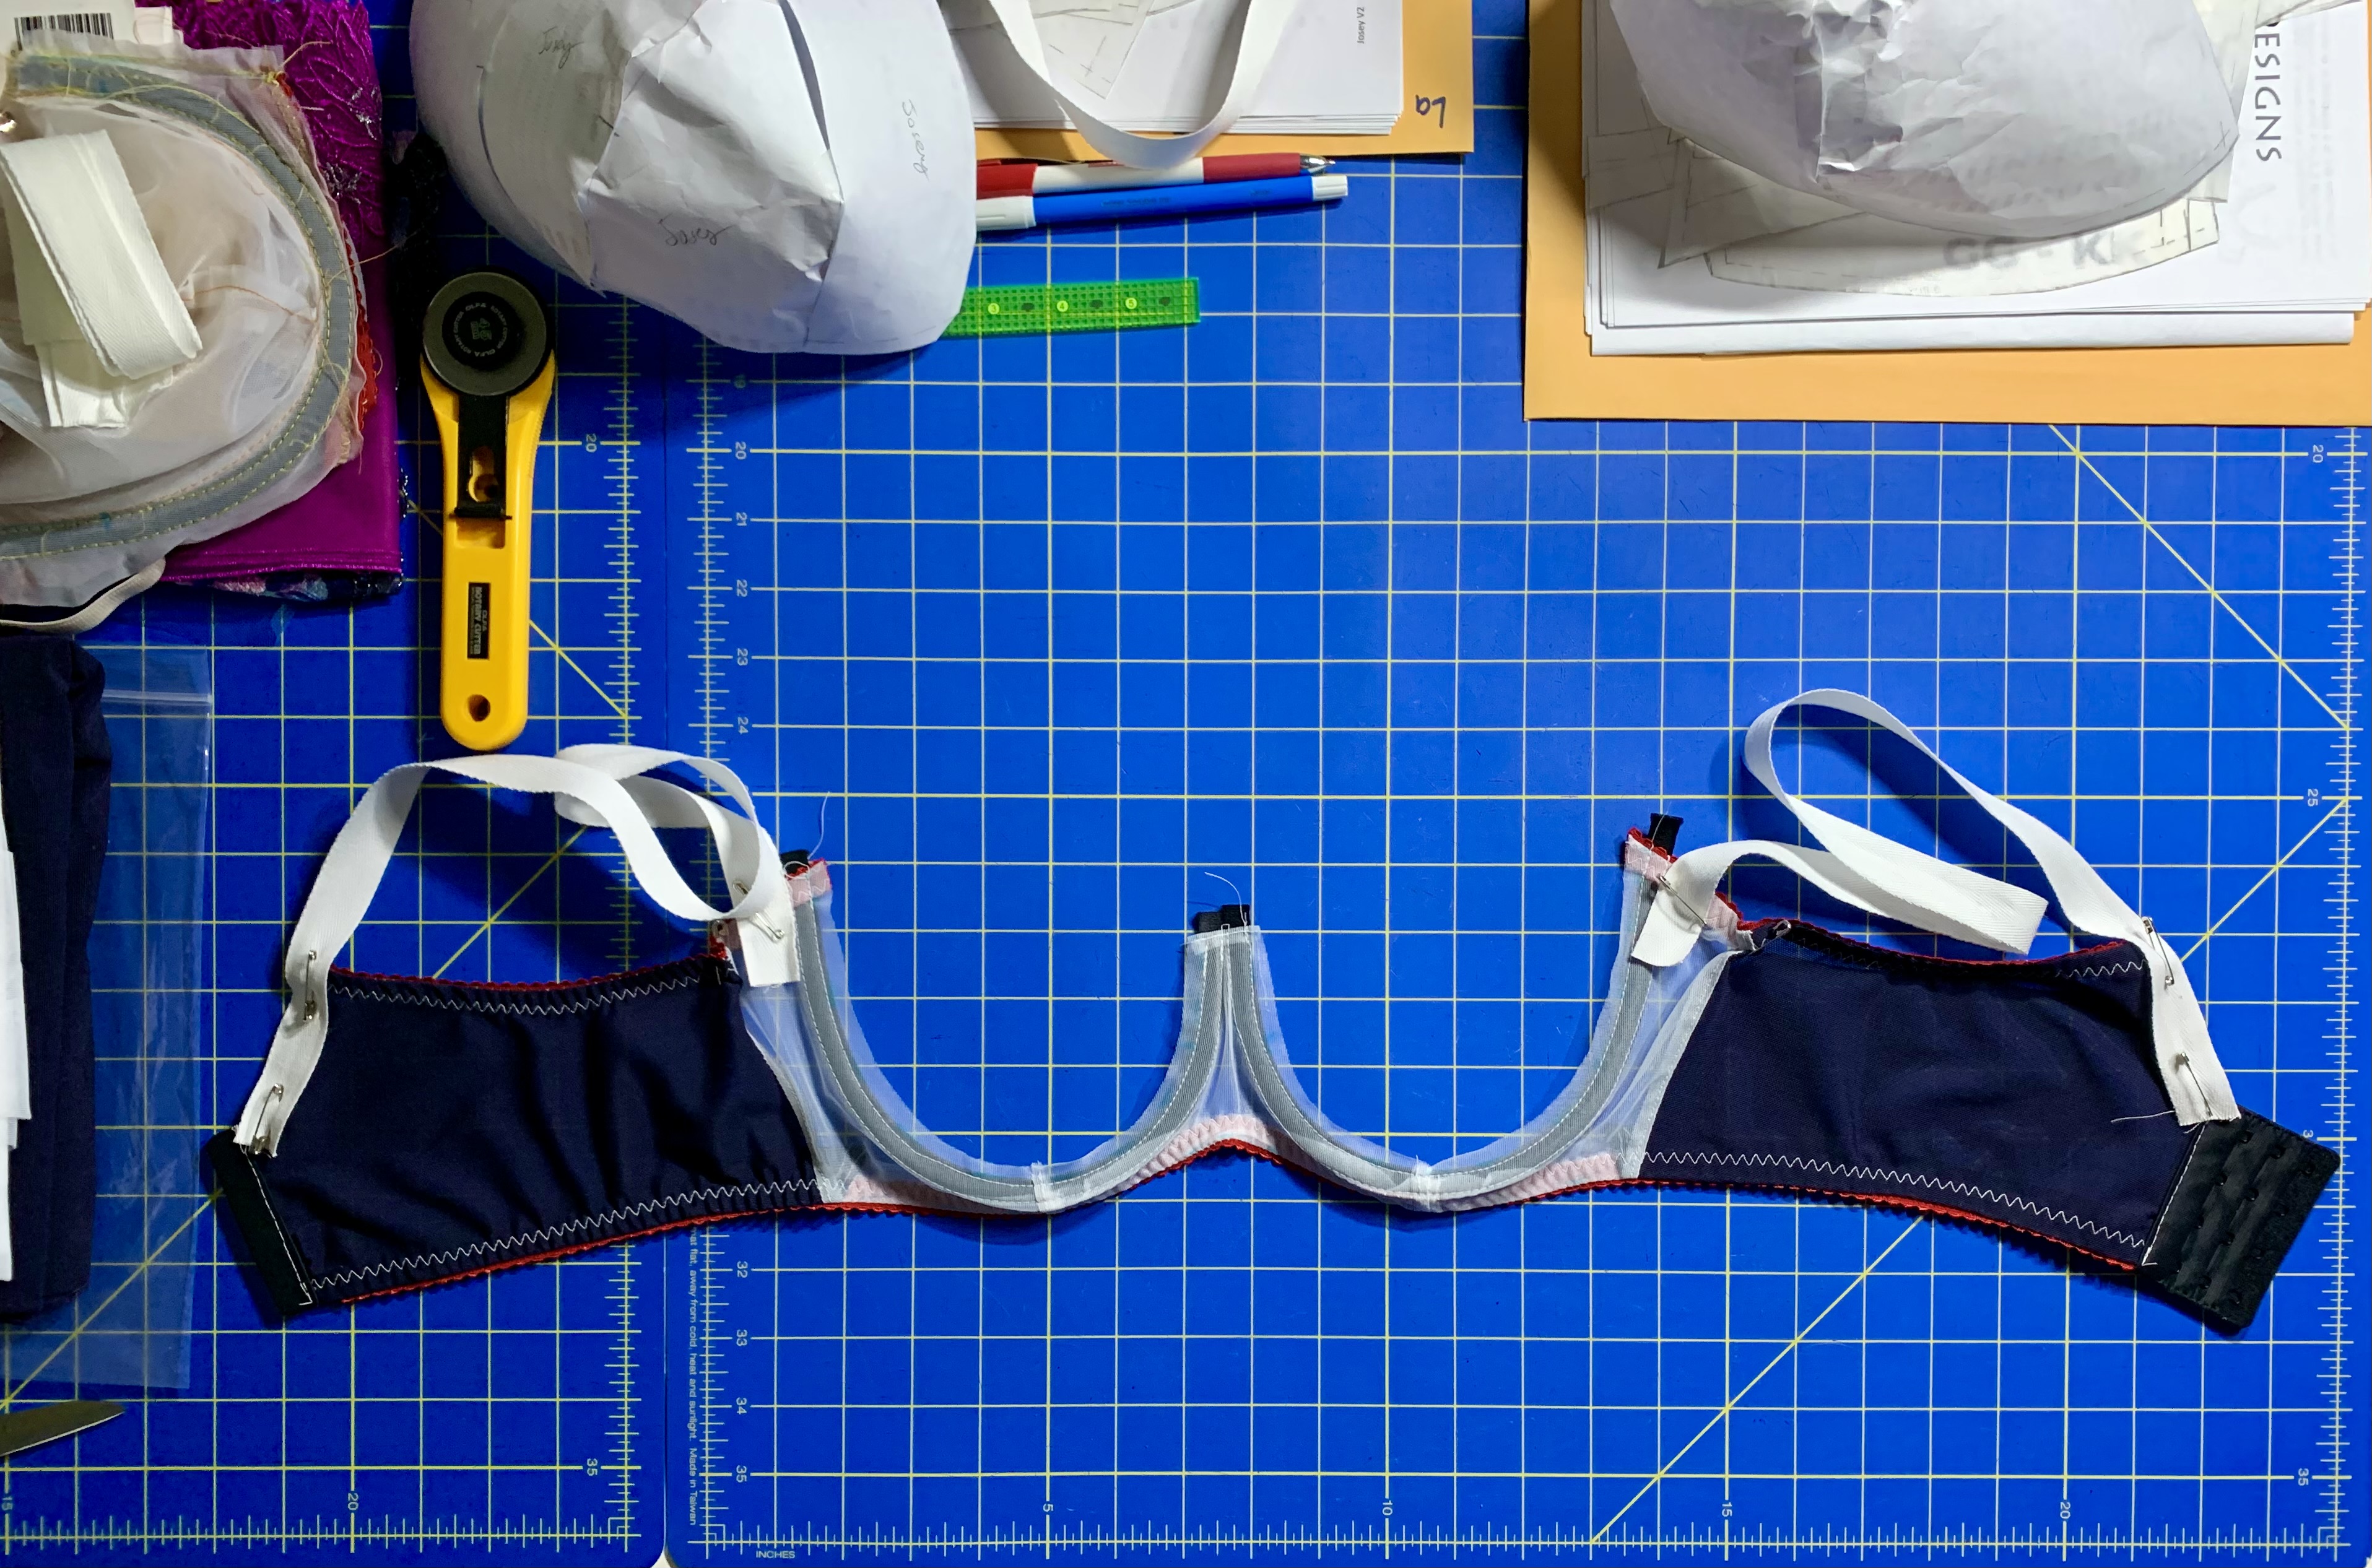
Although I’ve self-drafted my own band, I’ve been wanting to play with wire spring so I made a fitting band to test this pattern. It fit pretty well but I had to take out 1/4″ dart along the upper edge and increase the wire line height to give the wires a bit more wire play.


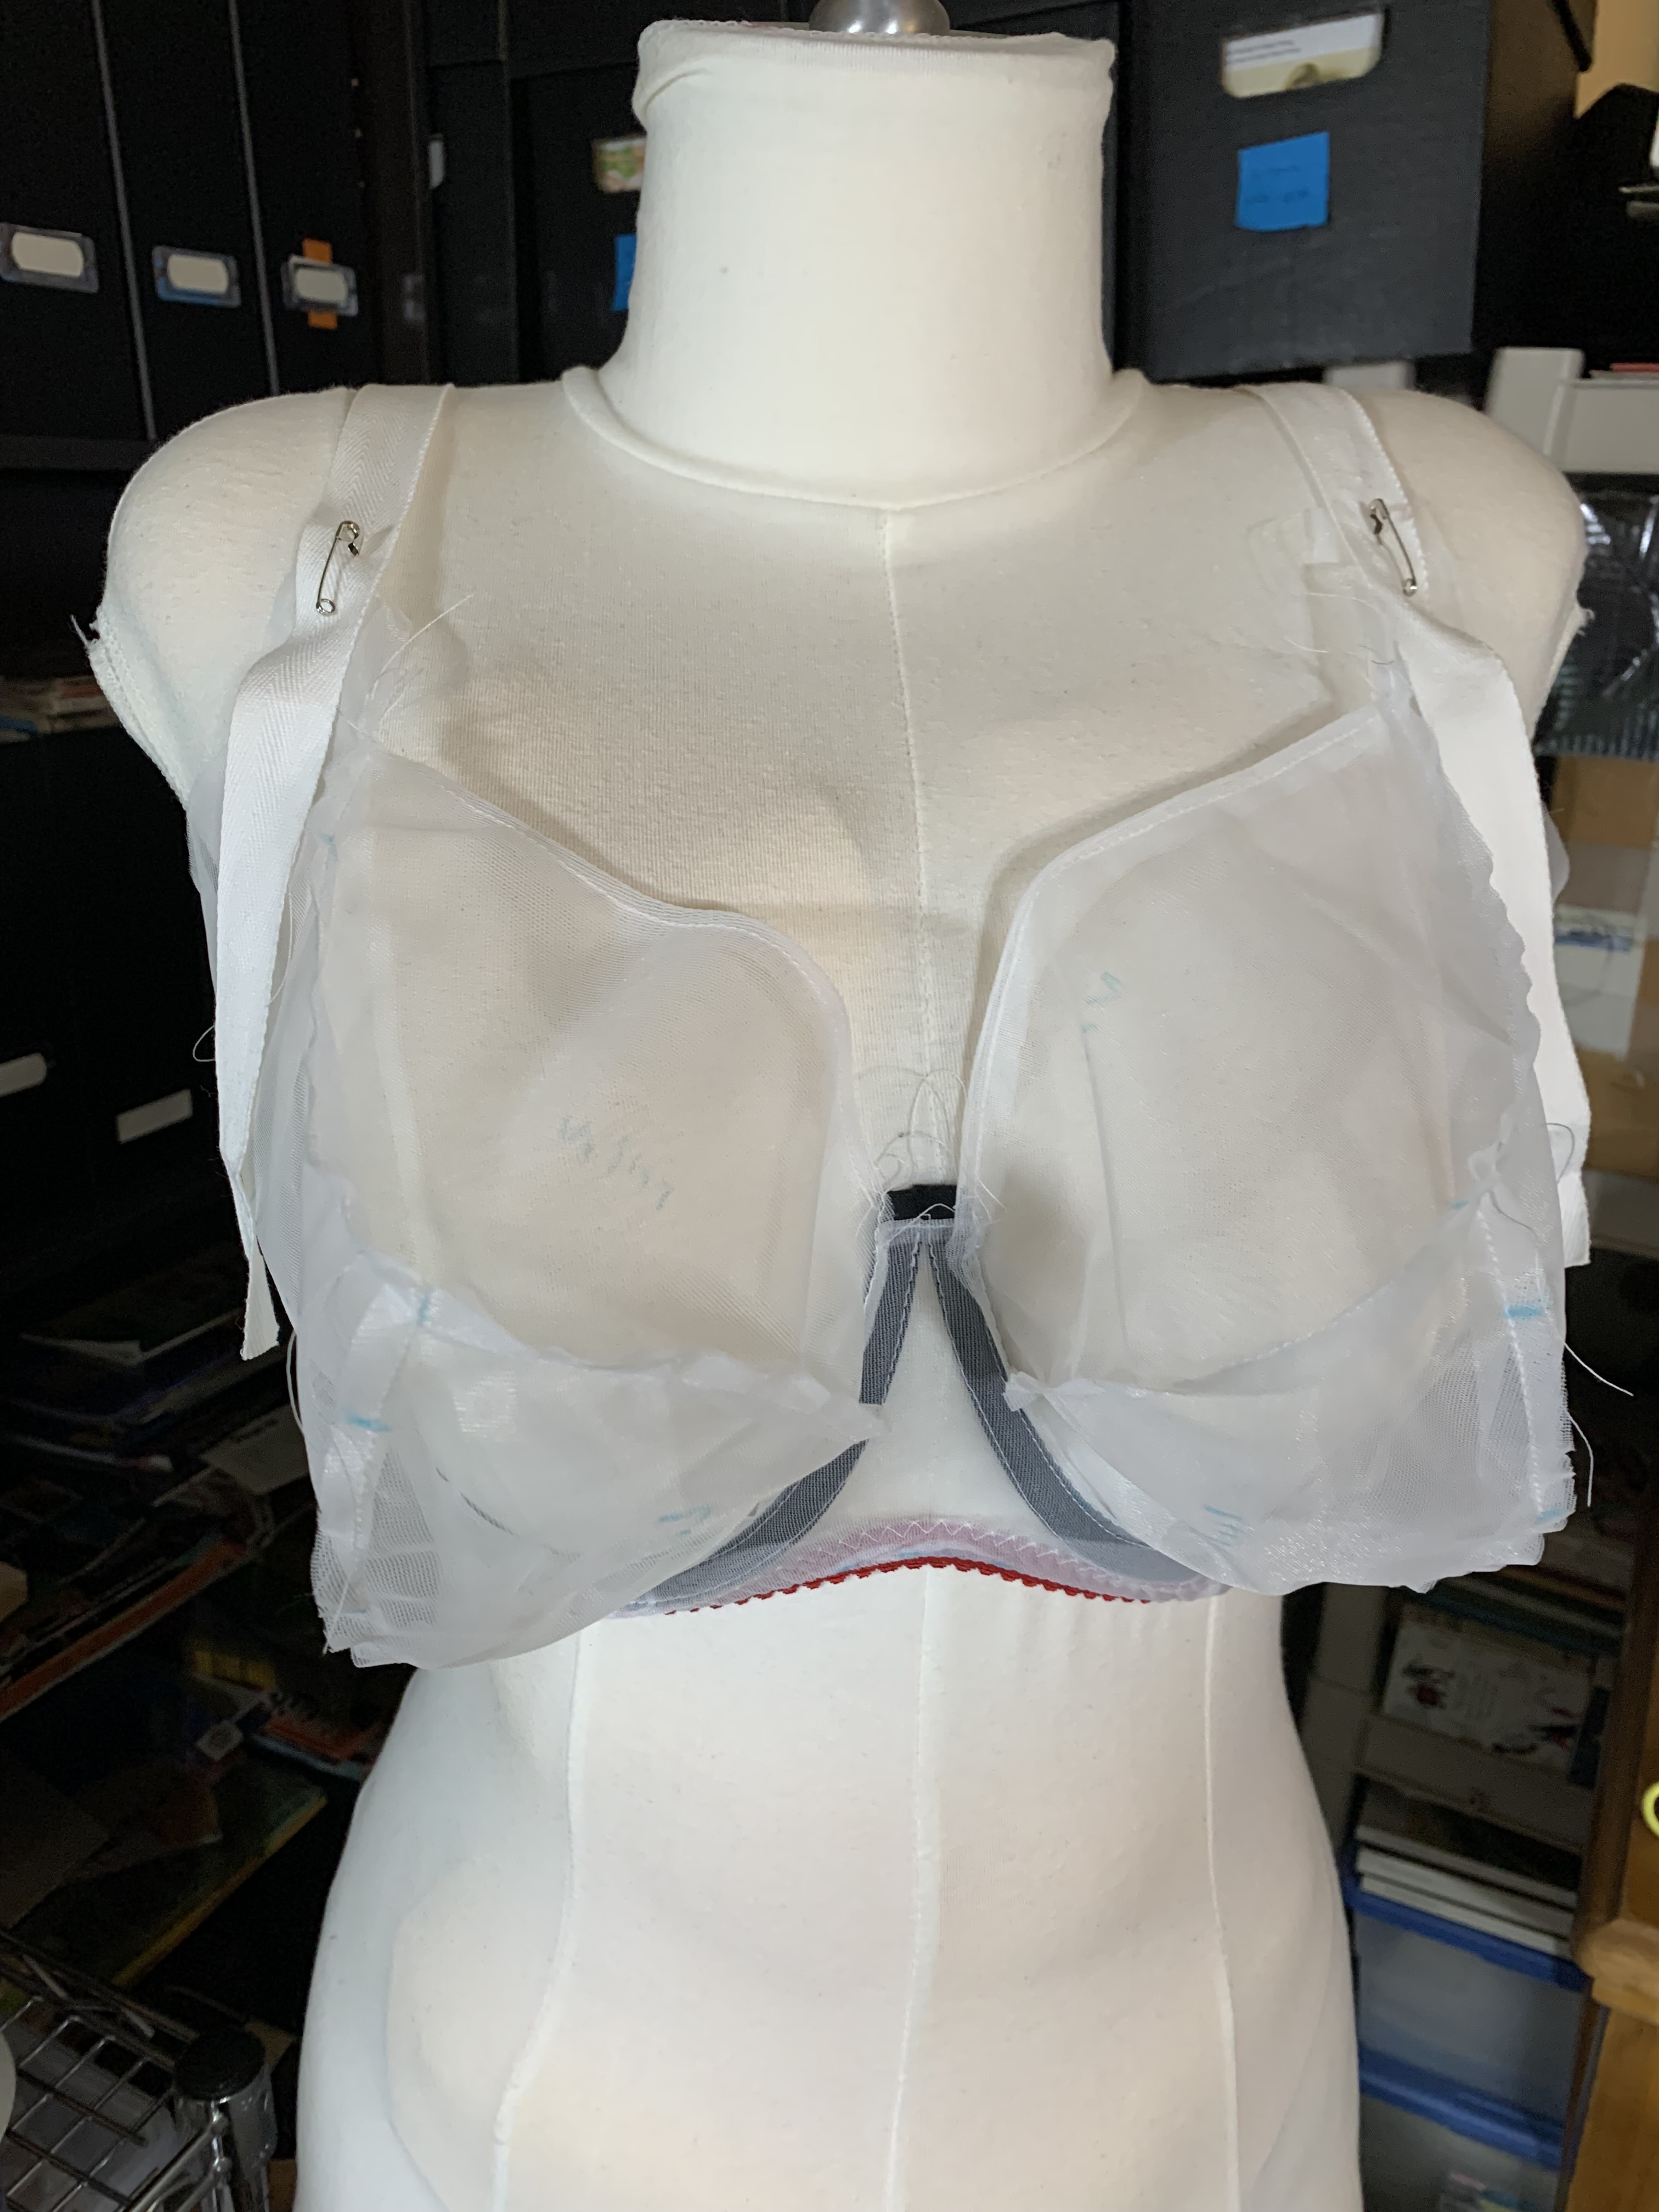
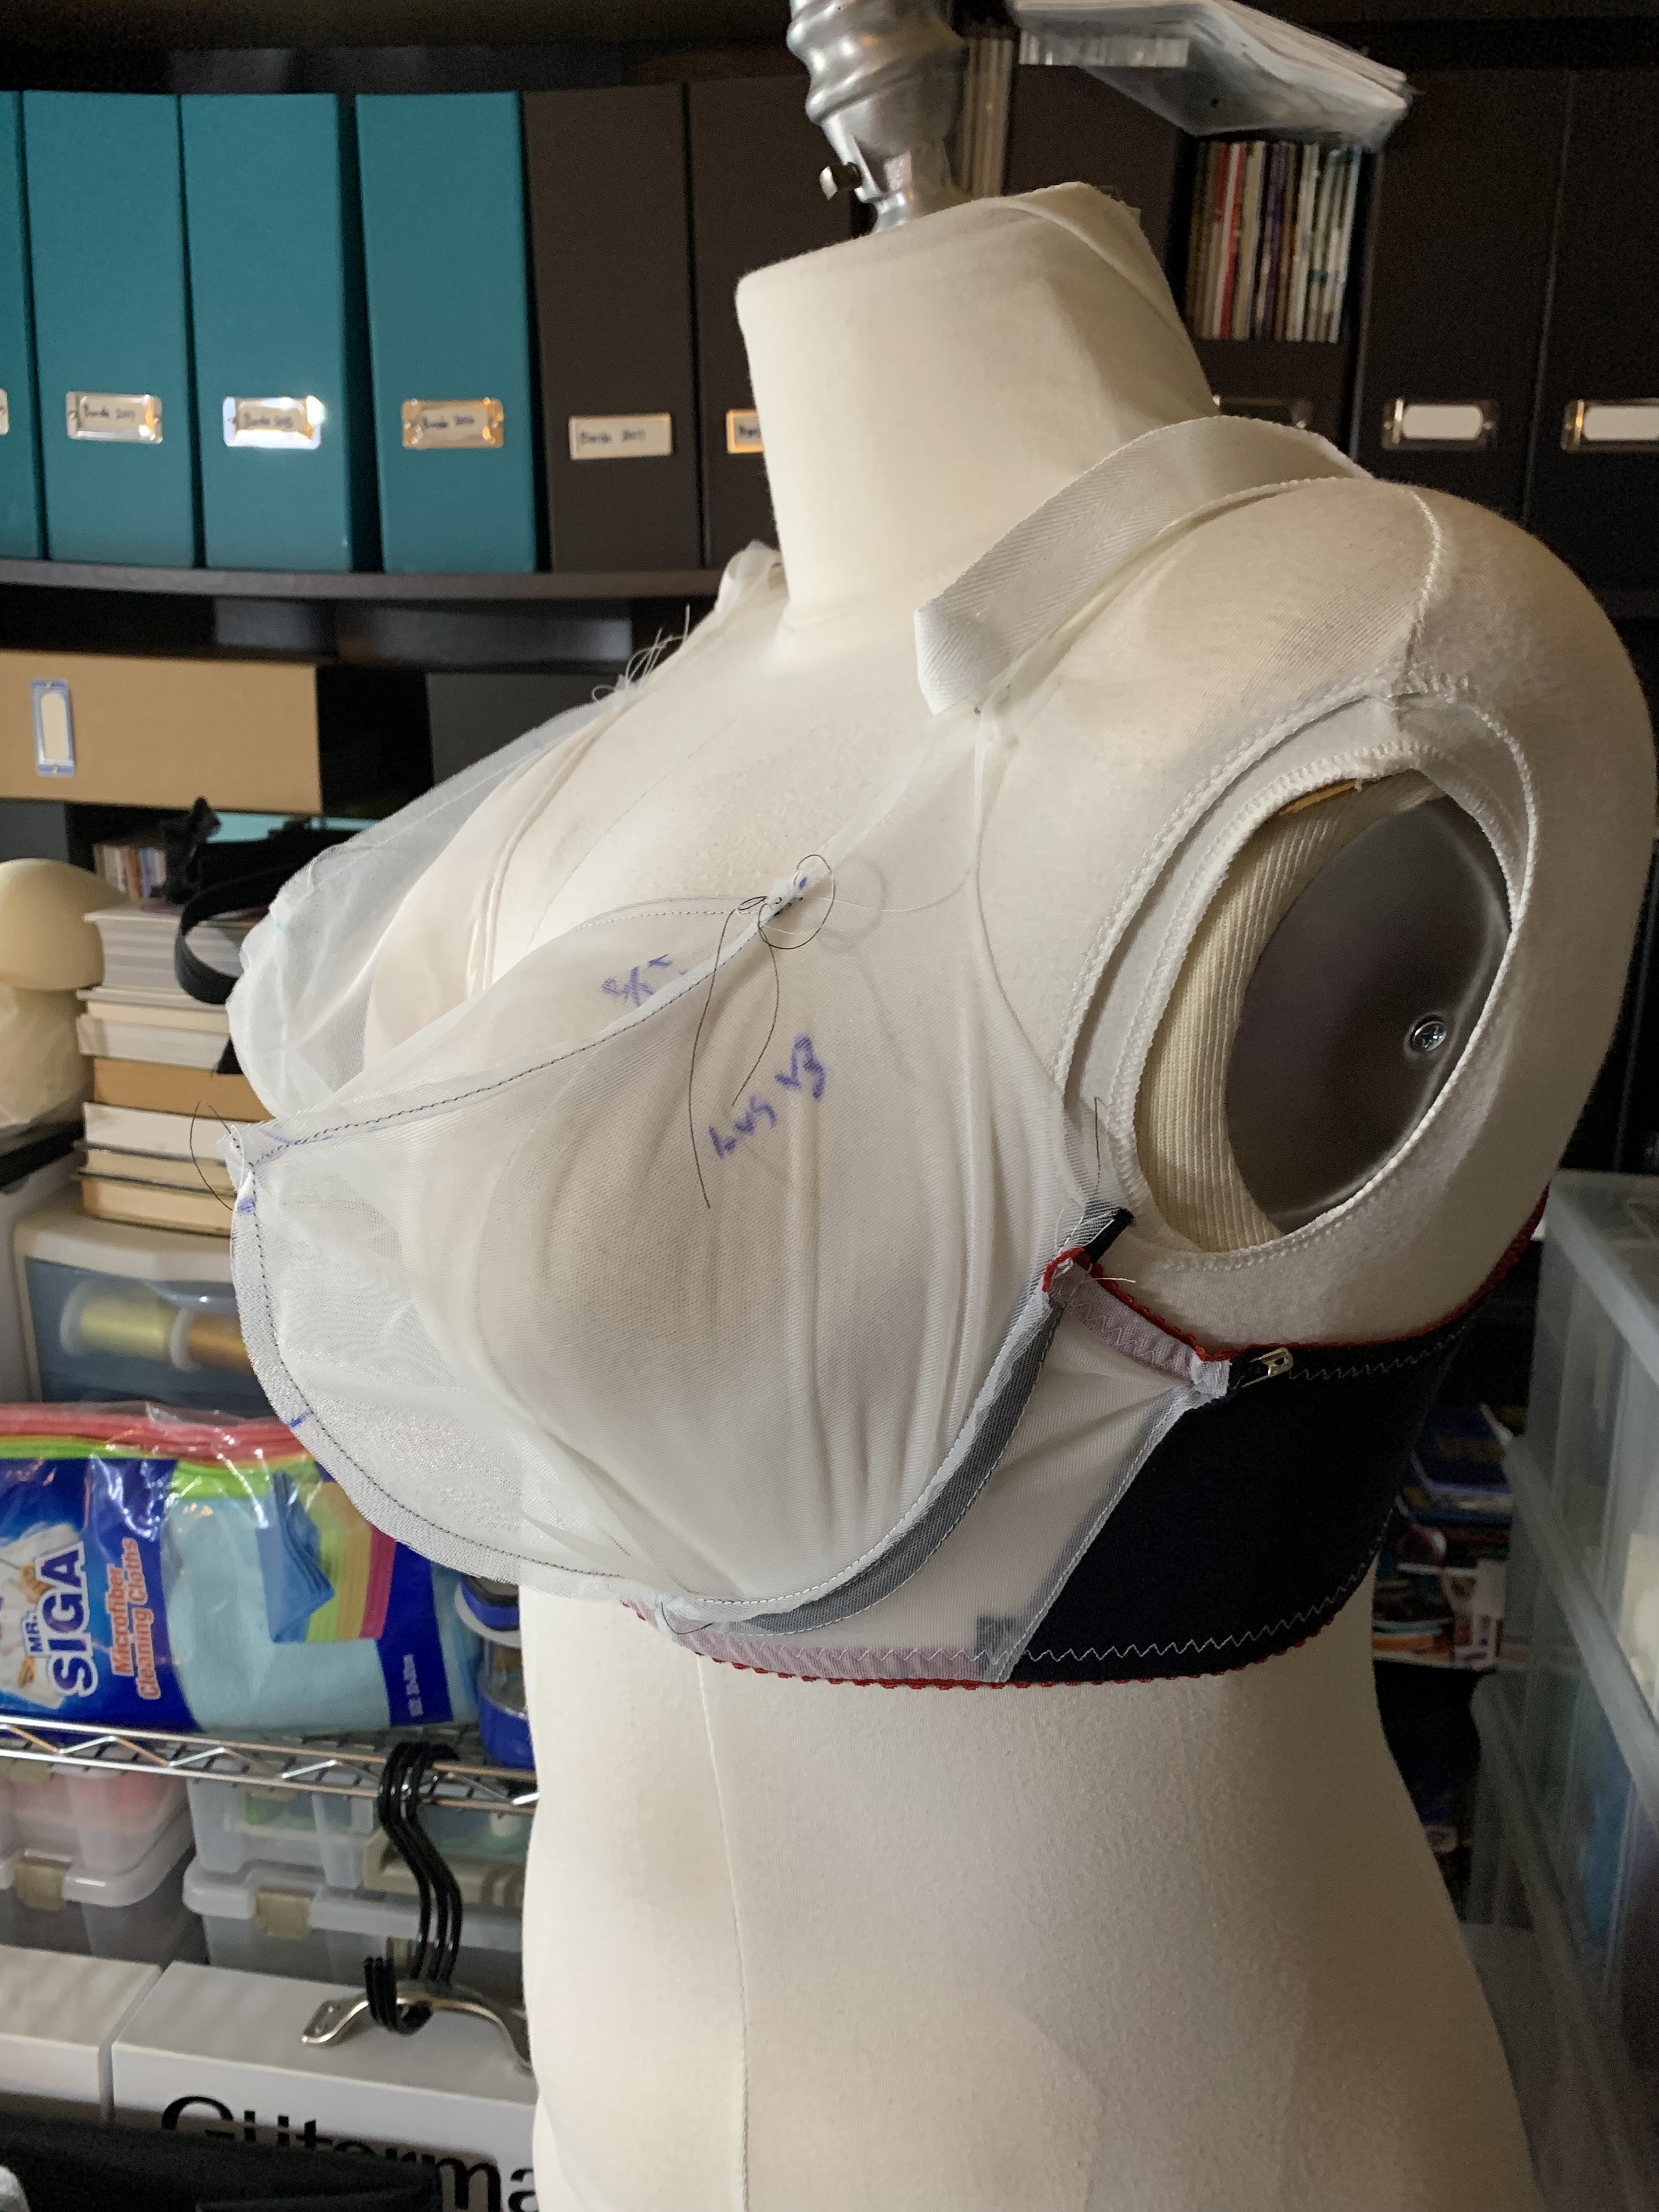
It took me three tries to get the cups right – mostly taking out a bit along the seamlines because I’d lost some volume between starting on the pattern and actually sewing it up. There isn’t a lot of change between version 1, 2, and 3 but it did make a fair bit of difference to the fit.


Out of curiosity I compared it to the Pin-up Girls Freja pattern, which is the pattern I made previously that clued me in on the fact that I didn’t actually know how to fit a bra pattern. I overlayed the Freja on top of the Lusamine and you can really see where the Lusamine is a LOT more projected, especially in the side cup and top cup pattern pieces:

I didn’t get a lot of in-progress shots because I pretty much screwed up construction on every part of this bra. I put the cups together in the wrong order (and had to cleverly cut and flip things to fix that), I had issues with the frame getting sucked into the machine during construction (and had to unpick almost every seam on this bra at least once), and just generally had a rough go of it, for no obvious reason other than that I was rushing to try and get my sewing in before I got busy again.

Despite this I persevered and managed to get a finished bra before rage quitting and flipping the table.
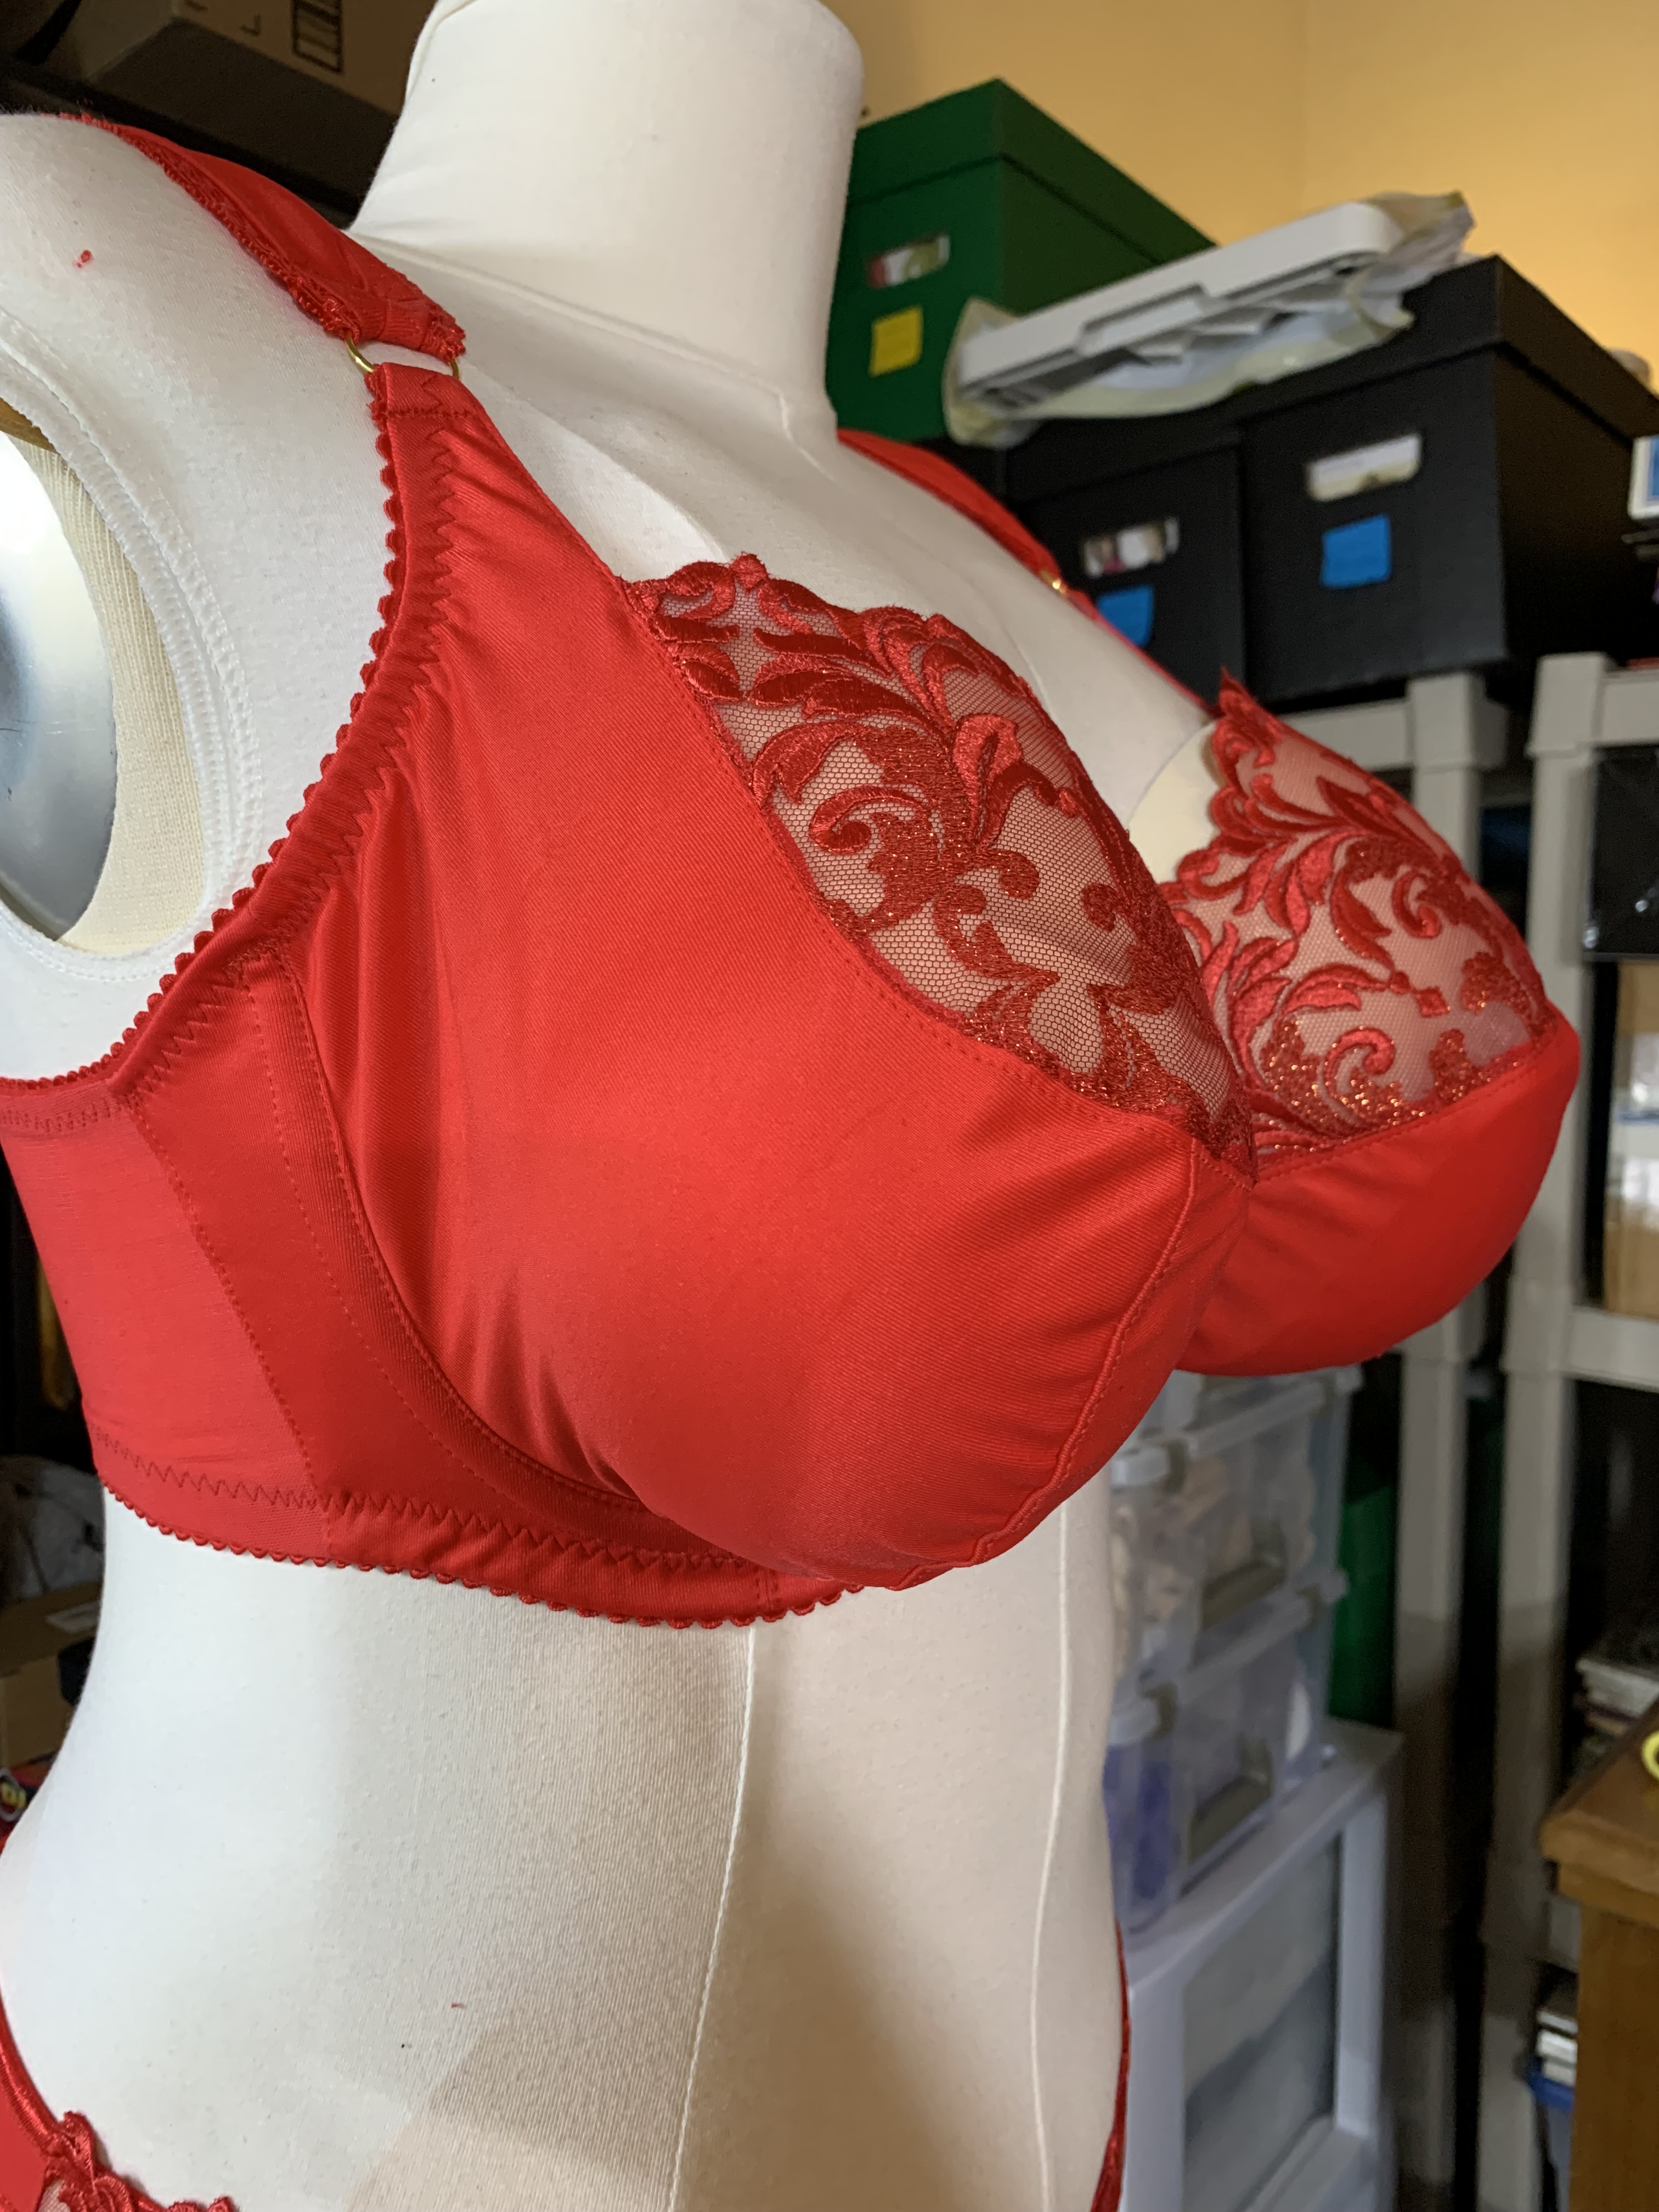

You can see how projected the shape of the cups is from the side view. It’s not my preferred look (I prefer a more round cup) but the style is a really pretty way to display the lace. I also used some fancy elastic to finish off the strap edge to add a bit more pizzaz to the garment. And despite the frustrations of sewing it I am really happy with how the final bra looks – I think it’s a really pretty set!

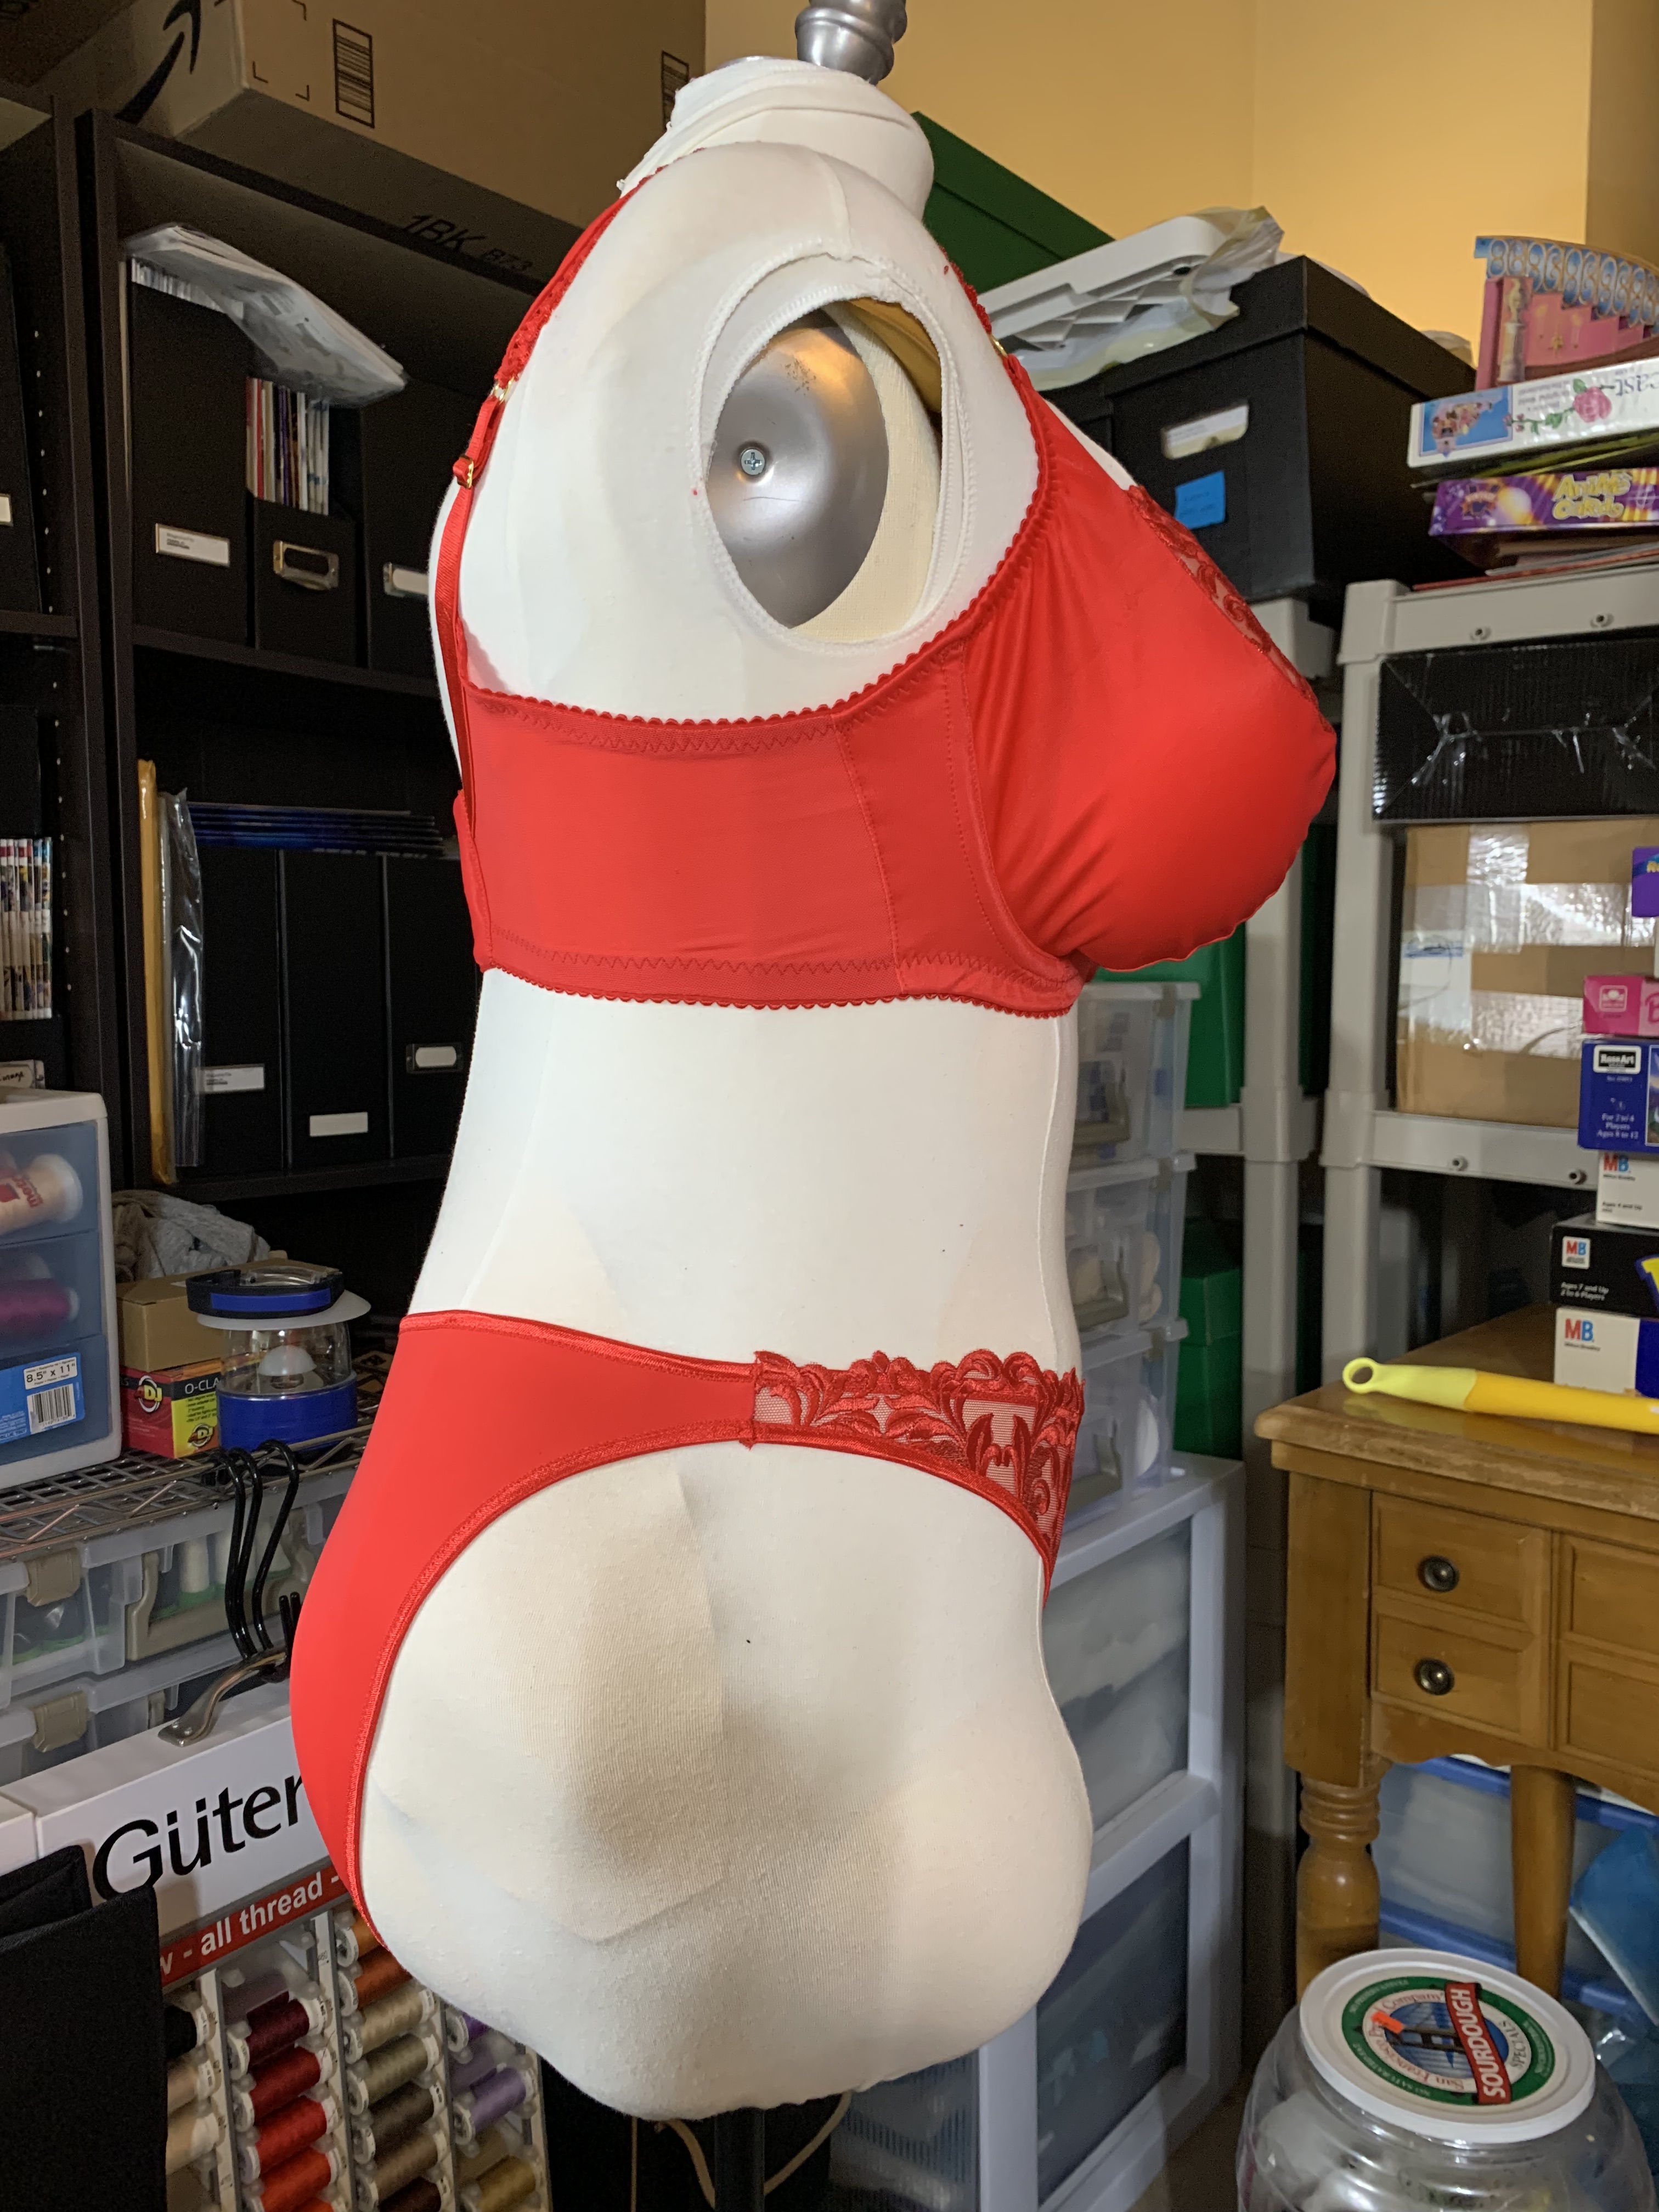
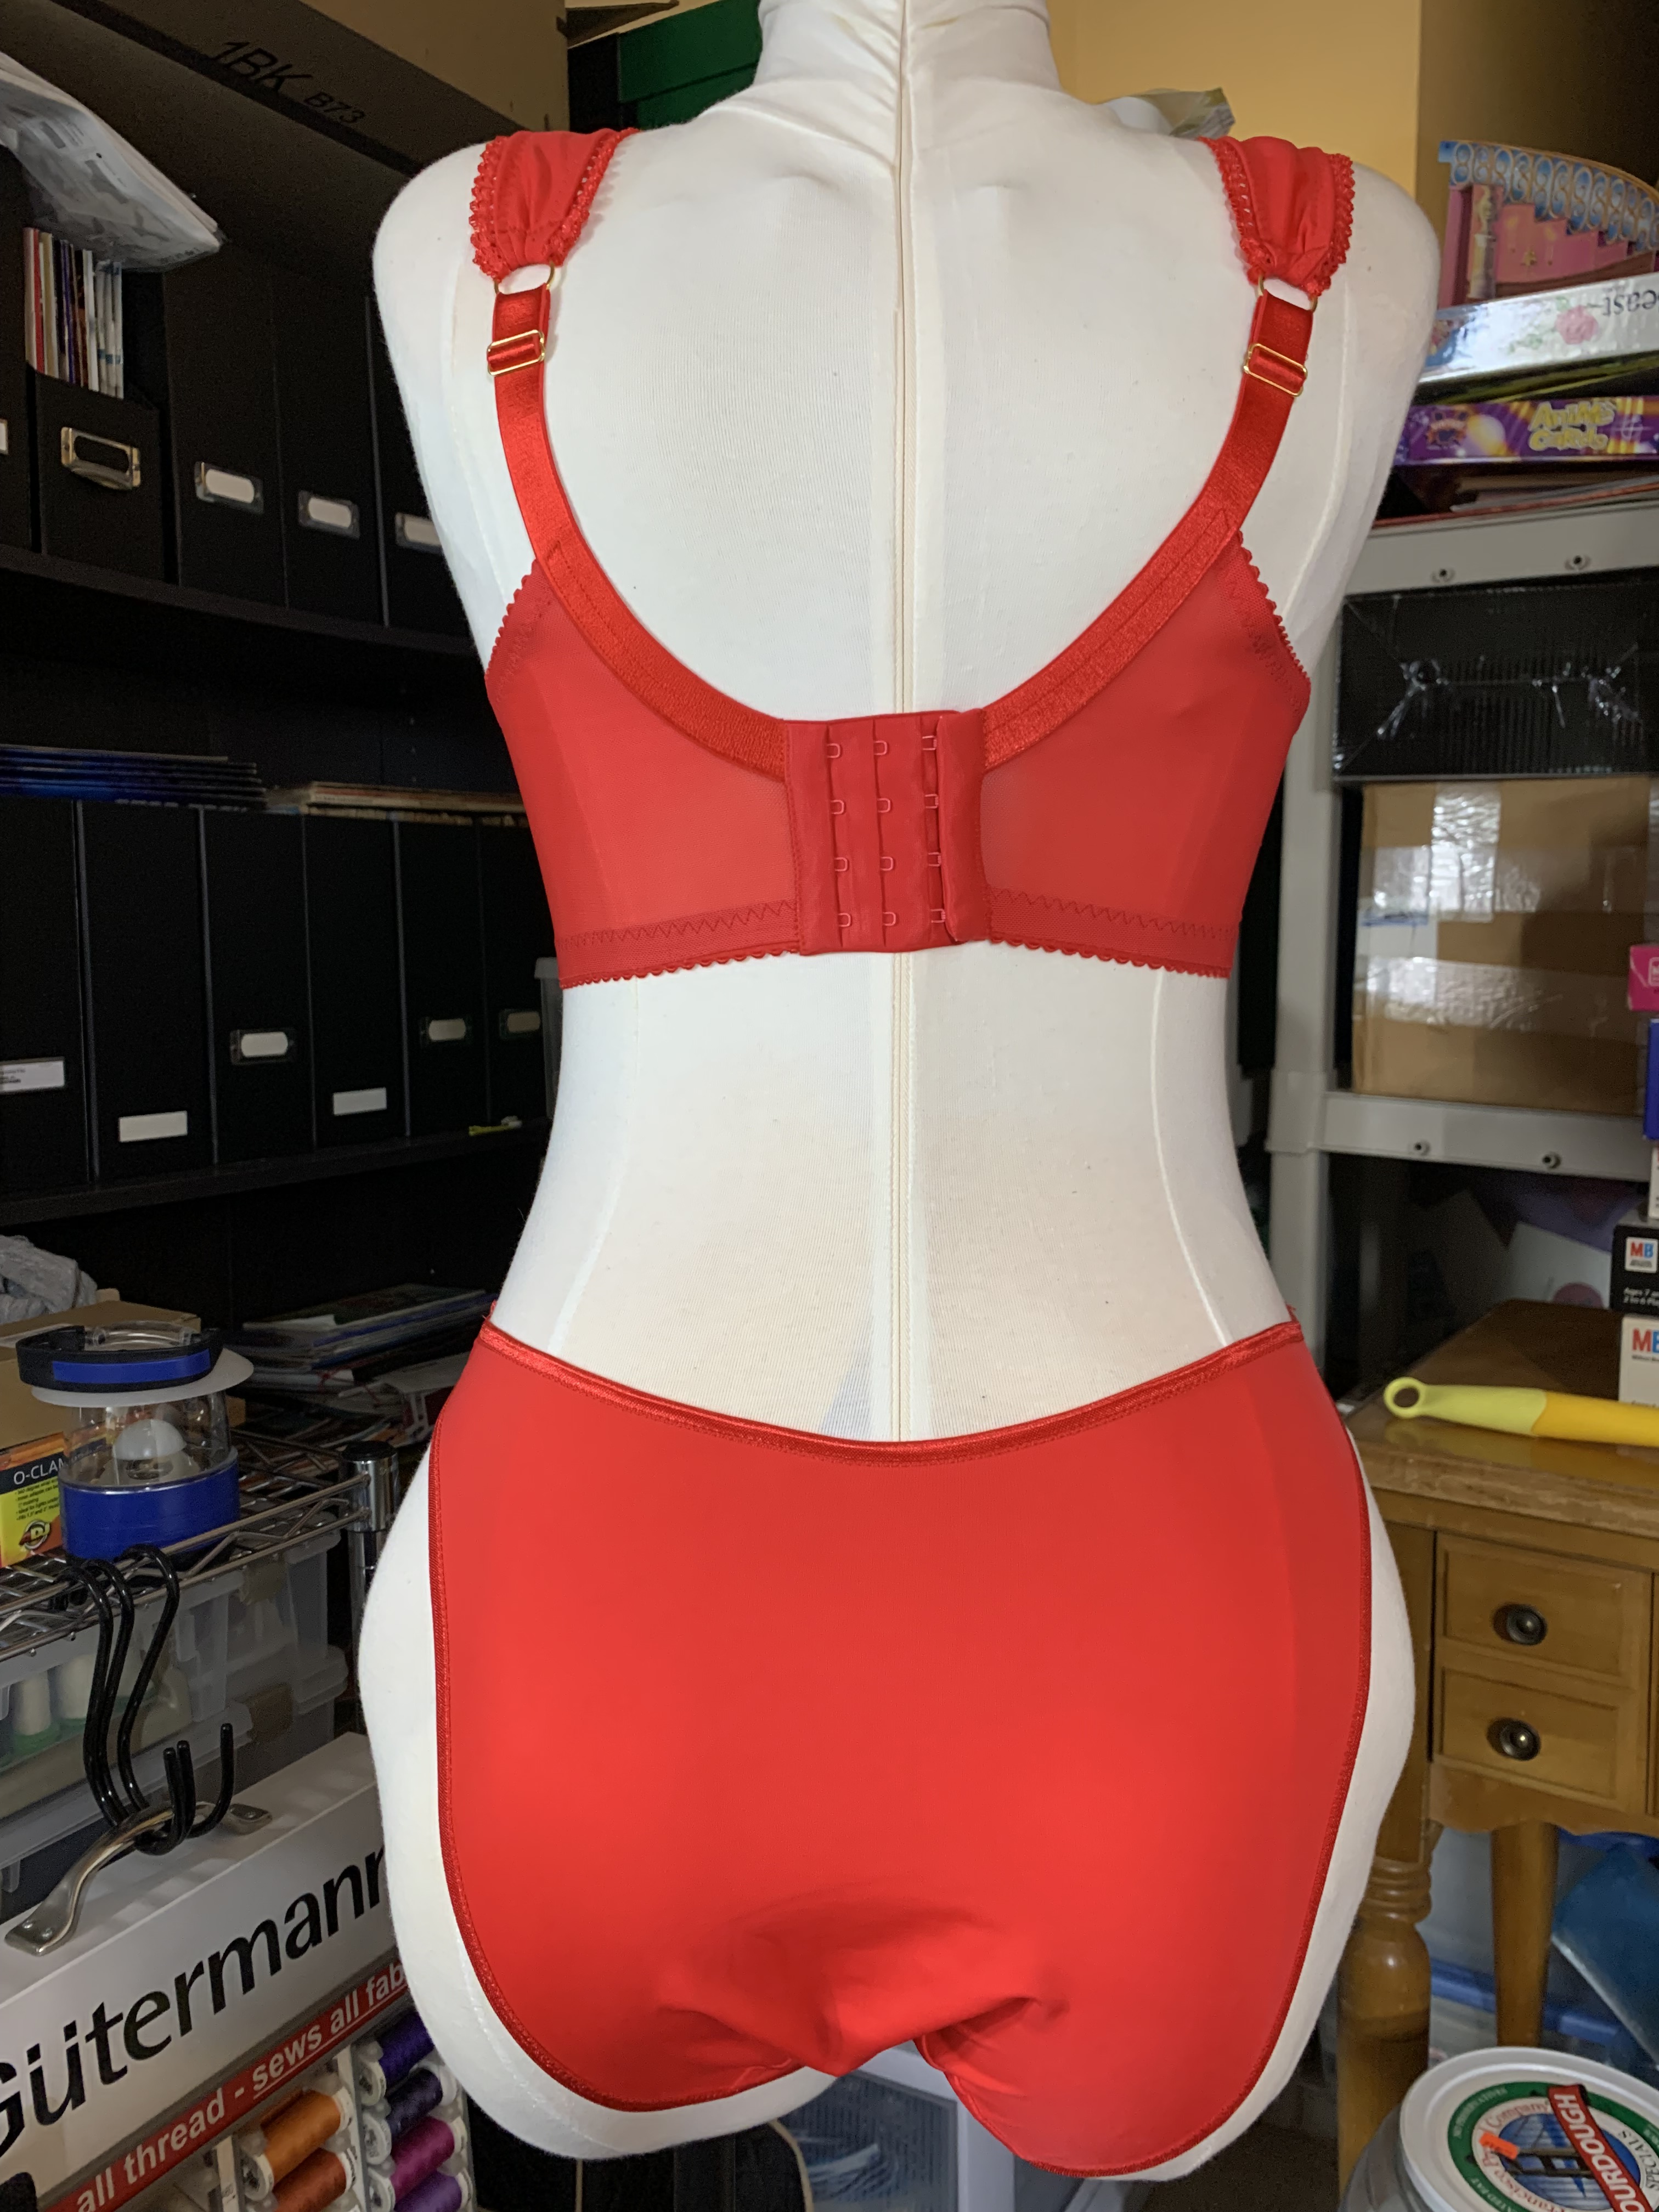
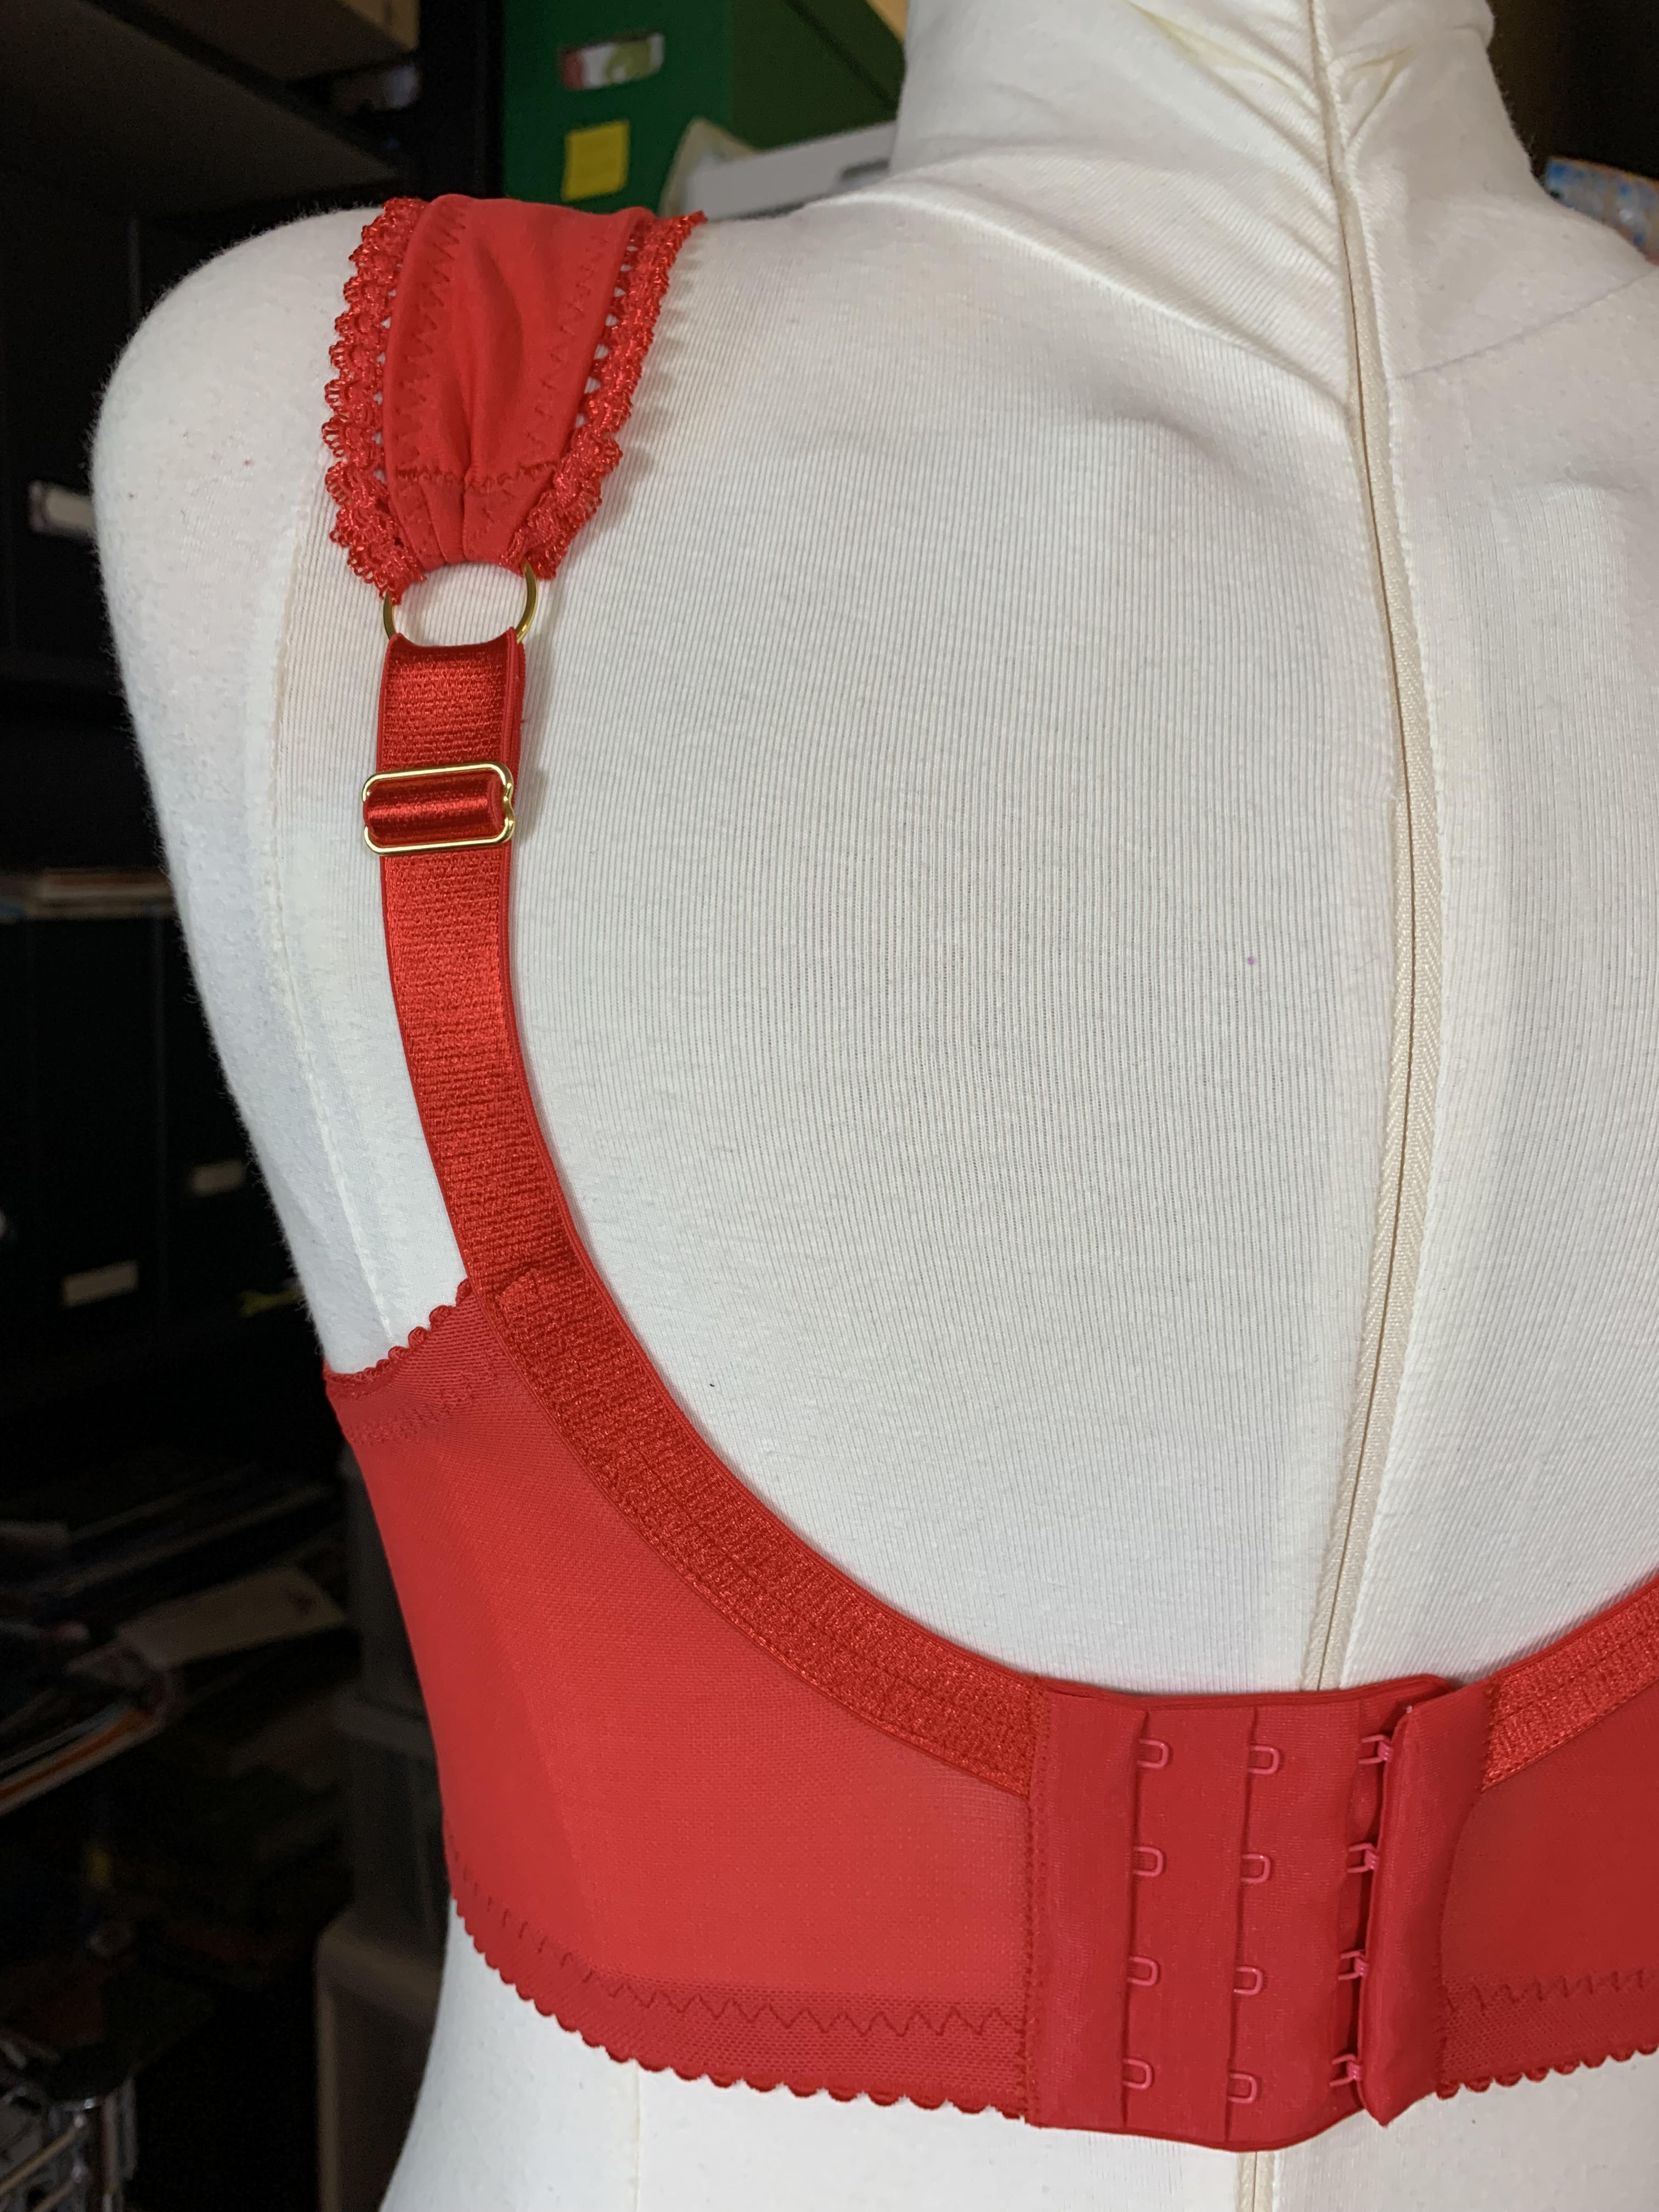
Although I love the look, I think I could do a bit more on the fit – I used a regular weight power net for the back band and I really should have reinforced it with a firmer weight or at least done a double layer. It’s most comfortable wearing it on the tightest hook, which means I should probably take a bit out of the back if I don’t use a firm power net in the future. Because of the angled side seam the power net back band wraps much farther around the body than any of my other frame pieces, and so using the lighter weight power net is far more detrimental to the support on this bra than on any previous versions I’ve made. I’ve noted this so I can avoid this issue next time, though I may also play with putting these cups into a different band next time as well. Despite this, I’ve been wearing it and it’s honestly pretty comfortable. The center gore tacks, the cups are encapsulating the tissue without bunching or pinching, it sits really comfortably around the under arm, and it gives a pretty great silhouette under a t-shirt. I thought it might be a bit of a let down when I tried it on the first time, but I actually think it might end up being one of my more comfortable bras!
Official Pattern Review
Pattern Description: A three piece underwire bra. From the designer: “The Lusamine Underwire Bra Pattern is a non-stretch bra pattern specifically designed narrow roots + lots of projection. With shape and drafting geared toward the large cup, small band set, this bra gently encourages a more centered, lifted shape. Choose from either 2, 3 or 4 piece cup options in 150 sizes! Includes instructions for optional boning, foam, fabric straps and common alterations. Ideal for Intermediate sewers but also tenacious beginners.”
Pattern Sizing: LilyPADesigns uses a combination of bottom cup depth (BCD), horizontal hemisphere (HH), and underbust band sizing in their patterns. The Lusamine comes in 3 size ranges: A-DD, DD-GG, and GG-KK. All size ranges have 28-44 band sizing, with A-DD 2.9”-5.0” BCD and 7.2-11.4 HH, DD-GG is 4.1-7.0 BCD and 9.0-14.6 HH, and GG-KK 5.6-7.9 BCD and 12.4-18.0 HH. I started with the GG-KK pattern sizes and used a 36 band with the smallest size (5.6) for the cradle and graded out to the 6.5 BCD and 15.7 HH sizes for the cups. I had to take a fair bit in because I lost some cup sizes between purchasing and making the pattern, so in hindsight I wish I might have gone with the largest size in the middle size range instead, or just started with a straight 5.6 in this pattern.
Were the instructions easy to follow? The instructions were very clear and had great diagrams. The instructions are also great in terms of learning how to choose a starting size and how to measure for a bra. I also appreciate the instructions for the optional features like the internal sling and cup boning. I got into trouble when I started doing my own thing and not following the instructions, but I was able to get it back on track with some cleaver snipping of seam allowances and folding of pattern pieces.
Did it look like the photo/drawing when you were done with it? Yes, I think it looked a lot like the line drawing!
What did you particularly like/dislike about the pattern? I like the style of this bra – it’s really pretty and great to show off fancy lace. I also like how high the back band is – I don’t see that commonly on a lot of other patterns but it helps a lot to provide support. I also like that this pattern is drafted for a narrow root with lots of projection; I find a lot of patterns draft for the opposite shape so it’s nice to have options for those of us with these fitting challenges! I also really like the PDF – it comes with all the sizes layered and you can turn the layers on and off before printing so you can get all of the sizes you need but none of the sizes you don’t. This is especially nice when compared with some other patterns where every size is on a different page and takes a lot of printing if you need to blend sizes for omega adjustments. As for dislikes – I don’t have many but I will say that this style says it’s designed for projection and it means it! It’s perhaps a bit more elongated than I tend to prefer, but the cups also fit really well because of this, so it’s a bit of a trade-off I think.
Fabric used: I used leftover microduoplex from a Bra Builders kit, along with sheer cup lining, regular power net, embroidered tulle from my stash and a standard bra finishing kit from Bra Builders to make this pattern. I will admit that the regular power net was a bit of a fail. I think this is the project where I’ve come to realize I really need to use firm power net to get the support I’m looking for. The Lusamine band in particular has a slanted side seam and an elongated back band compared to most patterns, so the additional stretch from the regular power net is more noticeable than I would prefer. I am curious to try the cups in a different band (or to make another with a firm power net band) to see if I can get more support in the next version.
Pattern alterations or design changes you made: Because of the nested patterns I was able to trace off and start with a pre-omega adjusted pattern, which saved me a lot of time. I made a fitting band which was great but I did need to remove 1/4” from the upper edge of the side seam to reduce the wing drop, and I raised the wire line by 3/8” to better fit my 44 vertical wires, though I probably could have just used 1/4”. The first fit sample of the cups was too big, so for version 2 I removed 1/4” from central cup seams but this was still too big so for version 3 I darted out 1/2” from the under arm area and removed another 1/4” from all central cup seamlines. I think the final fit on the cup was pretty good, but I am still having the bra slide down a tiny bit, likely because the back band isn’t firm enough.
Would you sew this again? Would you recommend it to others? I think I will probably sew this again, though I have other patterns and projects I want to work on first. Next time I want to try fitting these cups into a different band or using firmer power net to see if that improves the support. I want to test other patterns from LilyPADesigns though, so I expect I might be distracted working on other projects before coming back to this pattern. I would recommend the pattern though, especially if you have a narrow root with a lot of projection, which can be hard to fit. There is also a lot of size inclusivity with this pattern, which is another plus. If you are a wider root with shallow projection I might recommend a similar style from another brand, such as the Pin-up Girls Freja.
Conclusion: Overall I think the bra is really pretty and I like the style, but I do wish I’d done a double layer of power net in the back band to give enough support. I haven’t had this much impact changing the weight of the power net previously, but this pattern also has a much longer back band than my other patterns so it makes sense that it would have more impact here. I am sure I will return to this pattern though I am sure I will make adjustments before the next version.
Is this garment a “Triumph of Individual Style”? I think it’s really close. I really love the set I made with this pattern, but it’s not quite perfect in terms of the silhouette I get or in terms of the fit. I do love the style though so I’ll definitely plan more projects like this in the future.
Although I’m a bit disappointed that the fit isn’t perfect, I am generally happy with the way this bra turned out and how pretty it is. I feel like I learned a lot going through the process of making the fitting band and working on the cup fit, and I’m excited to try another LilyPADesigns pattern soon, especially since I think going through this pattern helped me narrow down my starting size quite a bit. And between fitting the Lusamine and the Josey I feel like I’ve learned a lot about fitting and alterations that I want to go back and apply to some of my previous styles that weren’t fitting quite right, as well as make the updates to these patterns so I can make more successful versions next time.

Oh, can I request a review, pretty please? I feel like the Lamina is still very much overlooked. I’d love to see an in-depth review of that.
Other than that, thanks for this review. The pattern piece comparison with the Freja was especially interesting. Seems like they really exist on opposite ends of the spectrum (with every other pattern somewhere in between, and it might be pure chance that you find your perfect fit right away…uh, scary). By the way, do you think there’s something like too much projection in a pattern? Because I also like a rounder shape with some cleavage, ideally, so I’m not sure whether I would like a pattern that just brings my boobs out, but not up.
Anyway, I hope you can overwhelm your workload, not the other way round. Looking forward to your next post.
LikeLiked by 1 person
The Lamina is on my list! After I get a perfect fitting band, so that way I can just focus on cups and styles after that 😁
LikeLike
Ooh have we discussed the “red-bras-are-invisible-under-white” trick? This looks like maybe the kind of red that would do that. My other reaction is I loathe having to decide which size range to purchase in a PDF pattern. I wish they’d price their patterns slightly higher but make the entire size range available. Especially with bras, it’s so common to have a band size and a cup size on the opposite sides of the chasm. I appreciate that it’s a lot of work to design a wide size range, but even so, at least they should overlap 2 sizes rather than 1.
LikeLiked by 1 person
The LilyPADesigns bras do overlap the sizing a bit, but the are broken apart based on the way they are graded, which is also why I wonder if I’d have a slightly better result from the middle pack. My other problem is that when I measure without a bra I am in a vastly different size range than when I measure with a bra. So it’s a bit of a conundrum if my bras are too small in the cup and smushing me in, or if I just stretch waaaay far out without the bra (probably a bit of both, TBH). I feel like I can maybe get better “best fitting bra” measurements with my two newest makes, so maybe I can get a better starting size for my next pattern.
LikeLike
I struggled with the Lusamine too and thought the split upper cup piece would solve all my fitting issues (from previous patterns). It wasn’t until your blog post that I had words to describe the problem: I hate the pointy bullet shape it gives me and prefer something much more rounded/push up. So I even though I made a bra from it that “fit” I never wear it.
Ty for confirming it’s not just me and my pattern alteration skills!
LikeLiked by 1 person