In my recent blog posts I have been contemplating the fit of the bras I have been sewing, which has led me down the rabbit hole of trying to find and understand how to achieve a better fit. I’d previously sewn with the Pin-up Girls Patterns (the Ruby and the Freja), but based on the information presented at the 2023 International Sewing Bee I decided to try the Bravo Bra #2 and the Cashmerette Willowdale as alternative starting points. I’ve done some comparisons of the pattern and some preliminary fitting and the results are honestly pretty fascinating.

I’m not usually a fan of PDF patterns, but bras tend to have relatively small pieces so I decided I was willing to go for the print at home options for the bra patterns I decided to try. In most cases I didn’t have to piece together individual pattern pieces, which was great, but for most of these patterns the designs aren’t nested – you have to print out the one specific size you need. This was a bit annoying because I had to print out a lot of pages to compare wire sizes to my breast root trace, but eventually I had a nice thick packet of papers with the pattern bits I thought I was going to need.
I know that part of the appeal of printing out PDF patterns is being able to re-print them and to cut them up and use them, but I still tend to trace the pattern and make adjustments that way… I think I like to be able to compare to the original if it all gets wonky, and printer ink continues to be more expensive than pen ink, so, there’s that.
Something that’s really interesting and/or annoying about all the different bra patterns is that they all use different measurements to determine sizing. Which, on the one hand, ok, I get it because they are different companies, but on the other is really annoying. For the Ruby I measured a 38 band and 5.25 BCD, but ended up using a 36 band with a blended 5.25/6.00 BCD, which I guess is roughly a 36H-ish. For the Bravo Bra #2 pattern, the instructions say to add 4 inches to the band and then use the high bust and full bust to determine a cup size, so I came out as a 40I. For the Cashmerette Willowdale you use your true underbust measurement to determine the band, so I came out as a 36J. However, for the Willowdale I decided to try the method of using the wireline to choose a starting frame size, so I printed out the 36F for the frame and band, and then blended the 36F and 36J cups to get a starting pattern there. I would have done the same for the Bravo Bra #2, but the wire line of the 40I was actually pretty good with my breast root trace, with a tiny bit of wire spring.
So, after I traced out the band sizes, of course I wanted to compare how they looked with the Ruby Bra pattern since I’ve been using that one the most so far.

What’s fascinating is the different shape of the cup sizes. In the image above, the Ruby Bra frame is on top, the Bravo Bra #2 is in the middle, and the Cashmerette WIllowdale is on the bottom. You can see that the Ruby is much wider in the bowl shape than either of the other patterns. The Cashmerette is the narrowest, and the Bravo Bra is somewhat in between. Despite having such different shapes, all of these patterns took nearly the same wire size! I’ll go into more details on my fit tests shortly, but it was really interesting how such different shapes could all use such similar wire sizes.
Another thing of note is the “wing drop” of the back bands (wing drop is apparently the angle at which the back band points downward). The Ruby has almost no wing drop, whereas the Bravo Bra #2 has a little and the Cashmerette Willowdale has quite a bit. This has some interesting implications for the fit as well.
Along with comparing the band patterns, I also wanted to visualize the cups using my paper cup technique again. Here the Ruby cup is on the left, the Willowdale is in the middle, and the Bravo Bra is on the right.


Again a lot of fascinating differences! The Ruby is the least projected when viewed from the side (even though this is the version with the increased projection 5.25/6.00 blended draft) and clearly the widest cup when viewed from the bottom and the top. The Bravo Bra is clearly the most projected and almost conical, whereas the Willowdale is very rounded in all dimensions. Personally I prefer the more rounded shape of the Willowdale, but I decided to carry on with both the Bravo Bra and the Willowdale at least through the test fit stage. I figured if either of the patterns was just hopeless from that point I could abandon it in favor of the more promising pattern.
So, I got to work making two test fit bras. Unlike my previous attempts where I was also trying to learn construction techniques, at this point it’s good fit or bust, so made the proper test fit band that everyone was recommending previously. On the one hand, yes, you were all correct about making a test fit band, on the other hand, I don’t know if I would have known what to look for in a fit band to begin with, so I don’t know how helpful it would have been at the very start of all of this anyway. But I ordered a ton of sheer cup lining to make the stable bit, used up some excess power net for the stretchy bit, and cobbled together some odd bits of elastic and such to make the fit bands.
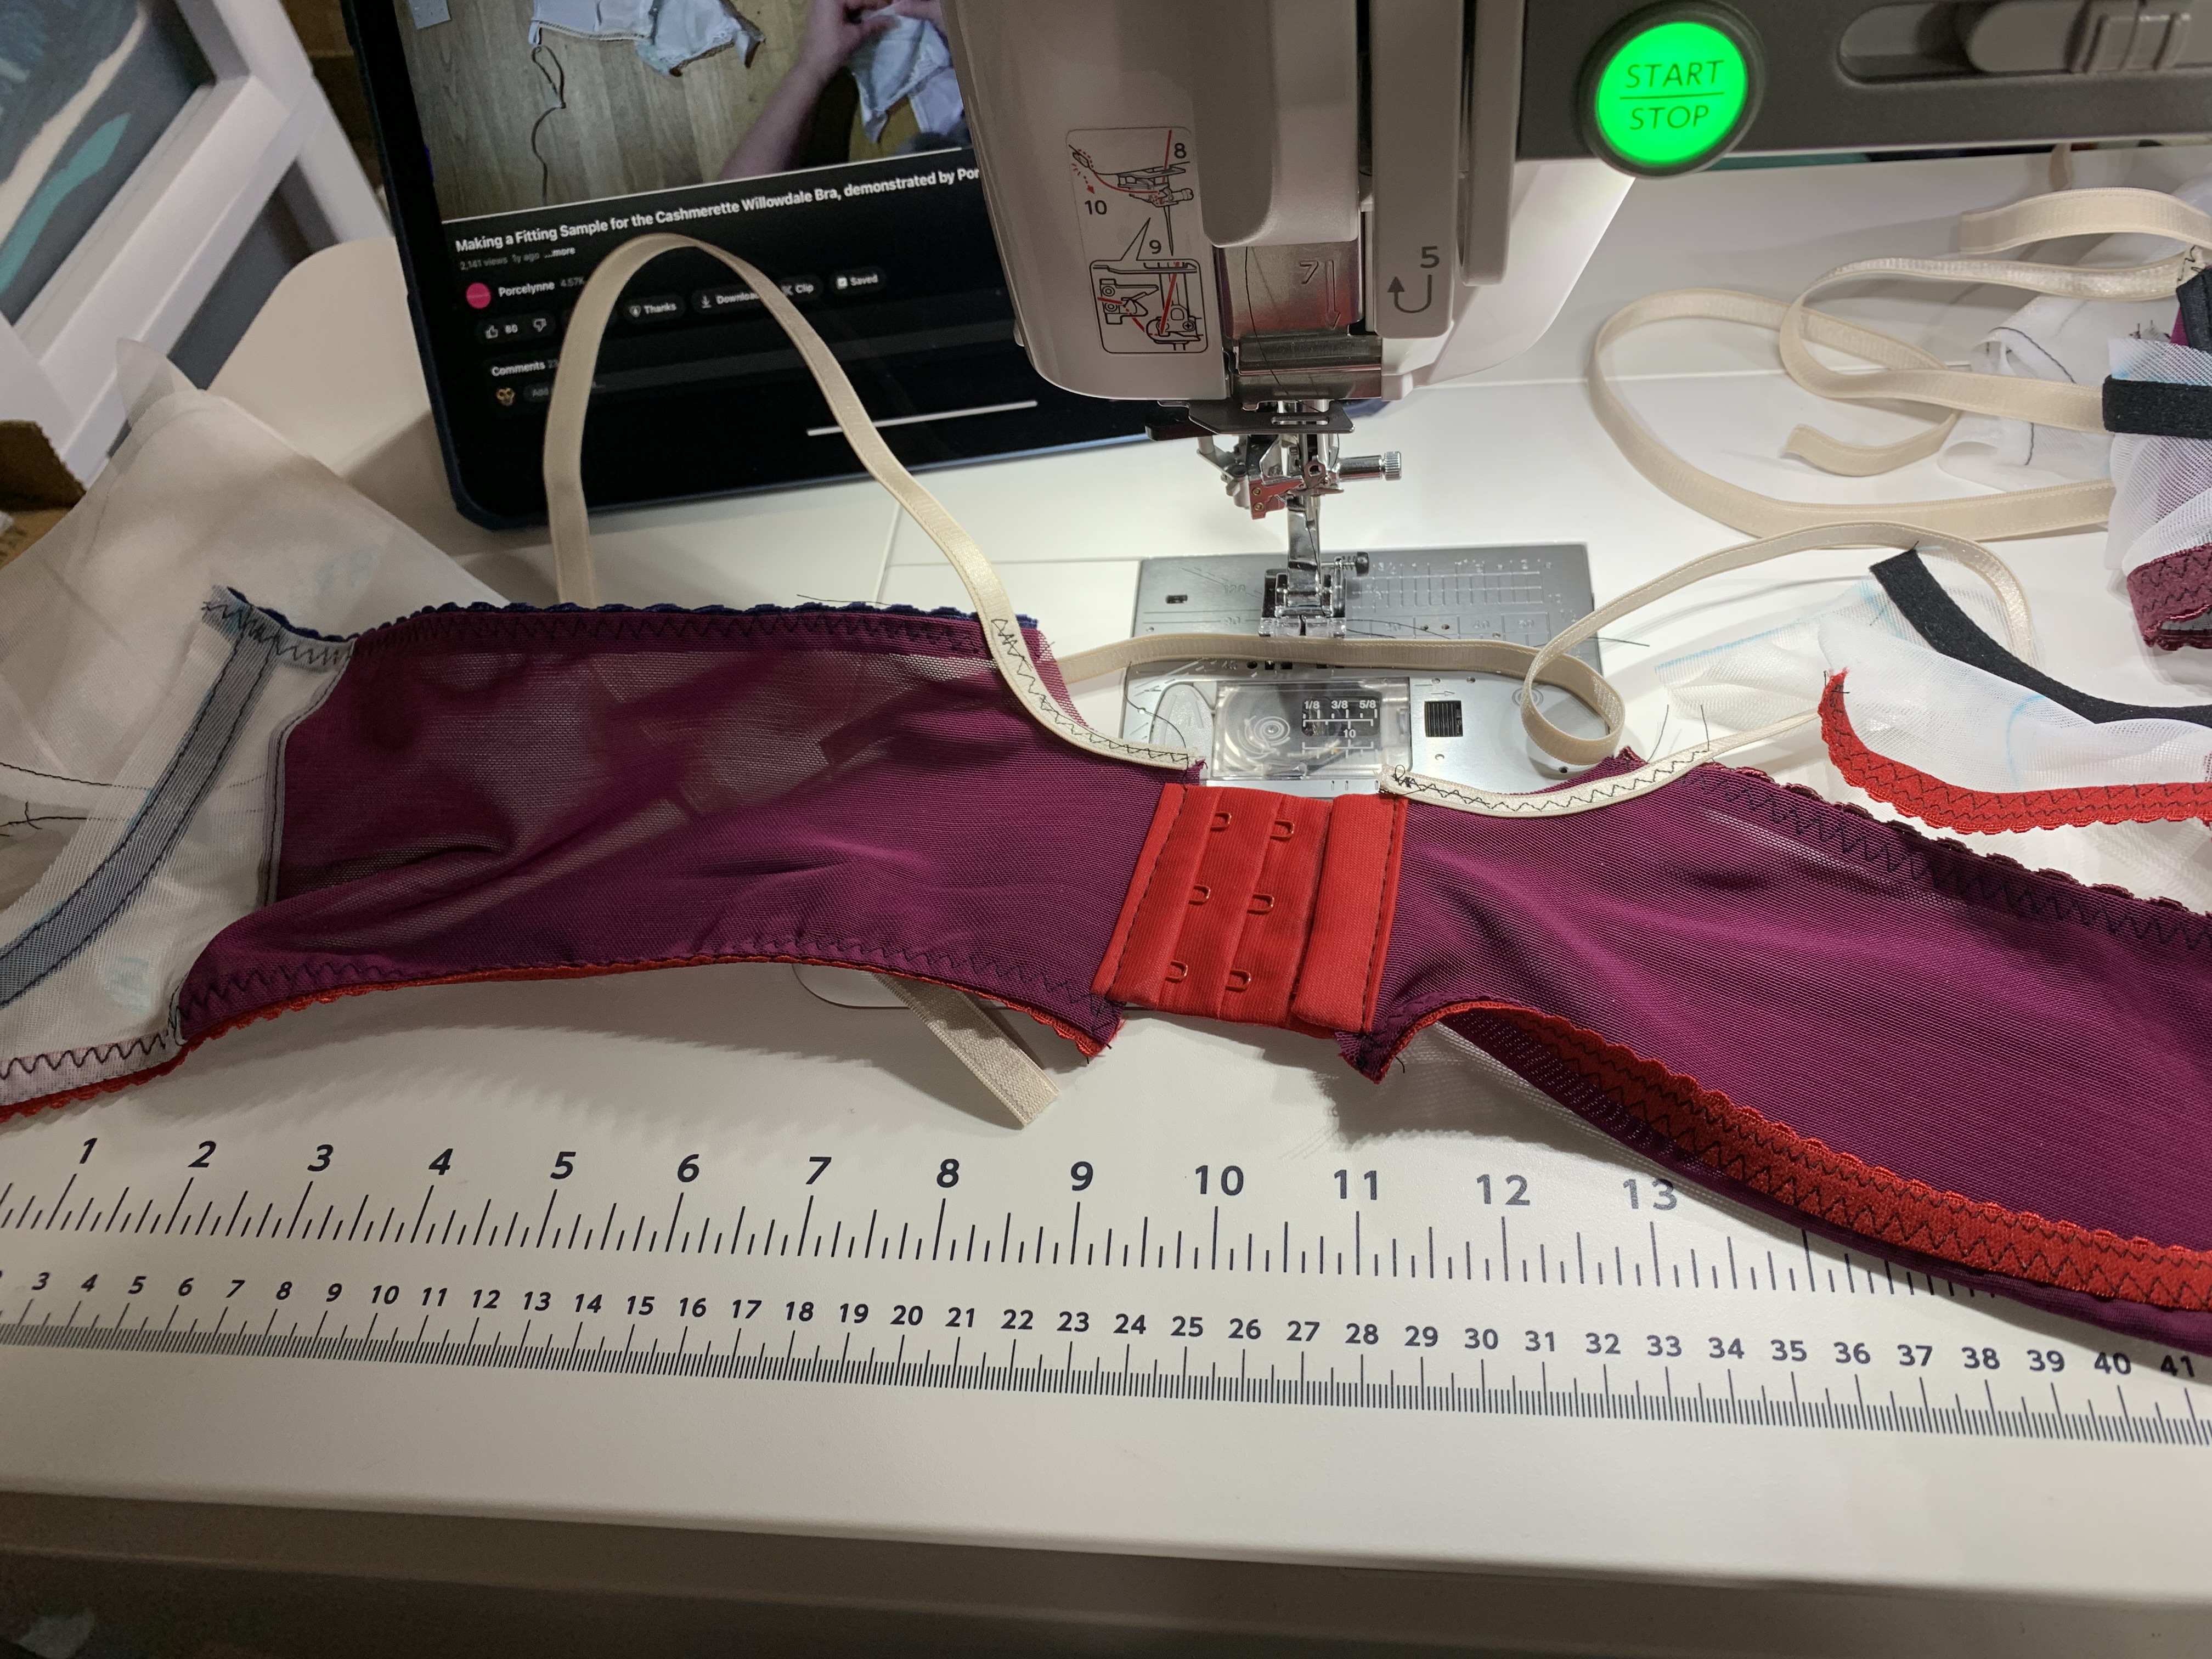


These weren’t sewn together particularly rigidly, so I can re-claim the hook and eyes and probably even the strap elastic if needed. The wires of course will pop out and be used in a real bra at some point. I followed a YouTube tutorial on making a fitting band… what I particularly liked was how the tutorial instructed cutting extra fabric for the center bridge and pinning it so that it could be widened or narrowed for a better fit. Of course, ironically, the center bridge fit great on both the Bravo Bra and the Willowdale! It was the thing I kept messing with on the Ruby to try and get the wires to sit flat, but, apparently, if you start with the right wire line they are much more inclined to do that… who knew!
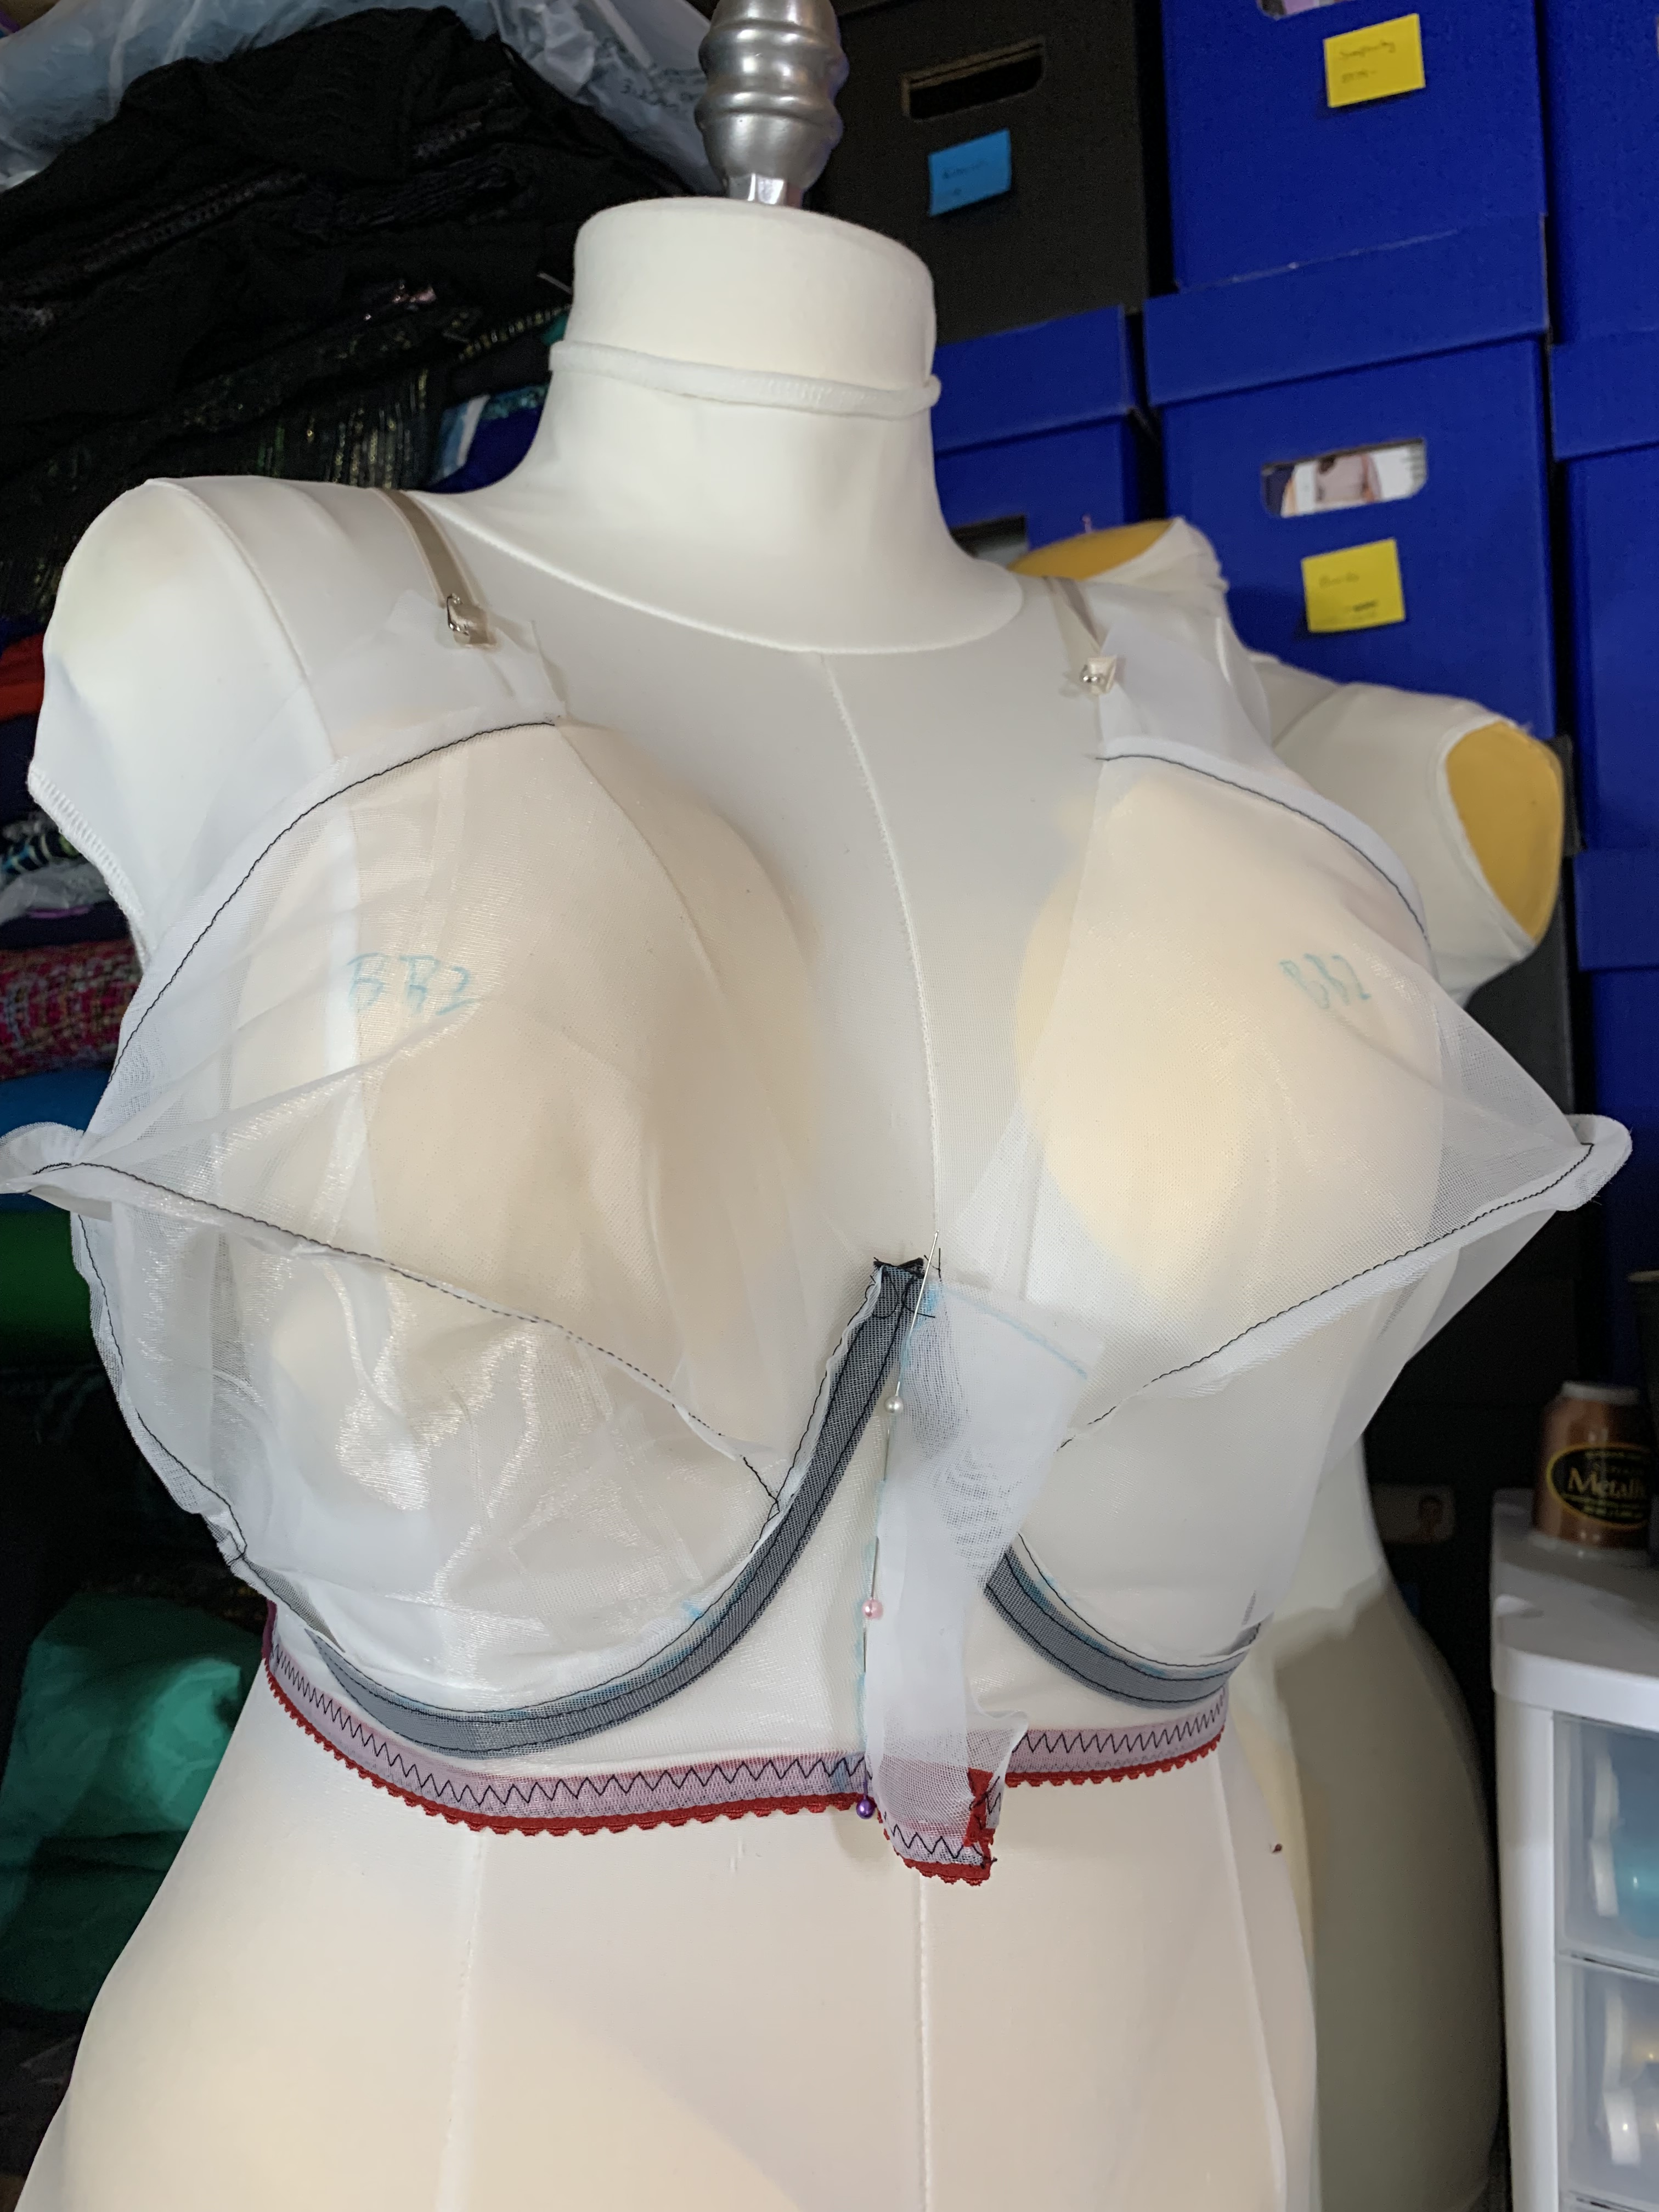
I added some single layer sheer cup cups to the fit bands to start fitting the bra. I know the tutorial, etc. say to use 2 layers of sheer cup, but since this was a first fit I figured I’d be manipulating the pattern a lot and didn’t see a purpose in using 2 layers yet. I think it was probably the right call because you can see on my dressform that these cups are a bit massive, in both patterns. Here is the Bravo Bra #2:


And here is the Willowdale:

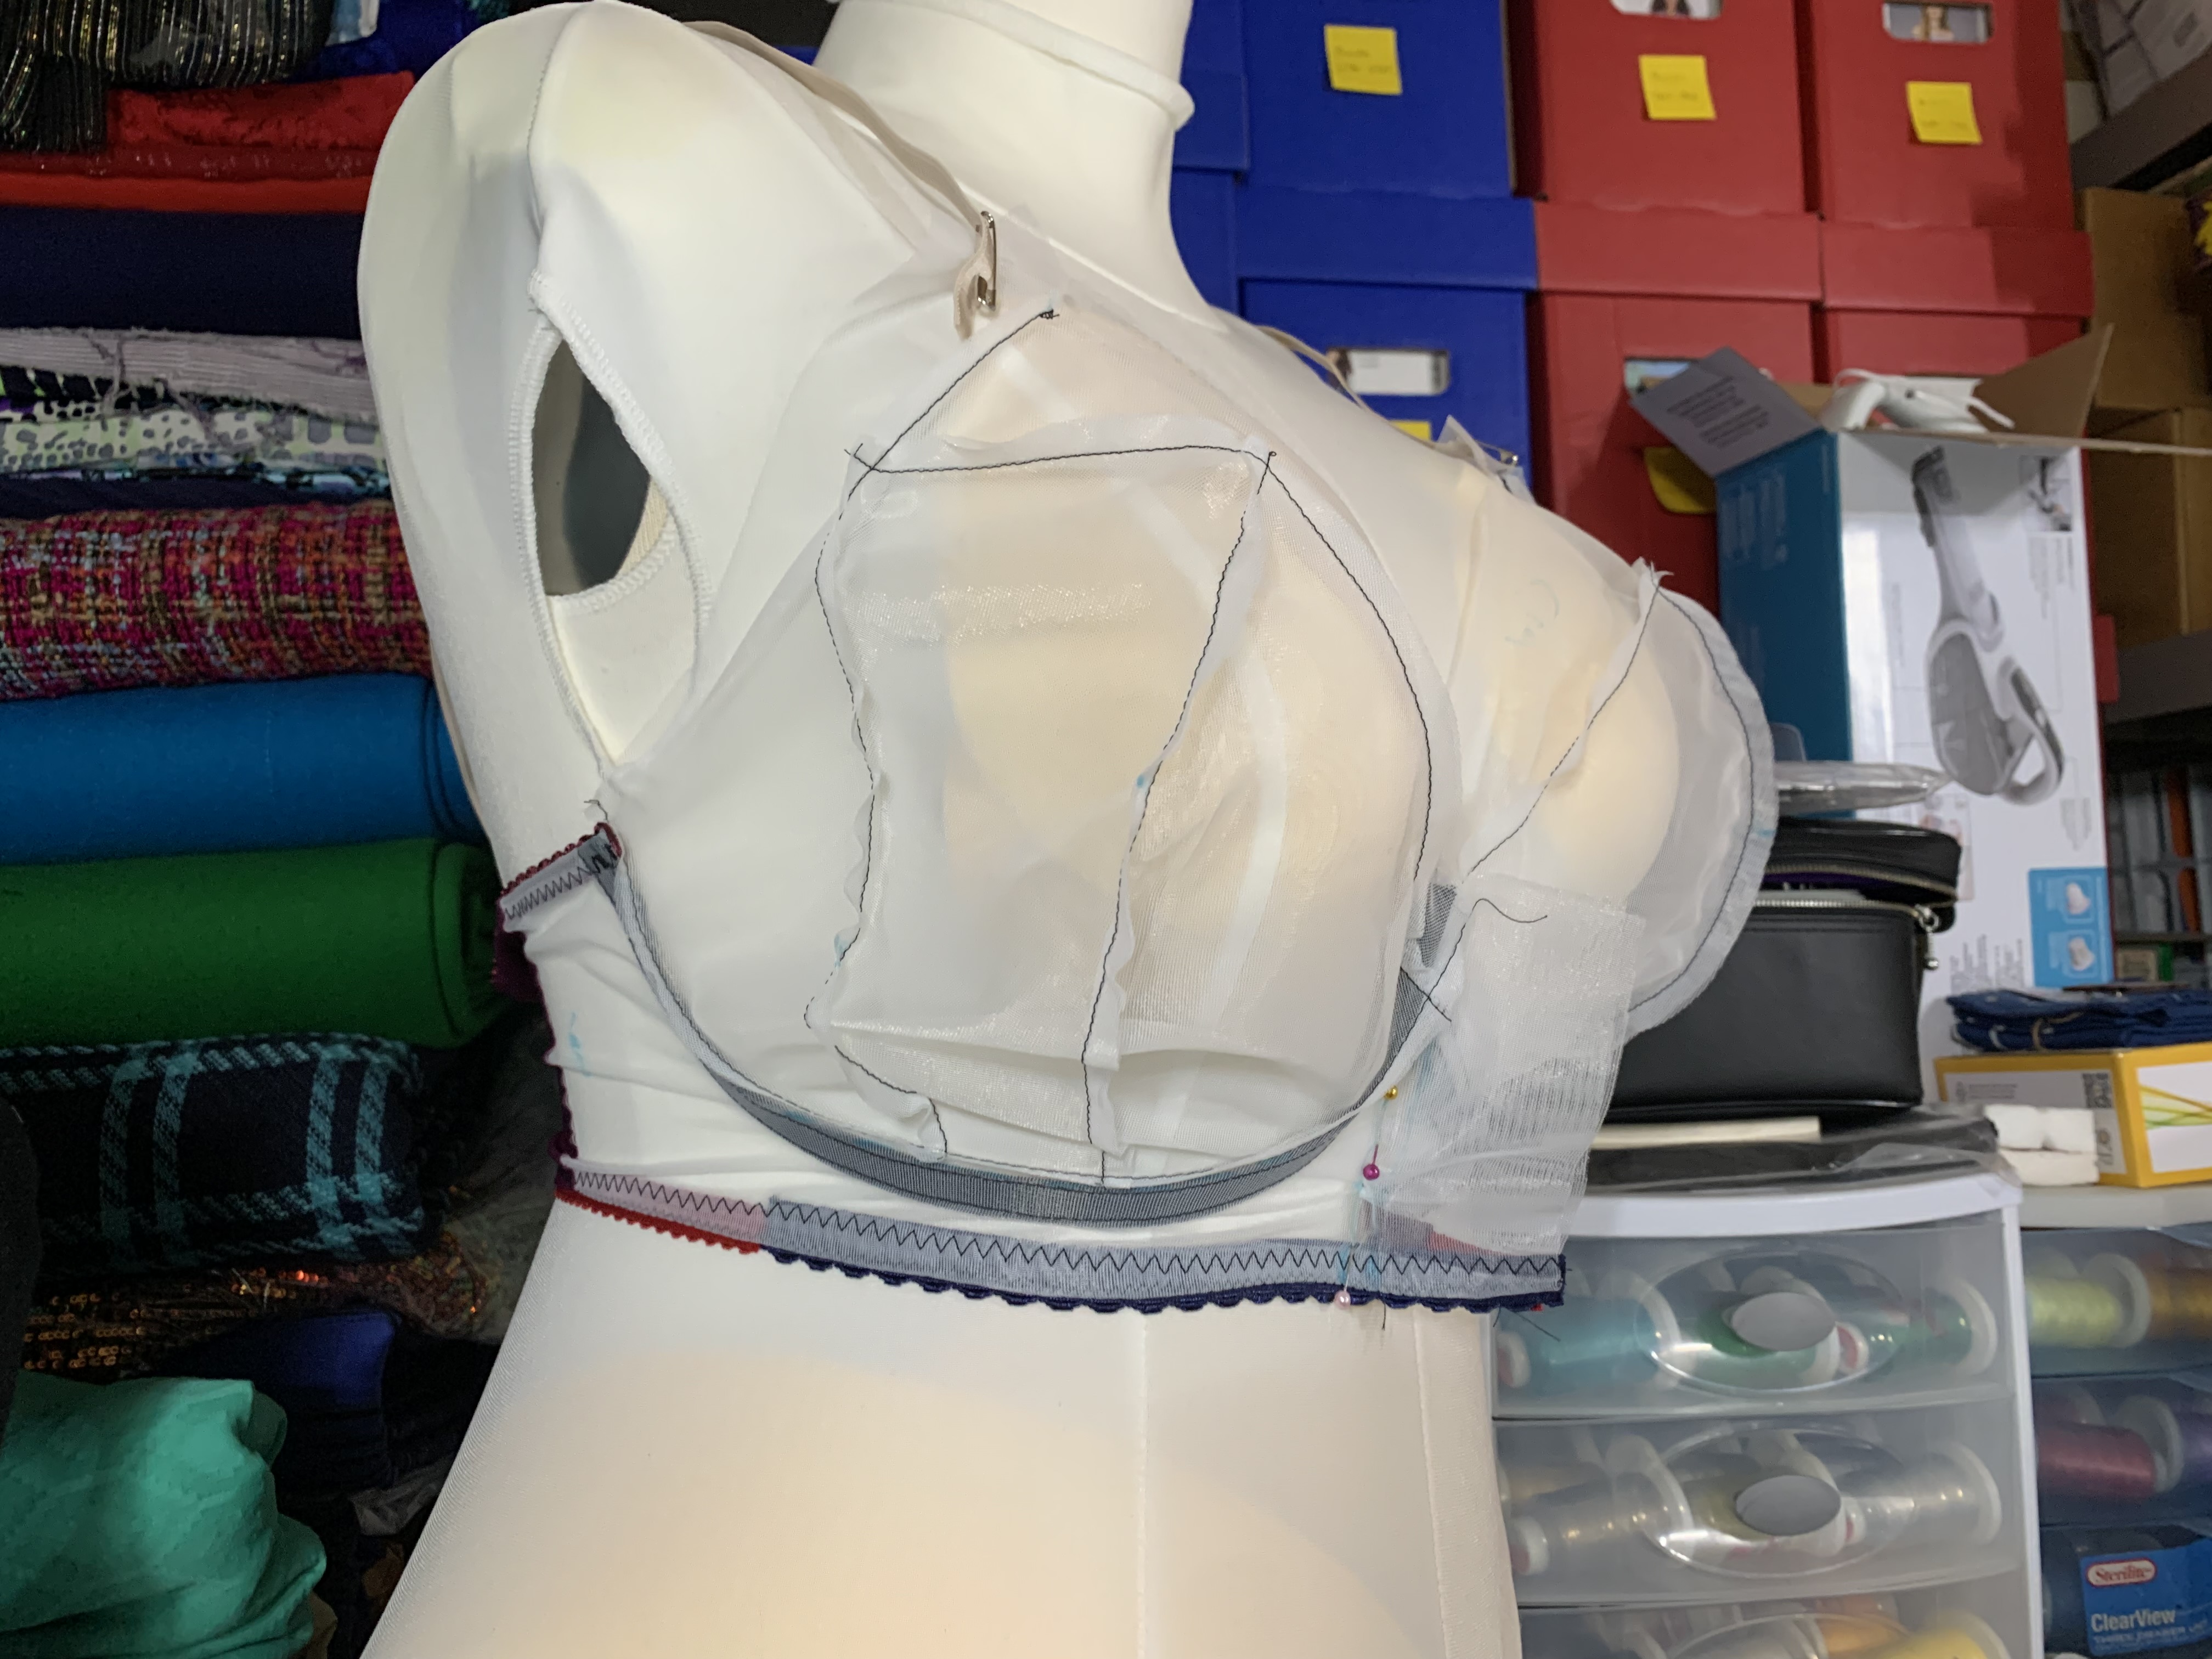

Of course, my dressform isn’t exactly the same size as me, but actually the same sort of fit issues are apparent. For the Bravo Bra, there is way too much fabric on the side of the cup across the diagonal seam, and the center front cup is a bit low and doesn’t fully cover the top of where it should. The Willowdale also is a bit wide on the side, but also needs darting at the center front and the underarm needs to be raised quite a bit. Now, I will say that when I first put on the Bravo Bra I thought this is it because the band fit was so good even though the cups were crazy big. Then I put on the Cashmerette and thought this is it because the fit on the band was also excellent. Despite being made in leftover, cobbled together, and unstabilized materials, the wires actually fit where they were supposed to! It was honestly rather shocking. Somehow the center bridge was great on both and the wire line fit was great on both, much better for me than from the Ruby. I just need to take a tiny dart on the top of the side seam each pattern, and raise the center front on each (somewhere between a half and full inch).
So, perhaps it is time to talk a bit about wires. I’ve been using the 46 rigid wire from Gigi’s Bra Supply in my previous Ruby Bras (and I used a 48 in the Freja). For the test fit, I tried sticking a different wire in each channel, just to test. I was able to use my 46 rigid wire in the Bravo Bra, and I used a size 44 rigid wire from a size testing kit in the Willowdale. I also tested some of the size 46 flexible wires from Bra Builders in each of the two patterns. For the Bravo Bra, the wire size was about perfect. For the Willowdale, the wires were both a bit too long, but since I need to add height to the center front and the underarm area I’m actually not too worried about that. I’m still waiting on an order of Bliss Wire testers from Emerald Erin to arrive; I think Emerald Erin has the best selection of wire types, and a really good article explaining the different styles. I have high hopes for the Bliss; it matches my breast root trace the best out of all of the wire sizing guides I printed out from the various companies, but I can’t test it yet because I’m still waiting for it to arrive. Which is probably just fine because I have a lot of fit adjustments to make before my next round of fitting.

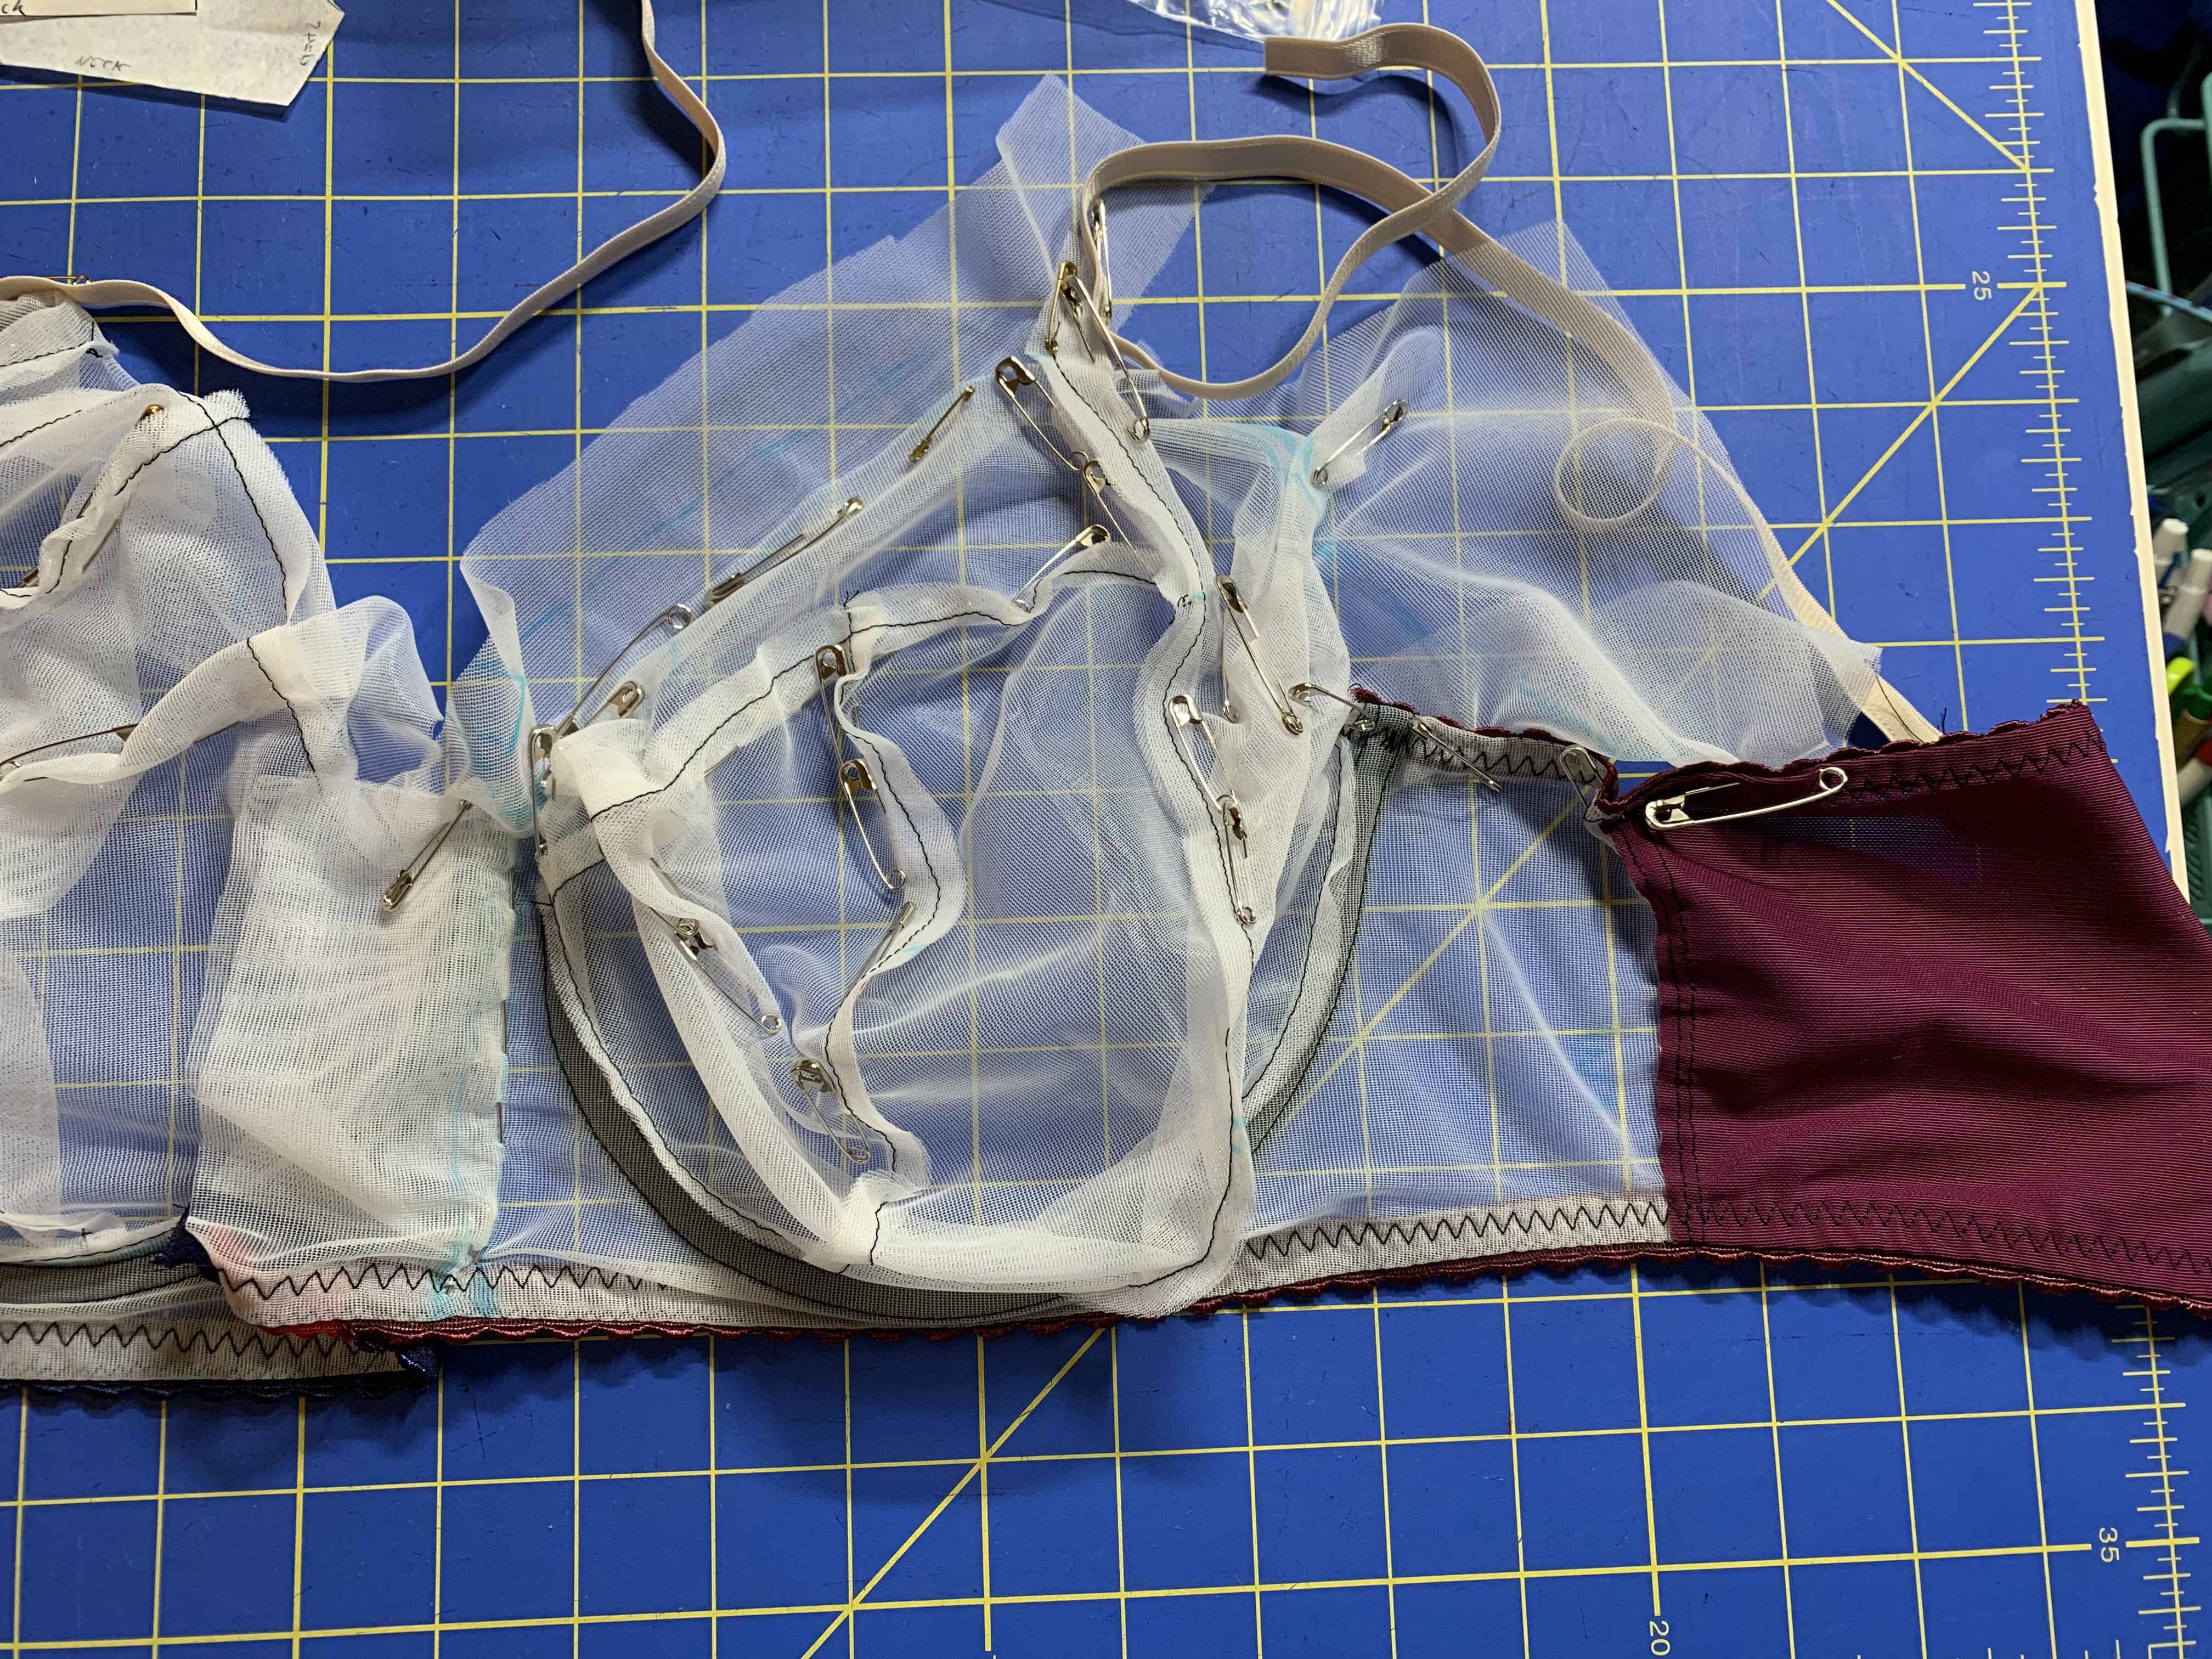
In the above images you can see all of the pinned out areas I need to adjust (Bravo Bra left and Willowdale right), as well as some patched on materials where I need to add more to the pattern. Interestingly, I’m taking a lot of volume away (I’m not totally surprised because I didn’t have a “best fitting bra” to start with, so my measurements were probably on the larger side), but I’m also adding more coverage back on the upper part of the bra. Going back to my previous musings, I think this definitely proves the vertical oval theory, as I need to add a lot of height for coverage in each pattern, but also take out a lot of width.
So, for next steps I’m going to work on adjusting the pattern and then I’ll pull off these cups, make a few tweaks to the band, and pop in the re-drafted cups for the next round of fitting. I basted the cups in (they are actually already coming out on their own) so this should hopefully not be too tedious.
And I think that’s where I’m going to leave off with today’s sewing adventure. Hopefully more soon about how the fitting process is going!

Absolutely fascinating! I’m learning so much from your blog posts. No wonder fitting bras is so fraught with difficulty. Thanks so much for all your work documenting your processes, they are going to be extremely useful.
LikeLiked by 1 person
This is so interesting- now I need to go look up what a test fit band is. After pregnancy I gave up on wired bras and have been wearing wireless styles- but now curious if a really well fitted wired bra would be as comfortable. Thanks for sharing your process with us!
LikeLiked by 1 person
I recommend the test fit band based on breast root trace sizing! It was like mind blowing how different it felt than stuff that slides down my rib cage cuz it’s too big/small in the wrong spots. I usually feel like I need wires for support, but after I play with these two wired bras I’m going to try the Sahaara wireless bra pattern to see if I can get the support I need without wires. Which would be cool because I’d also love to make some really well fitting sports bras also, and I don’t love wires in a sports bra.
LikeLike
This is all fascinating (even though I don’t need to wear a bra myself !) Congratulations on all the work you are putting in, the rewards will be huge 👍
LikeLiked by 1 person
Looks like you are fitting it all in in this one month. I’ve been on a bra sewing journey for more than three years, while my weight went up and then backdown at least 125 lbs. Needless to say, when I’d get a near perfect fit it never lasted long! Still, though everyone chases that perfect fit, near perfect made me so much happier than most RTW ever did. I recommend everyone try it, and panties too!
LikeLiked by 1 person
This has been an amazing journey! It’s really interesting how many areas of a bra need to fit well. And while it’s – as always – giving me the “hm you should do this as well” itch, I’m also struck by how much STUFF you need to buy! Not just the (very specialised) materials, but so many test kits etc. I get that they’re not obligatory, but you show what difference the right wire etc can make.
Also: good on you that you sewed some actual wearable bras first!
LikeLiked by 1 person
So, on the one hand, yes, there’s kind of a lot. Rings, sliders, multiple types and sizes of elastics, wires, casing, different kinds of fabric… on the other hand there’s probably more economical methods for fitting than making four bras and deciding to start over. Most of the companies who sell wires do have downloadable PDF diagrams so starting with the breast root trace and finding a good set of wires is probably a better starting point. From there you can either buy a pattern and adjust or self draft one based on one of the many YouTube tutorials… I haven’t felt the need to self-draft yet, but it’s an option if you are so inclined. As far as materials for testers, the sheer cup lining isn’t too terribly expensive by the yard, and there are a few places you can also get Powernet for a reasonable price. If you buy a yard of each that should give you plenty to make several test fit bands fairly economically depending on your size. The elastic, while better using proper plush elastics, could probably be swapped out for cheaper elastic variations for the test fit. I will also say that Wawak has a limited selection of lingerie elastics that are not as high quality as what I’ve gotten from one of the specialty shops but are what I used for the test fit and the price was really not too expensive. With that, a lot of the pieces can be reclaimed from the test bra if so inclined (wires and hooks for sure, possibly even casing and elastics depending on how securely they are sewn and your tolerance for seam ripping), so that’s another way in which you can economize the start of this. I have seen a few tutorials that use doubled up cotton muslin for the rigid parts and the Powernet for the stretch parts, which, while generally not recommended because the cotton has more bias stretching around the cup line, did seem to work for someone who felt they needed to do multiple test bands. So, I guess what I would say is, yeah, there’s a lot but also, there’s ways to cut costs if that’s a major concern. And, arguably at the end you can get out a custom bra for much less than it would cost to have one made, and, depending how you want to split up costs, possibly even less than buying some (possibly even most) RTW bras also. I also have to factor in that this is a hobby, so I do get enjoyment out of the making process as well, which can’t really be factored in but also isn’t not part of the calculation of decision around spending money on sewing supplies.
LikeLike
Yes, those are some good ideas for a more economical approach. But knowing myself, I’d definitely go for the “let’s try out everything” approach! It’s not even just (or mostly, I’m lucky at the moment) a financial concern, but the space and the mindspace it takes up. Buying supplies quickly becomes its own hobby, for me 😉 And lately I haven’t had any executive functioning, so sewing is right out. I just cleaned out my fabric stash and had to face reality that a lot of these projects will remain dreams. .. So this wound is fairly fresh.
I also thought it would be a great thing for a workshop or something similar, where things like test kits etc. can be shared and reused.
Since I can’t *quite* give up the idea of sewing my own bras, I’ll definitely keep in mind your tip about starting with the breast root trace! Might even be a good idea just for RTW bras.
LikeLiked by 1 person
There’s a Goldilocks remake in this. Probably PG-13 or R-rated, though 🙂 On seeking a perfect fit, I agree with B Showell. For me, “good enough” is just fine, especially since I verified over the past few weeks that my key measurements fluctuate by a full inch from week to week. Ayup. That means either fitting more than one size or tolerating some looseness here and there. One practical point about fitting the bands: I see from your (extremely helpful!) side-by-side pics that the three patterns have slightly different widths of back band pieces. I find that this will affect the fit quite a bit, since the wider the piece, the less give it will have. I sewed the same pattern twice with the same gsm powernet but modified the T-back to a scoop back, and while the T-back was loose, the scoop back was spot on. All I did was widen the piece in the vertical direction.
LikeLiked by 1 person
I am also finding myself widening the narrow bands. I think they are narrower because I’m starting with the smaller wire line, but this is causing more fit issues everywhere else. I will say I fluctuate a lot too, but it’s sort of why I’m interested in playing with these two patterns… one can be my go-to and the other can be my puffy week bra pattern since it has a bit more room…
LikeLiked by 1 person