I actually finished this project before Christmas, but this post is a bit delayed because of atypical holiday travel schedules and certain gift recipients wanting to be surprised… But it’s a super cool project so I’m excited to finally be sharing what I made!

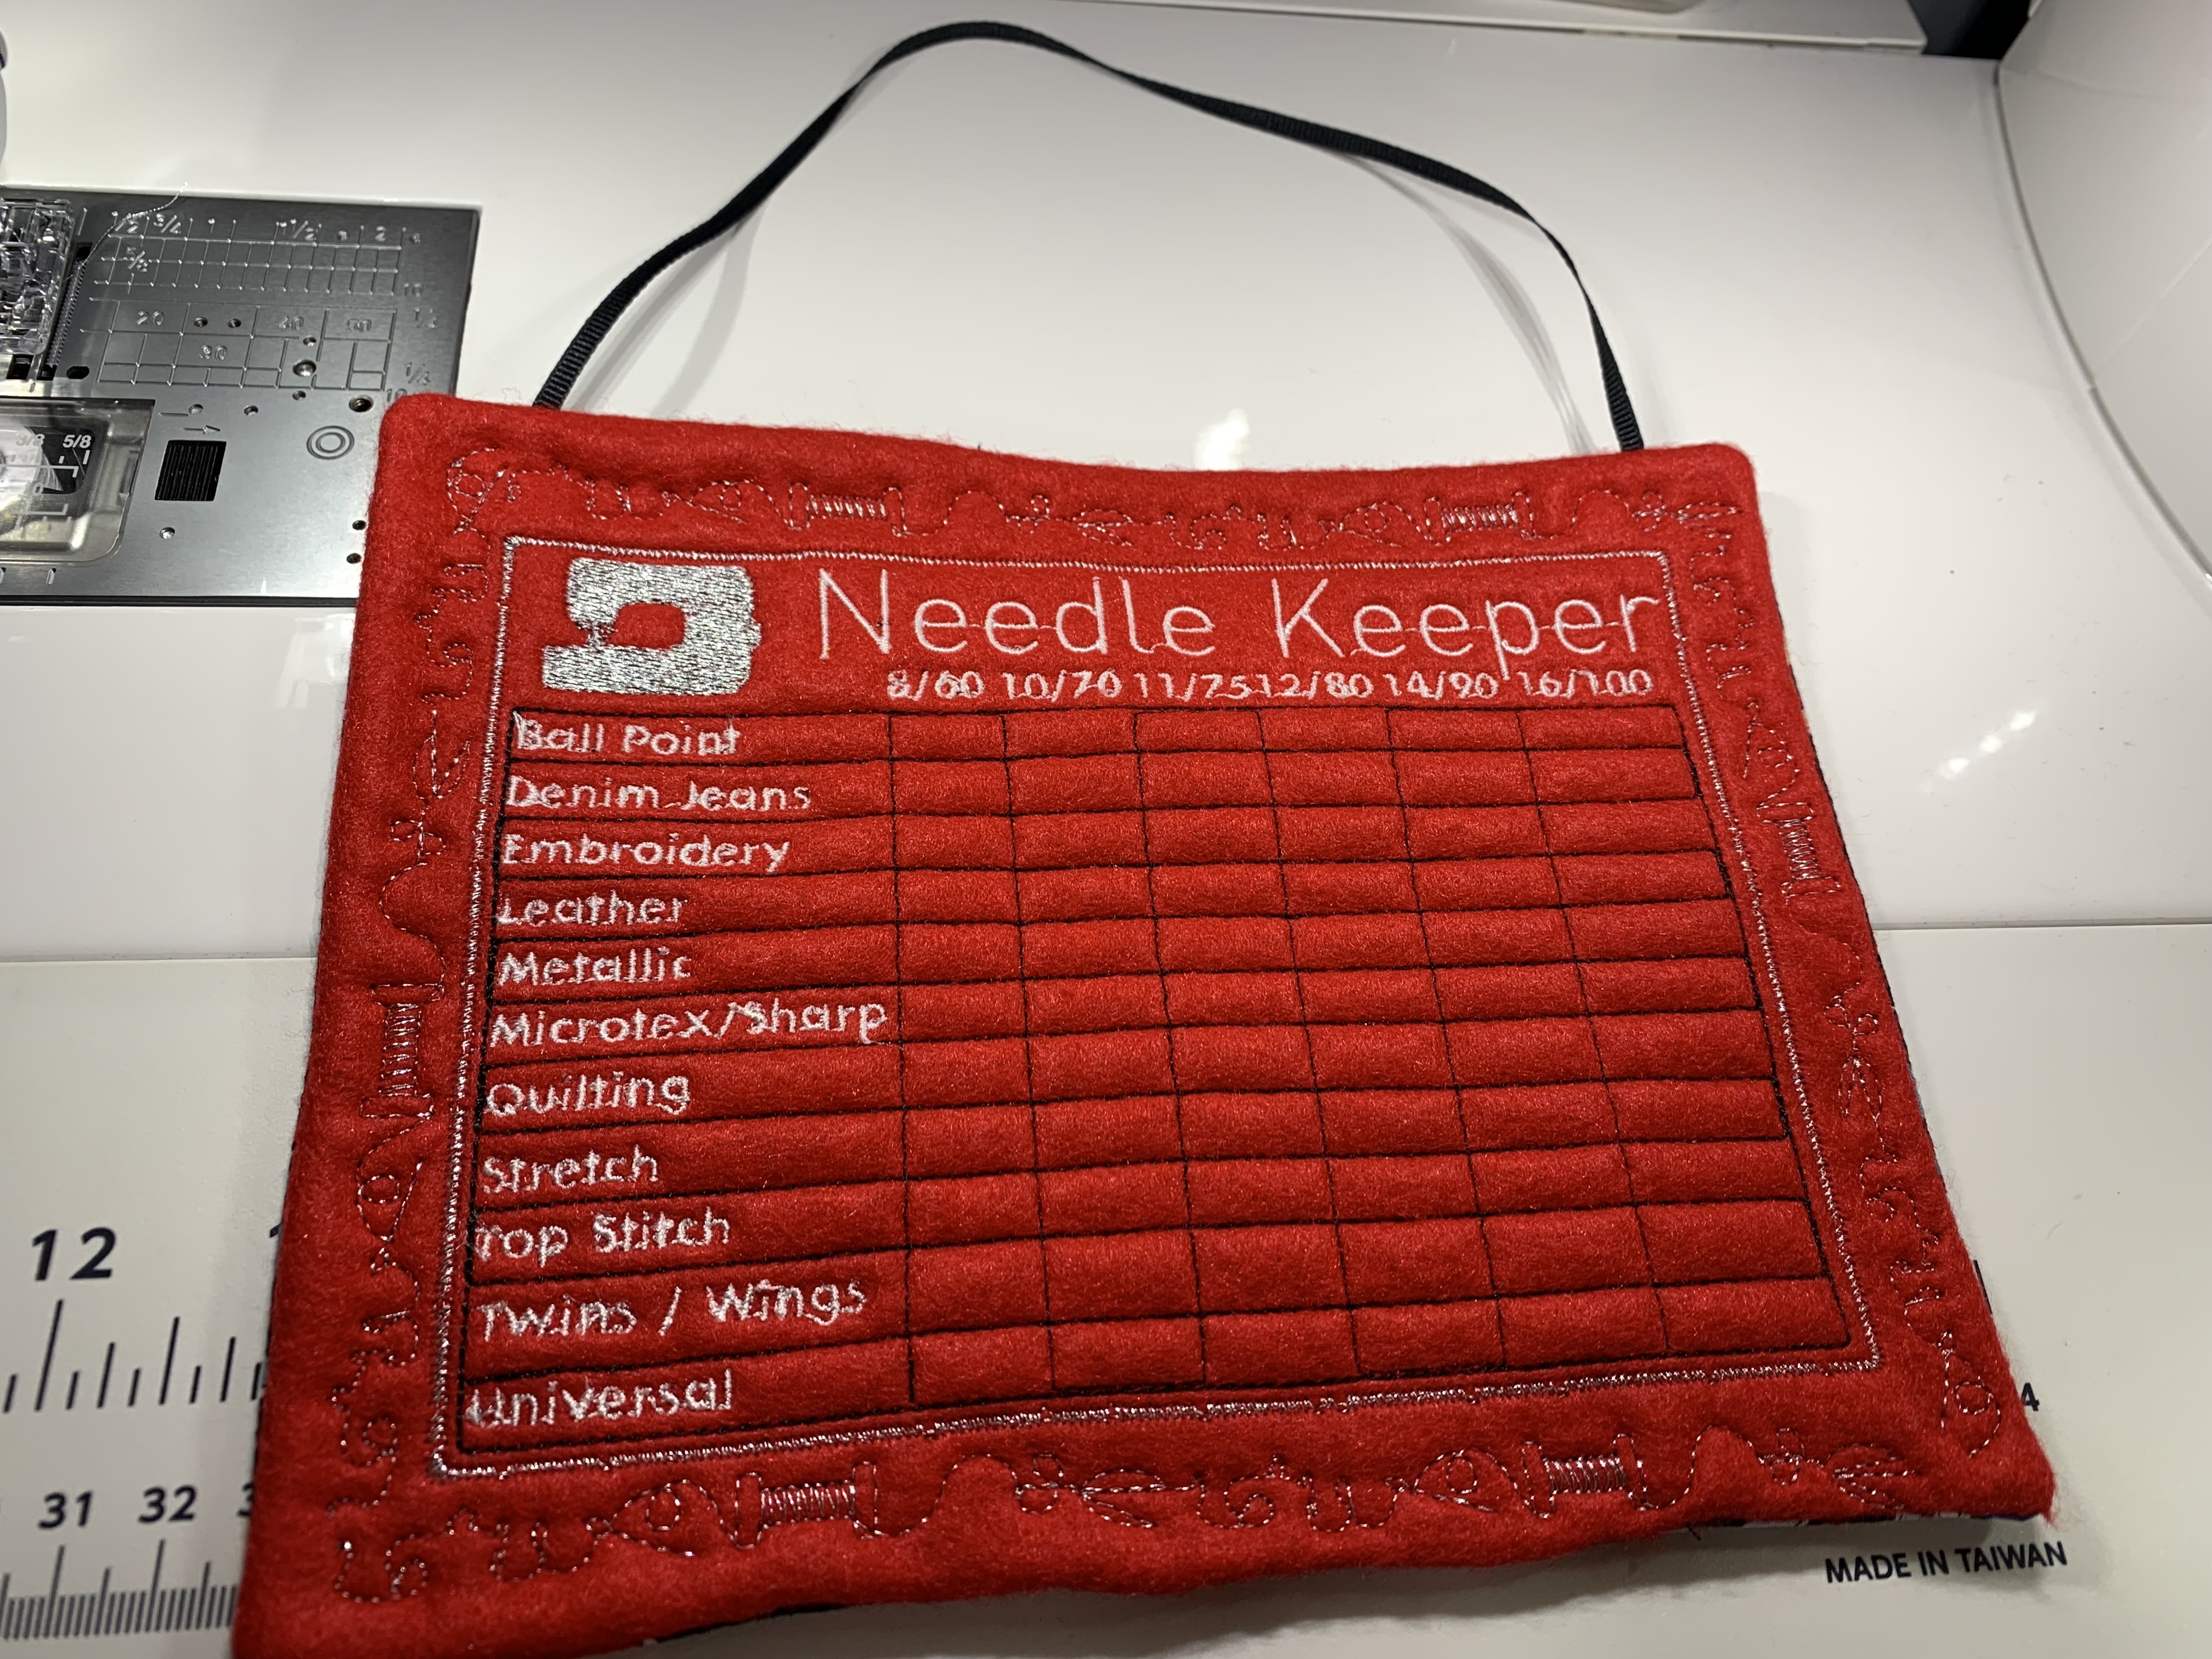
A while ago I was scrolling Instagram and I saw a post by confusedkittysewing showing a cool little Needle Keeper – a way to store used needles that aren’t ready for the sharps container yet. I thought it was pretty neat, so I showed it to my sister who absolutely declared she needed one because used needle storage was a problem for her. So, long story short, while I could digitize this myself, I ended up just buying the design from KKQuiltStudio’s Etsy because in the time vs. money equation, I was totally willing to pay $6 for this design. While there are several version of this type of needle storage tool on Etsy (both from this seller and other sellers), I decided against making the in-the-hoop designs because I wanted something flat that I could hang on the wall behind my sewing machines or be easily storable in my sister’s sewing cabinet. I got some wool felt in a craft pack from Amazon, and used quilt batting, cotton backing, and ribbons along with embroidery supplies I already had in stash to make the rest of these keepers. It was also a great excuse to break into the fun decorative stitches in my machine as well as play with some fun features I never use on a regular basis. My first sample was really just a test, and I was feeling the holiday spirit when I was picking out scrap fabrics I guess, but I’m sort of loving the Grinch-y quality of the result:


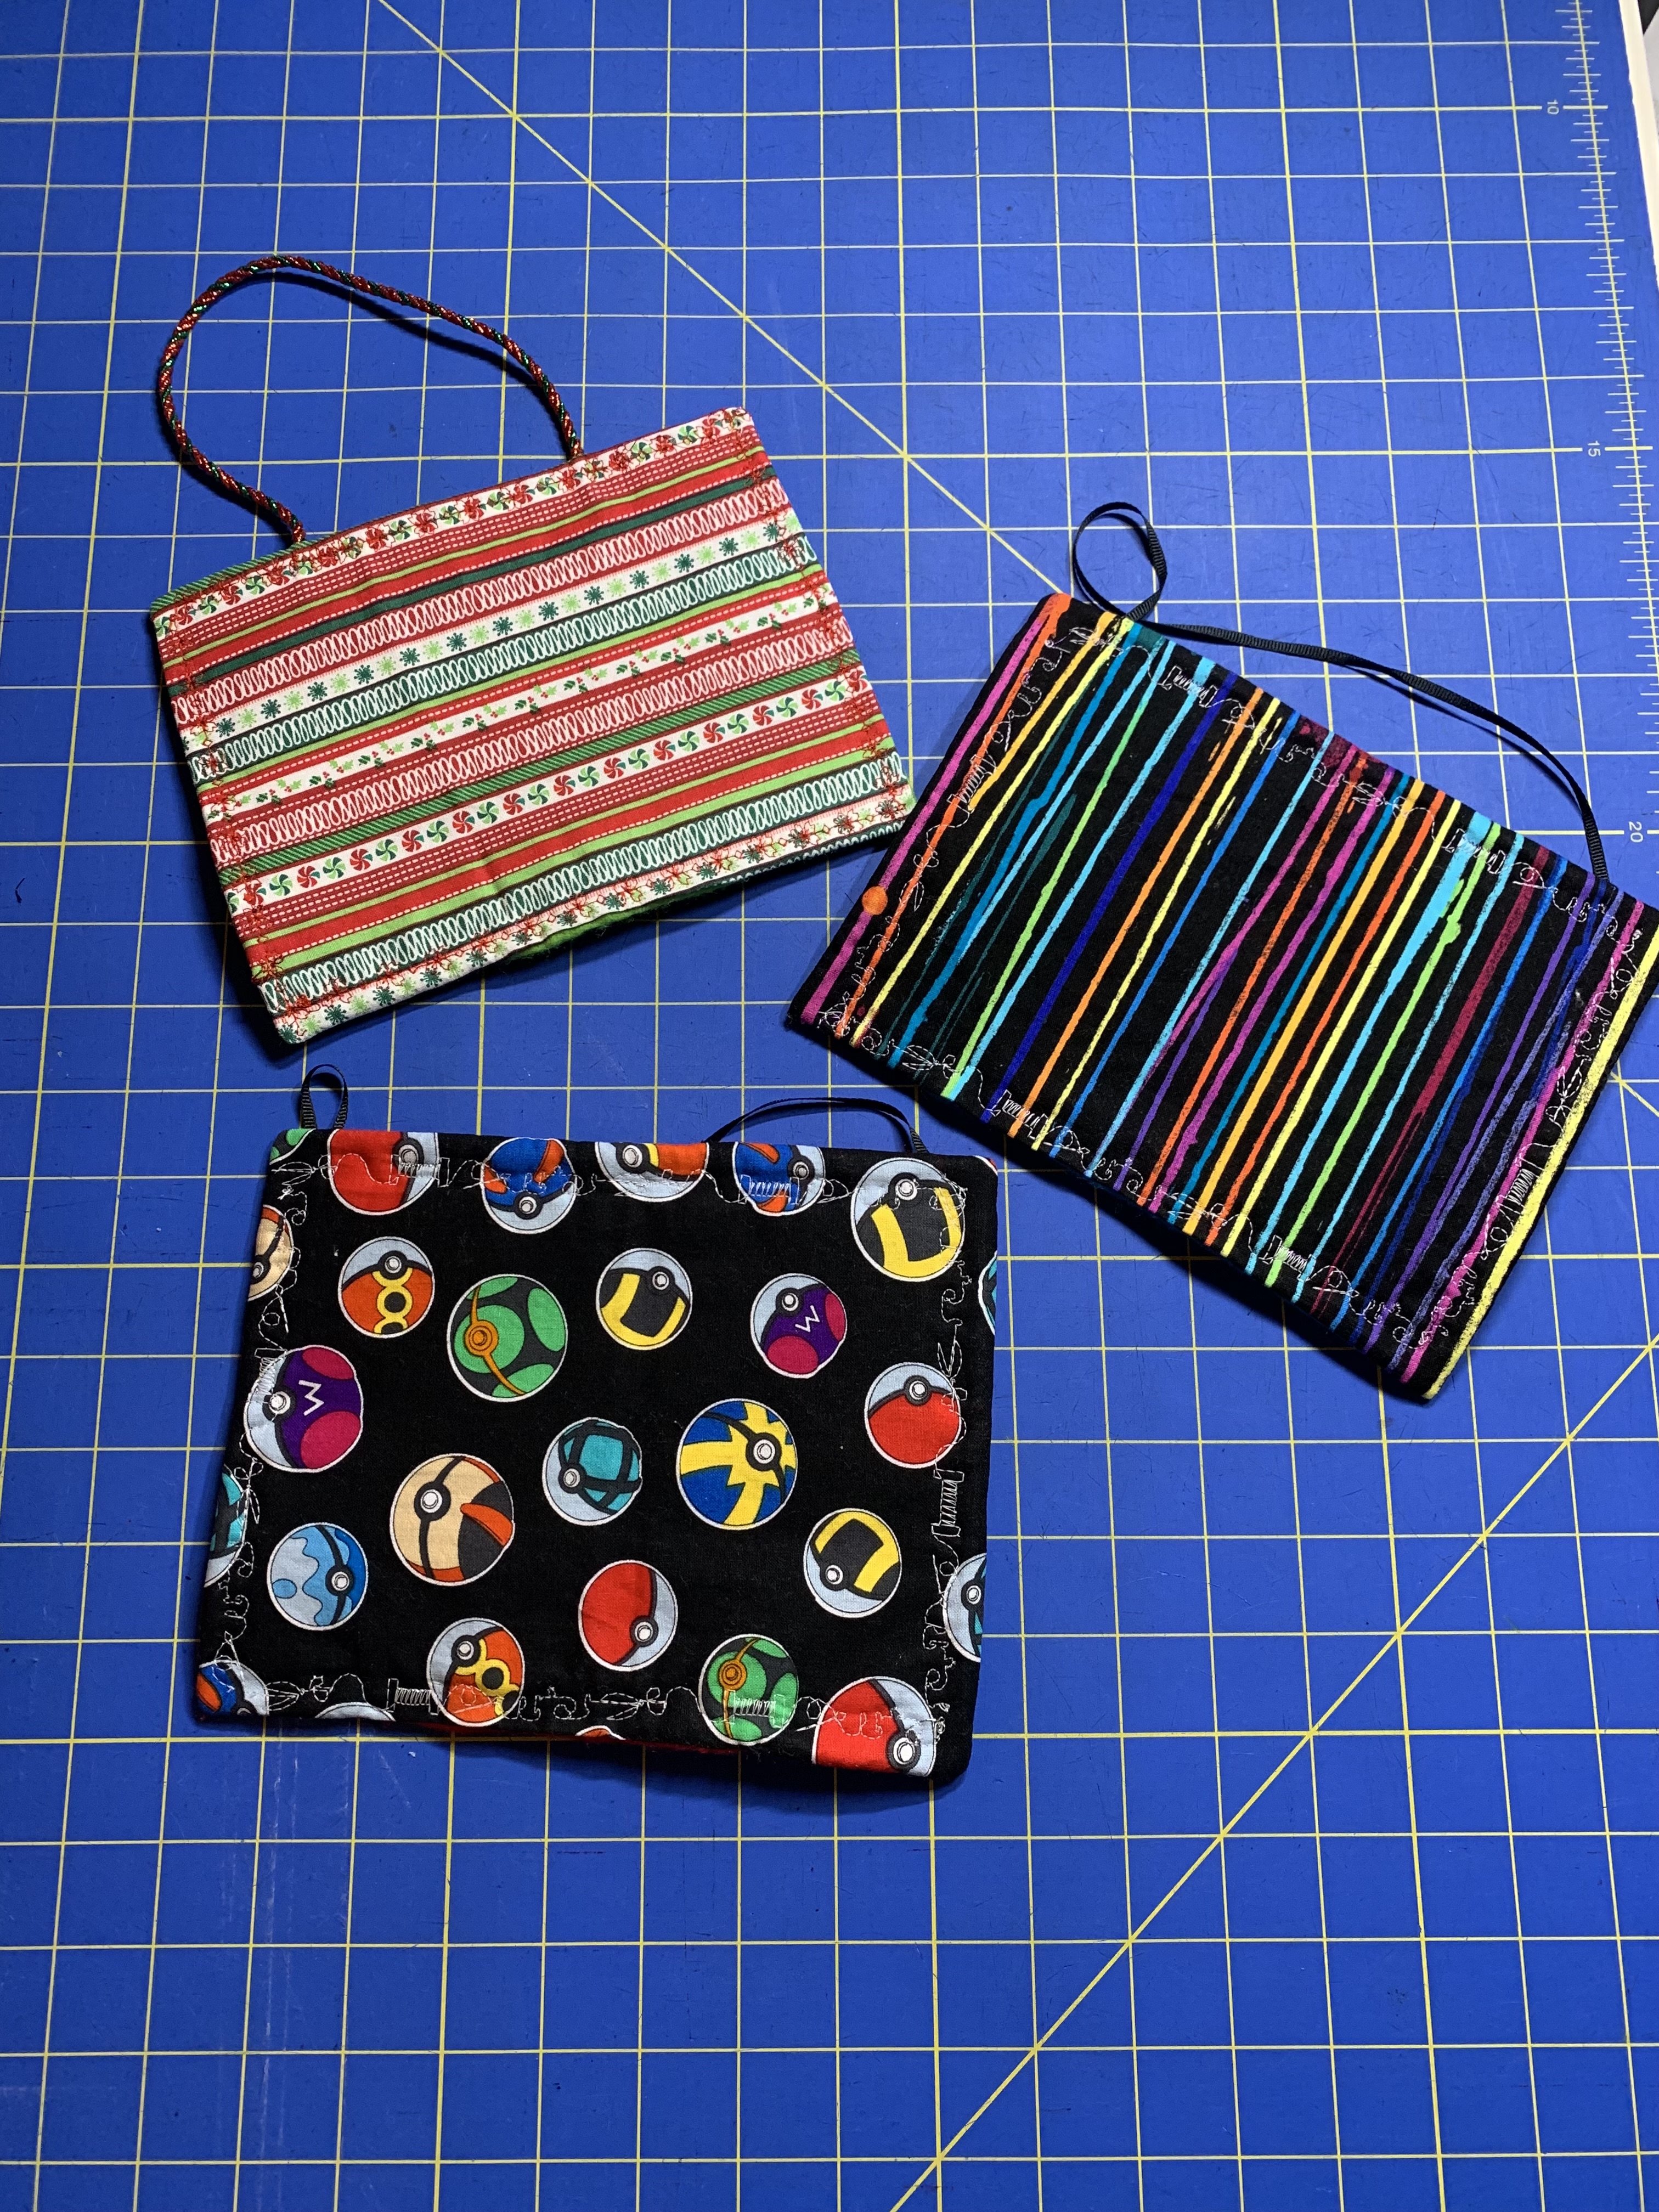
From this I made a few changes for some of the less holiday inspired version I made for myself and my sister:

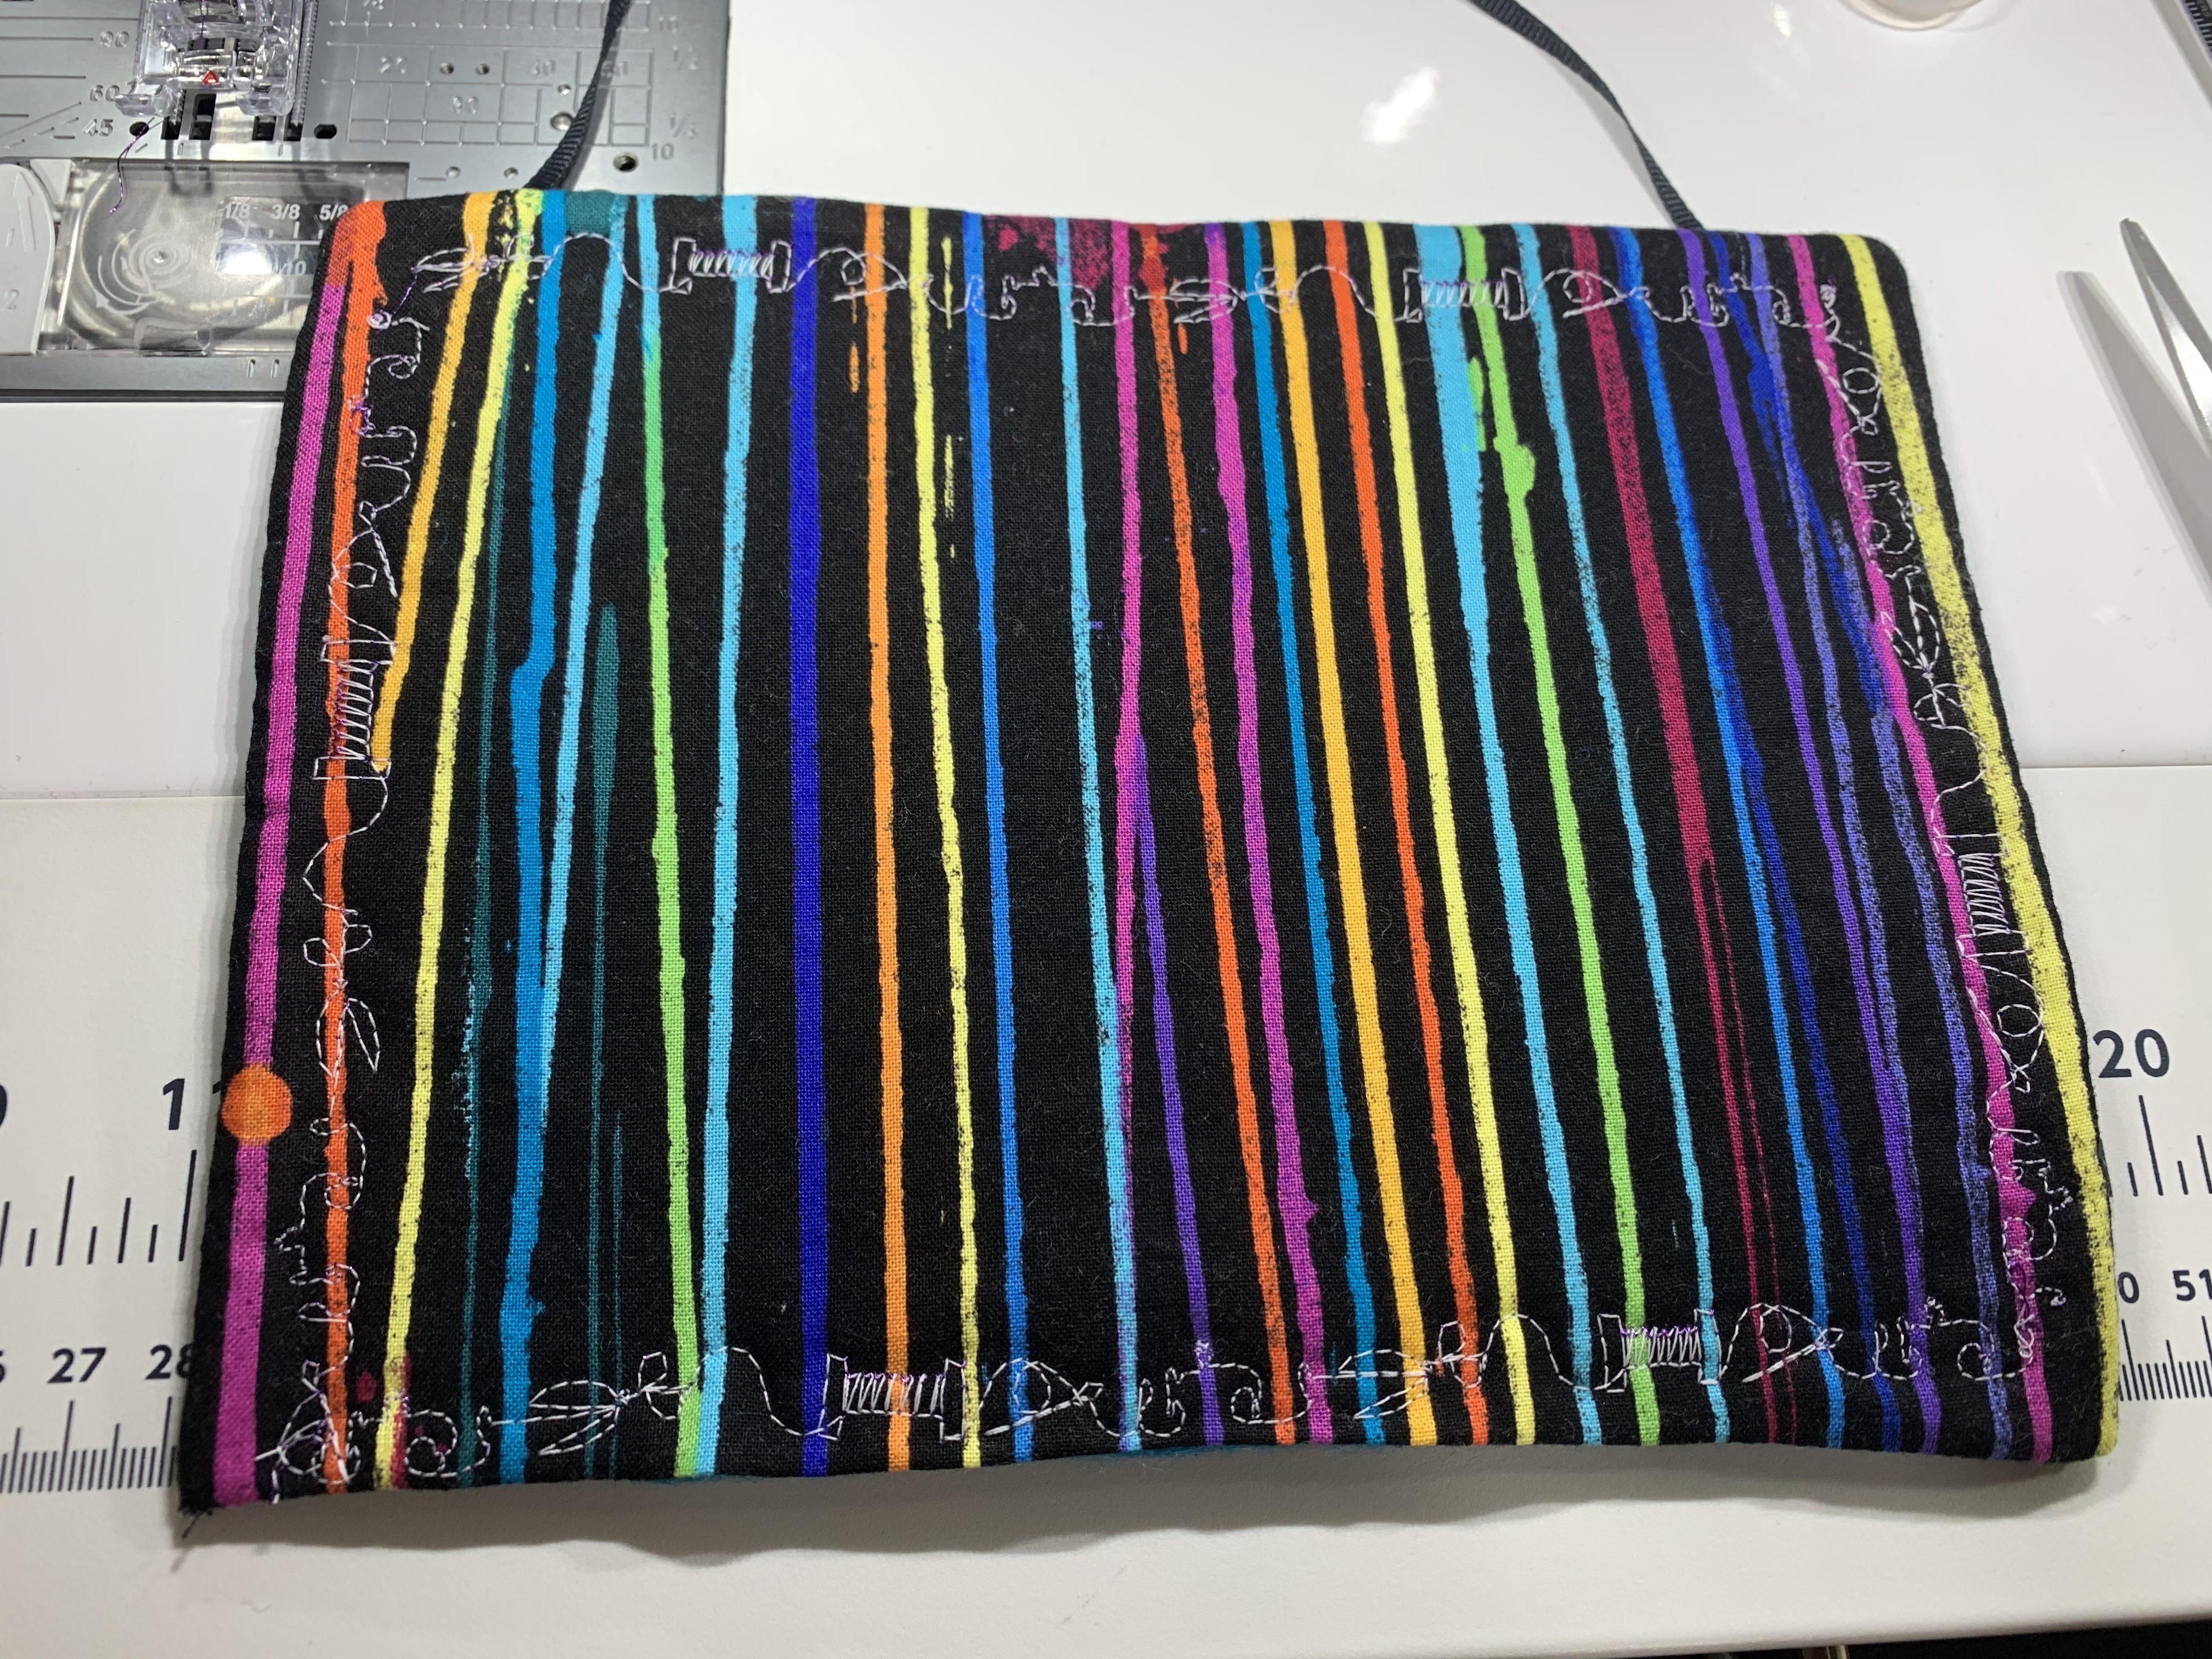

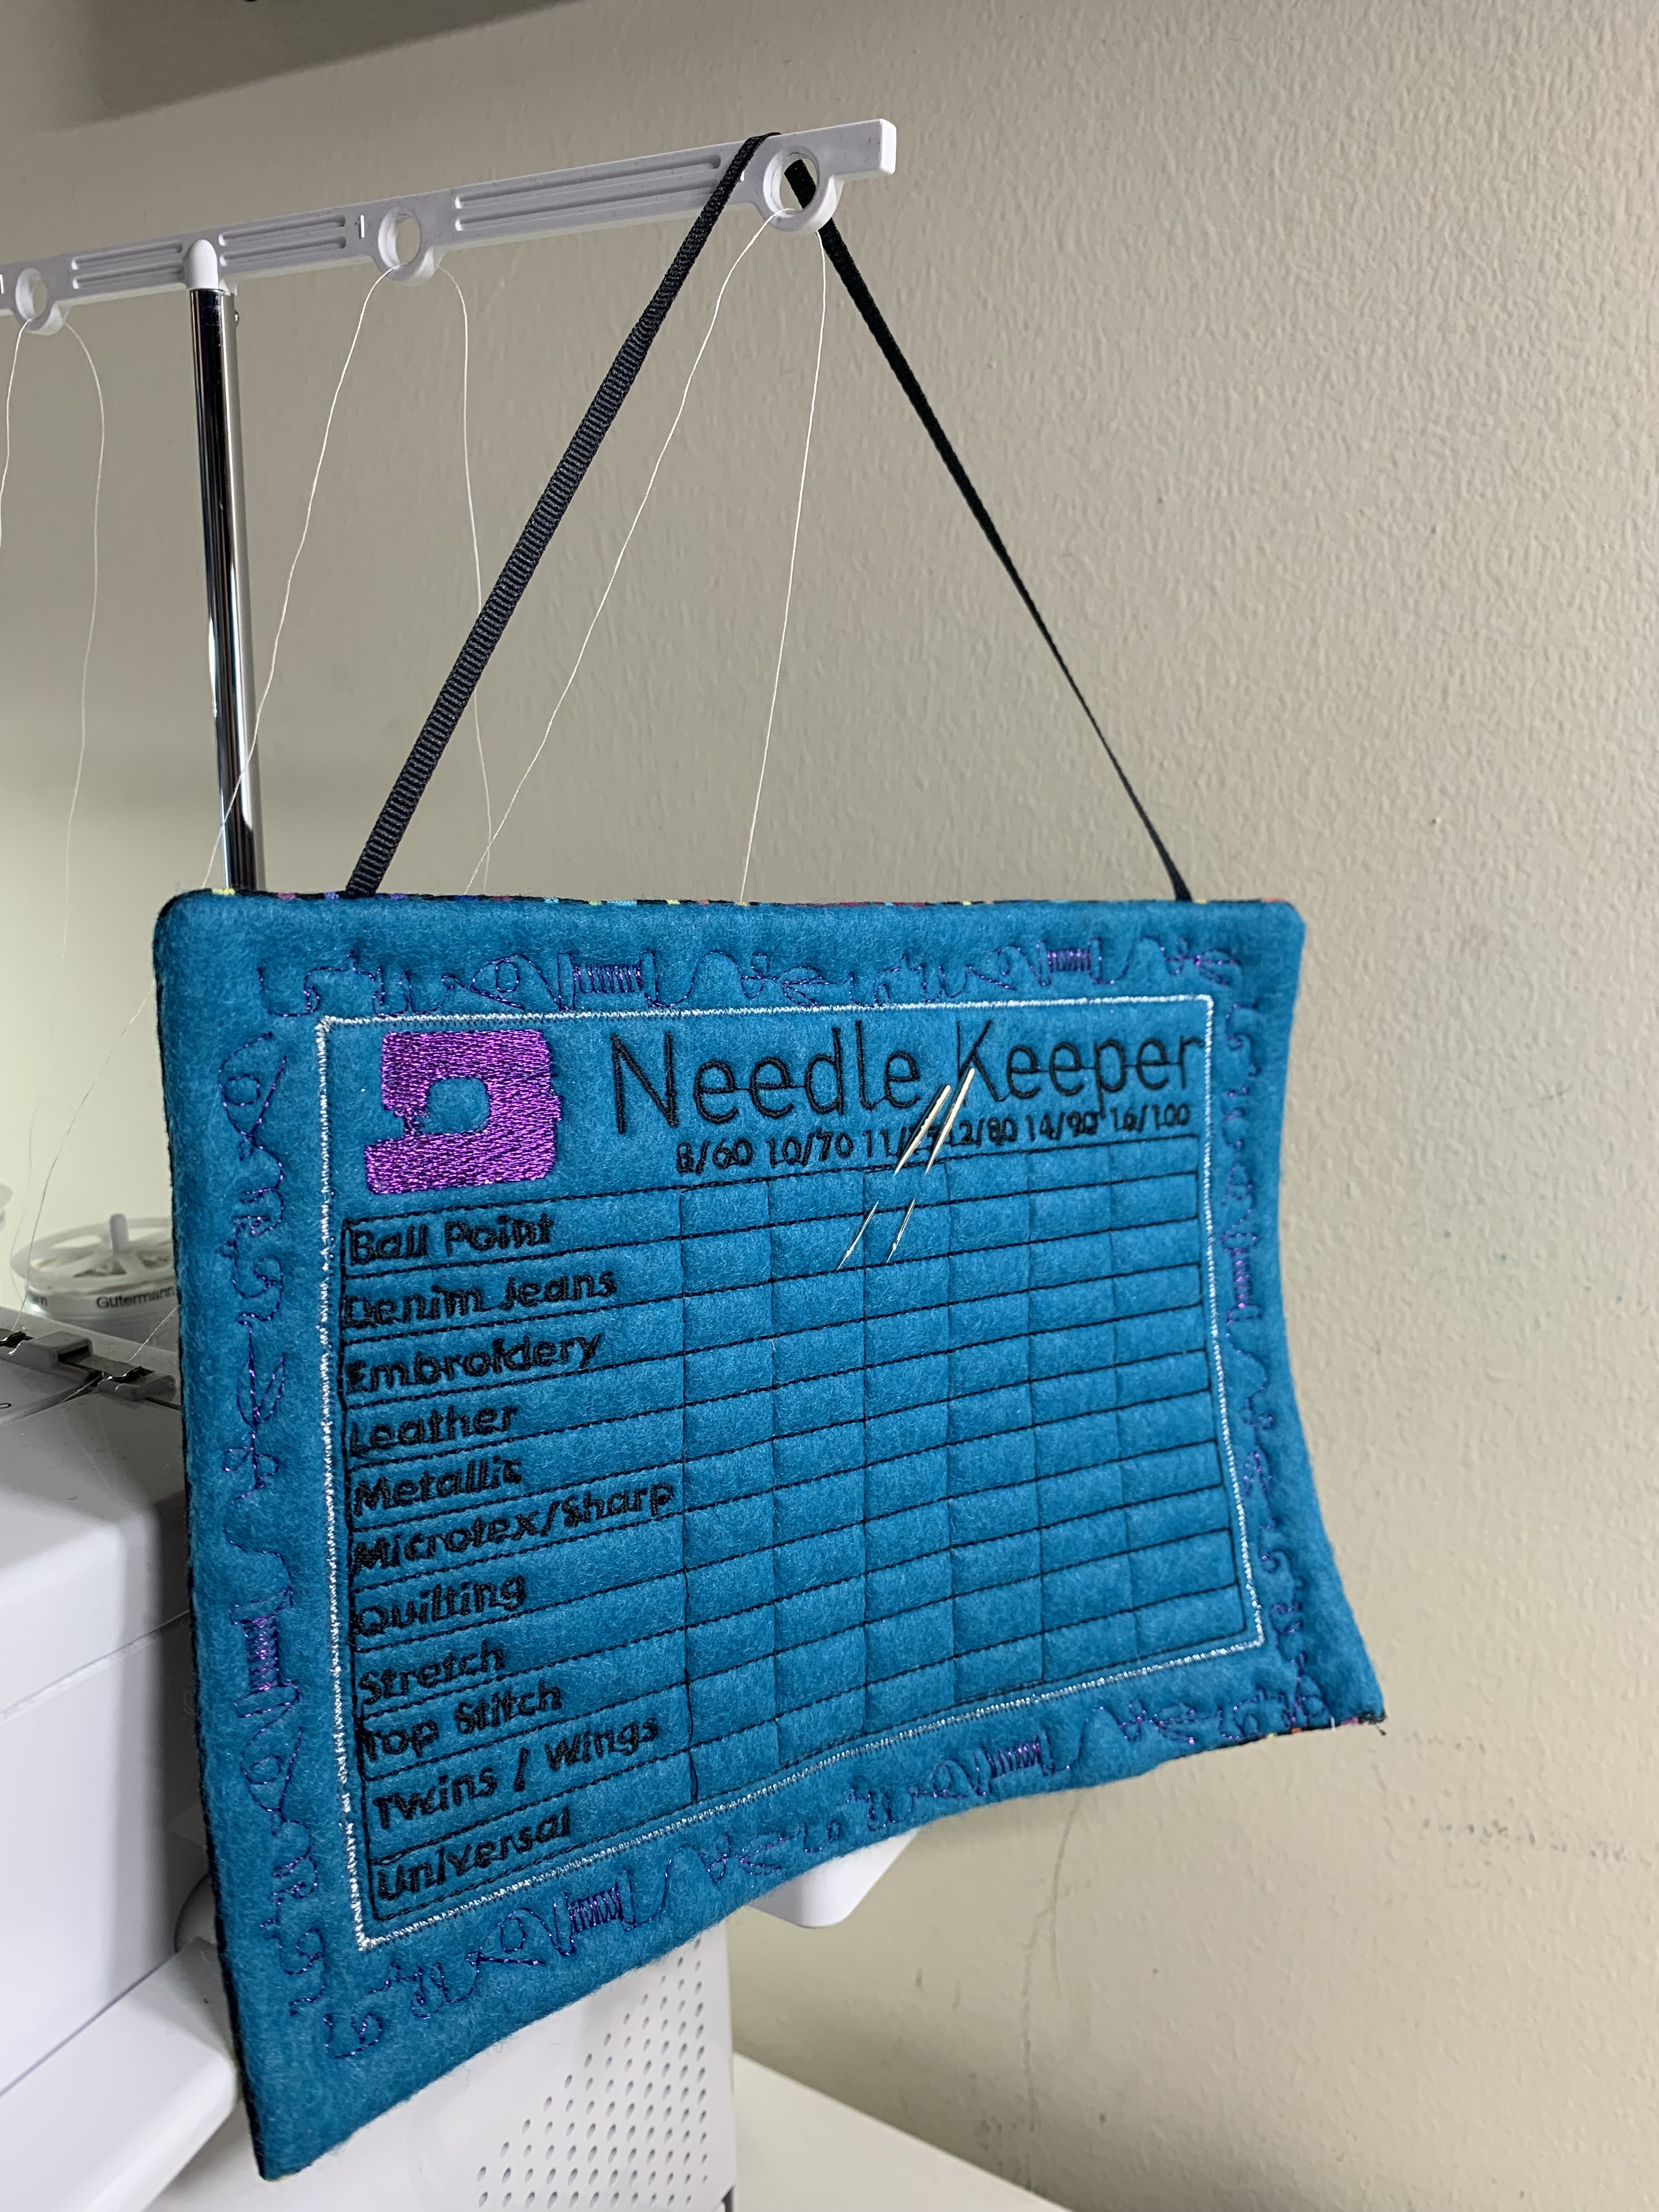

Of course, mine is the blue and purple one, and her’s is the red and silver one. She asked for something that would look cute with her machine, so I went with Janome colors of red, black, white, and silver. I couldn’t resist adding some nerdy vibes to the back of hers though with a bit of Pokéball fabric. I probably should have done something similarly fun with mine, but I opted for the fun colors of the striped fabric instead.
To make this I embroidered the design onto the layers of wool felt and quilt batting with a cut away stabilizer in my embroidery machine. I was originally worried the cut away might be a problem, but in my sample I think this type of stabilizer helped the tiny text turn out a bit cleaner, added stability to the overall project, and didn’t impact the needle storage at all; with the felt and batting there are plenty of lofty layers to hold the needle in place without having to stab it through the stabilizer or backing fabrics.
To attach the backing fabrics I sewed everything right sides together with a bit of ribbon for hanging the finished project (I’m planning to put some command strip hooks behind my machines to hold these) wedged in the middle and left an opening on the bottom edge to turn it right sides out. It was honestly pretty poofy at this point, so I decided to use some of the decorative stitches on my sewing machine to create a boarder around the outside and to help flatten out the fabric (and, of course, to avoid hand sewing closed the opening). This actually worked super well and I was really pleased with how sturdy (and pretty) this made the final results!
On the sample I went with a simple flower design that I thought looked festive. For the blue and red versions I tried a (new to me) feature of my machine and combined a bunch of decorative stitches together to make what I think is a pretty cute sewing inspired border:


Overall I am super happy with how these turned out and I’ve already been using mine a ton. I hope my sister will be able to enjoy her new Needle Keeper soon as well!


Very cute! I wanted to order one, but I couldn’t find the link to your Etsy shop ;=)
LikeLiked by 1 person
😂
LikeLike
Very cute! I have one of those little tomato pin cushions that does basically the same thing, but I like that yours has a bit more description for the needle types. Times like these make me really wish my machine had embroidery capability.
LikeLiked by 1 person