I have mentioned in several previous posts how much I was not loving my self-drafted Craftsy Boyshort pattern. Although I had considered the idea of abandoning the possibilities of boyshorts altogether, I have a few upcoming sets I want to sew that I think would just look so much better with this style of undergarment, and everyone else seems to swear by their supposed comfort. So I did a bit of research and it looks like while the Craftsy class drafts for an all-in-one pattern with a lay-in gusset lining, a lot of RTW boyshorts use a separate gusset piece. This got me to thinking that maybe I should reconsider this style and see if I couldn’t figure out something that would work for me.
At the 2023 Bra Sewing Bee, part of their series of sew alongs was “undergarments by the decade” showcasing different styles of undergarments that might be comfortable or have unique features for people in different decades of life. I decided to re-watch one of the 40s sew alongs, which featured a boyshort style, to see if I could pick up any tips in there. It’s honestly a great sew along with lots of details about fitting for a fuller thigh and dealing with weird fit along the gusset. The pattern that is used is the Bravo Bottoms #2, which has several styles, including the boyshort with a separate gusset piece:

At first I was determined to see if I could edit my self-drafted pattern to look more like the pattern in the video, but I got a bit stuck on that because the shape line of the back and crotch curve is so different. A while ago I was looking at Miss Celie’s Pants’s Instagram story and she said something to the effect of “we are adults, we can buy a full price pattern” in regards to the recent Vogue 2000 DVF re-release. That has kind of stuck with me, so after spending about an hour of sketching out possible ways to move forward with my self-drafted pattern, I said screw it and bought the pattern from the Bra Builders website. It’s only an $8 digital pattern and it comes with 3 underwear styles, so it’s honestly a pretty great deal. And unlike the Bravo Bra #2 pattern, this one has already been fully digitized, so it’s a lot more typical to what would be expected in the current pattern market today.
I sit in the middle of the largest (XL) size range for the waist, and slightly above for the hip, so I am aware that this pattern might not work for everyone, especially if you need very large or very small sizes. However, if you are in the size range and don’t want to deal with drafting your own patterns, this pattern was a much better starting point for me in terms of fit. Even though I really just wanted the boyshort, since I bought the pattern I thought I might as well try the hipster too. I have absolutely zero interest in trying the tanga, so I’m just ignoring that. Here is a comparison of how the pattern pieces look when laid on top of my most current iterations of my self-drafted Craftsy class patterns:


For the hipster, it’s actually pretty close. I did add about 1.5″ to the waist height preemptively; I measured the crotch depth because it looked suspiciously low, and it was. I think the pattern assumes you will use wider waistband elastic, but I prefer to have the height on the pattern so that I can choose fold over elastic or a wider waistband at the time that I’m sewing. The gusset shape is also quite a bit different, I think because it sits more forward, and on my self-drafted version it sits farther back, if that makes sense. There is a much lower front leg line, along with a slightly more shaped curve along the back gusset seam of the pattern, which I accounted for more in my self-drafted gusset piece. I was reasonably confident that this pattern would be pretty good on the first try. As for the boyshort, you can see how wildly different the shapes of the patterns are. The Bravo Bottoms #2 is practically vertical in the back, and all of the crotch shaping is from the gusset piece. The leg opening is also much more curved and a bit longer. I wasn’t sure how it was going to go, but I thought it was worth giving it a try.
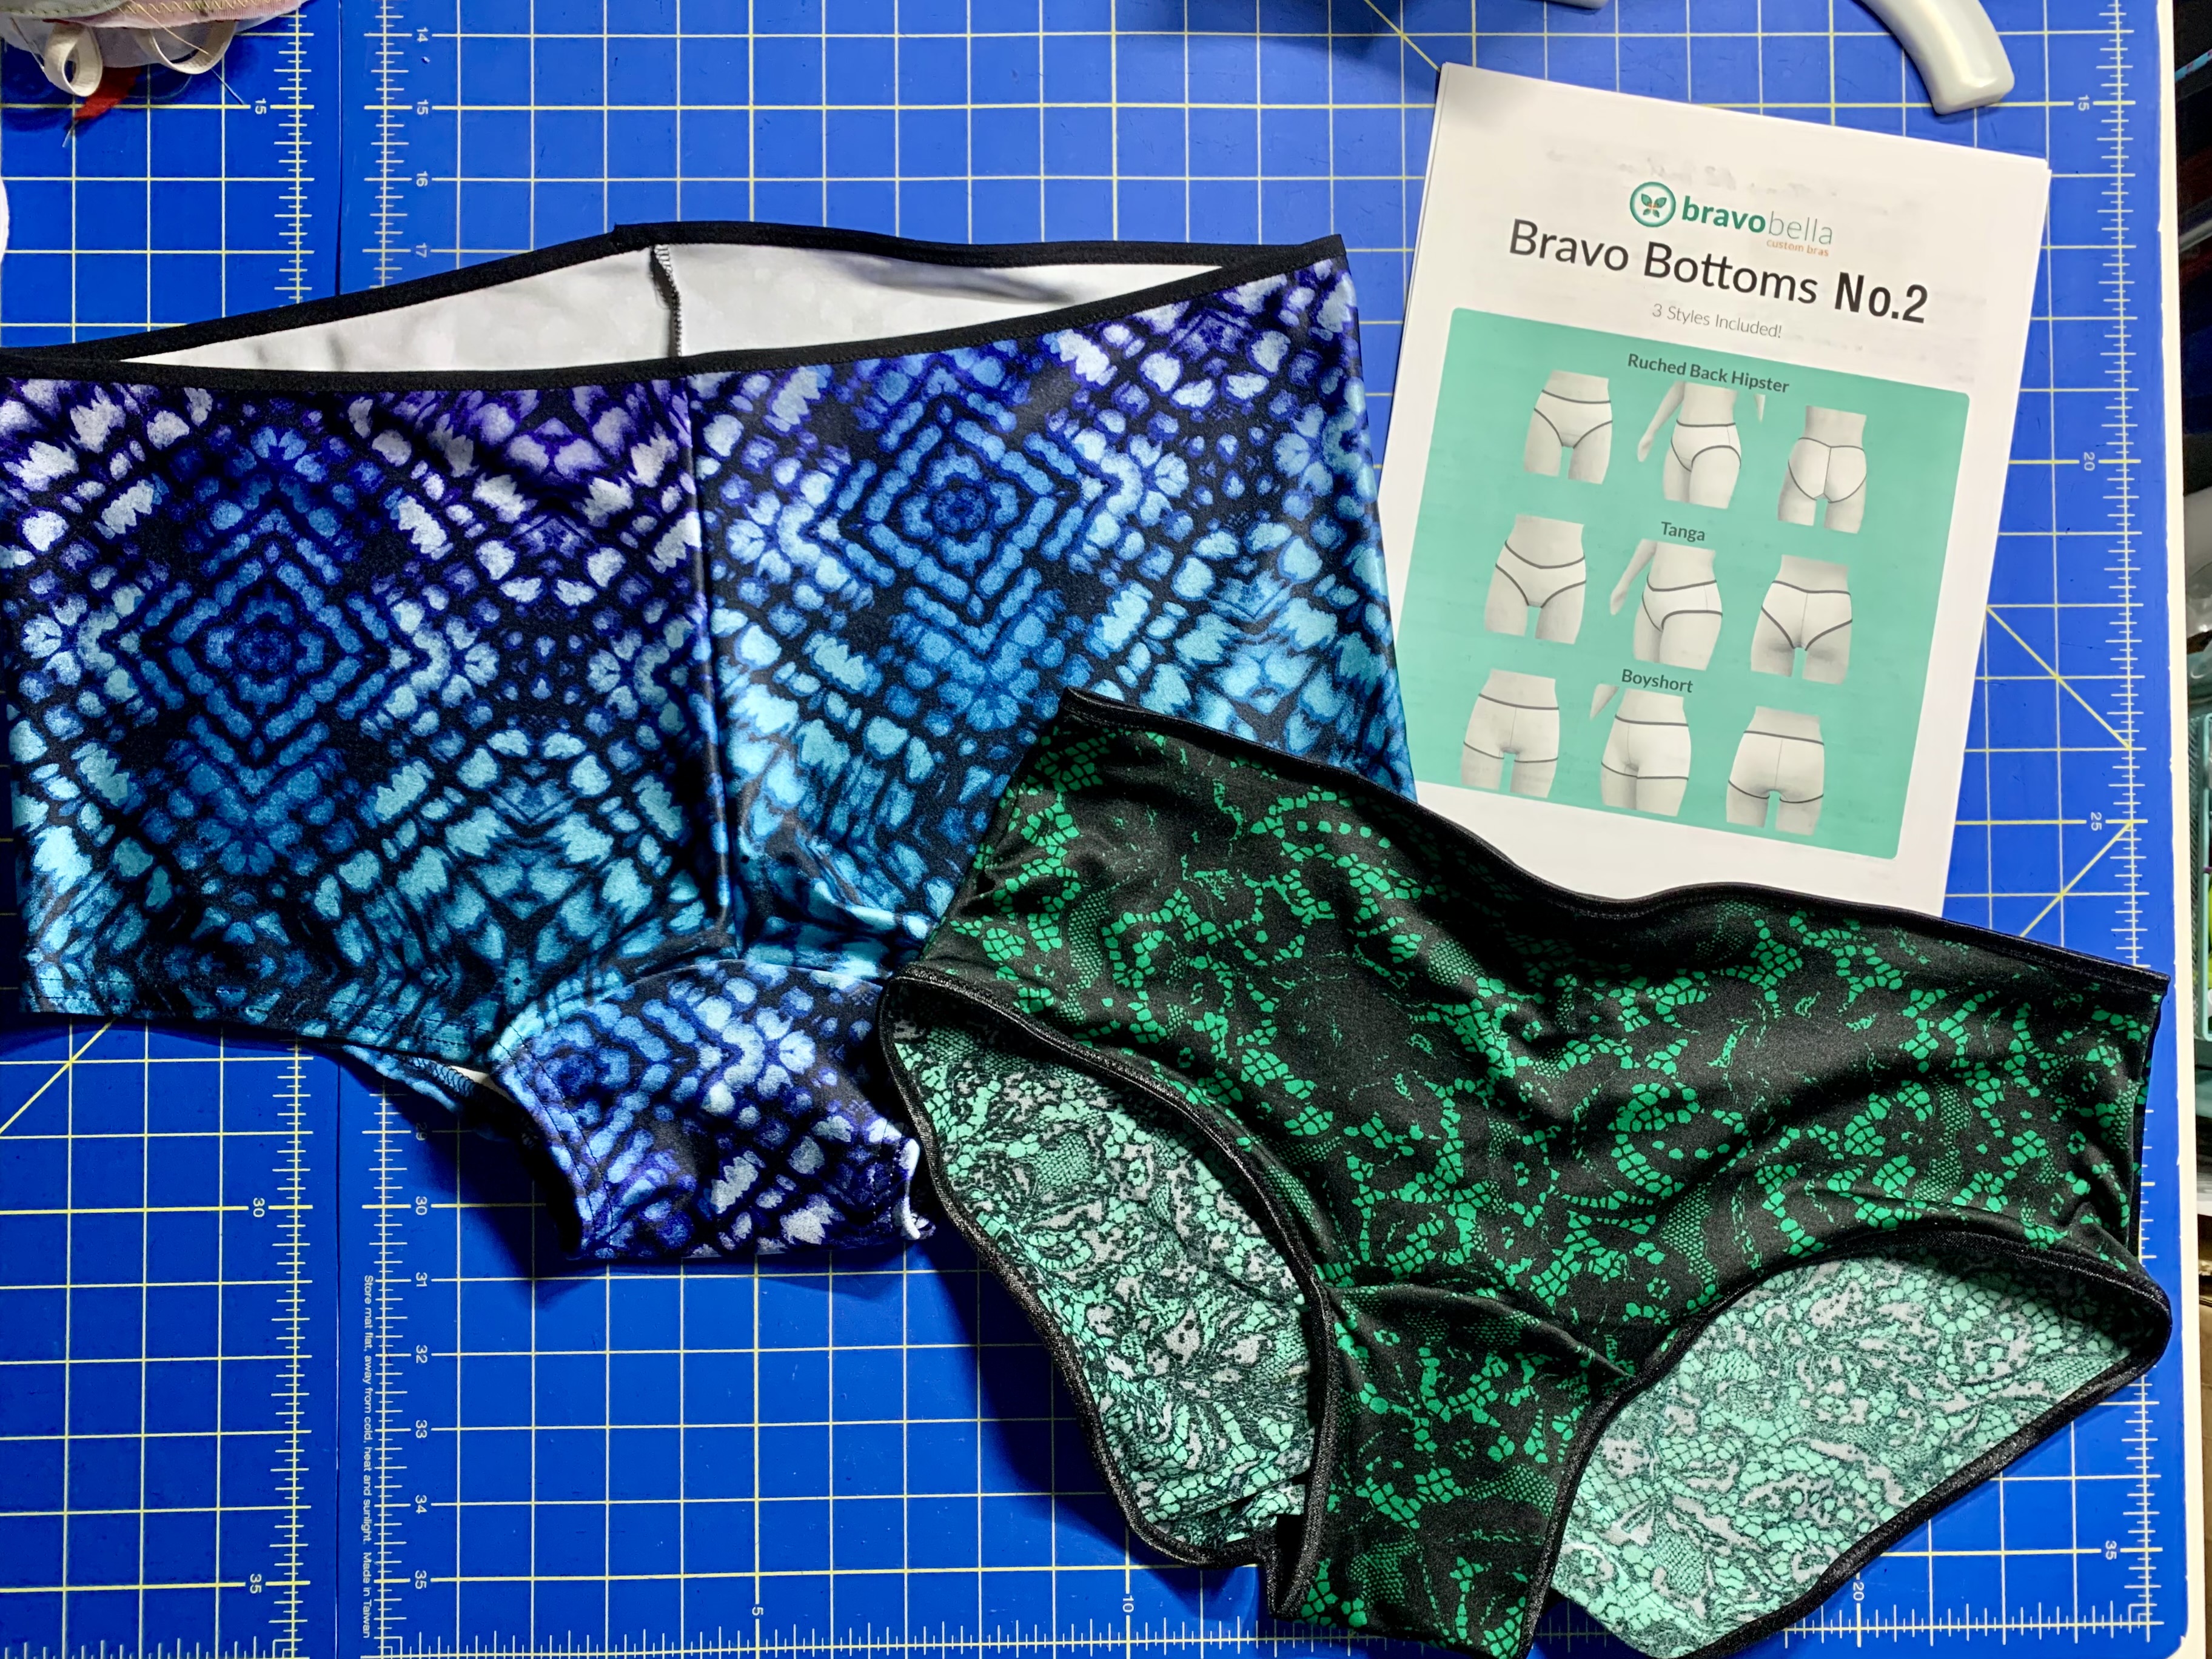
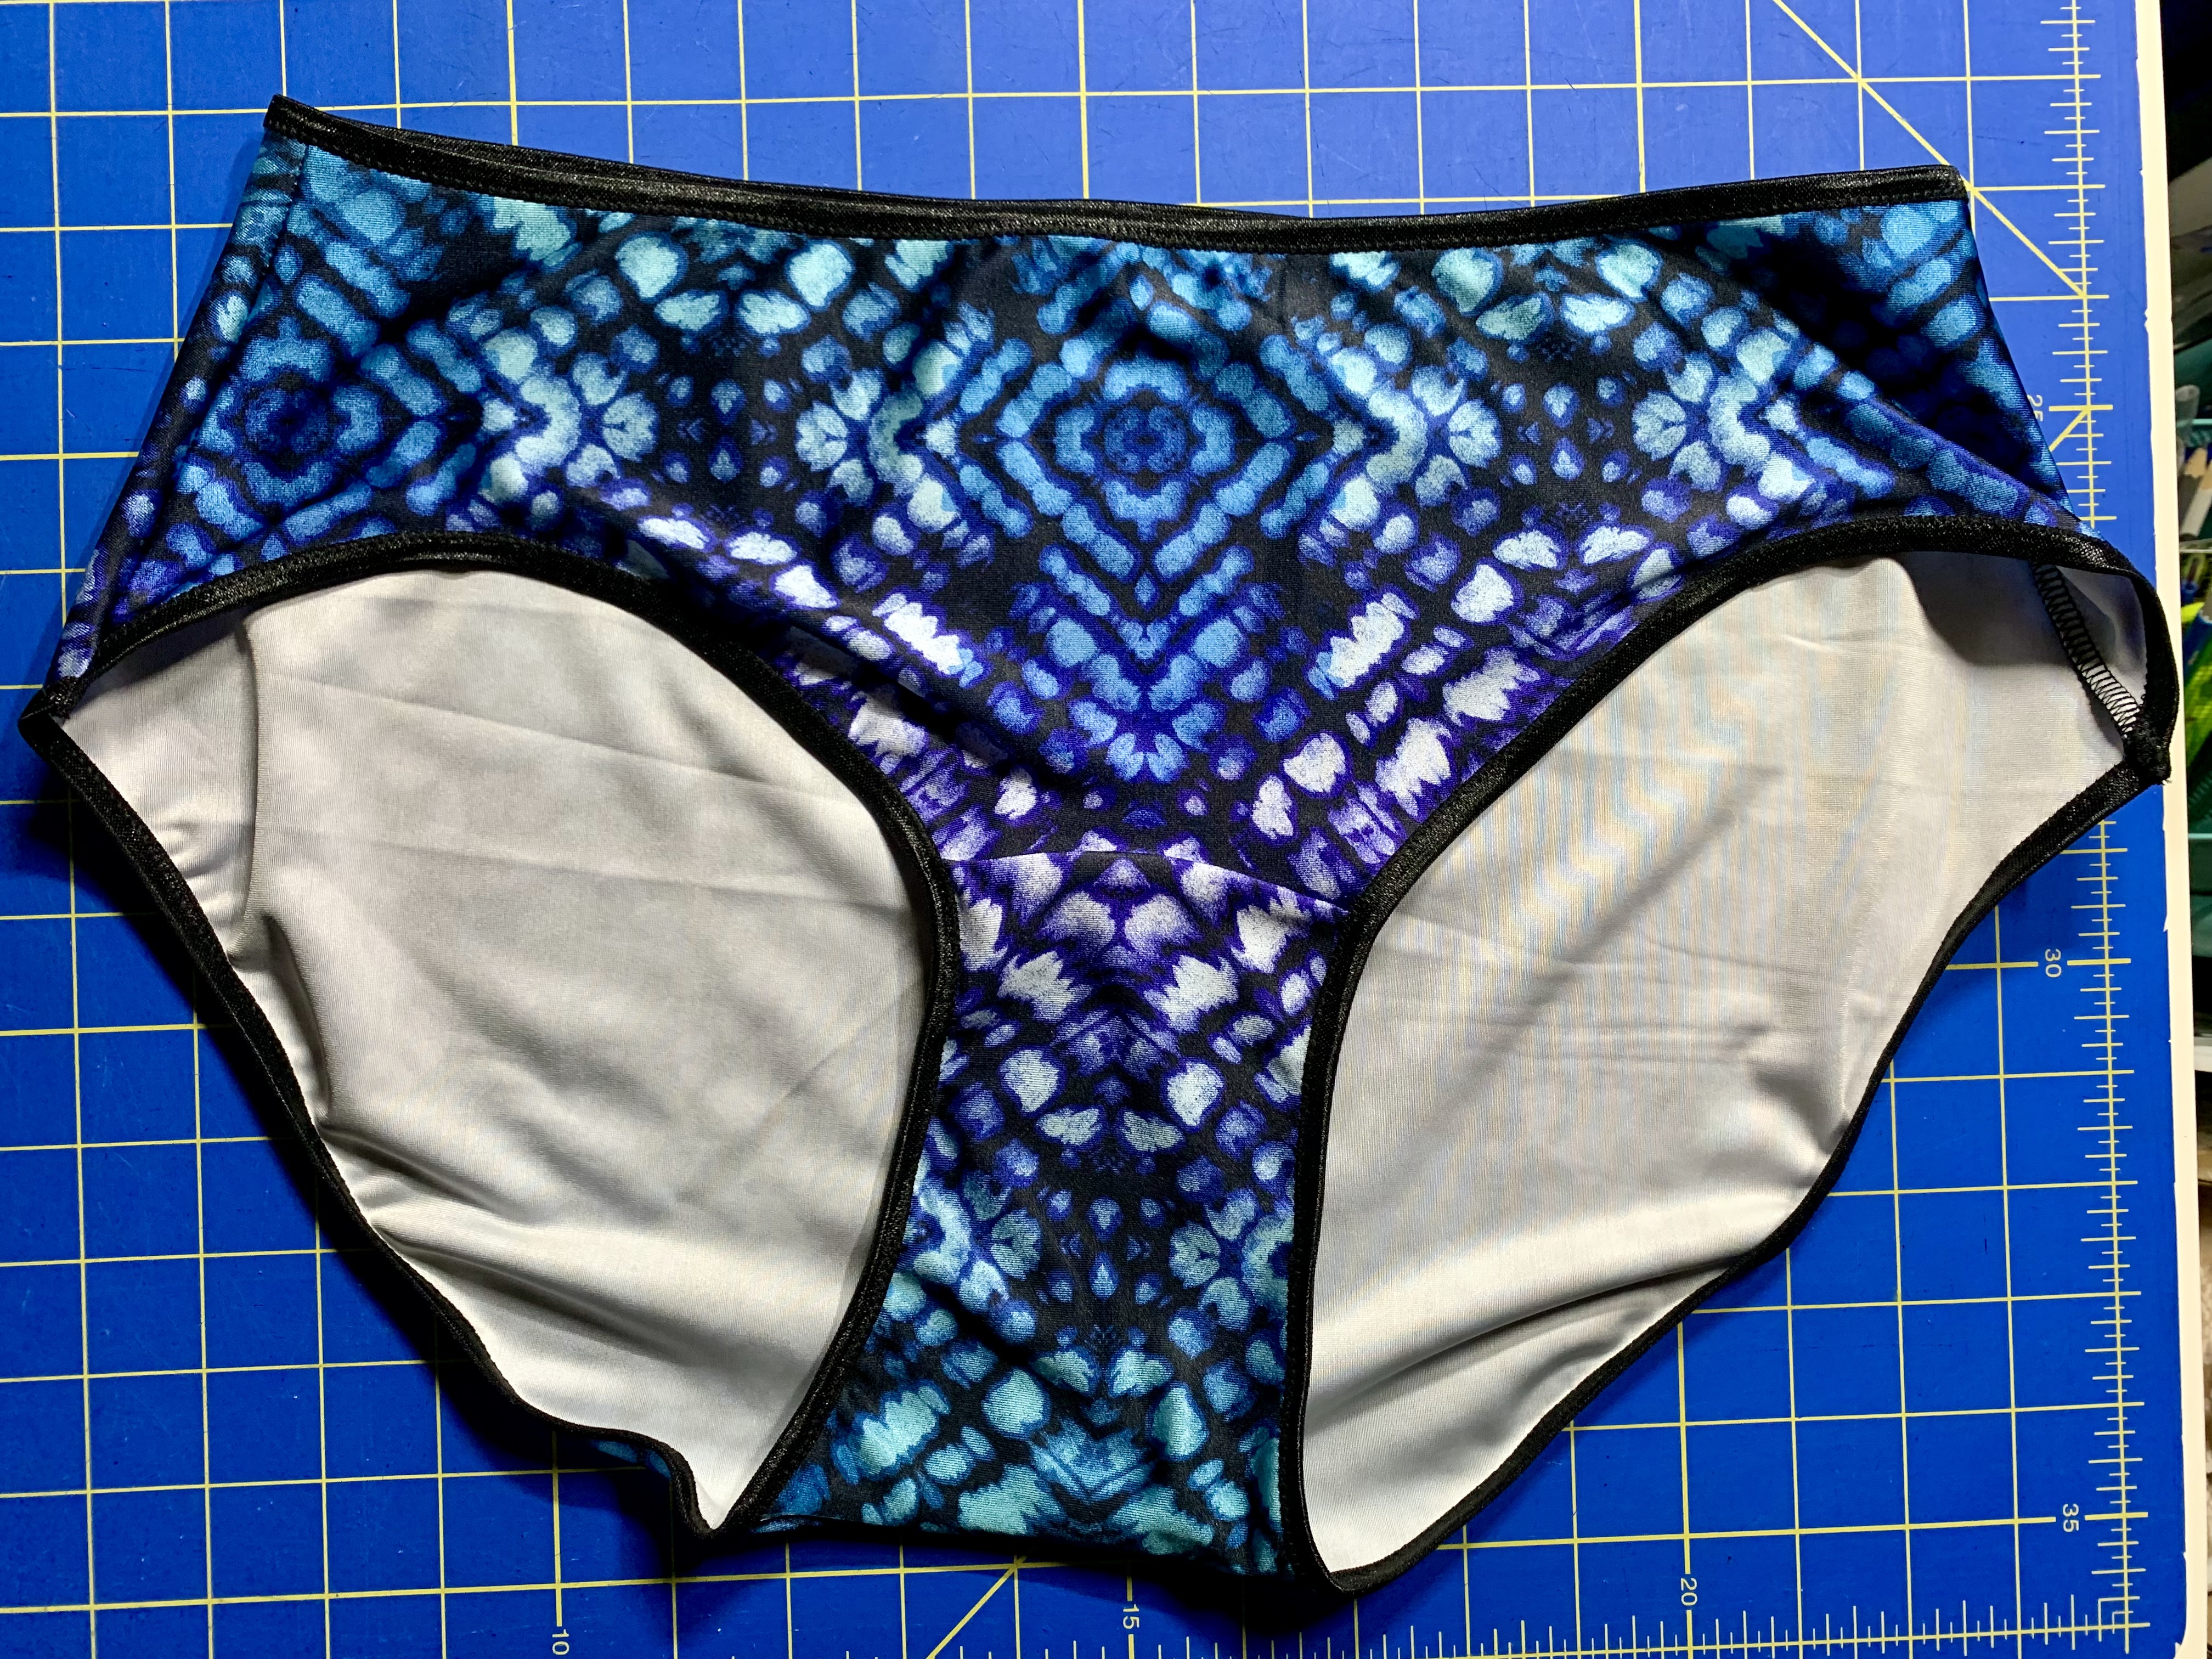
And the first try actually went pretty well! I had enough leftover fabrics from my previous bra project to make some additional underwear sets, so I decided to go with that, since it was lying around. The patterns sewed up really quickly:

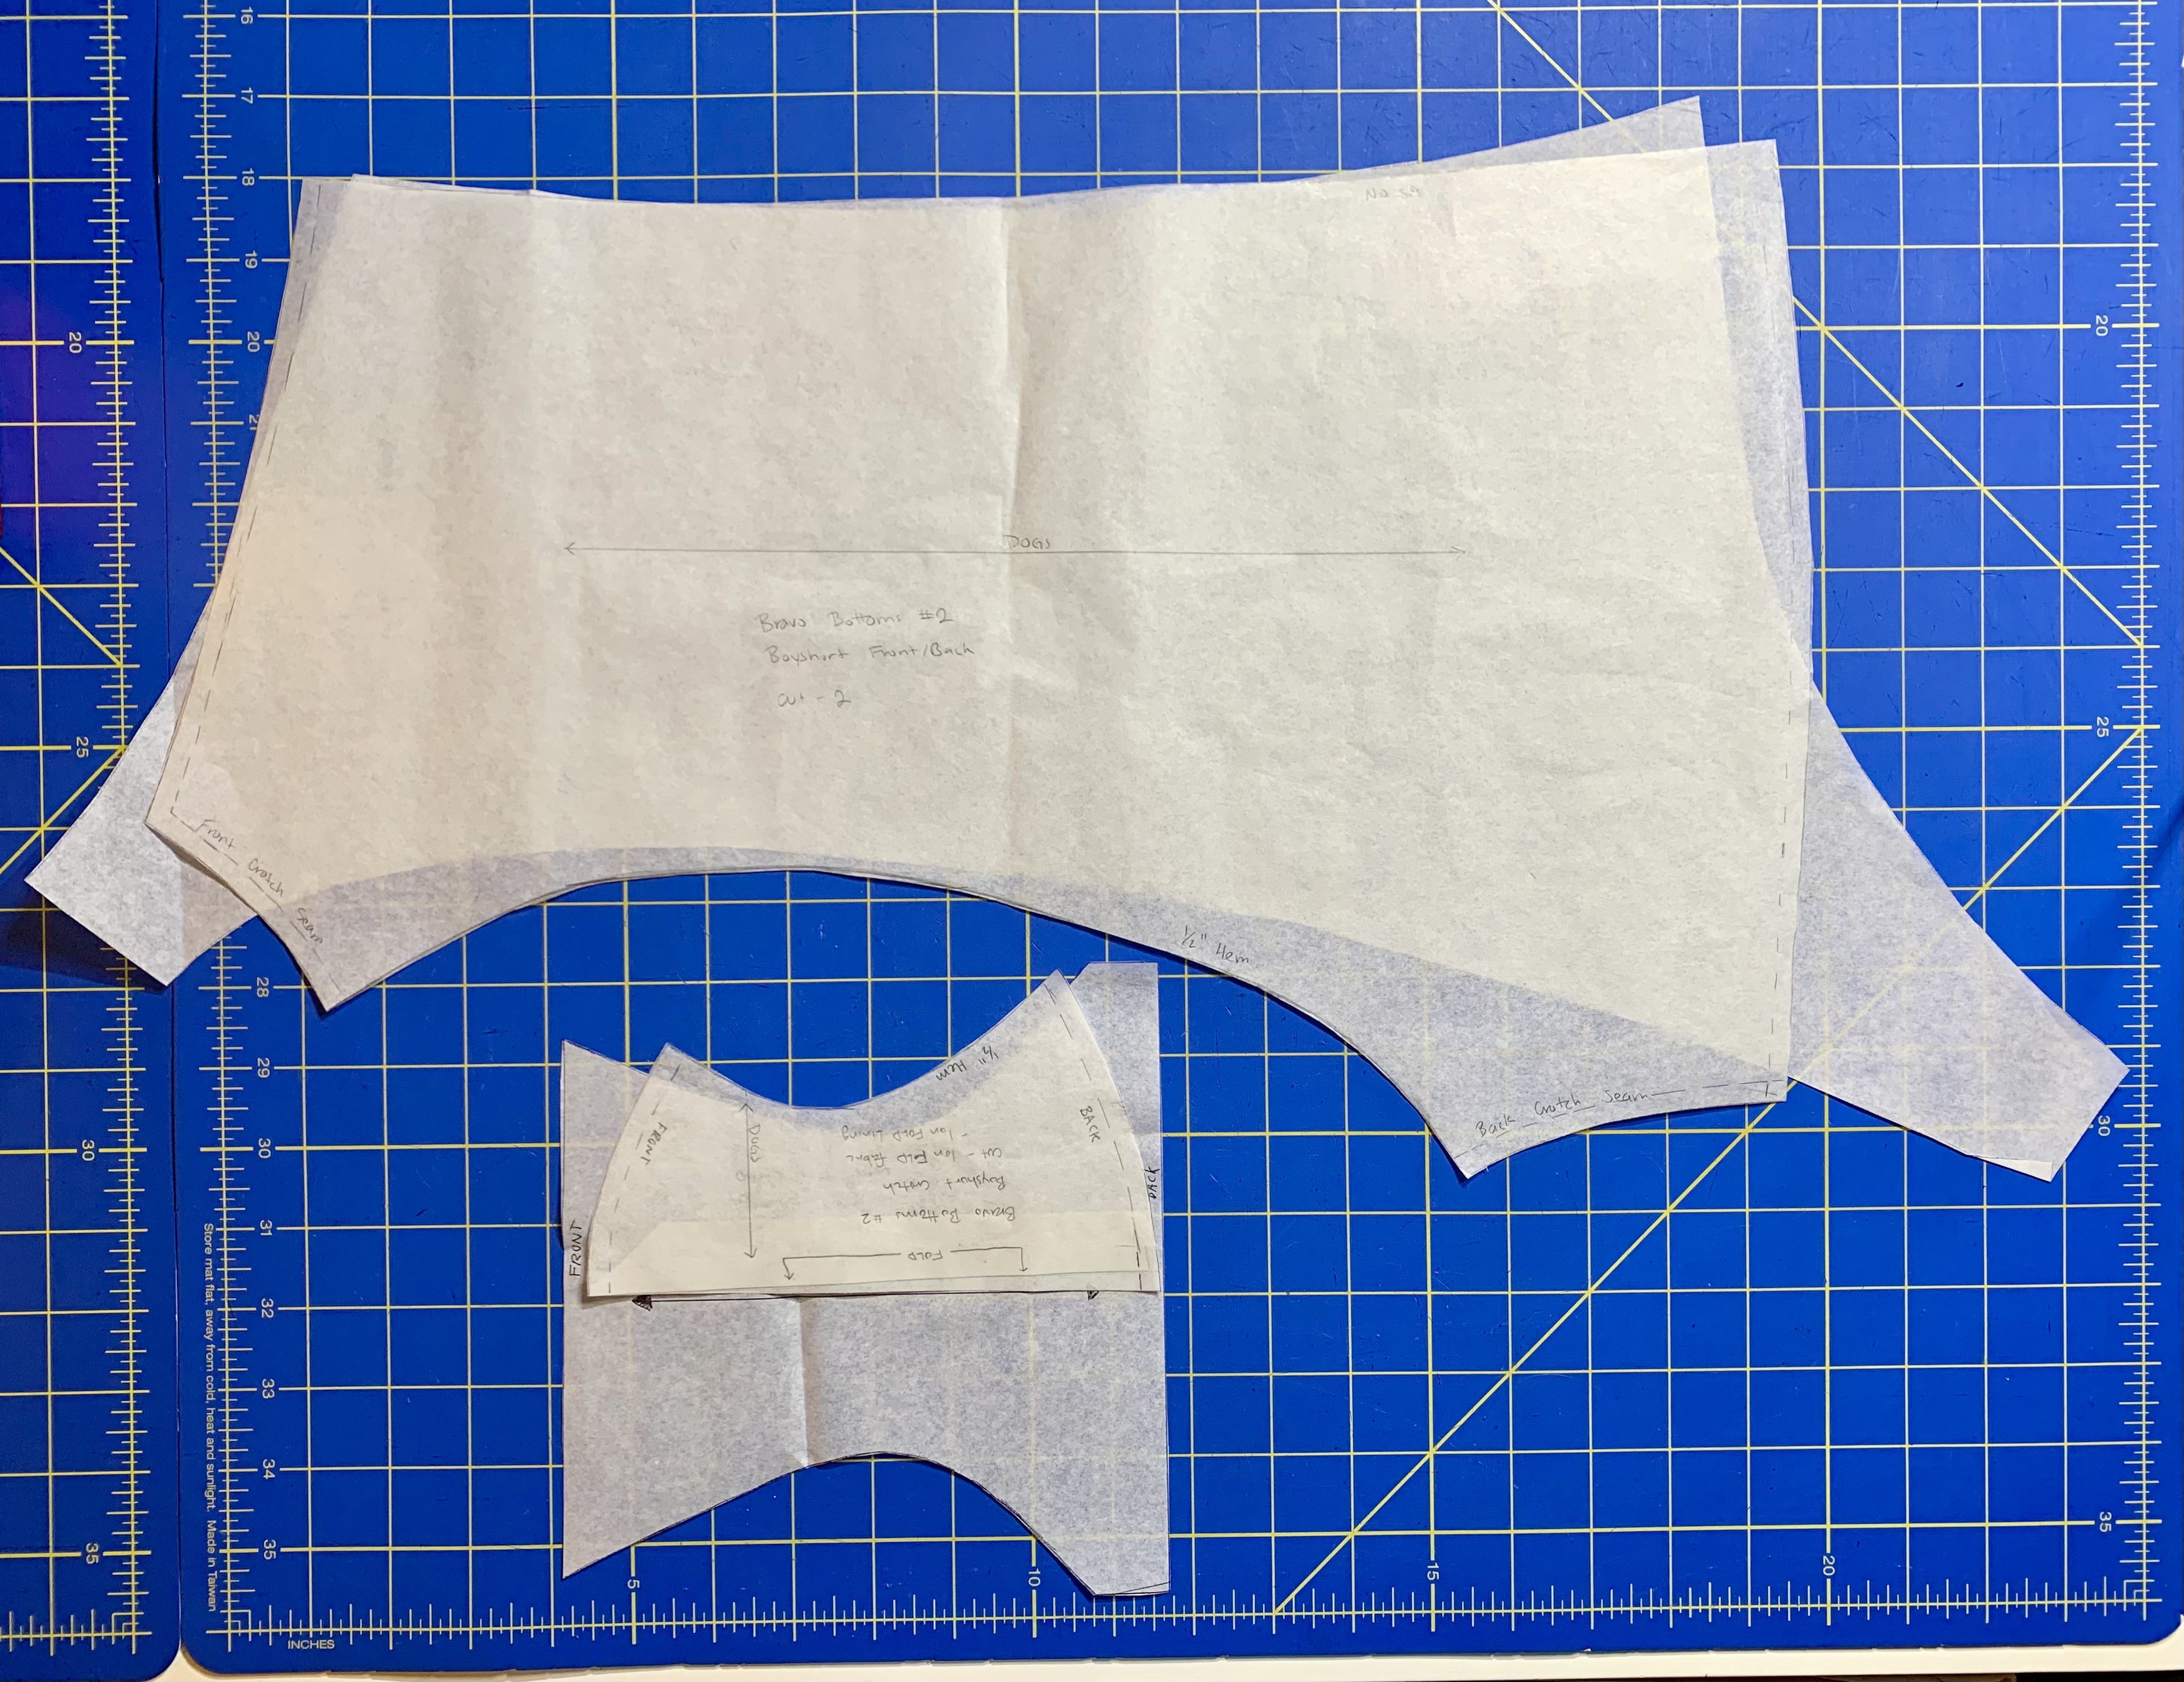
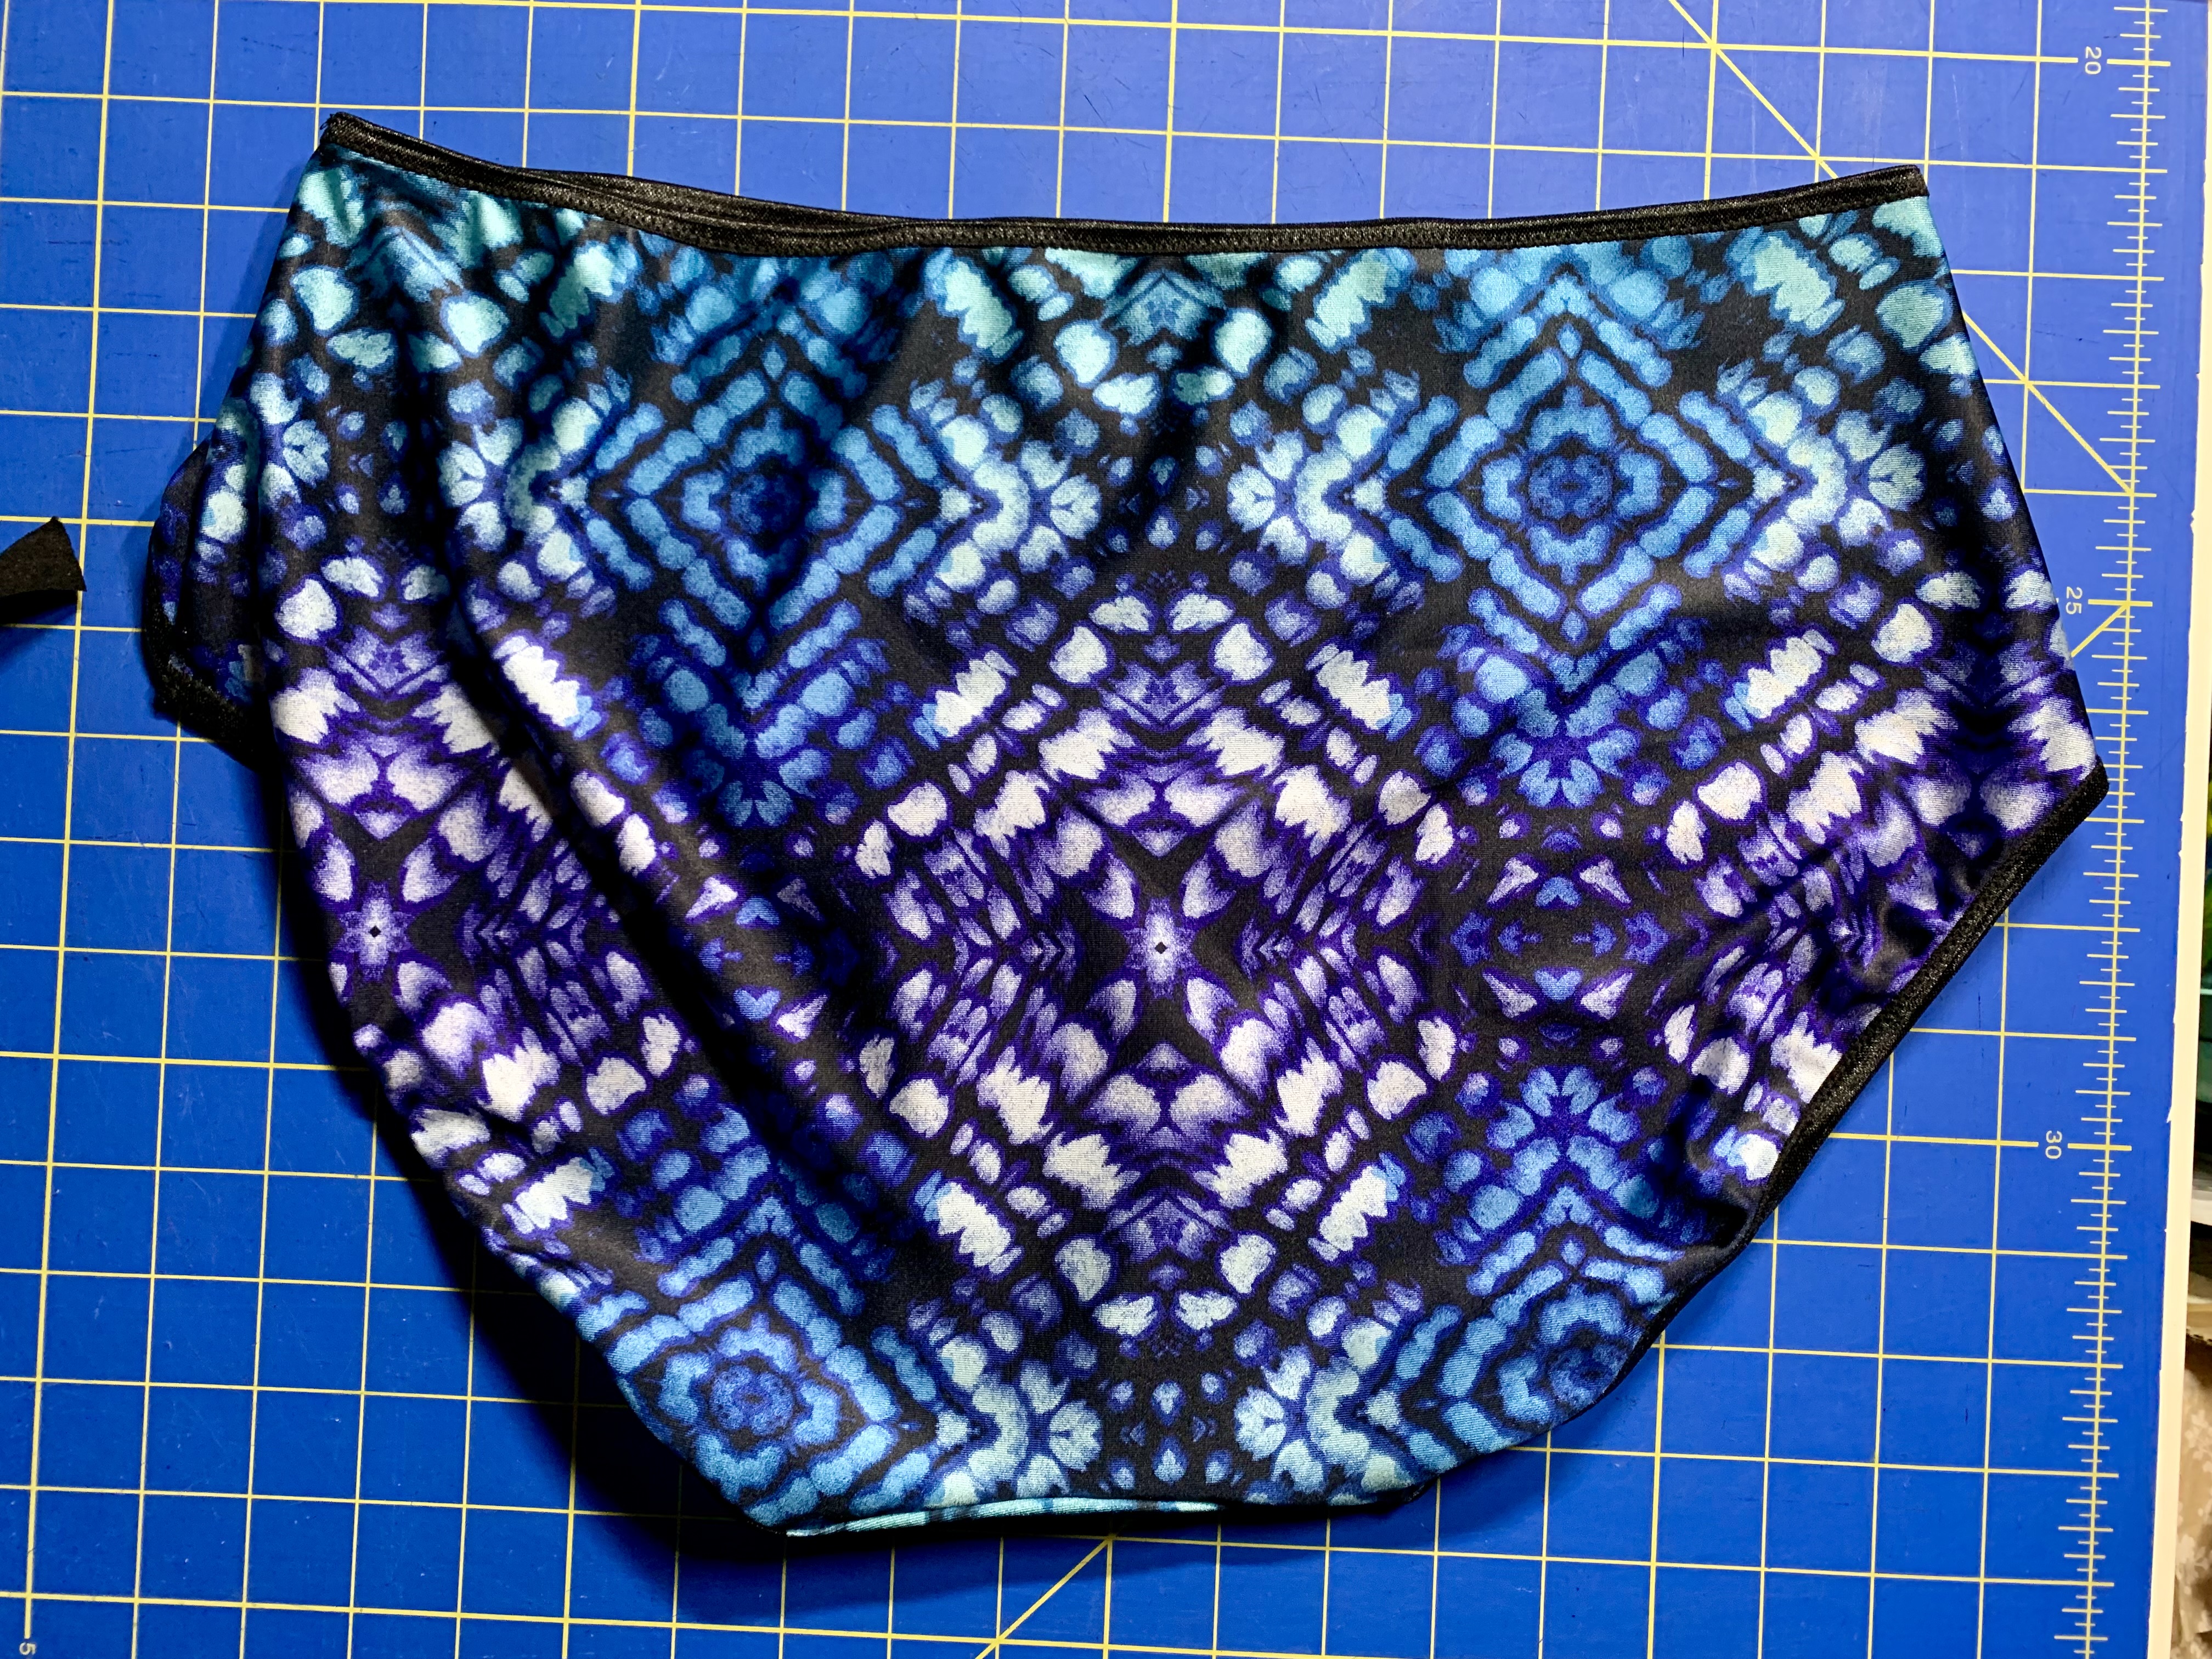
Trying them on though, I needed to make several adjustments for fit. I know there are a lot of patterns that go horizontal, so maybe it’s just me, but I really dislike having excess fabric bunch up on the front of my legs. Probably this has to do with wearing skating costumes for 20 years, but I definitely dislike when the elastic is below the natural leg crease, so I raised the front leg by about 1-1.5″ on both styles. I also added a bit of width to the back pattern piece and to the gusset on the hipster. I needed to take in both the front and back waist seams on the boyshort, and I needed to reshape the back seam, which also resulted in adjusting the back of the gusset piece to keep the seam lines trued up. You can see the pattern adjustments before I re-cut them here:

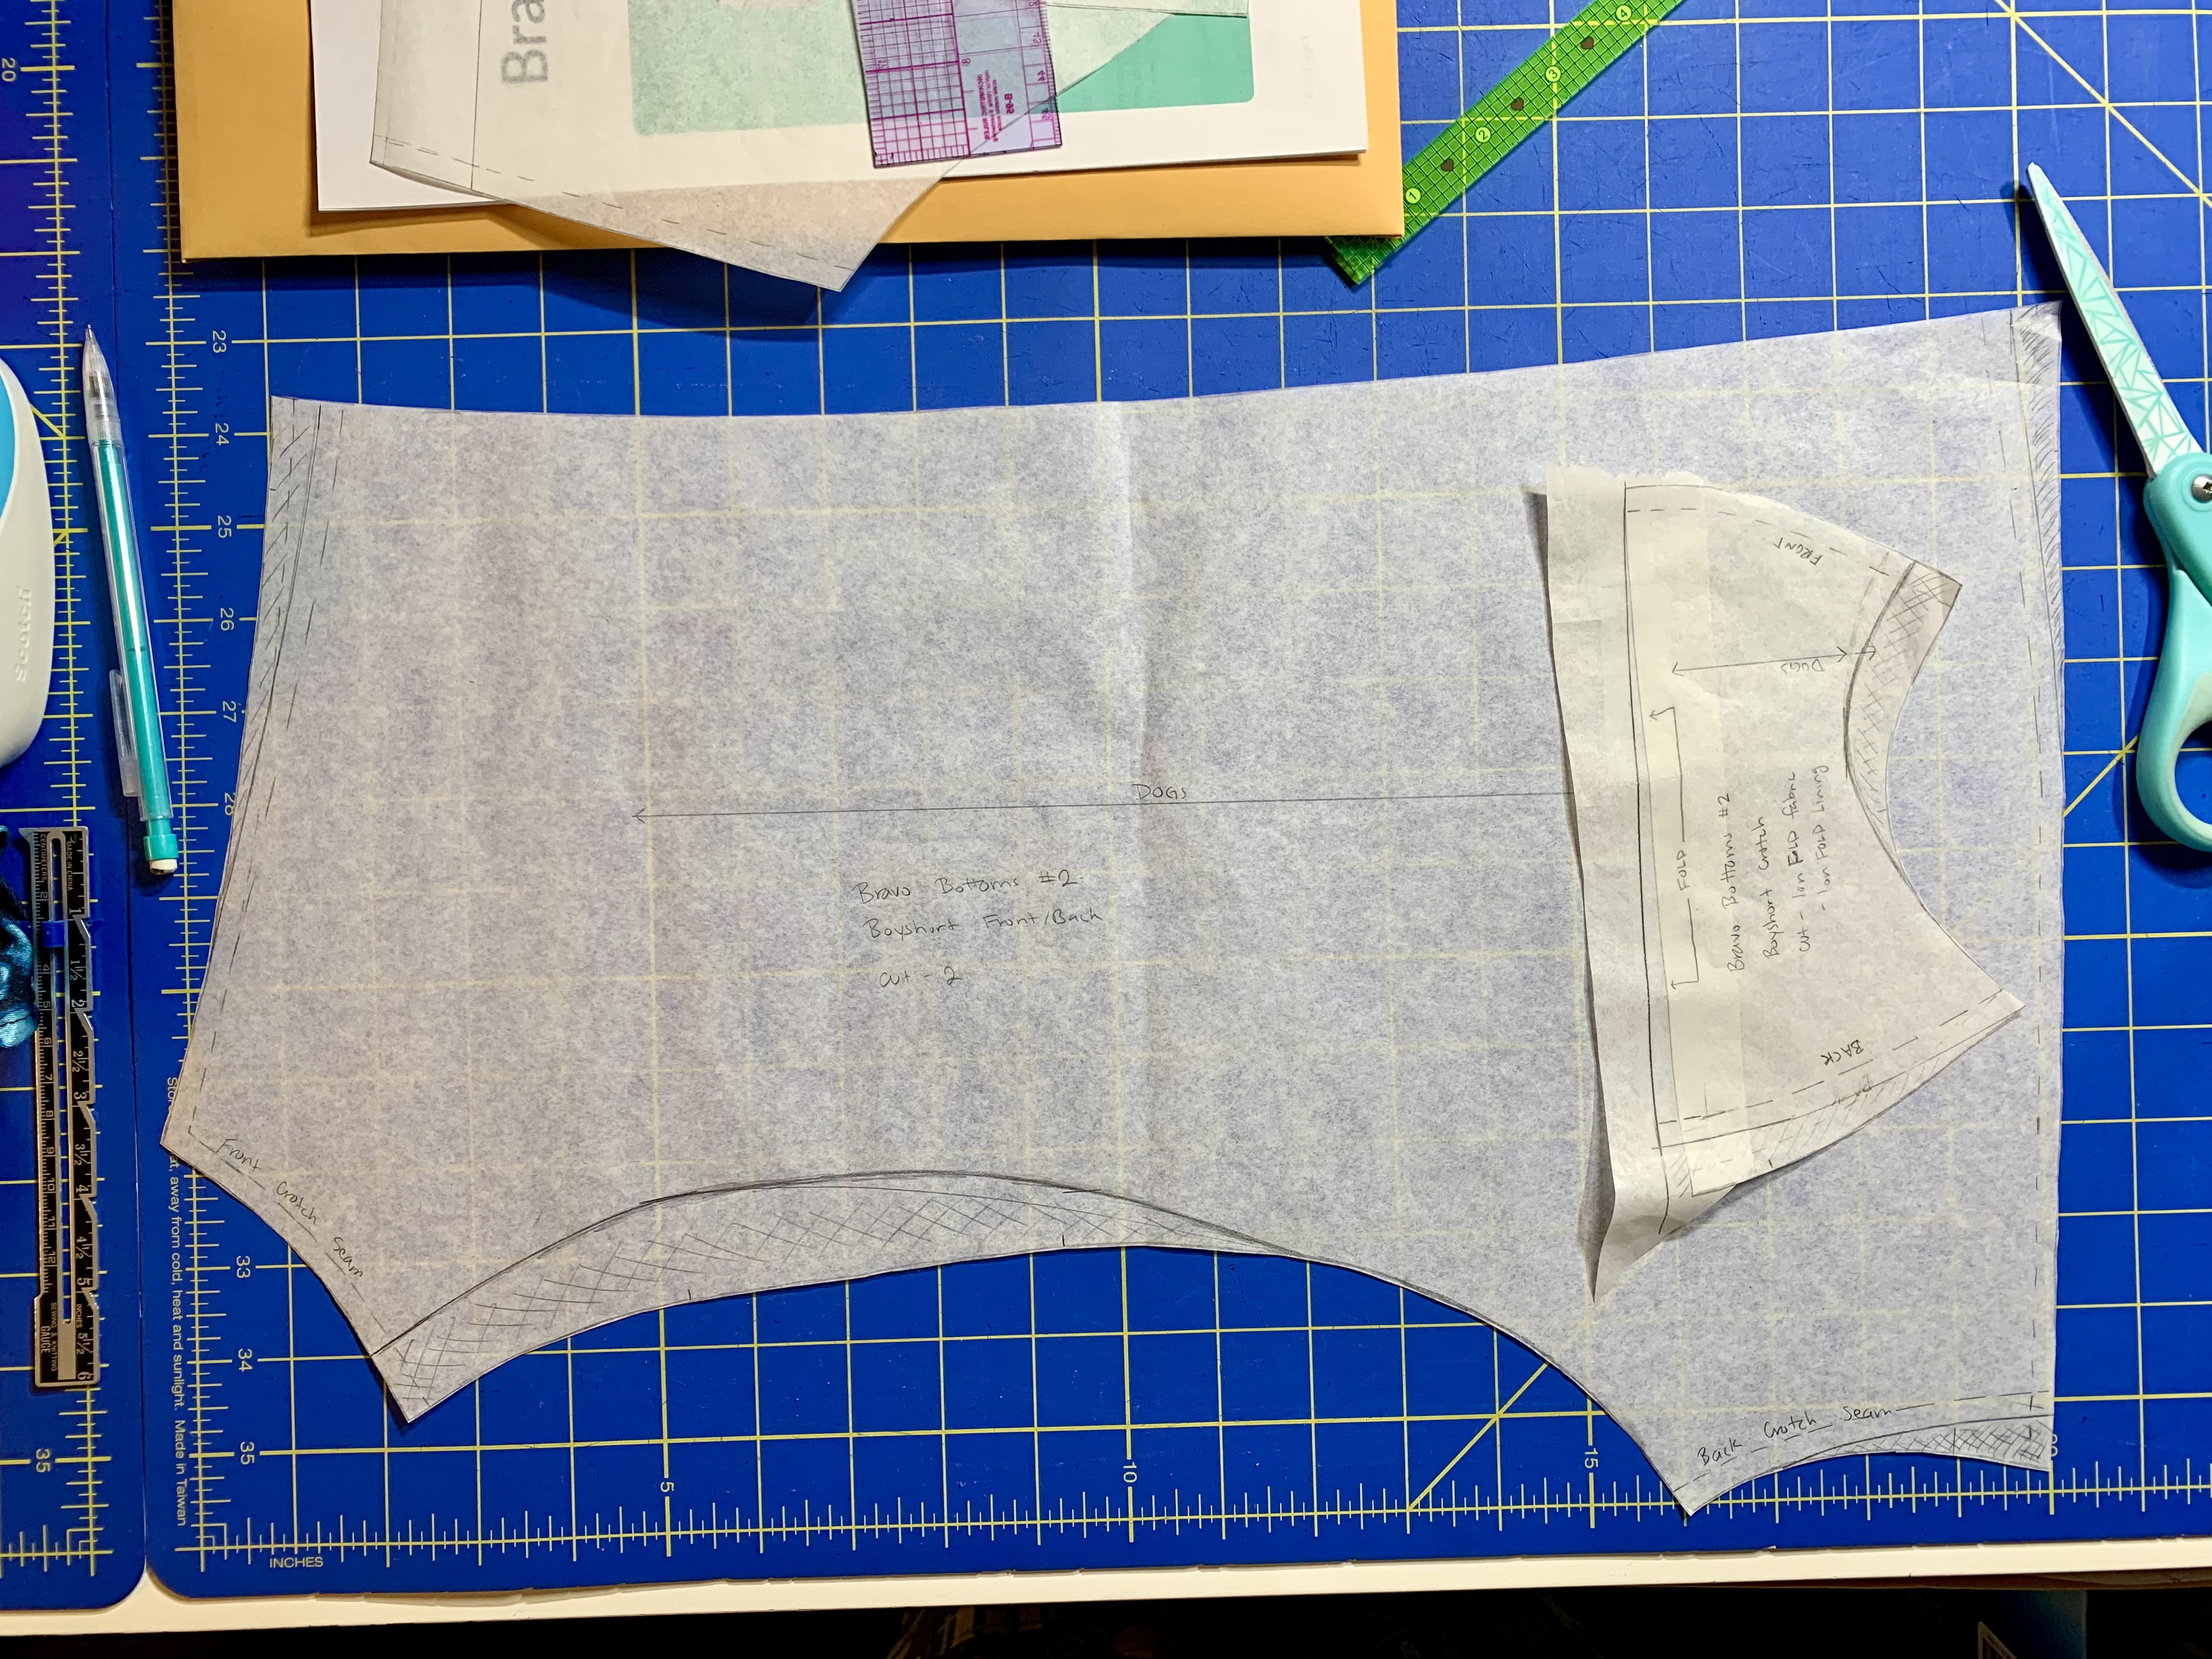
When I did my pattern comparison at this point, the hipster pattern was actually shockingly close to my self-drafted pattern, with the main difference being the gusset length and shaping. The boyshort is still a different shape, but you can see that the front leg allowance is now the same length, and the length at the waistband is also more similar:

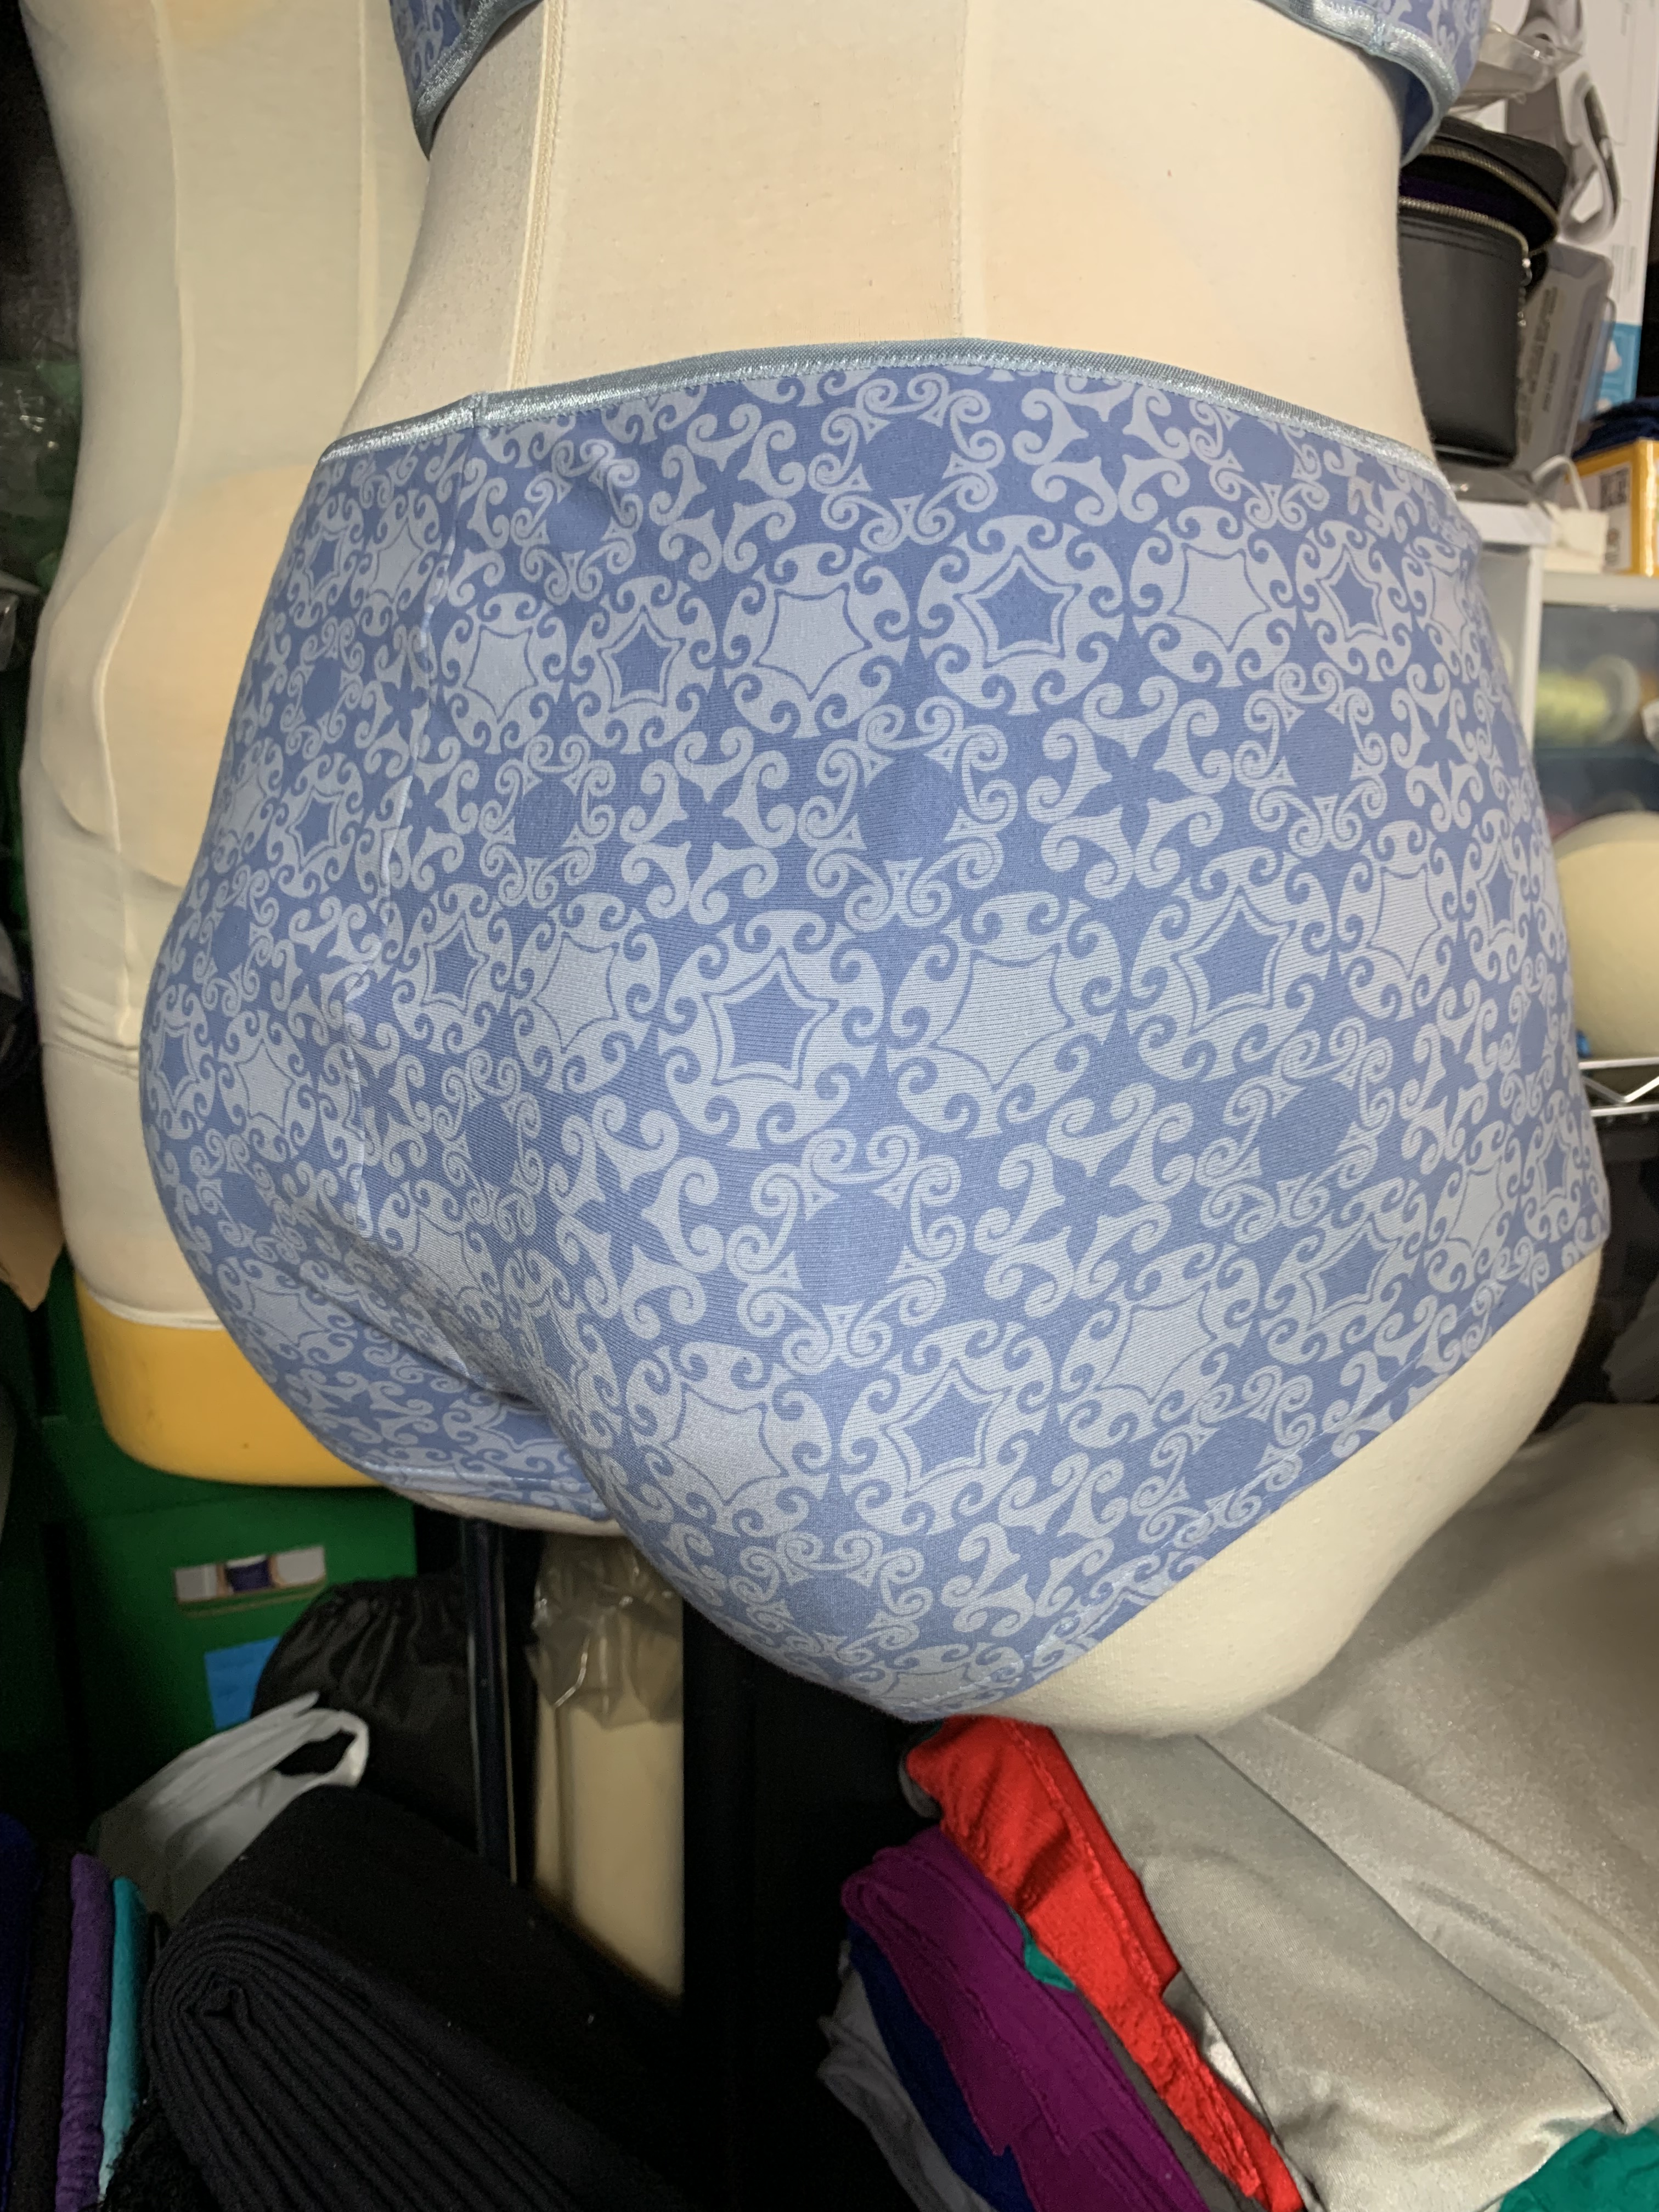
From here I decided to sew up the patterns again, to see if my changes helped fix all of the issues I was experiencing. I didn’t bother with the back ruching on the hipster this time, but I do think the overall fit around the leg line was much better.
Even after this version I found a few more things to tweak. Because there wasn’t any ruching to pull the center back down, it was a bit high, so I took out about 3/4″ off the back height (so it is still 3/4″ higher than the original pattern draft), added an inch of height to the center front, and curved the gusset piece in about 1/4″ inch. Compared to my self-draft it is remarkably similar, with the major difference still being the gusset shape:

For the boyshort, I’m happy to report that my changes have resulted in a very comfortable pattern:


So I think it’s official – I have a new boyshort pattern I actually like! I was skeptical, but I’m really happy I bought this pattern and that I now have some options aside from one one self-drafted pattern.
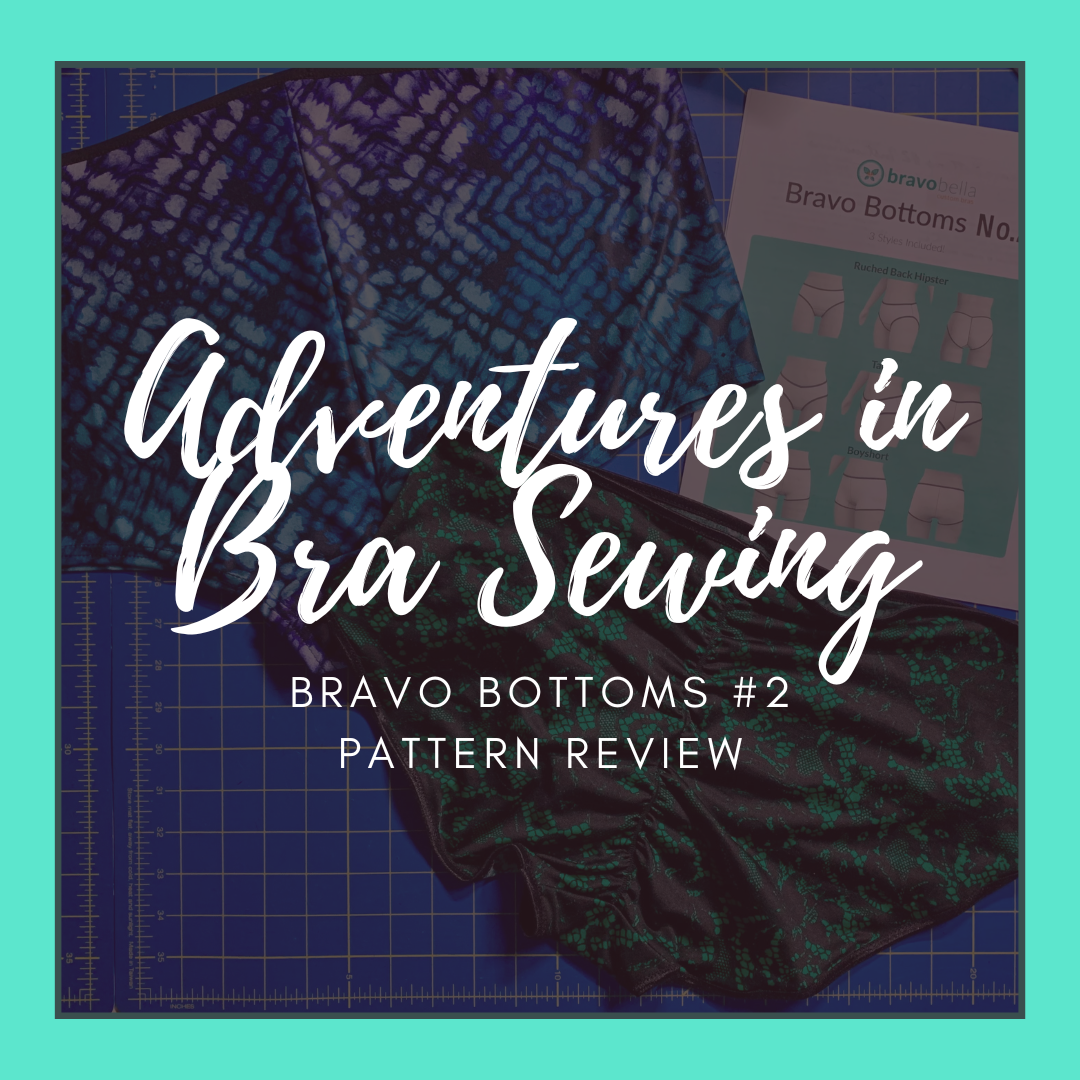
Official Pattern Review
Pattern Description: From the website: “Bravo Bottoms #2 has 3 styles, a boyshort, a tanga with high cut legs and a cheeky bottom and a ruched back hipster.” I bought the pattern for the boyshort, but I made both the boyshort and the ruched back hipster. I have no plans to make the tanga because I don’t like that style of undergarment, but even using two of the three styles is a great value from this pattern.
Pattern Sizing: It comes as one set of sizes XXS-XL, with waist measurements 19.5-37” and hip measurements 29-47”. I used the XL for my versions; I am slightly above the largest hip measurement but if the fabric has enough stretch it still fits well.
Were the instructions easy to follow? Yes, the instructions are streamlined but pretty good. Sewing underwear is pretty straightforward, but I like that the instructions include the closed gusset technique for all of the styles. Some of the information (such as elastic allowances) is included, but it was at the back of the instructions, not the beginning. As an FYI, this pattern assumes you will use fold over elastic or a lace treatment, so it doesn’t include elastic allowances on the hipster legs. It does include a hem allowance for the boyshort.
Did it look like the photo/drawing when you were done with it? Yes! Both the hipster and the boyshort look very much like the pattern image. I will say that I found the hipster to have a much lower waistline than the boyshort when coming directly off the pattern, so I would recommend checking the overall crotch length before sewing to make sure you have enough height at the top of the pattern.
What did you particularly like/dislike about the pattern? I think this pattern is an incredibly good value because it includes three very different styles. I bought the pattern because I had self-drafted boyshorts using the Beverley Johnson Craftsy class, but I really didn’t like the fit and couldn’t figure out how to adjust them. I looked at some RTW boyshorts and saw that they had a separate gusset piece in their construction (the Craftsy class does not). I tried to modify my pattern to add a gusset but got frustrated, so I bought this pattern because I saw it used in a sew along in the 2023 Bra Sewing Bee and it looked like it had a very different shape than the Craftsy draft did. Although I had to make some minor fit changes after my first version, it was a much better starting point than the self-drafted boyshort. I really like the curves in this pattern’s drafting – they help with fit and shaping quite a bit. I also like that all of the sizes come stacked on a single page. I didn’t need to grade between sizes, which is unusual for me, but I’ve come to be really annoyed at patterns that print every size on a different page. I also like that many of the pattern pieces don’t need the PDF print-outs taped together, which really speeds up and streamlines that process. The largest pattern piece is for the boyshort, and it is only 6 pages.
Fabric used: I used some leftover ITY knit and lycra knit for my first versions, with cotton jersey lining for the gusset. For my second versions I used the rest of my lycra knit and some cotton jersey I had leftover from other previous projects.
Pattern alterations or design changes you made: For the ruched back hipsters, I pre-emptively added 1.5” to the top of the waist before making my first version. After testing the fit, I raised the front leg line along a curve and removed up to 1.5”, narrowed the front of the gusset but widened the back of the gusset by 1/2” on the pattern (1” total). After I was done this pattern looked very similar to my self-drafted pattern, with some minor differences in the shape of the gusset and the location of the gusset seams. After making a second version (without the ruching), I removed 3/4″ off the center back, but added 1″ of height to the center front, and curved in the side of the gusset another 1/4″. I think this should give me a really good fit moving forward. For the boyshort, my first version was an XL straight off the pattern, but then I removed 1/2” from both the front and back waist seam (2” reduction total), I raised the front leg hem by up to 1”, narrowed the front of the gusset and widened the back of the gusset, and removed 1” of height from the center of the back gusset seam. This pattern looks pretty different than my self-drafted one because of the shaping, but most of the key points (waist, hip, leg height) are the same, so I think this should fix most of the weird fit issues. I’m really happy with the fit of the second version. I could maybe add a smidge more width across the back gusset, but I’m really happy with the alterations after the second version.
Would you sew this again? Would you recommend it to others? Yes and yes! I’ve sewn a lot of underwear from my self-drafted pattern over the past year, but I was feeling a bit stuck having only one style that fit really well. Although I don’t think it will become my default, I am very happy to have the boyshort as an option now. I even think that I prefer some of the shaping on the back leg of the hipster, so I can see myself using that as an alternative to my self-drafted pattern going forward, even if I don’t use the back-ruching feature every time. I would definitely recommend this pattern – it is a great value to get three different styles in one package, and even though everyone will probably need to make a few fitting adjustments to suit their own body shape, this pattern is a good starting point. I especially recommend it if you are looking for a boyshort style because it has a separate gusset attachment and I think that helps a lot getting underwear to fit.
Conclusion: Overall I am really happy that I decided to buy this pattern and test it out. It’s going to be hard to replace my self-drafted undergarments as a new TNT, but this pattern might just do that. Even if I had only used the boyshort pattern I think it would have been a good purchase because it saved me a lot of time and trials to try and get my self-drafted pattern into a wearable version. I’m looking forward to having more variety in my underwear drawer!
Is this garment a “Triumph of Individual Style”? Not yet, but it is going to give me a lot more options moving forward. It’s maybe not a triumph of style, but it is a triumph of fit!
Even though this is a fairly simple pattern, it has taken me a long time to get this post out. It probably doesn’t seem like it because I’ve been scheduling and timing out other blog posts in the interim, but it took me several weeks between the first and second versions of this pattern. My family had been recovering from COVID, and while I generally had a mild case (very minimal flu/cold symptoms and testing negative by the time we had ordered more tests for me to take one), the exhaustion has just lingered. Everything has been exhausting and it seems like I keep falling farther and farther behind on some things. Even though I’ve got several projects planned out, after finishing the foam bra project I just couldn’t muster the energy to do anything with any level of complexity right away. Sewing something quick and easy was just what I needed, so I was happy that I decided to add “get a fitting boyshort pattern” to my list of sewing to-dos when I did. Happily, I feel like I’m just starting to come out of the foggy exhausted state of things. The rest of life is about to start getting busy again, but I’m hoping that now that I’m getting more energy back I’ll be able to get caught up on everything I’m behind on and still be sewing a bit in my spare time. Especially because I’m overflowing with project ideas and because I am planning to do some of the sew-alongs with the Bra Bee this year, including another Sahaara and hopefully fitting bands for some new patterns I want to test. With any luck I’ll be posting about more sewing adventures soon!

Boyshorts have no elastic at the bottom of the leg, right? Do you find they stay in place without that?
LikeLike
Boyshorts have no elastic along the leg, right? Do you find they stay in place without it?
LikeLike
They stay in place pretty well, but the do ride up a little in the front. I raised the height of the front leg between the first and second version and that helped a lot to keep everything in place.
LikeLike
Grr, WordPress has stopped sending me updates about new posts so I’m only now catching up. I’ve found underpants to be the hardest garment to fit both in RTW and in home sewing, and boyshorts are especially hit-or-miss because they have to fit the legs and the gusset area and the waist. I’ve bought so many duds, and my own sewing from self-drafted and purchased patterns has been no better. I also find it really difficult to dial in elastics somehow, which, as you’ve noted in the bra post, are a major factor in fit. I think it’s going to require a “fitting journey”, possibly a more intense one than anything I’ve done for bras.
LikeLiked by 1 person