I think this is the part of writing this blog where I tap the mic to see if it’s still on and blow heartily to clear away the dust and cobwebs. It’s been and continues to be a crazy year (for so many reasons), and I must admit I have largely let sewing fall by the wayside. But I’ve started doing some early morning sewing sessions, and it’s amazing how much you can get done with slow and steady progress. To be fair, I started working on this project back in May with the pattern fitting, and somewhere over the summer I managed to cut it out, but I haven’t really been able to get it sewn until now. The bottoms were completed during my one quick sewing session in September, but I did most of the sewing on the bra this month.

The impetus for this project actually goes way back to March, when I taught a class about analyzing patterns for projection at this year’s Bra Sewing Bee. During that class, I identified that the LilyPAD patterns would probably be really good fits for me, especially now that I’ve really dialed in my measurements and found a good starting size. I’ve made a few LilyPAD patterns before (the Mysa, Lusamine, and Marei), but when I made the Lusamine I was doing some pretty substantial adjustments because I was starting from the wrong size pack. So I decided to do a bit of a deep dive into the LilyPAD patterns and test out the style and fit of what I’m going to call the “Basic L’s” – the Lamina, Labellum, Lusamine, Lazulite, and the newest pattern, the Liora. These patterns are all quite different design-wise, but they are “basic” in that they are all variations on a fairly standard underwire bra pattern, as opposed to some of the more unique styles like the Cambia or Akeru. Even though I’ve already made the Lusamine, I’m starting over from the correct size pack, so all of these projects kind of feel like “new” patterns for me. I’ve already done basic fit testing on everything except the Liora, but finished fit testing right before I got super busy over the summer, and have really only found odd moments to work on this the past few months.
In terms of picking where to start when coming back to this experiment, I’d like to say there was some strategy to it, but, honestly, when I was picking out kits to use with the different patterns as hopefully wearable first drafts, the Lamina was the one I paired with the most neutral kit, and I really need to add more close-to-my-skin-tone colored bras to my wardrobe. I’ve been needing to start working on updating or replacing some of the early bras I’ve made, which I’ve been wearing regularly for several years at this point, and have really started to notice where some fit issues exist in my early projects. I had hoped to finish this project last month, but better late than never, and it’s not like I won’t still have plenty of use for this project. So let’s take a look at the LilyPAD Lamina.
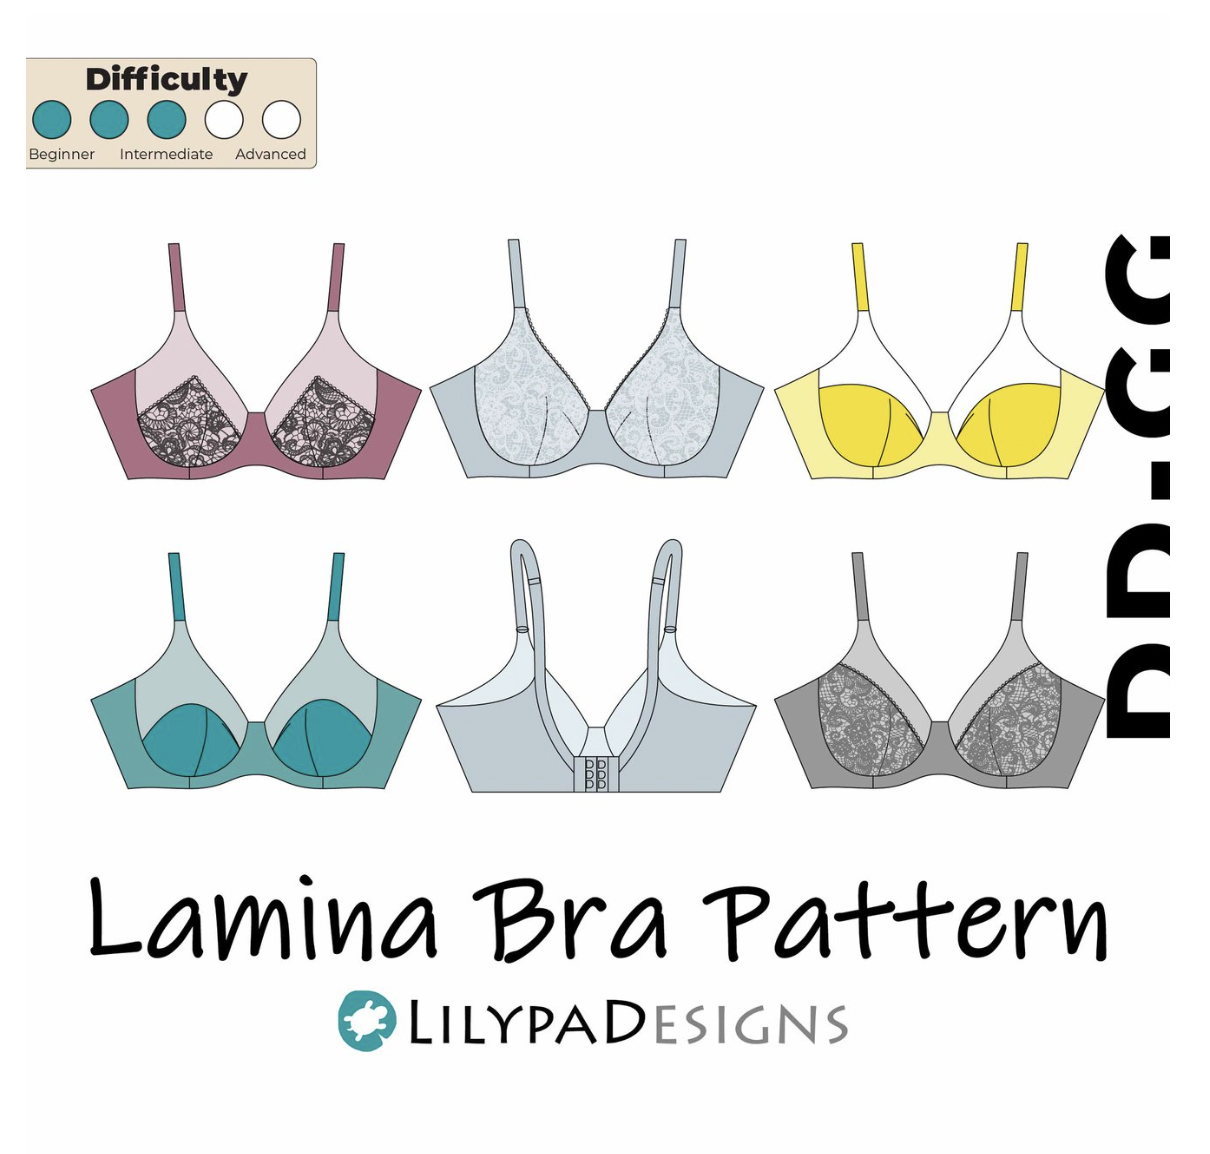
The Lamina is a one-piece cup pattern, which is really unique for larger cup sizes, because it’s difficult to get the shaping without the additional seams. I think the B,Wear Gunsan is the only other pattern that I know of with a similar style and size range, though there are many other brands that offer something similar for smaller sizes. During the Bee, one of the sew along projects was for the Chelsea Bra, which I purchased hoping I could fit in the largest size, but realized it was much too small and would never actually work for me. So I was really excited to try the Lamina as an alternative.
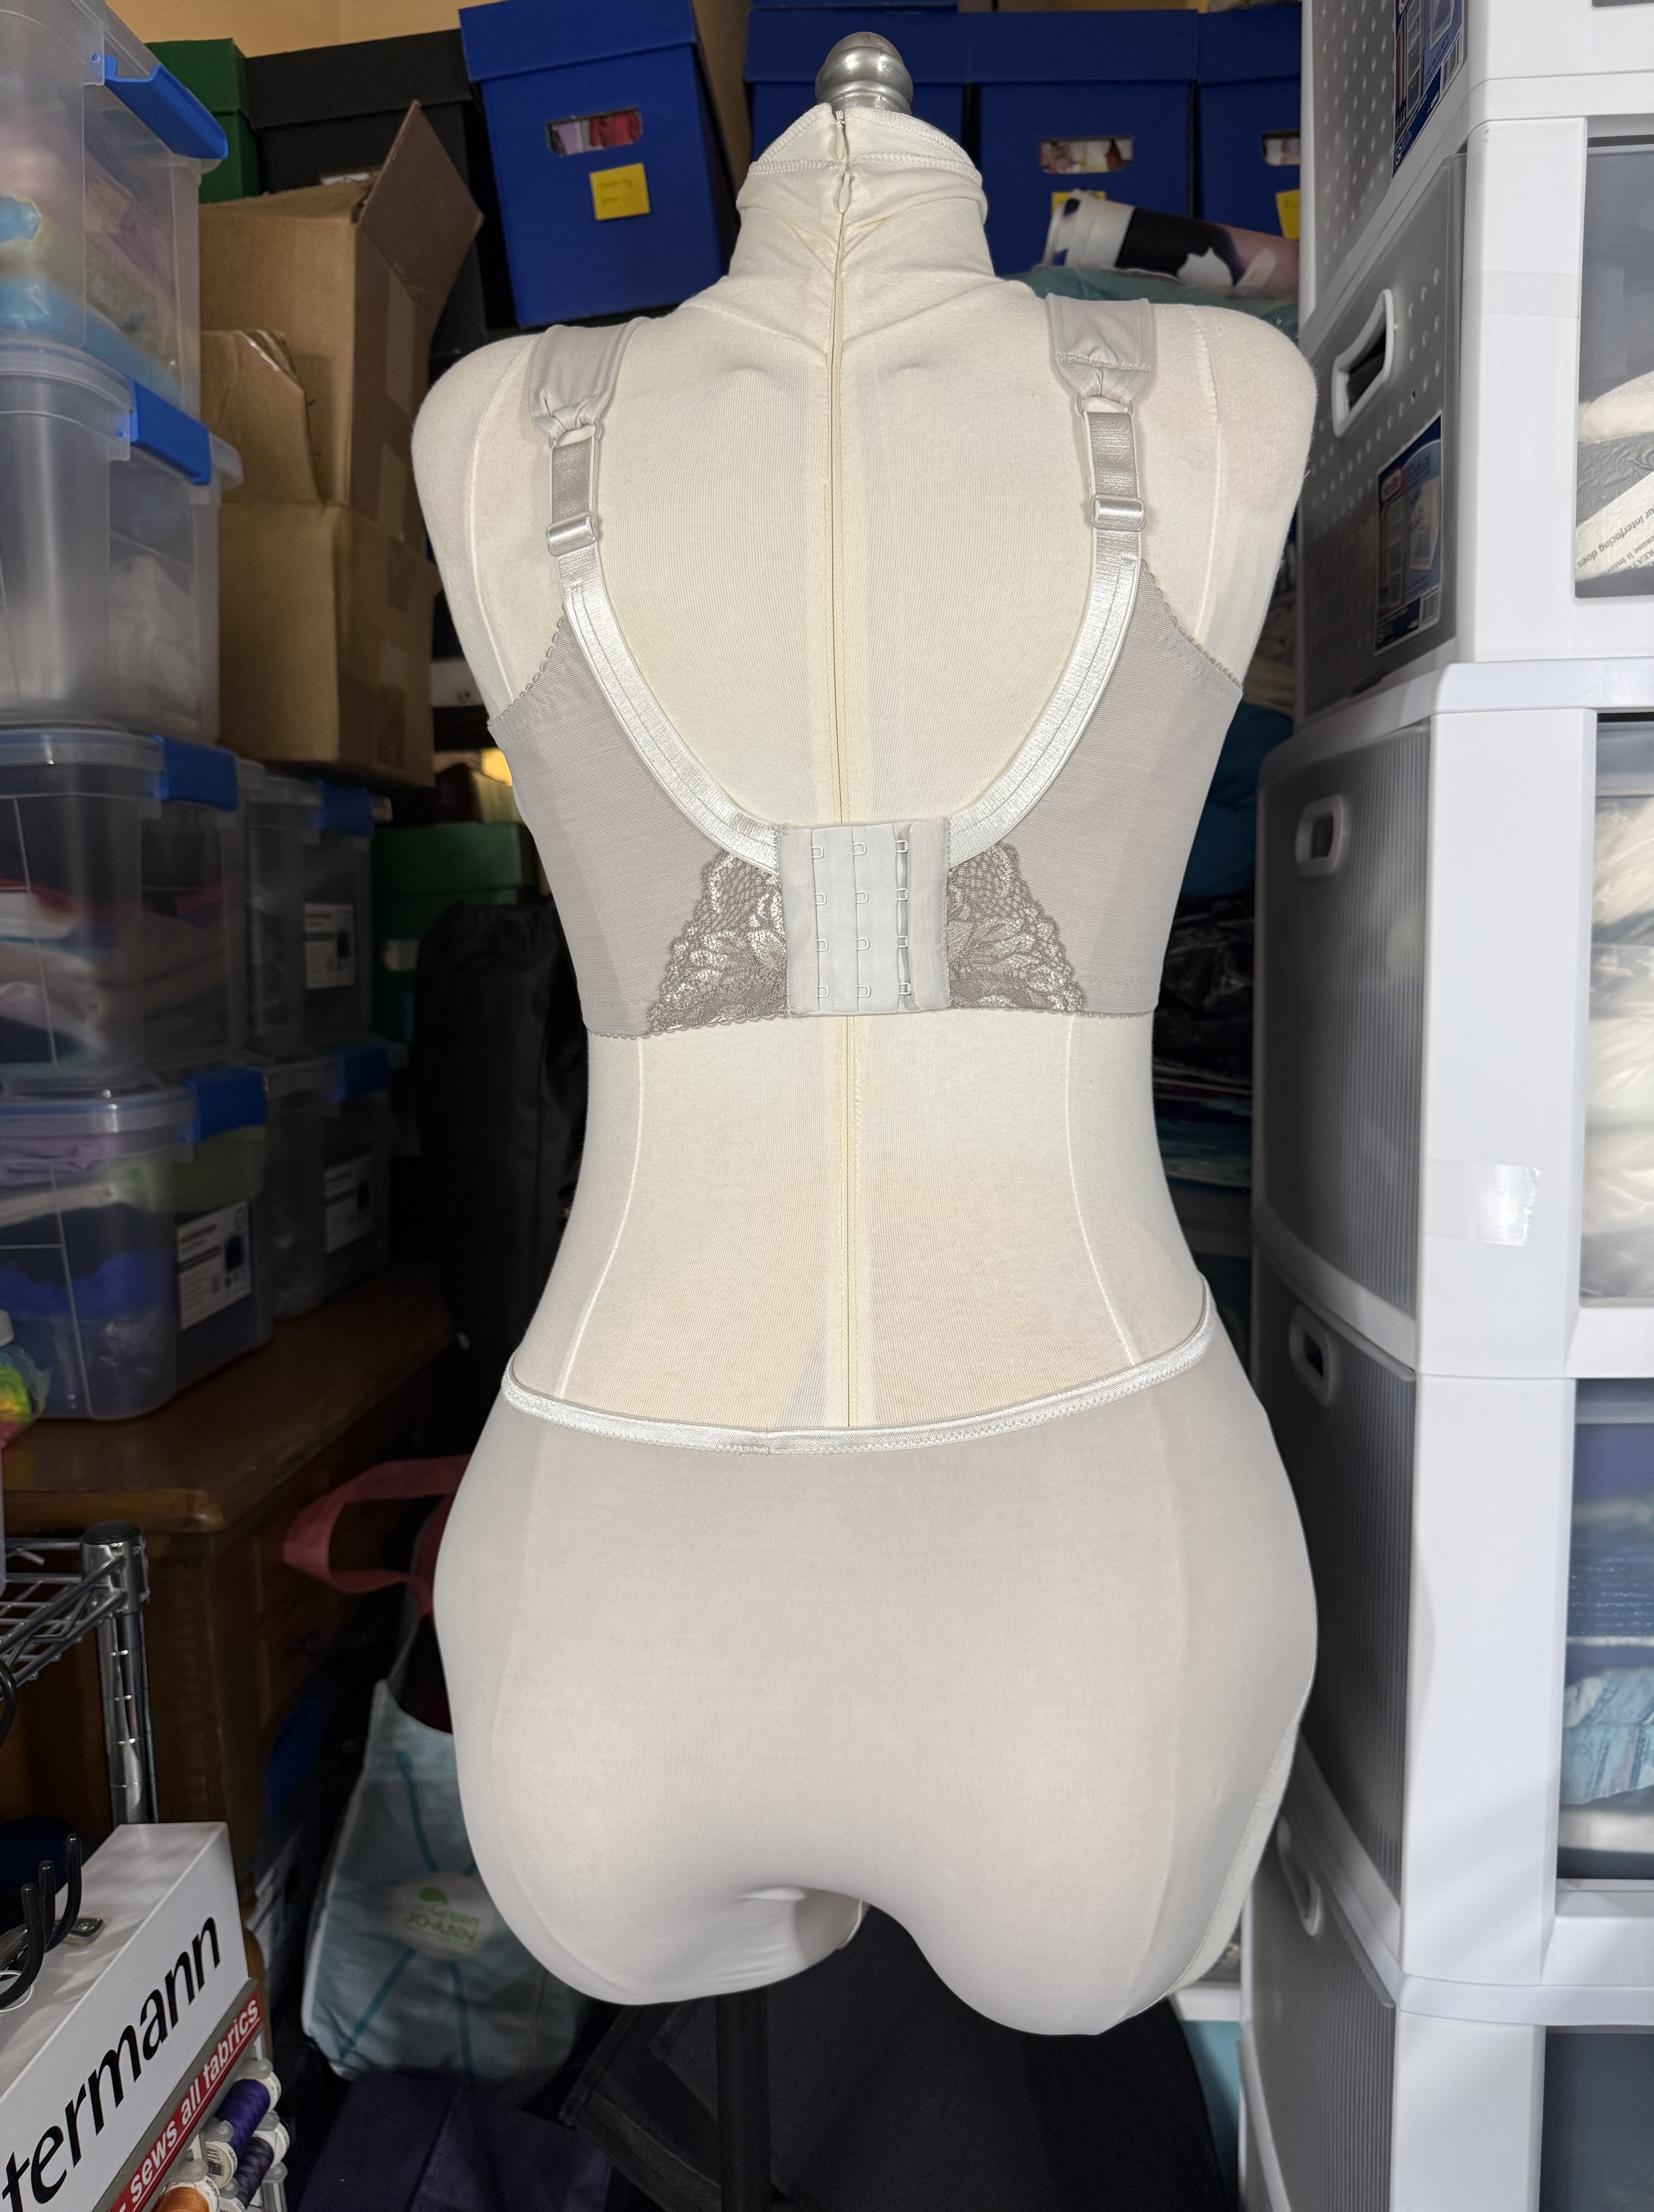
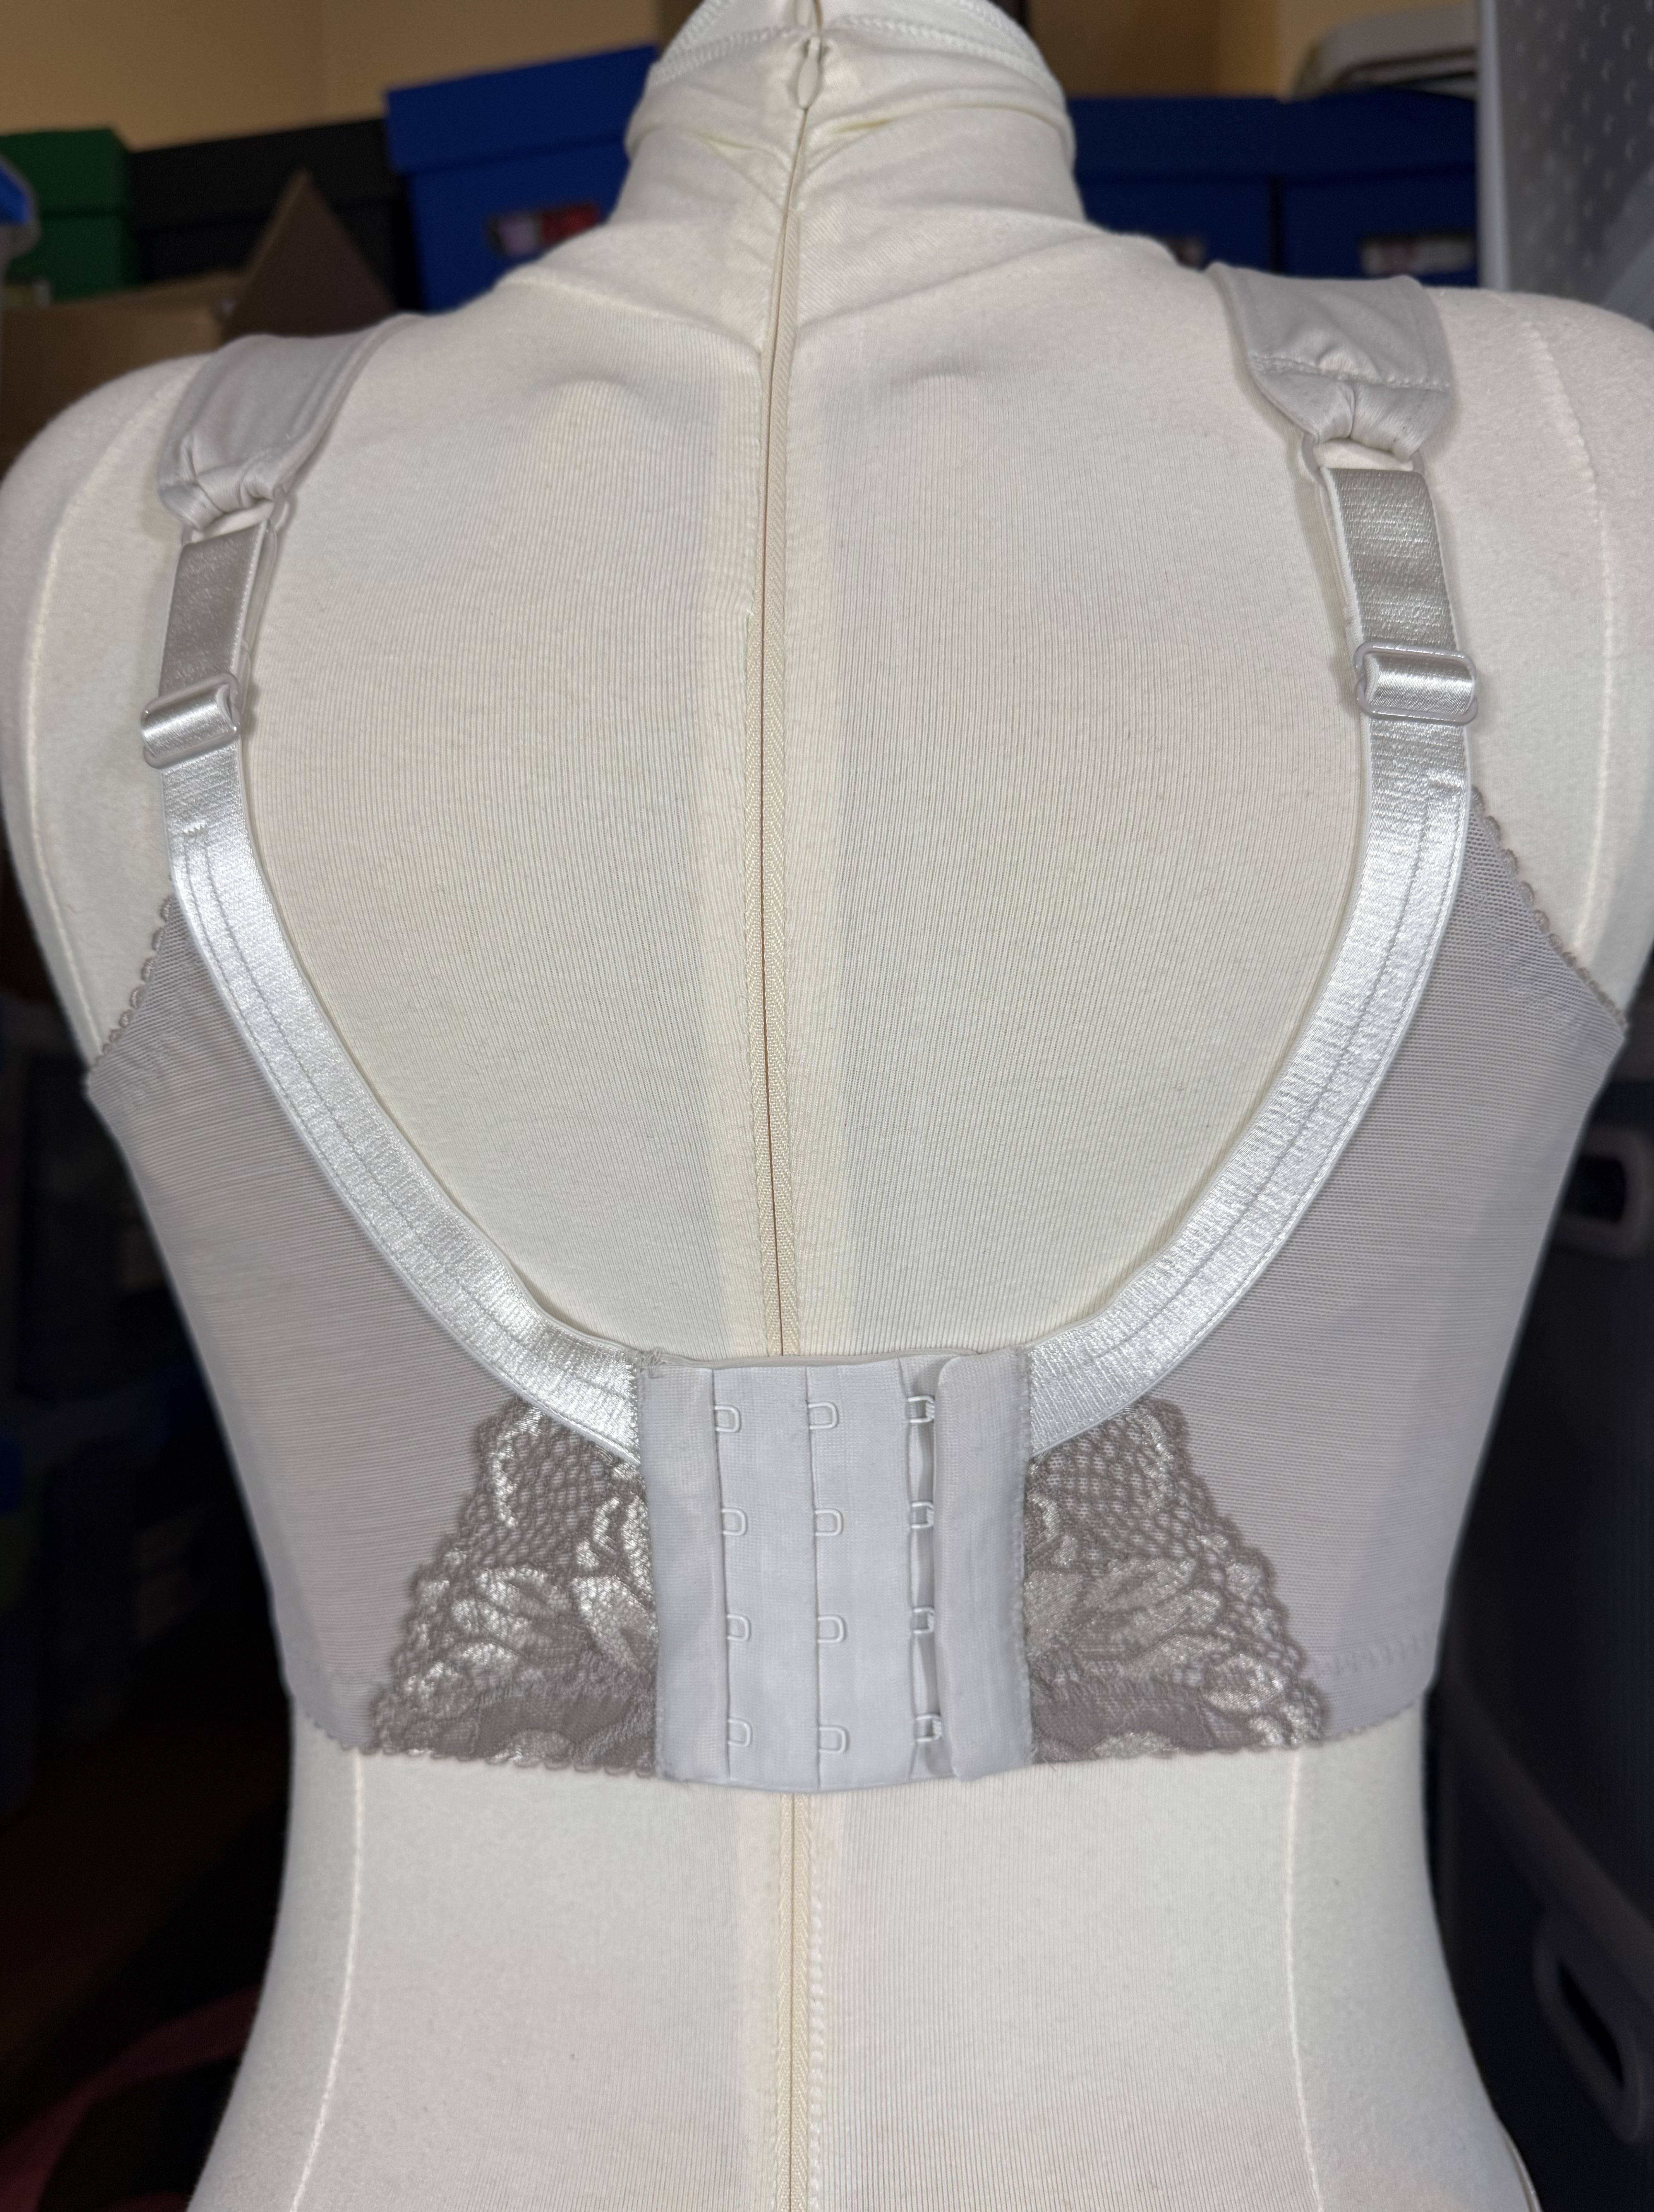
Adding to that excitement was the way this pattern fit, even during the first fit test. Usually I have quite a few adjustments I need to make, especially around the underarm edge of the cups, which tend to gap on me quite a bit. However, with the Lamina, I actually felt like I could take a gamble and make it almost directly as drafted in the pattern. Wild, right? Especially considering how many posts I’ve written over the past several years detailing my challenges with finding the perfect fit. I will admit I did have to go back to the LilyPAD website several times and did quite a bit of inspection into how the patterns were fitting the models because the center gore height seemed quite low and the neckline seemed quite wide, but it actually looked about the same on me as on the fit models. Once I was convinced it was sitting in the right spot and was indeed supposed to be so low in the front, I decided to just go for it and proceeded with the cutting and sewing of the project, with only very minor alterations to the side and back band (I removed 3/8″ from the lower band at the side because I was getting wrinkling there, and I changed the back to accommodate a 4×3 hook and eye).
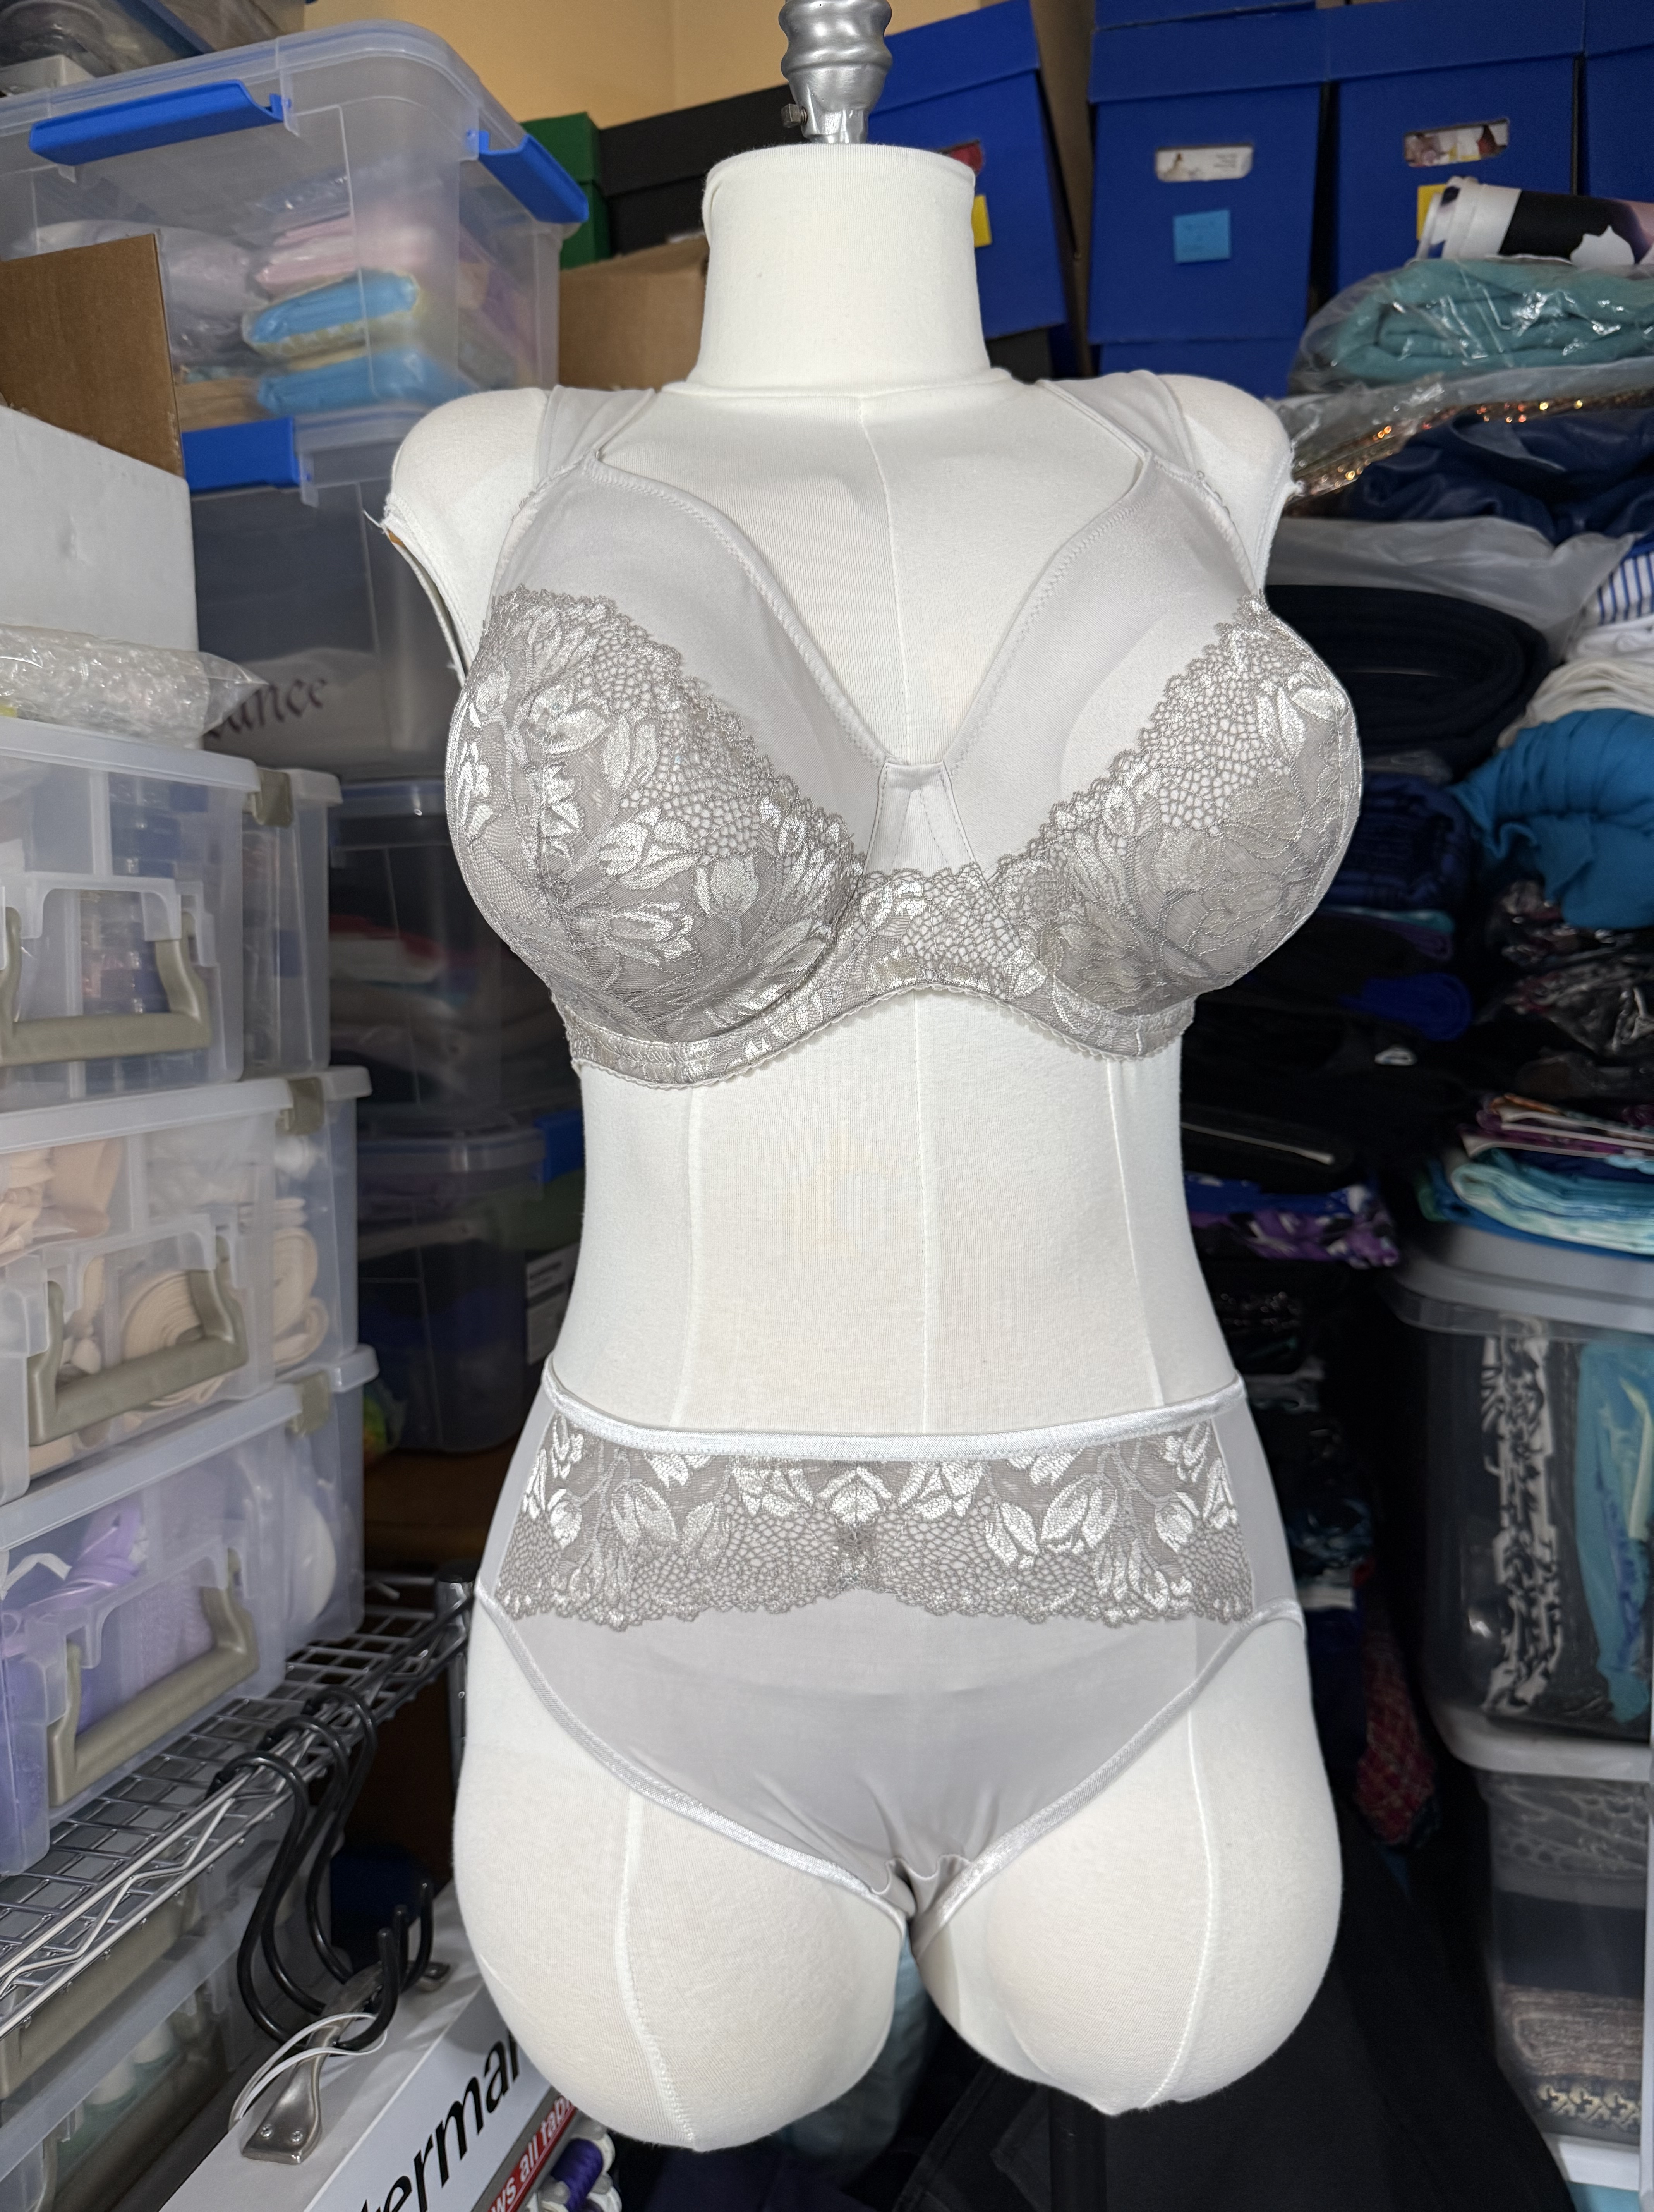
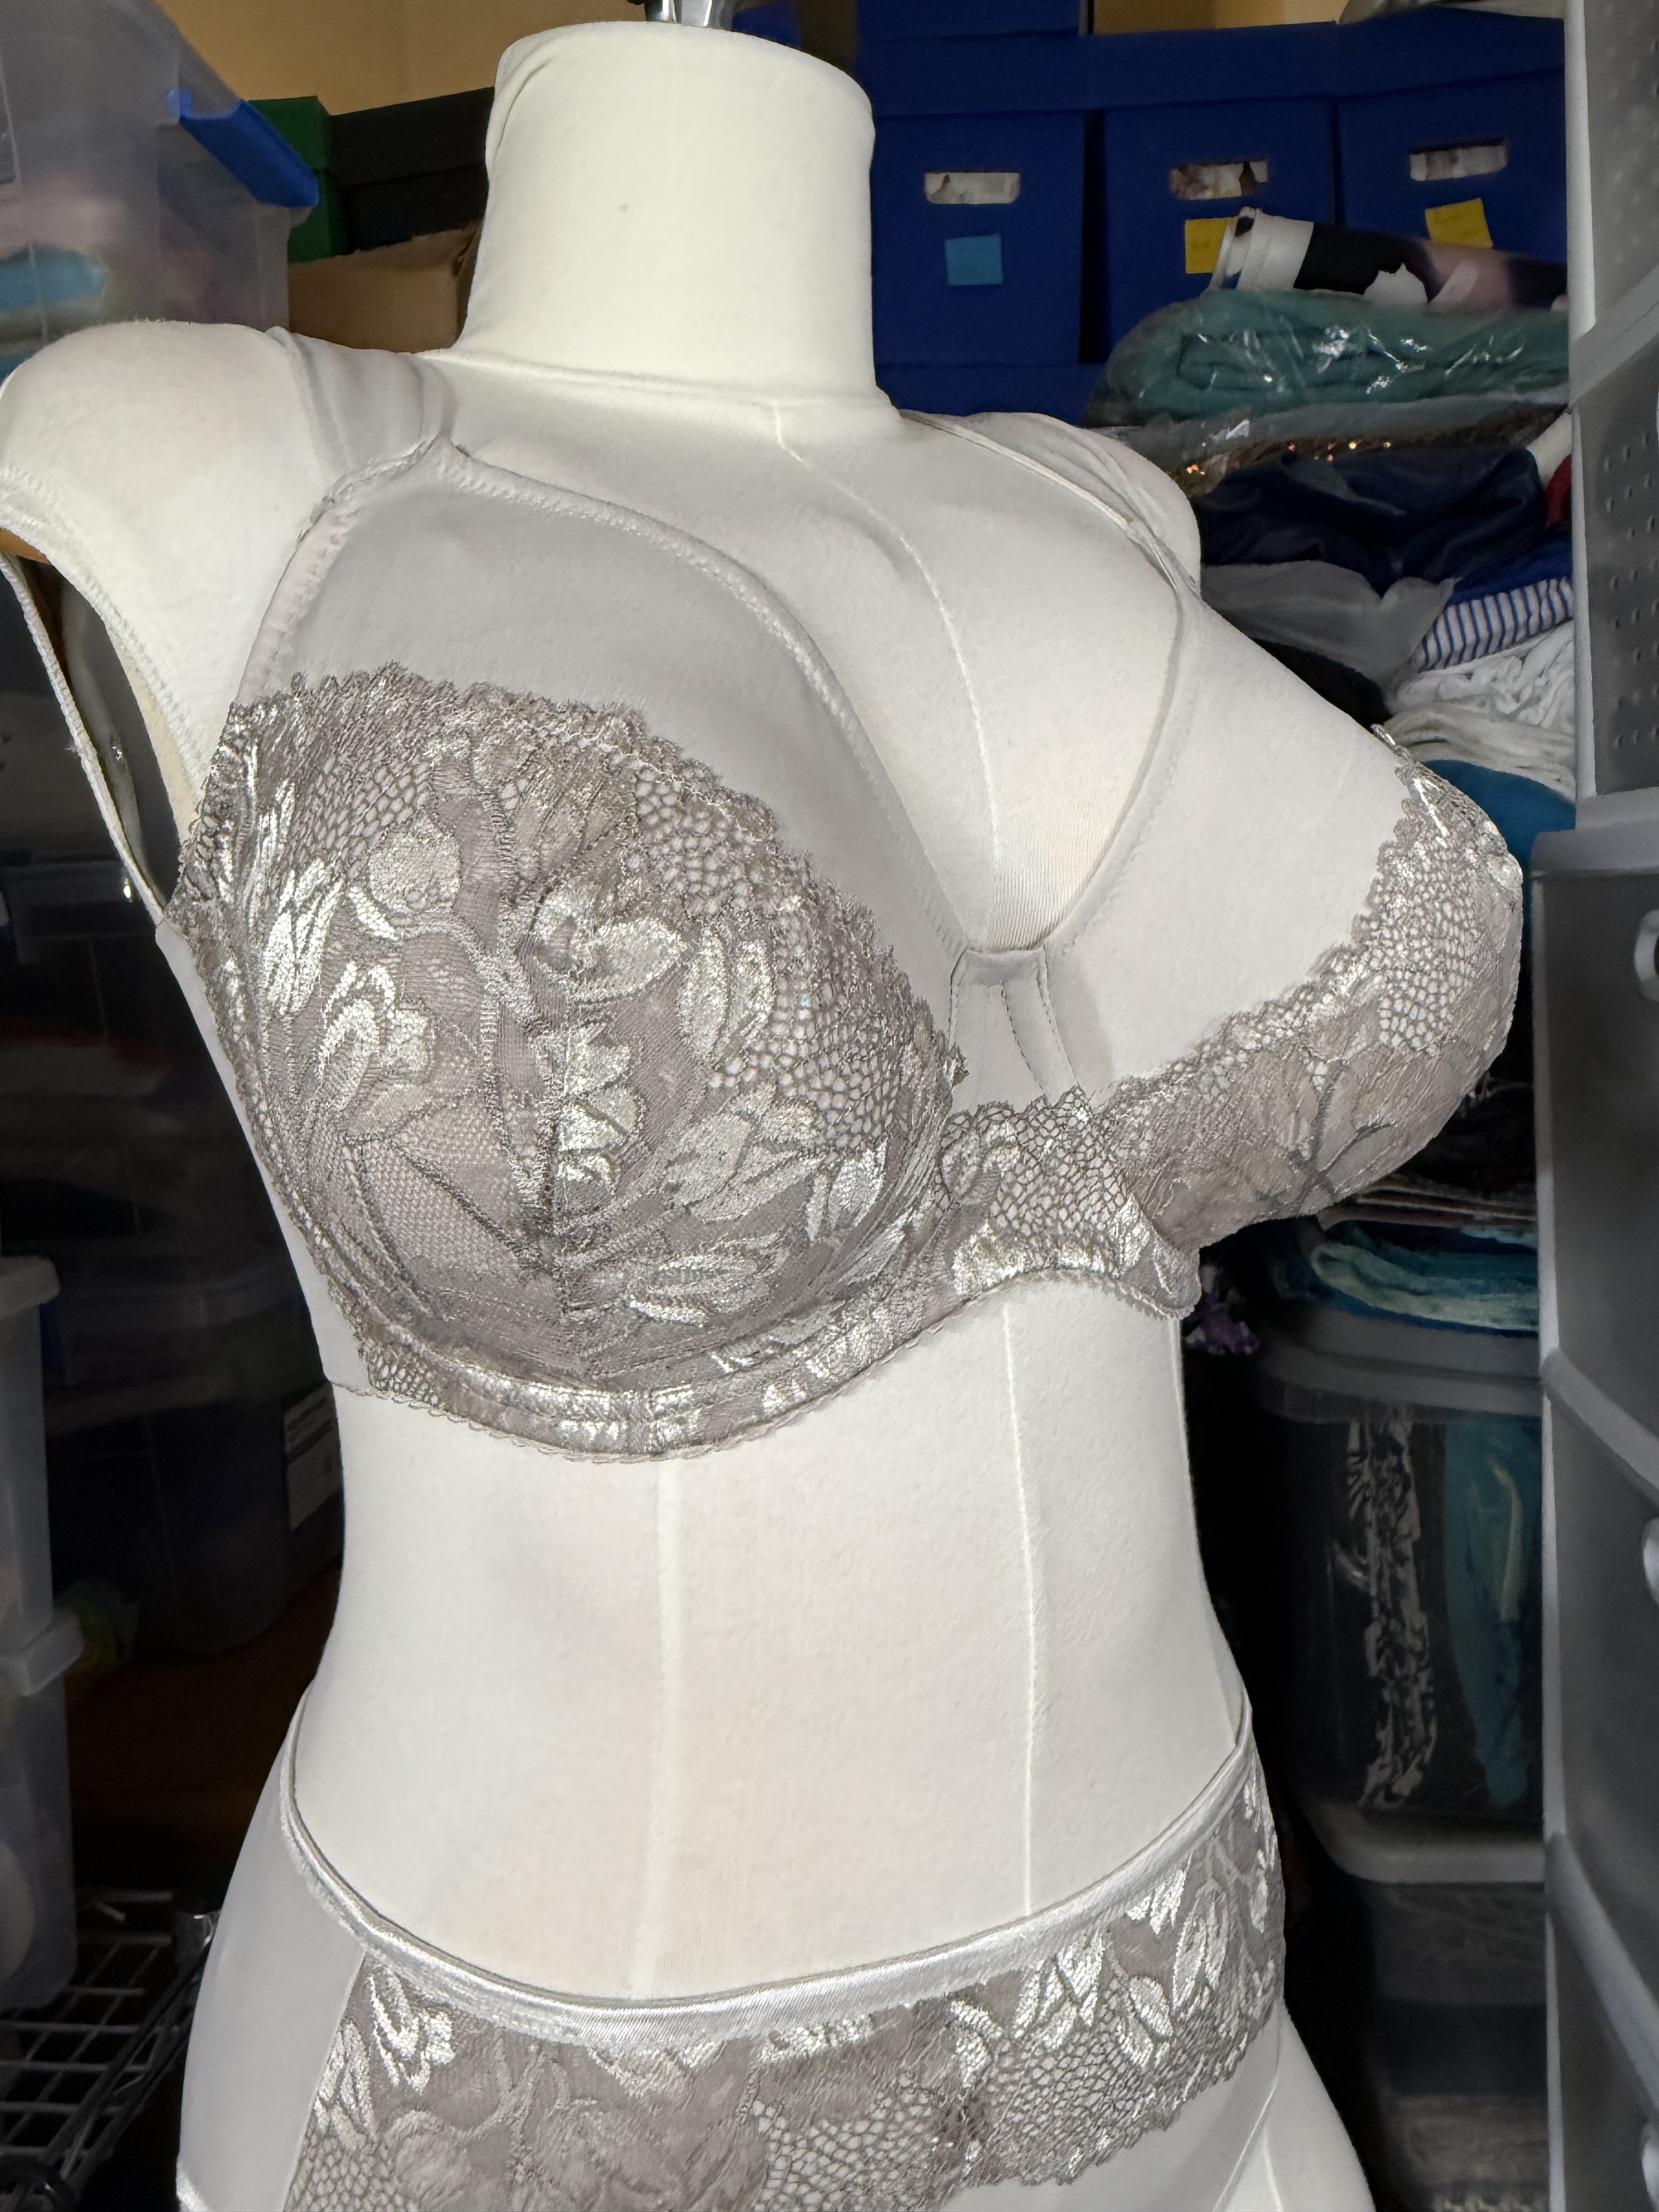
Of course, the cutting and sewing for this project took me all summer because I barely did any sewing, but actually this was a very fast project to sew, even with me finding every possible location to add more of the lace that came with the kit. I used the Bra Builders Silver Garden kit for this project; I think it was a Club Member exclusive and is no longer listed on their website. It was a really nice wide stretch lace, and I had enough to make not one but two matching bottoms to go with the Lamina. In terms of the optional pieces included with the pattern, I considered making a full lace cup but I wanted to test out one of the overlay designs, so I used the diagonal overlay and also included the optional internal slings for added support. Since the start of the year I’ve fully moved away from using sheer cup lining for anything other than stabilizing the front of the band, and I think it has actually helped the cup fit and shaping a lot, but it did make me interested in including other options for additional support in the cups.
Overall though it was a pretty straightforward project. I added to the complexity just a bit by putting the lace almost anywhere it could go (technically, since it’s a stretch lace I could have made the whole band out of it, but I was afraid I wouldn’t have enough so I went with more decorative positioning instead). For the bottoms I used my Craftsy self-drafted pattern, which is my go-to TNT when I just want something that works. Since the lace was that perfect level of firm stretchiness I wanted to repeat a technique I used a few years ago, which uses a lot of lace but not a lot of the other materials, so ultimately meant I had enough materials to make two versions of the bottom to go with the Bra. Here is set #1, which is the more standard brief with minimal lace detail:
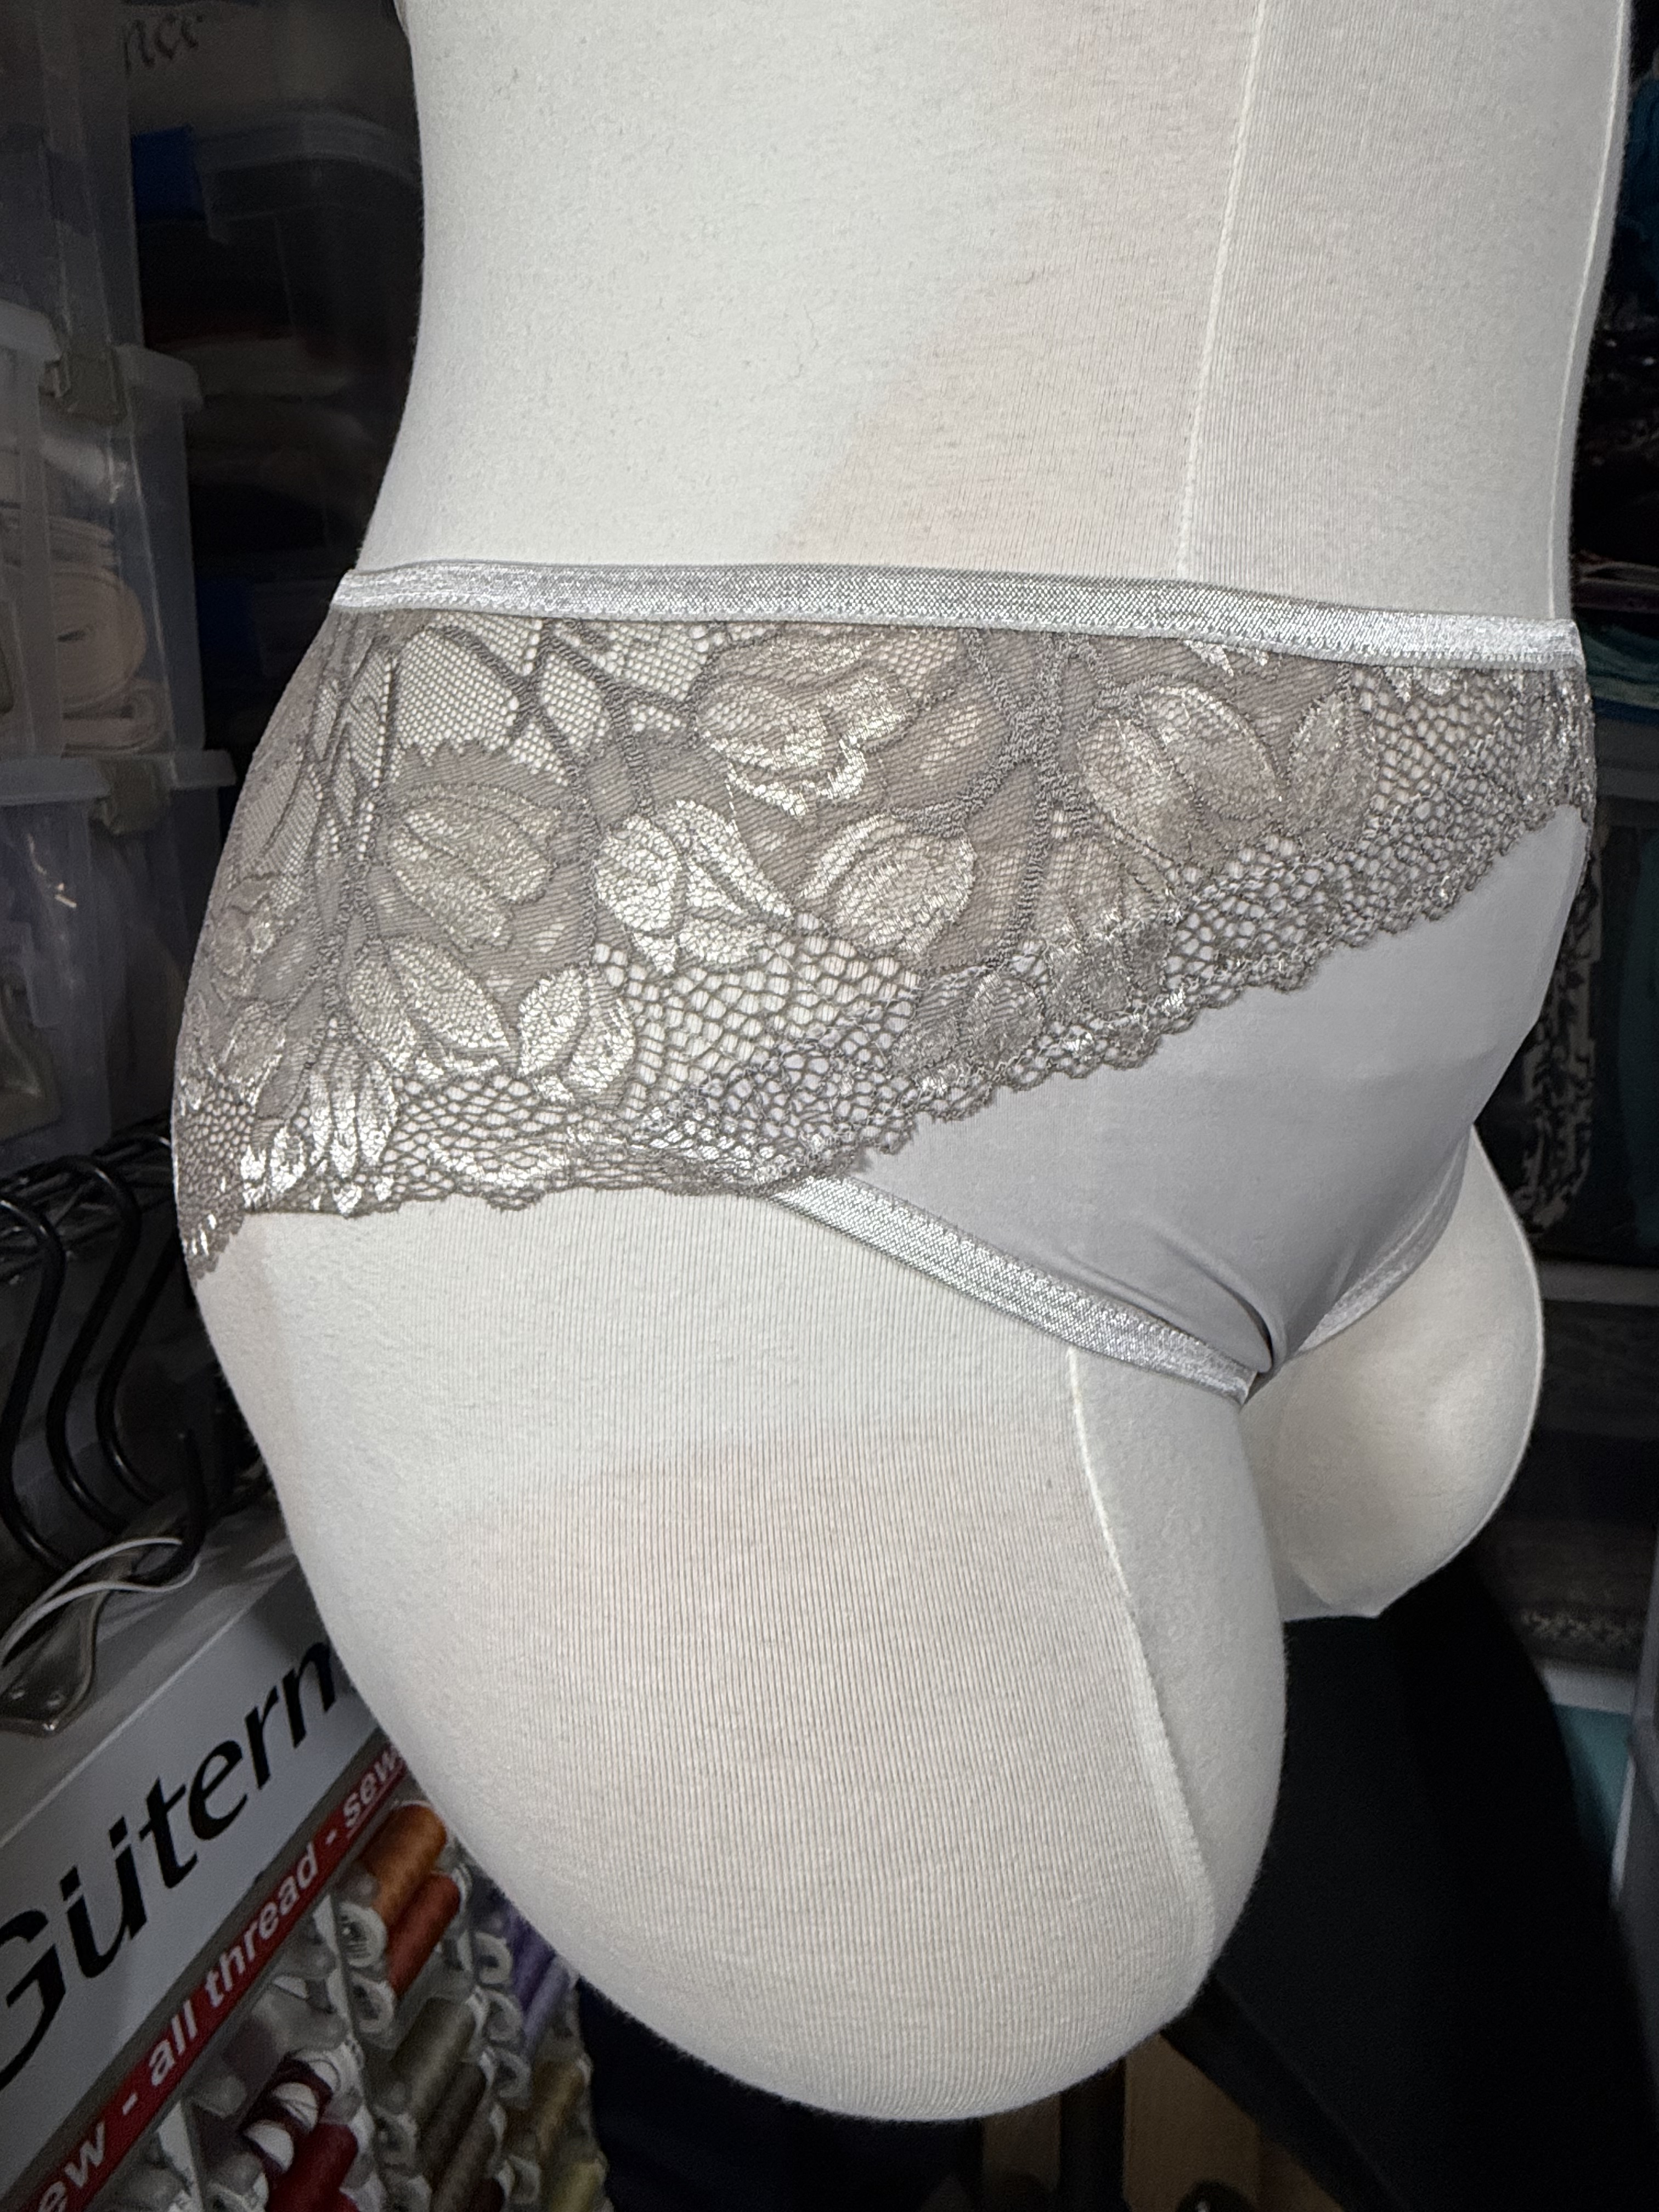
And here is set #2, which is the very lacy bottom:
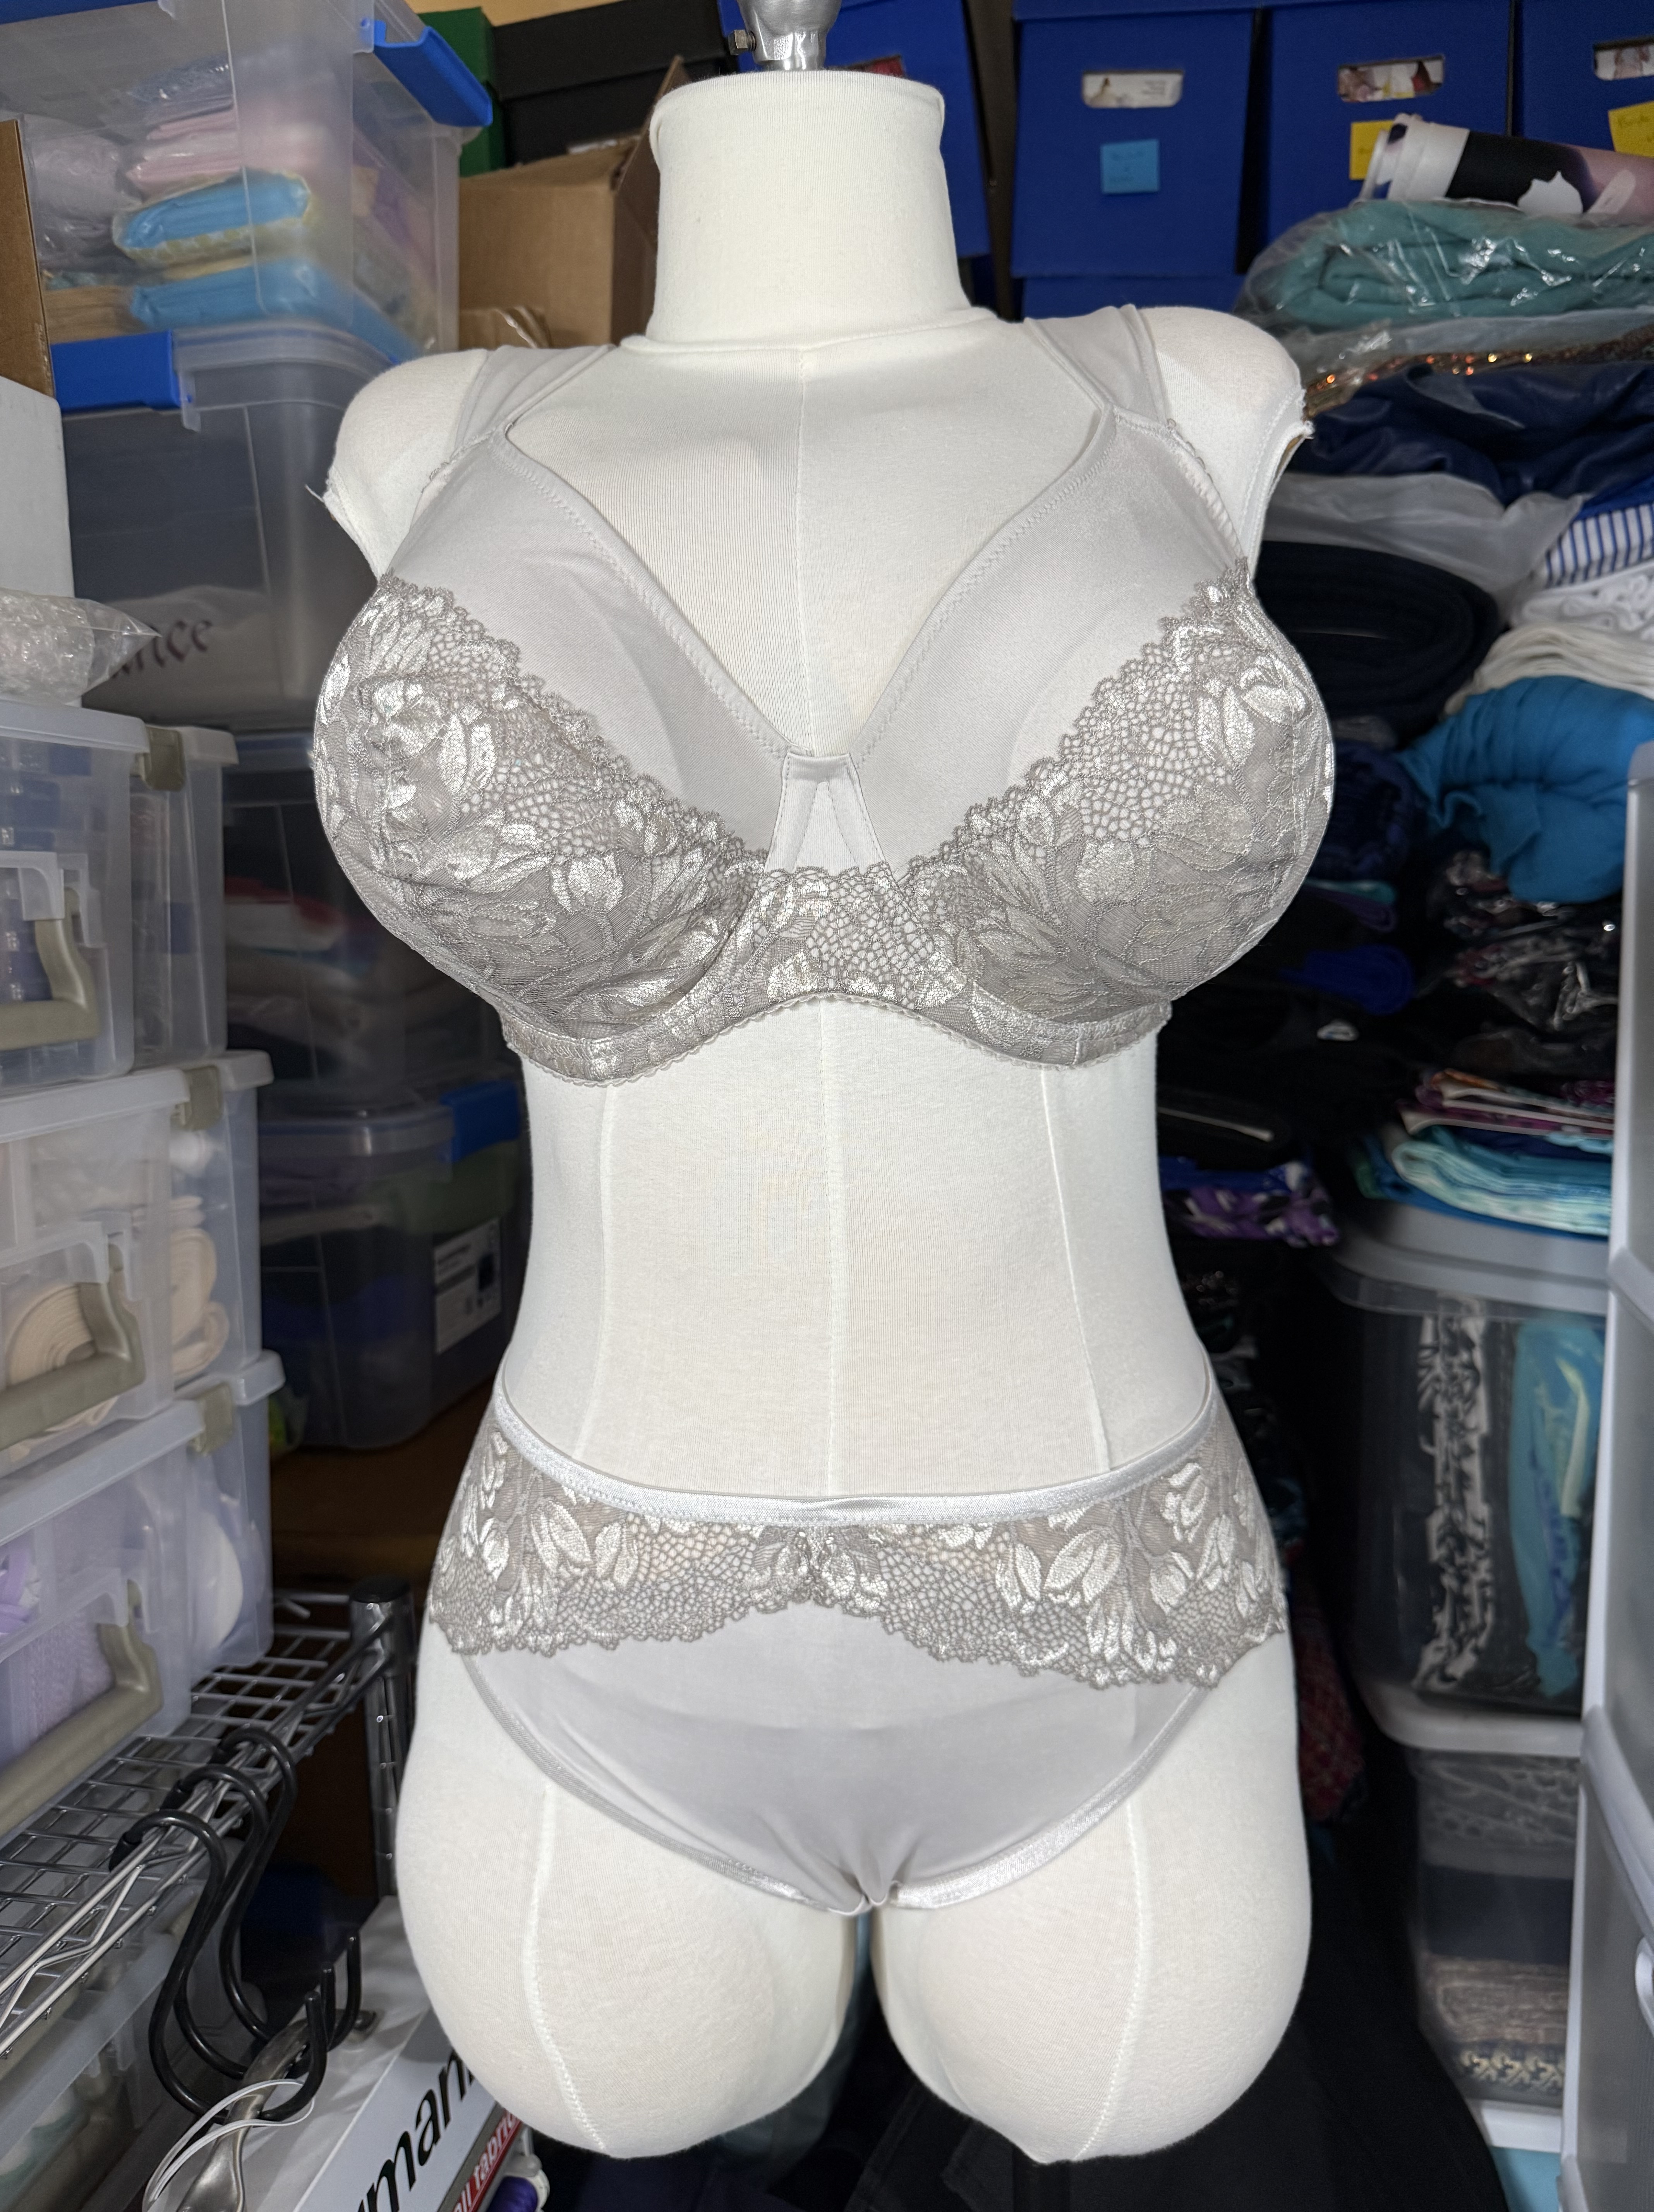
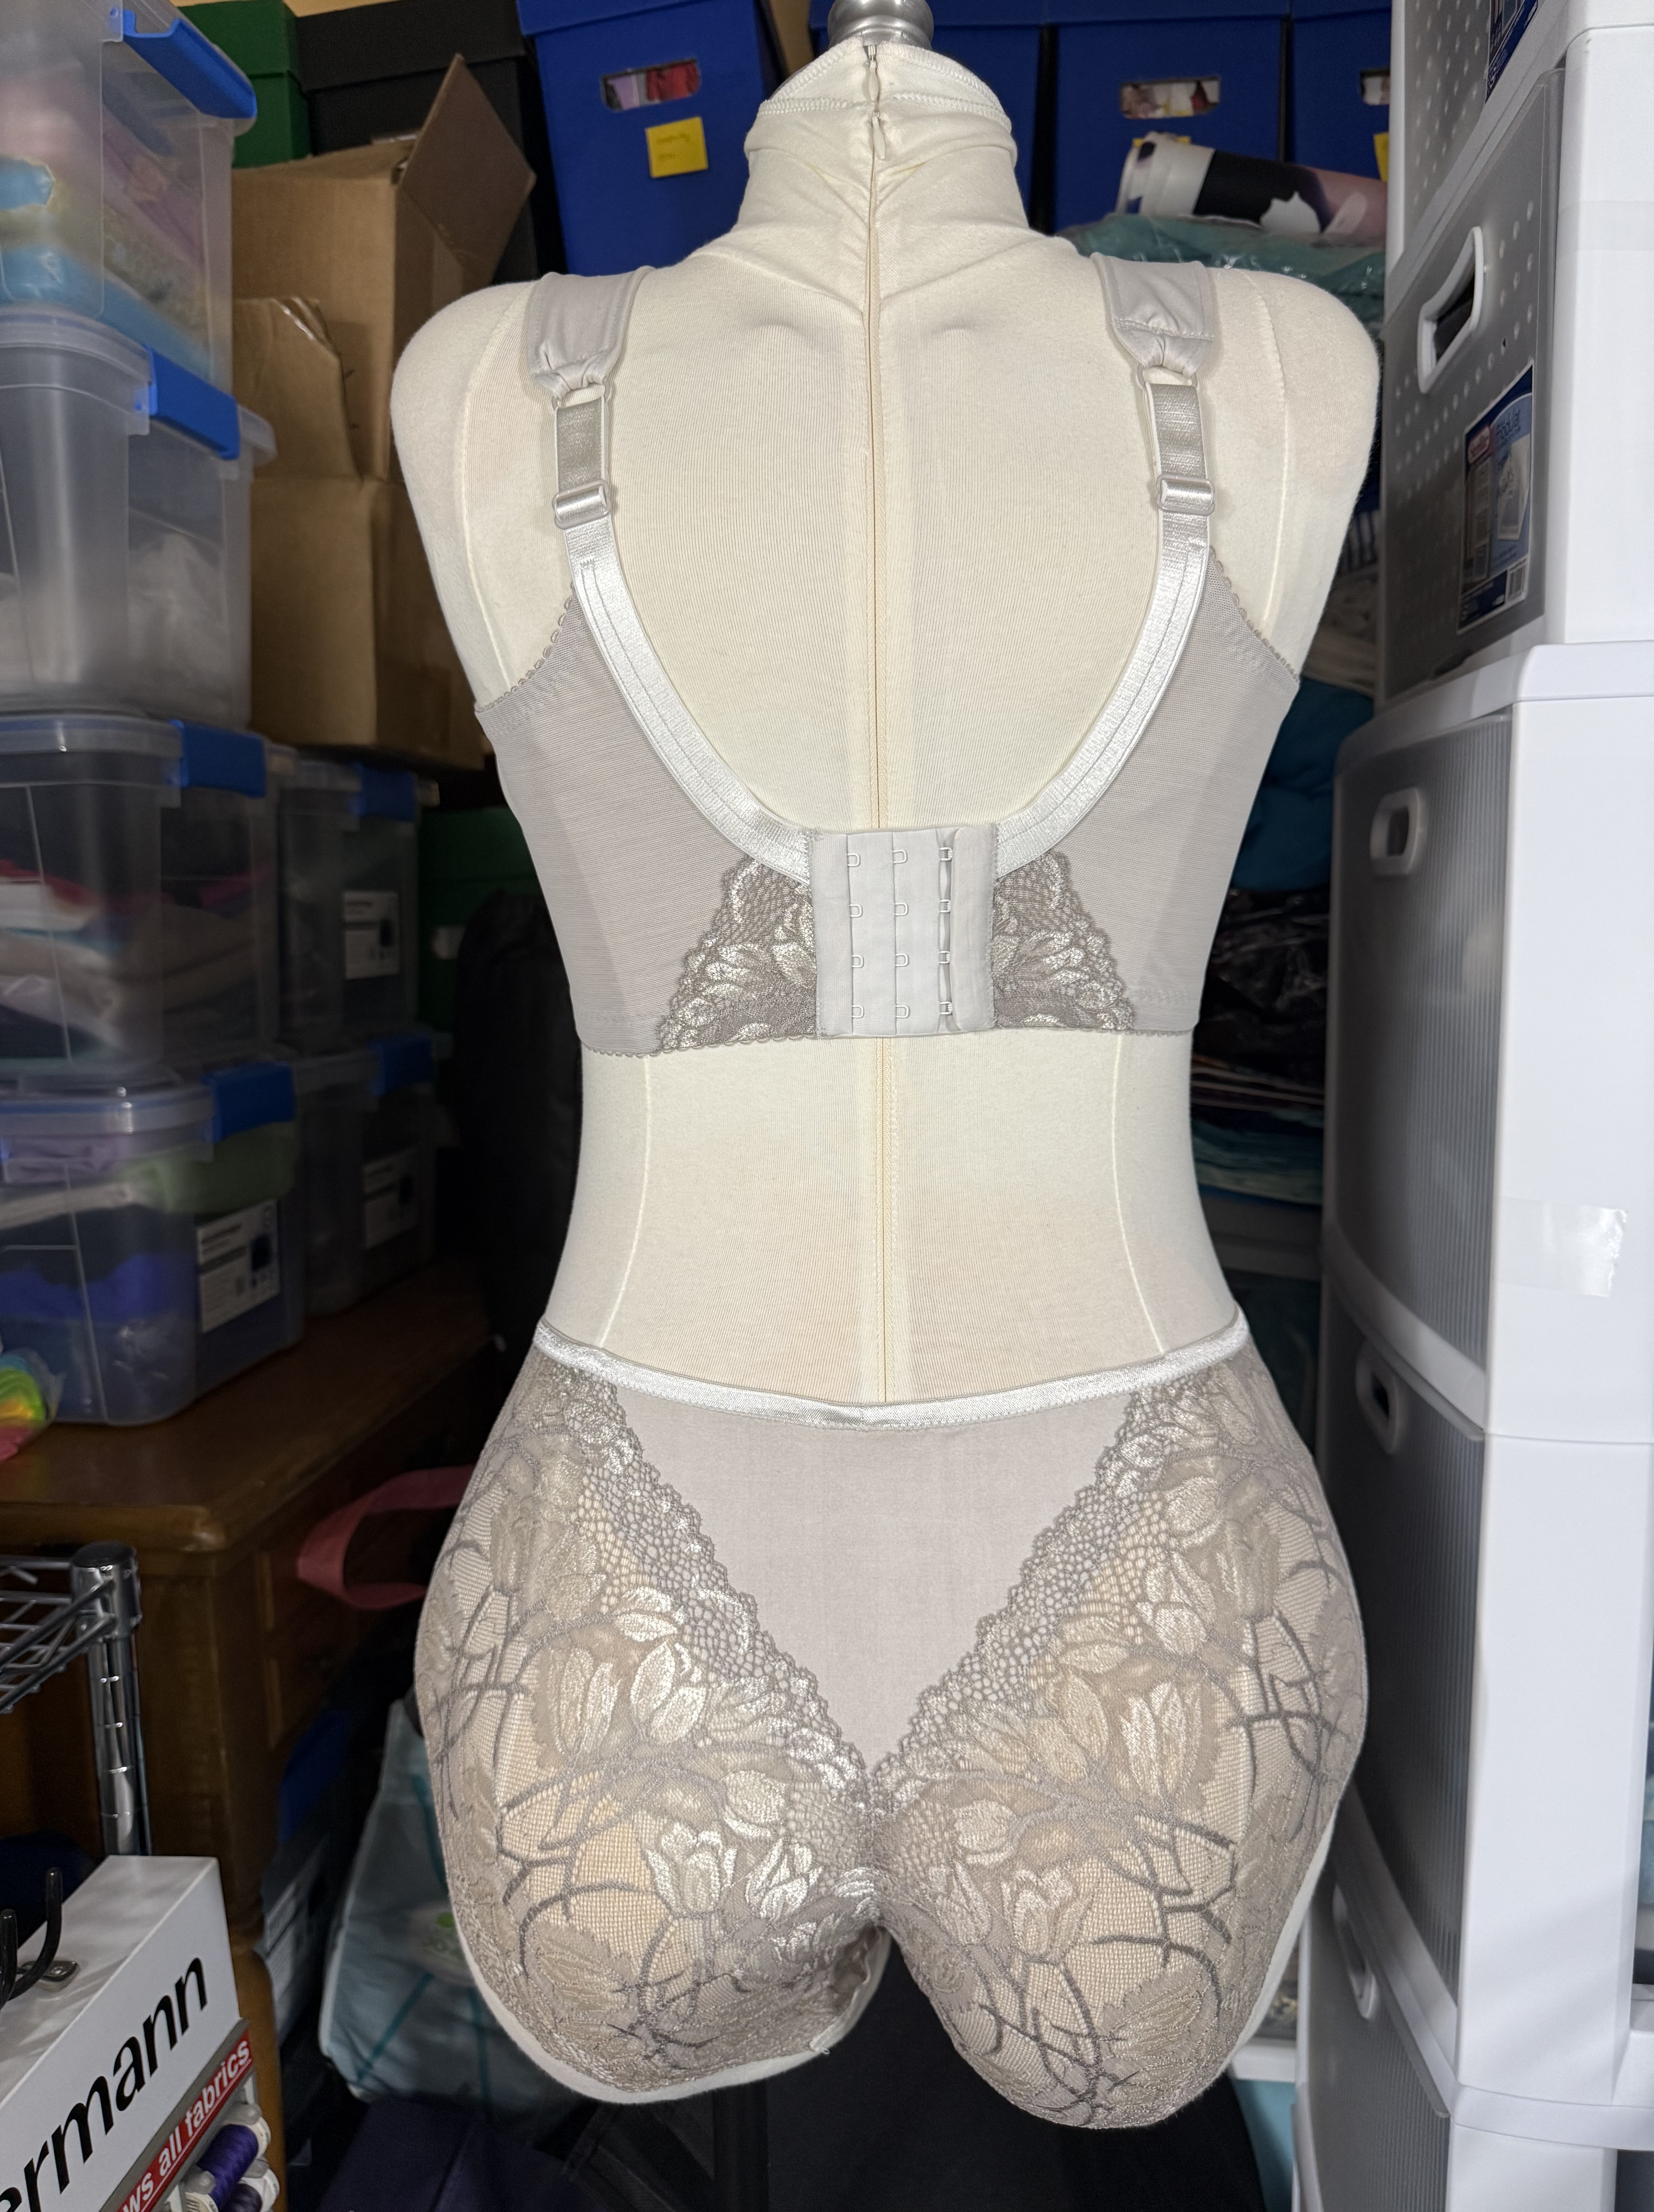

Honestly, since I use the same pattern for both, both bottoms fit pretty similarly. The lace edges are phenomenal if you want full coverage but also want absolutely no lines to show through your main clothes. However, I will say that for long-term wear, the more traditional brief is more comfortable. Here are some close ups of the details, including the extra lace on the bridge and at the back of the bra near the hooks:


And, this is a very minor detail, but I really wanted to show off how nice my fold over elastic joins were on the underwear. I mean, just look at them. Practically invisible.
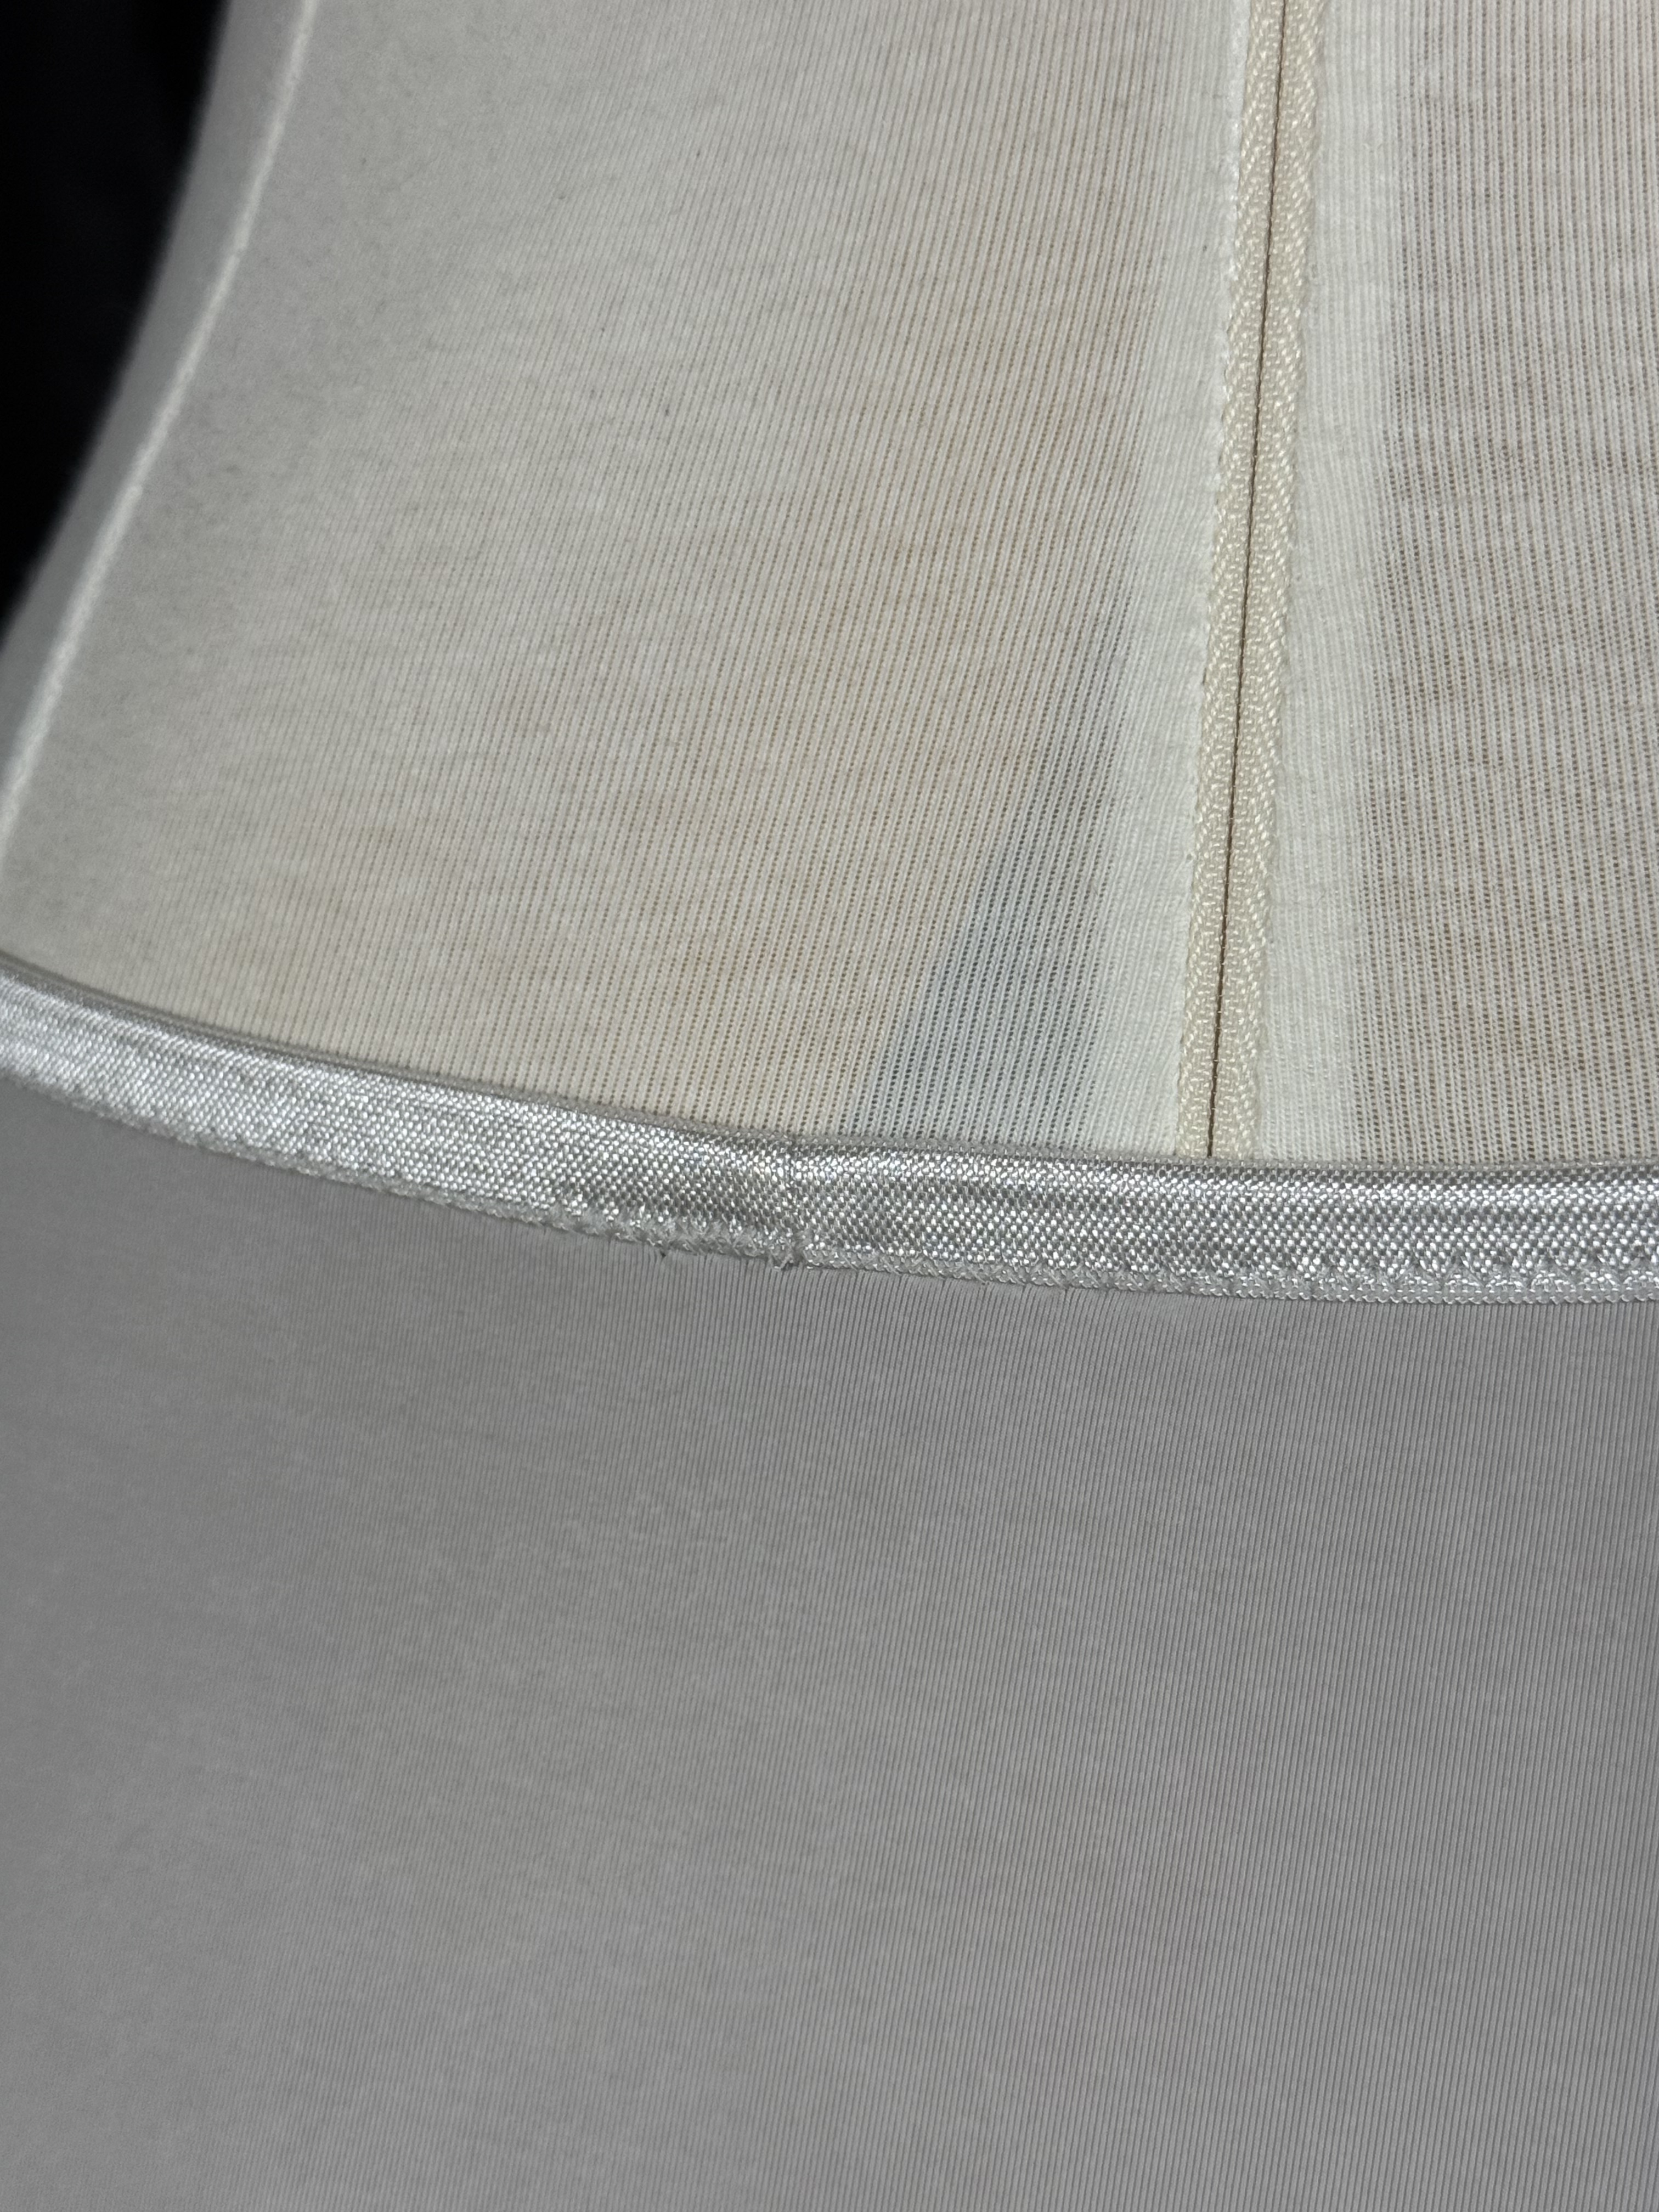

It takes me more time to finish off the elastic using this technique, but when the results look like that – oh man is it worth it.
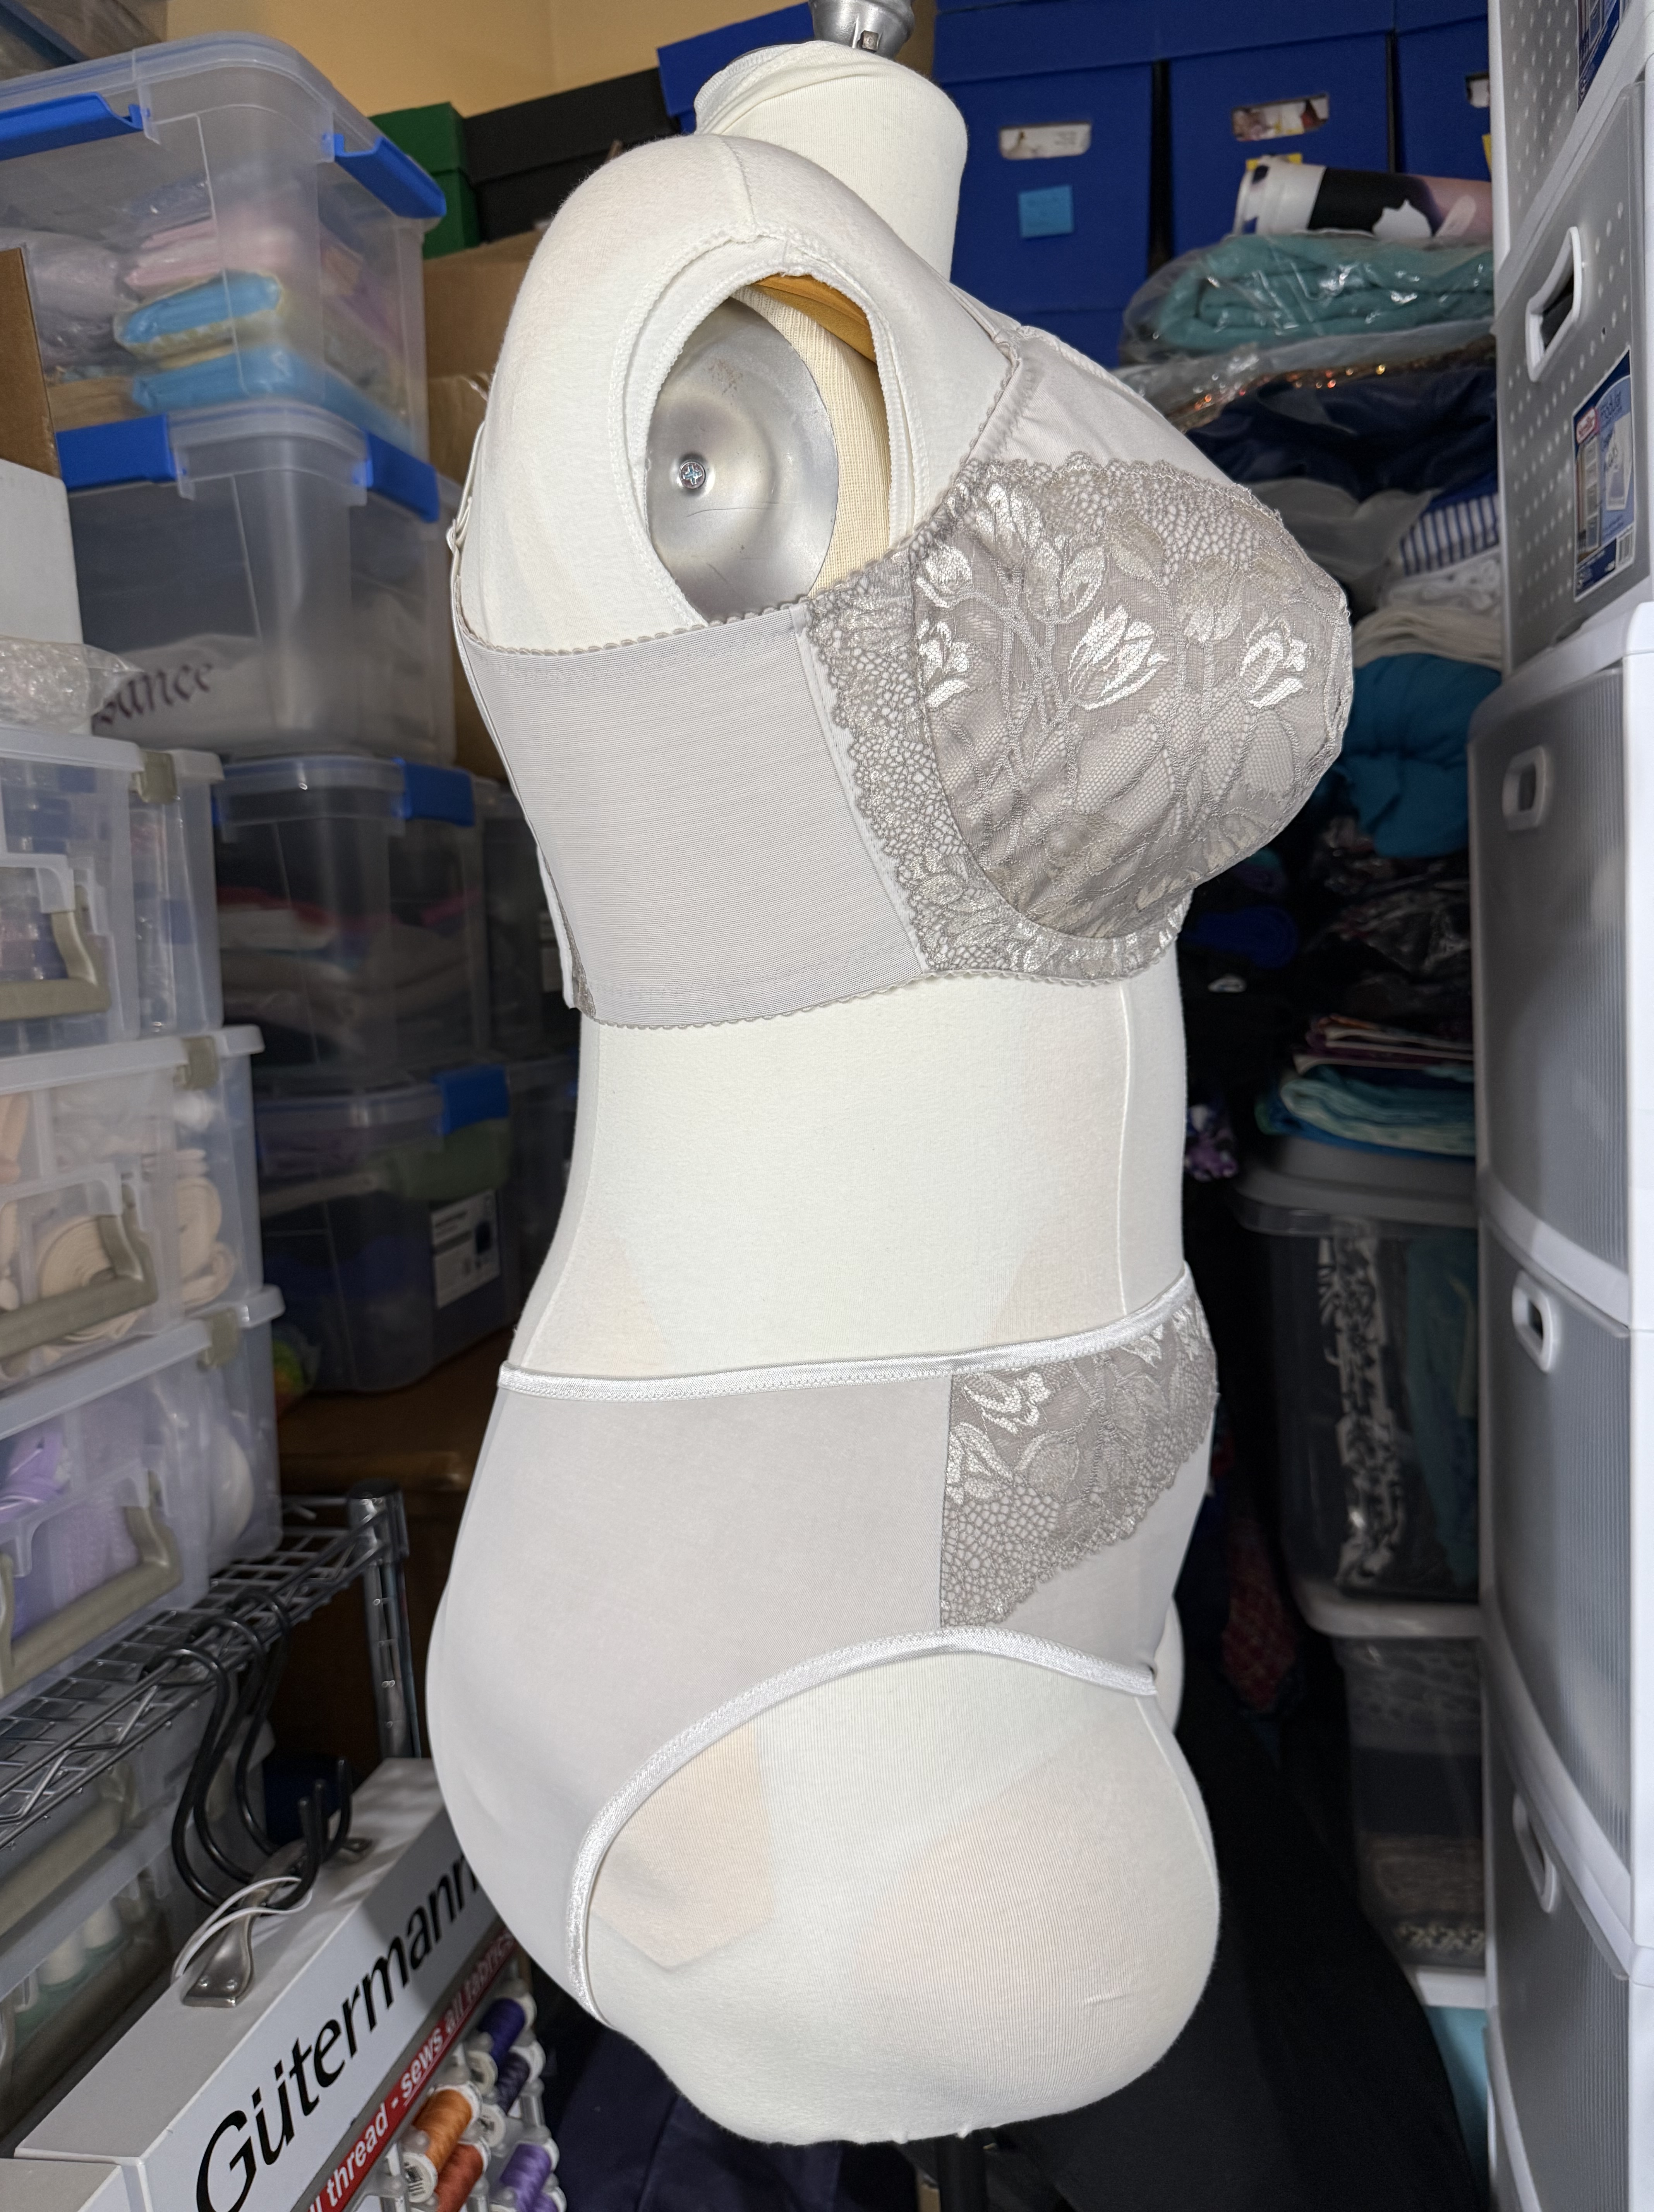
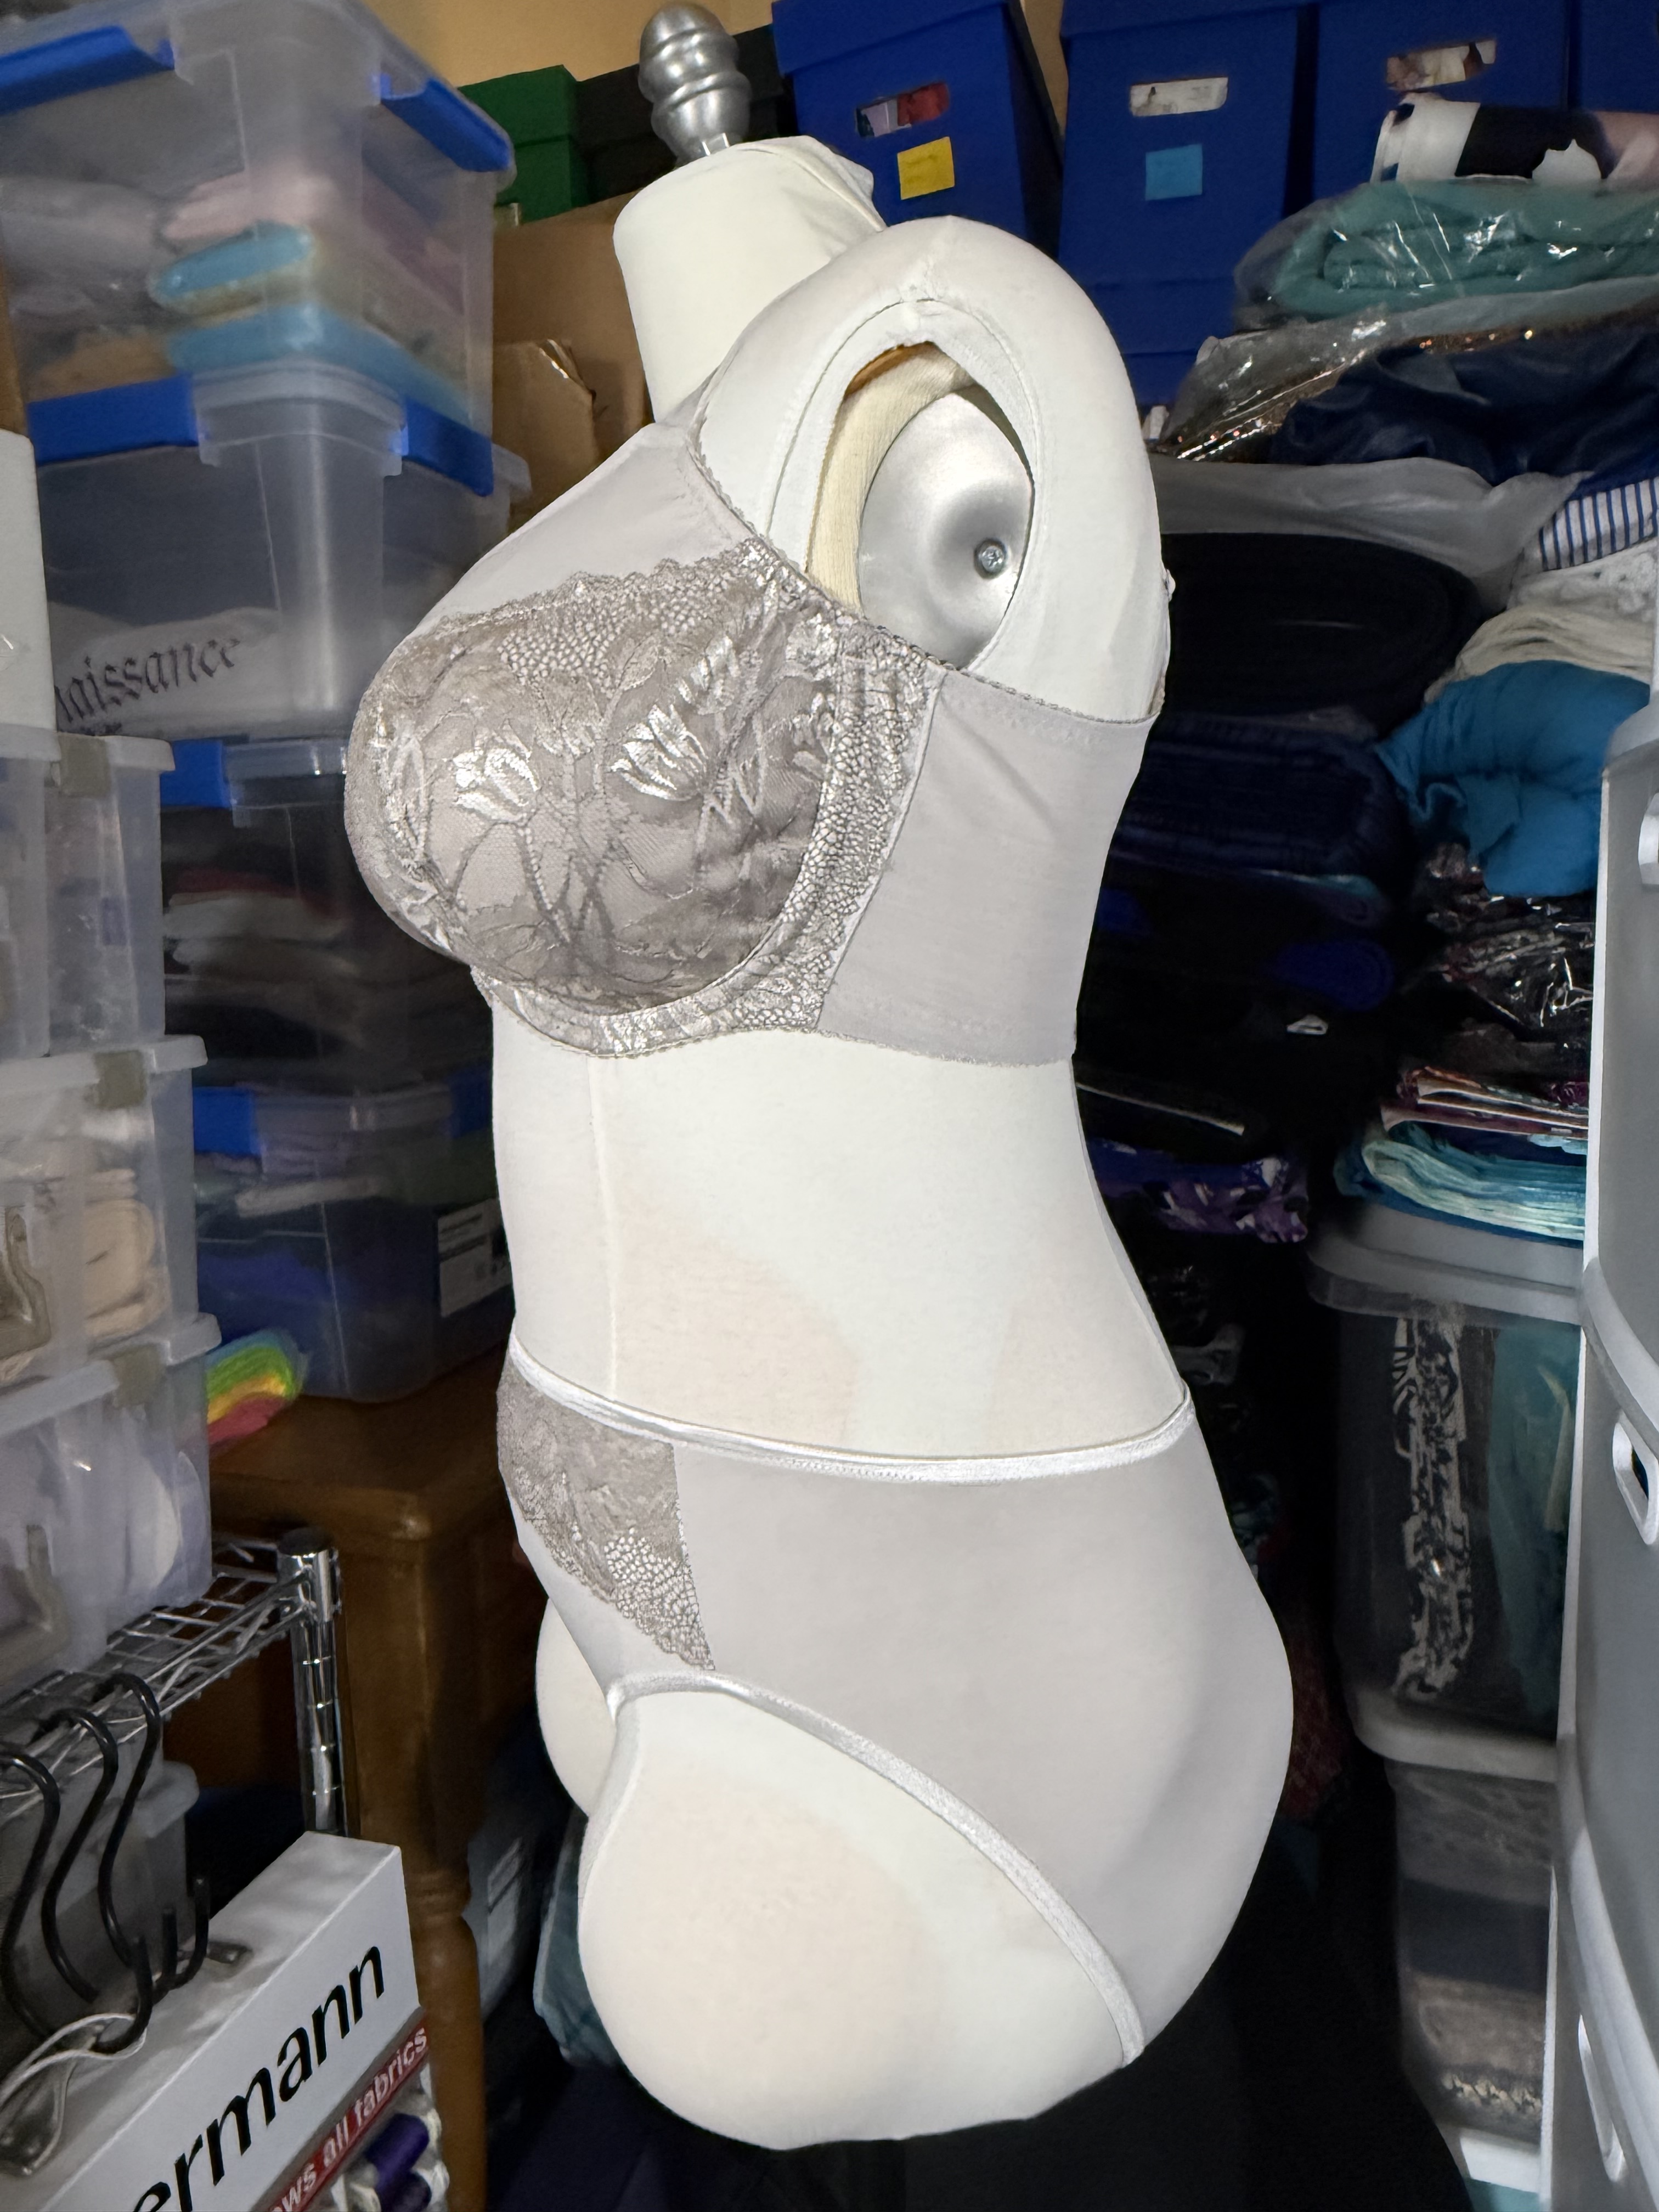
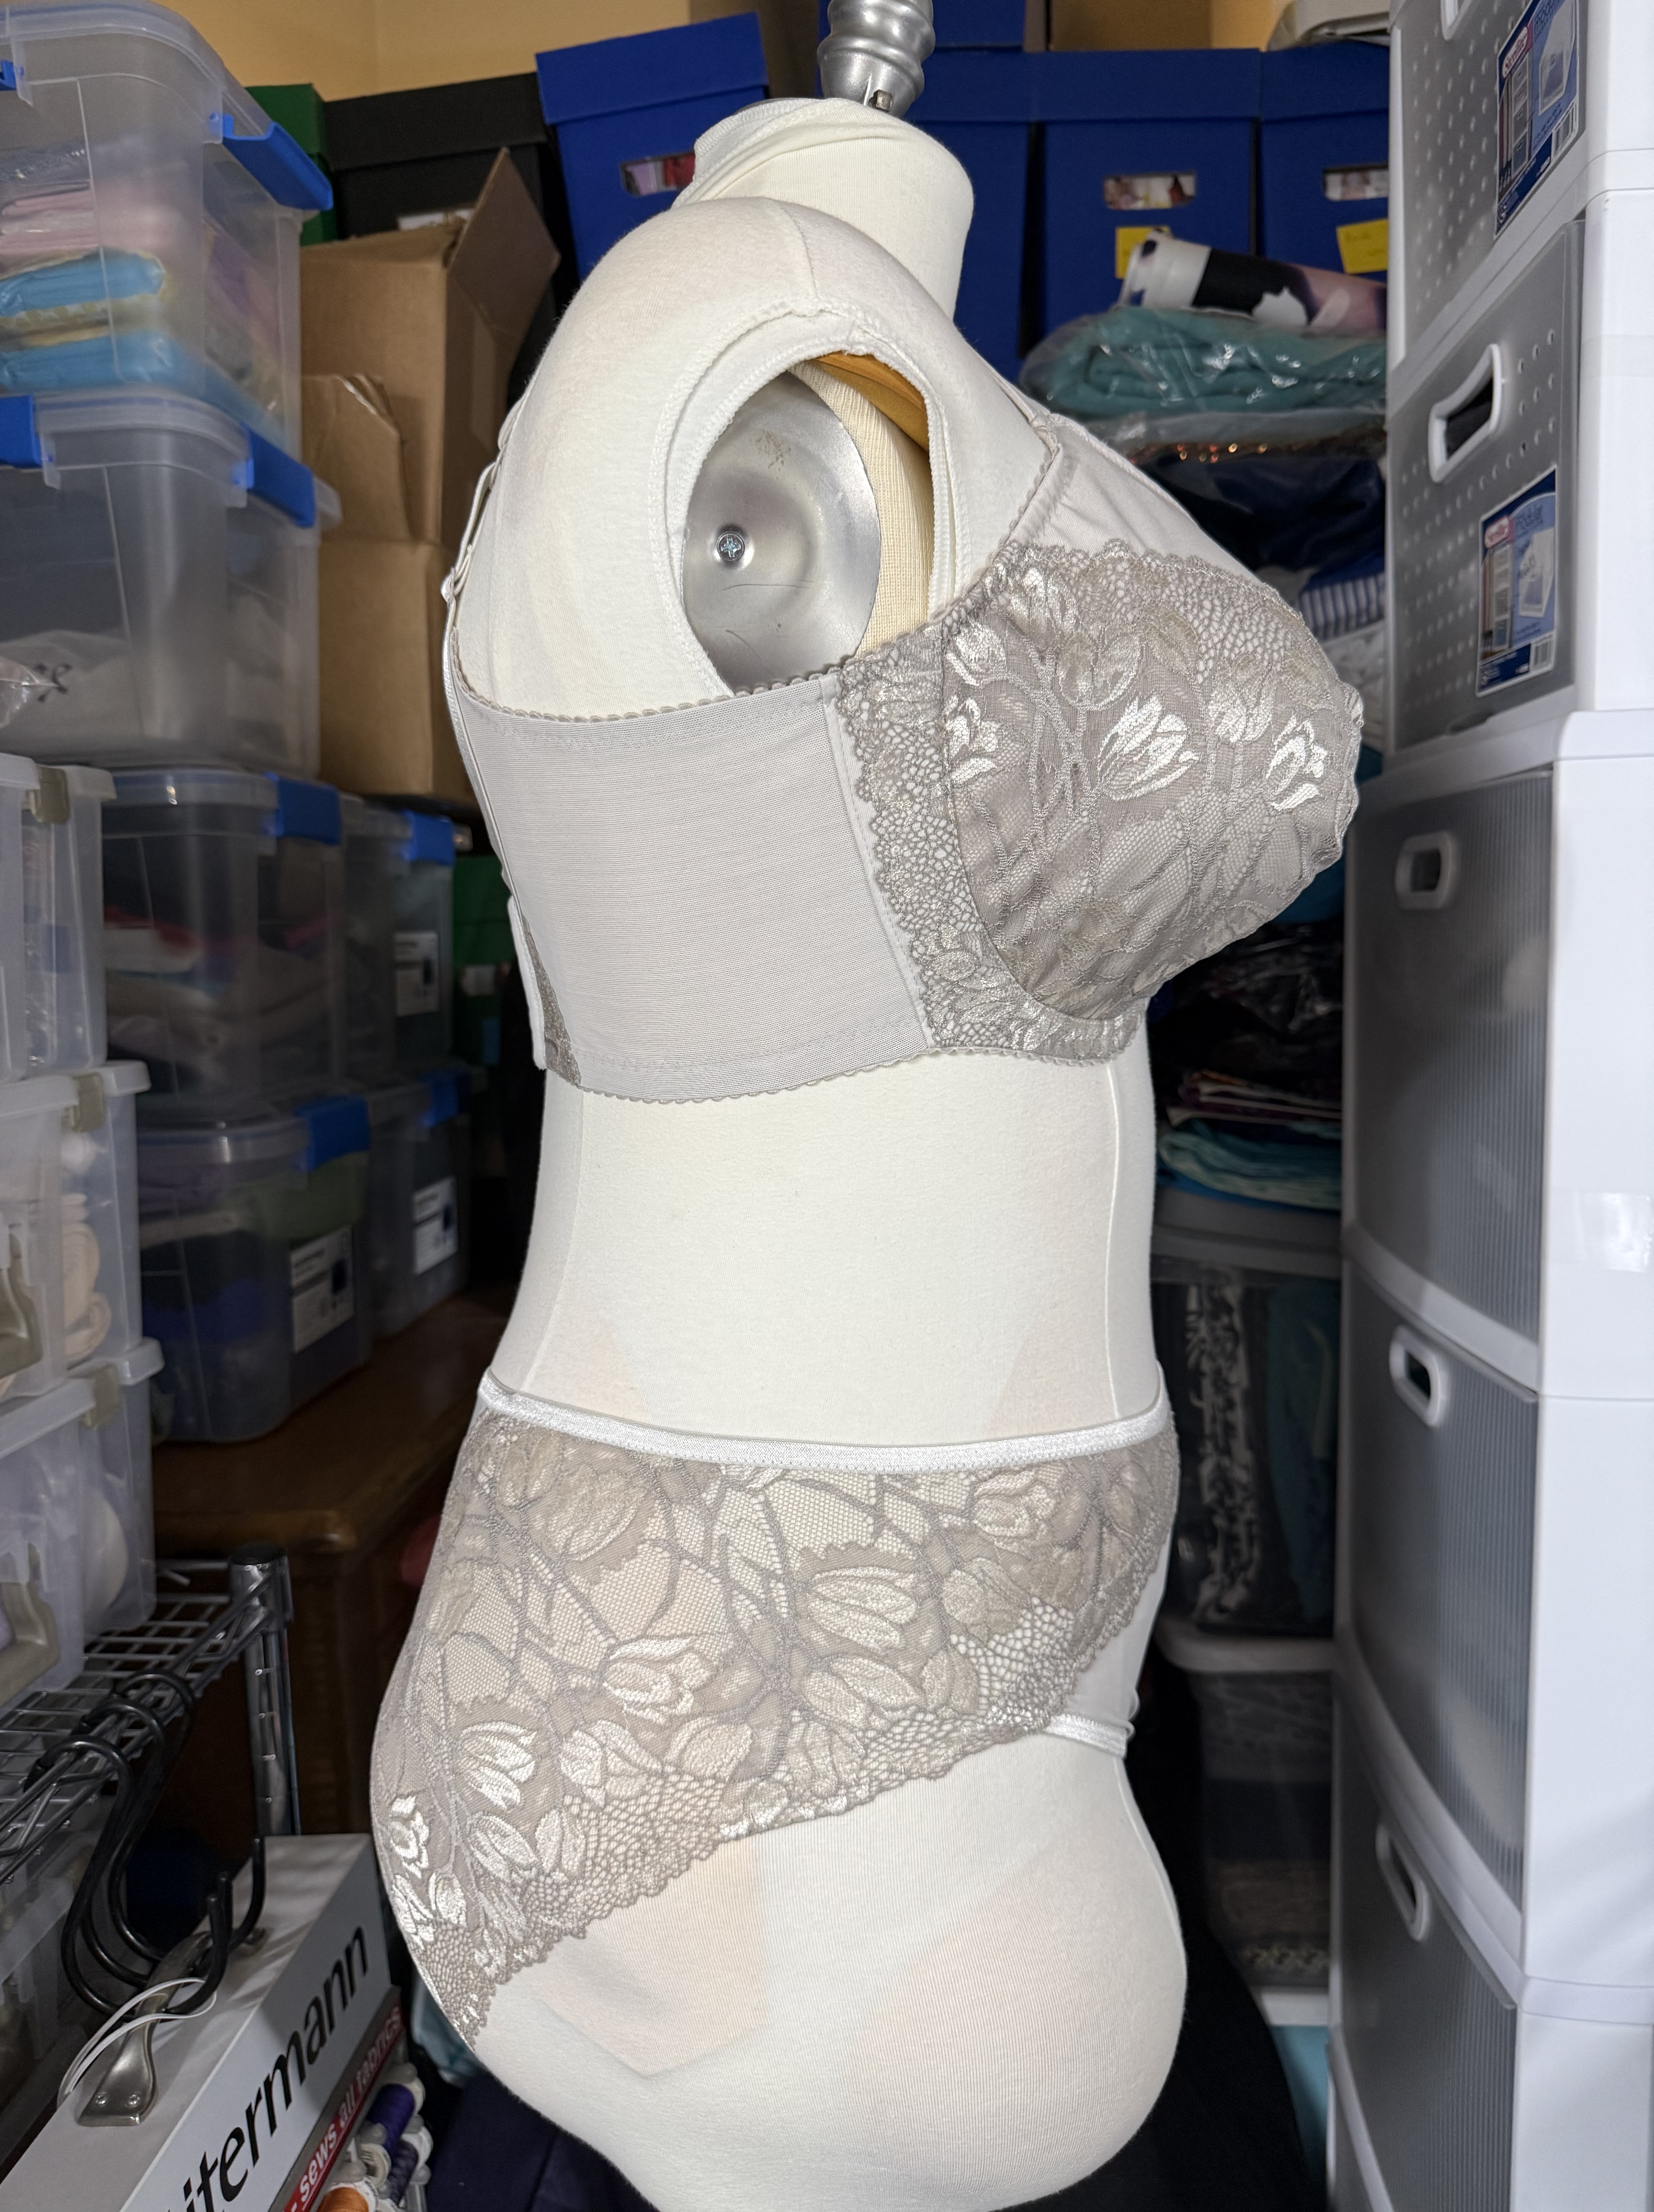
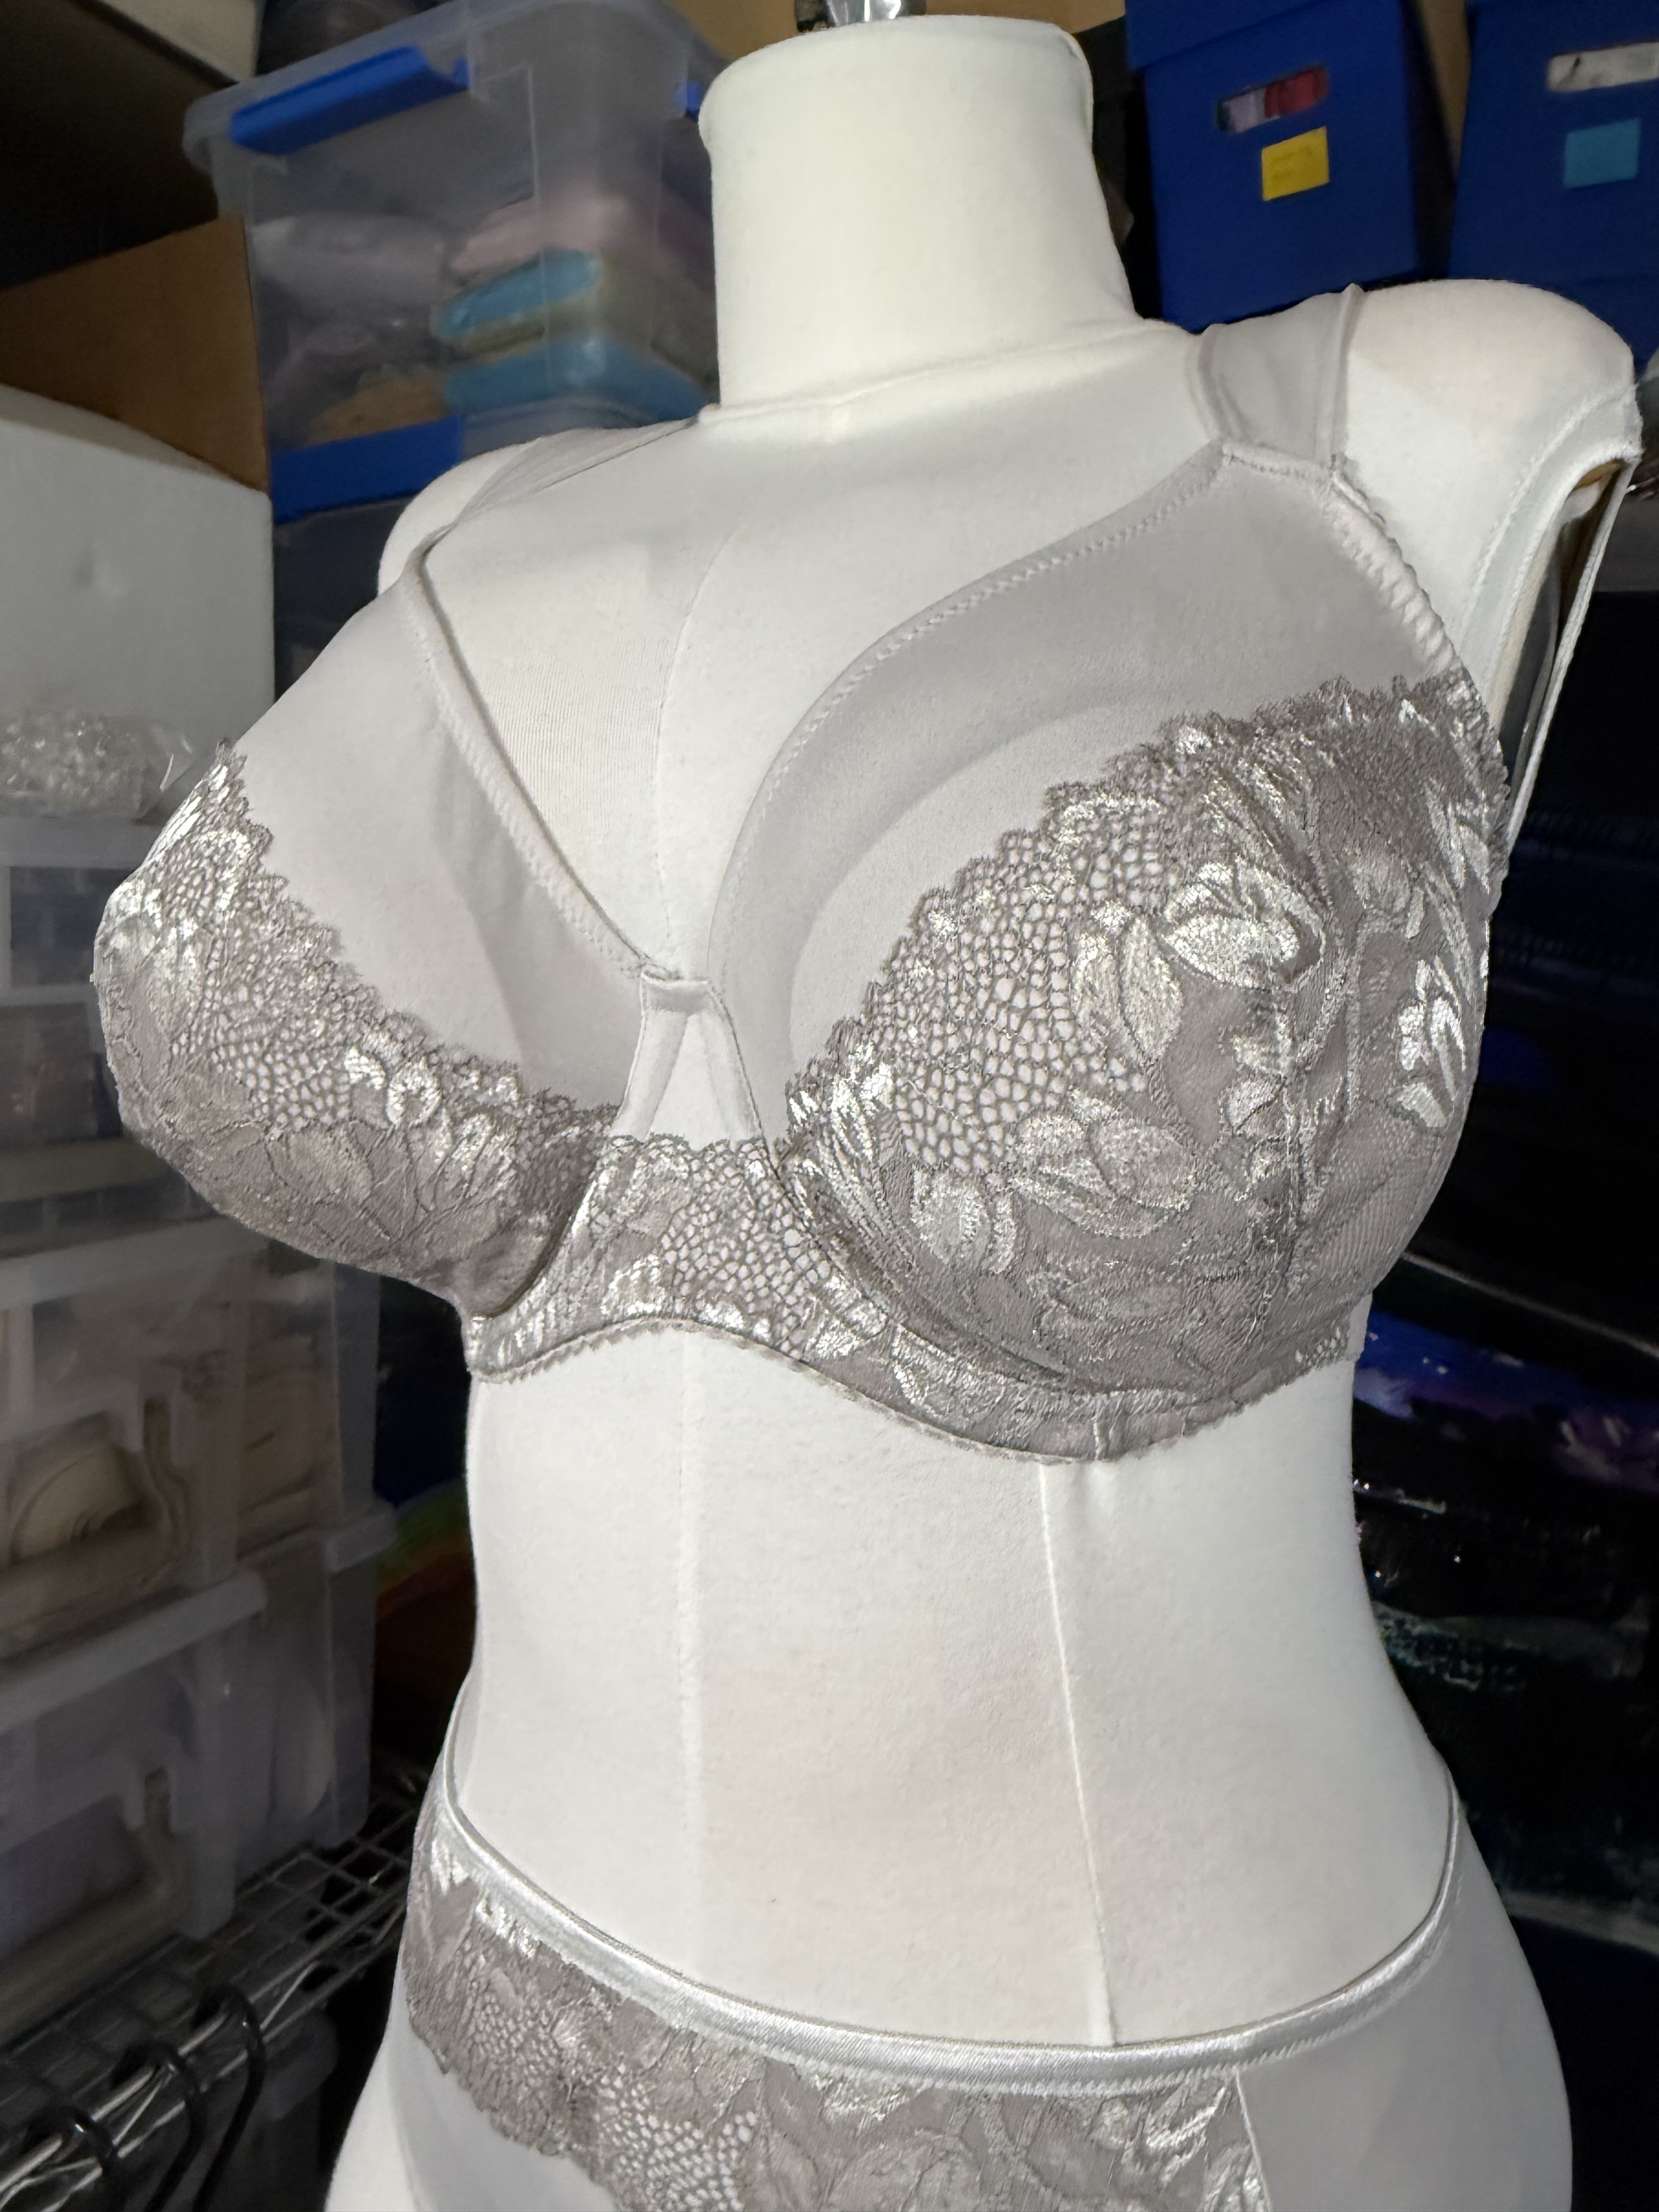
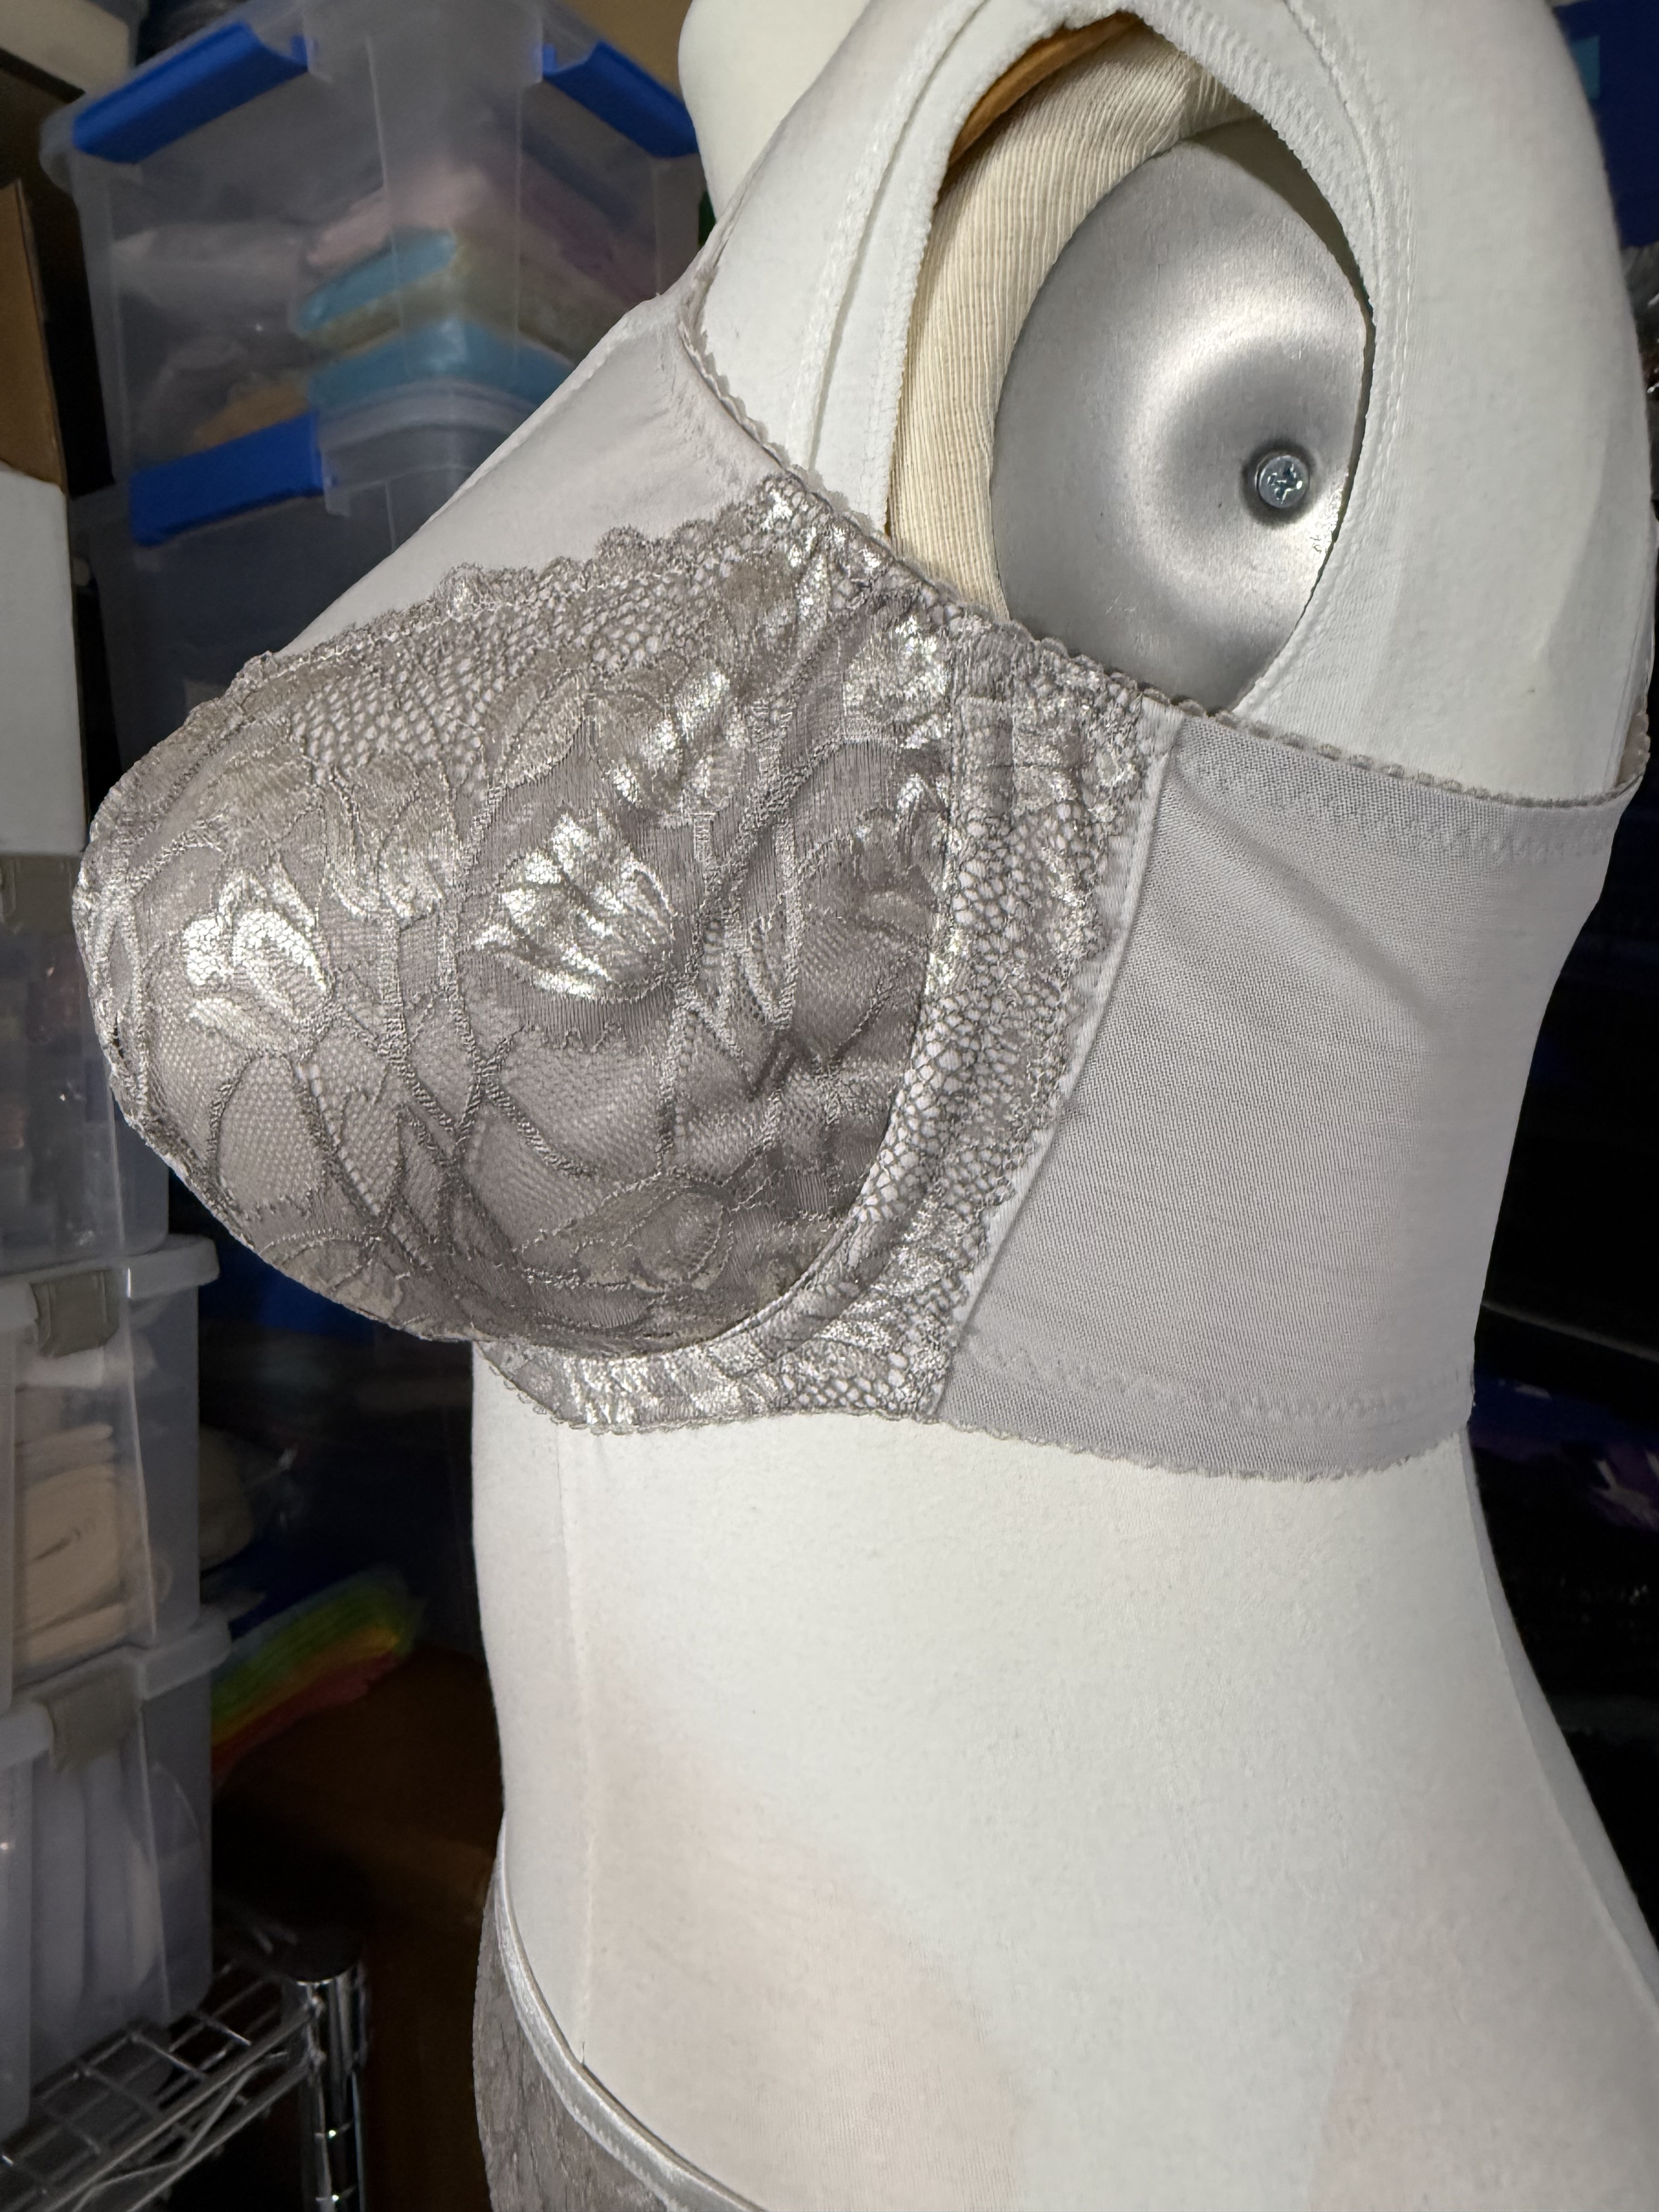
A few notes on the fit and shaping of the bra: I would say that this is probably the most comfortable underwire bra I have in my collection at this point, even including the four bras that I made for Bee on a Wire earlier this year. I would argue those patterns offer more coverage, support, and better shaping, but I used longer underwires on most of them, so I do tend to notice the wires irritating me by the end of the day. I’ve been wearing the Lamina quite a bit, and I can really go through most of a day without noticing any pain or discomfort, or getting annoyed with the wires. It definitely passes the driving test. I used 46 Vertical Wires from Gigi’s for this version, and it has been really comfortable. However, I will note that the bra shaping is definitely more of a “natural” almost cone-shape, and not as rounded as many of the other patterns I have used previously. I think there is only so much you can do with shaping on a single piece darted cup, especially for larger sizes, but I am very curious to compare the shaping of the Lamina to the other LilyPAD patterns when I make them. I think you can really see this shaping from the 3/4 angle in the picture below:
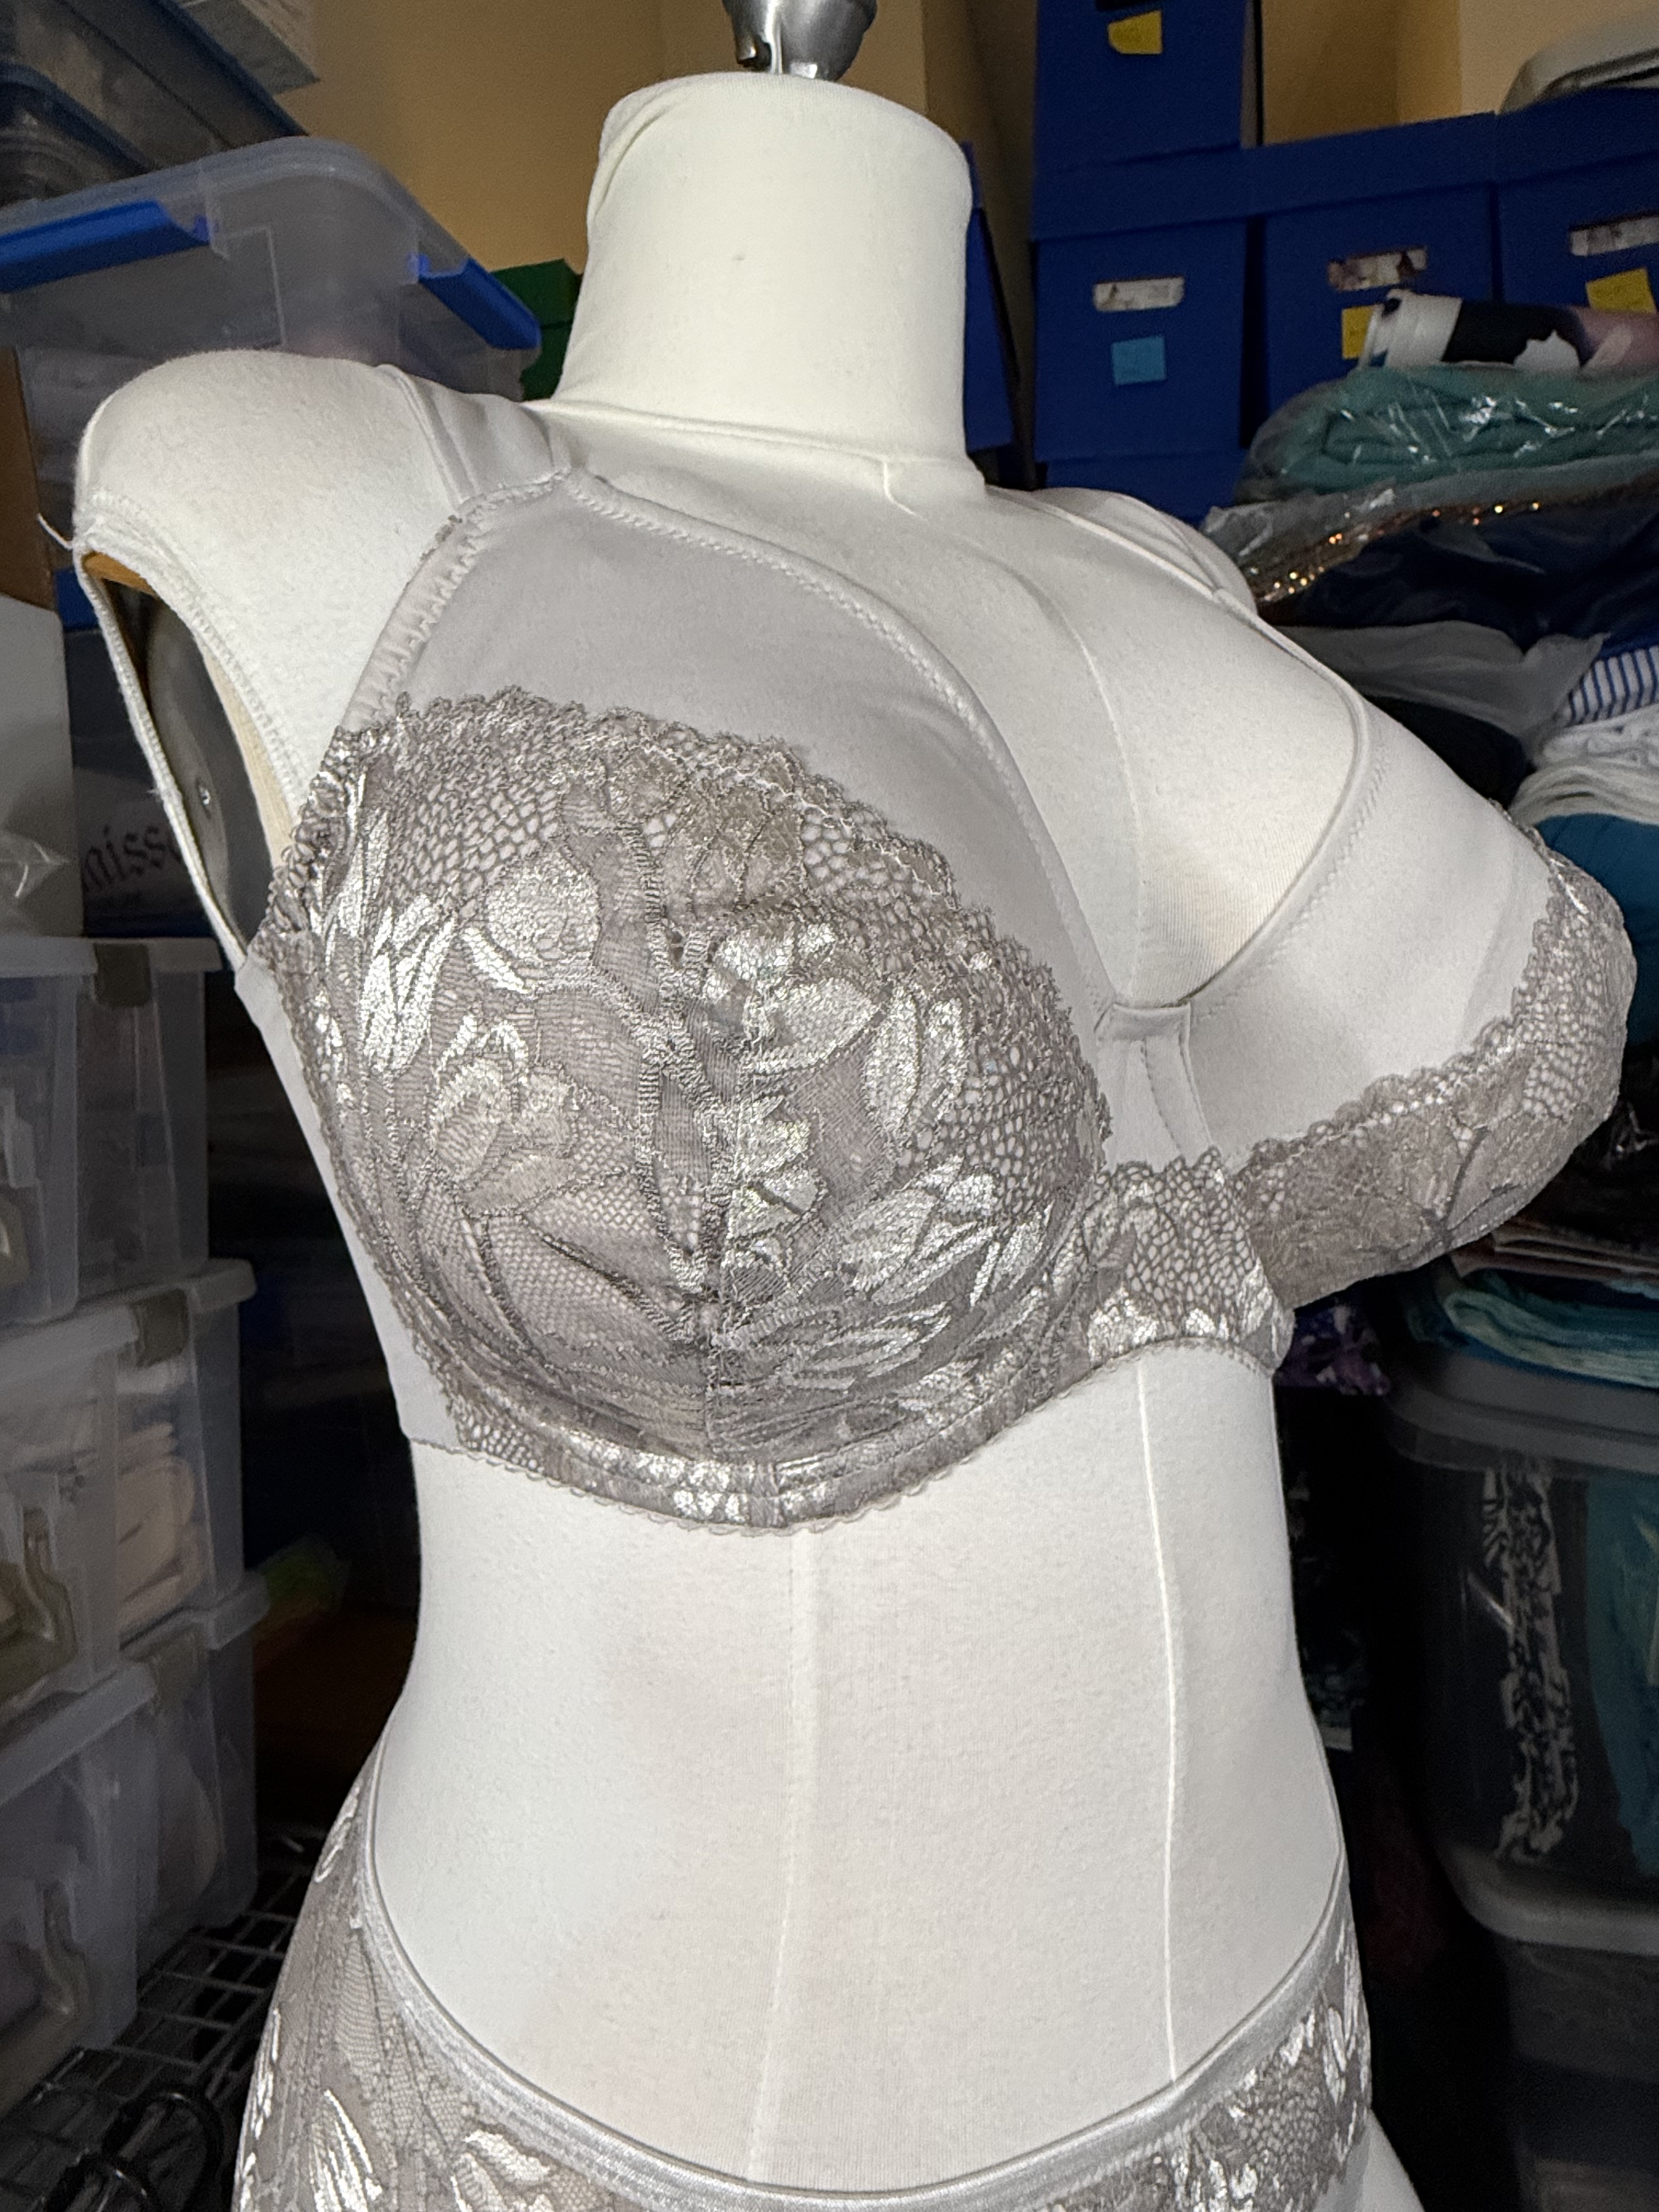
Although I prefer more rounded shaping, I still like the way this bra fits, and I expect I’ll be wearing it quite a bit since it is so comfortable.
Pattern Review
Pattern Description: A multi-dart, single piece cup underwire bra with overlay design options. From the designer: “The Lamina Underwire is a non-stretch bra pattern with overlay options in 50 sizes and featured in Threads Magazine Online. Includes instructions for optional internal sling (for nursing or support), overlays and common alterations. Ideal for intermediate sewers but also tenacious beginners!”
Pattern Sizing: LilyPADesigns DD-GG sizing only; 29”-42” band, 9.0”-14.6” HH, 4.0”-7.1” BCD. This is one of the few patterns that only comes in the middle size range and not also expanded to the larger or smaller size ranges. I made the 5.6 BCD with the 36 band, so I am using sizes that are in the middle of this size range.
Were the instructions easy to follow? Yes, overall I think the instructions were pretty good. I did notice one part early on where the optional slings are mentioned in multiple steps; I would recommend ignoring the slings until after the rest of the cup is constructed; if you add them before adding a lace overlay they are just sort of in the way. I generally followed the construction order, but there are a few steps where I deviated because I have different techniques or stitch settings that I prefer. I did like that after the main instructions there are some supplemental materials about how to make fit alterations or how to change this style into a maternity bra if so desired.
Did it look like the photo/drawing when you were done with it? Yes! I added some additional lace detail to the band, but otherwise it looks like the line drawing. I didn’t even realize it when I started, but even the color looks similar to the sample in the line drawing.
What did you particularly like/dislike about the pattern? I’ve never had a bra pattern I haven’t had to do major adjustments on, but I was able to make this almost directly from the PDF print out. I am really excited to find a single piece cup pattern that works for my size, because I wanted to play with the design overlays and follow some tutorials for similar styles that are too small for me. The bra is super comfortable, and I also like how much the band provides support from being a bit wider and having a lot of back coverage. The only dislike (and I can’t even say it’s a dislike as much as a preference thing) is that the cups end up being more of a “natural shape” rather than being more lifted and rounded, and that the top of the cups are a bit lower and wider than my usual preference. By the nature of this style of cup, I’m not sure that there is a lot of other ways to change the shaping (given the minimal number of seams), and there really aren’t a lot of pattern options in this size range if you do want to make a single piece cup (the B,Wear Gunsan is the only other that comes to mind). The shaping is honestly not bad, just not as rounded as is my typical preference.
Fabric used: Microduoplex, stretch lace, power net, and the typical bra findings and elastics. The kit I used was the Silver Garden kit purchased from Bra Builders, but I believe this kit was a Kit of the Month Club special and is now sold out.
Pattern alterations or design changes you made: This is probably the least number of alterations I have ever made on a bra pattern. I only raised the bottom band by 3/8” at the side seam (typical adjustment for me on all bra patterns), and I changed the back from a 3×3 hook and eye to be a 4×3 hook and eye, as that is my preferred hook and eye height. Otherwise I was able to make it straight off the PDF pattern.
Would you sew this again? Would you recommend it to others? Yes and yes! I’m currently working on a “sewing tour” of the more standard LilyPADesigns underwire bra patterns, so I can try the different styles and compare the patterns for my blog, but I could see coming back to this pattern in the future, especially if I wanted to try some of the other overlay options or had fabric that would work really well in a single piece cup. I think it’s a really great pattern, and very unique style for this size range, so I would definitely recommend it if you want a single piece cup bra, but have found other patterns run too small.
Conclusion: Overall I really like this pattern! I’m more excited by some of the other LilyPAD styles I have on my cutting table, just based on personal preference for various design lines, but the ease of fitting this pattern and coming up with something comfortable as a result is still pretty amazing to me. I’m fairly confident that the LilyPAD line will become some of my TNTs moving forward because of the really great fit and fun styles.
It’s been really nice getting back into the sewing space and finishing up what has felt like a perennial WIP. I am looking forward to wearing my new garments, but also to working on my other LilyPAD patterns that I have on my cutting table. I also have a few other exciting projects that might take priority for the rest of this month, so hopefully there will be a bit more activity on the blog soon.

I’m impressed the shape is so natural with a single (?) dart. I guess one could make a more rounded shape by splitting the dart in two and moving the tips away from the apex, but that would take away some of the advantages of having a single dart design (suitability for lace sewing!)
Your FOE sewing is so much better than mine 🙂
LikeLiked by 1 person
It is actually two darts in the main cup piece but only one on the lace overlay. The edge of the lace covers the dart at the center front. I’m curious to compare this to the Gunsan which is a true one dart cup, and see what kind of shaping it gets. After I do a LilyPAD deep dive I want to do a BWear deep dive next. But I have some other things I have to do first, so that will probably be a next year project.
LikeLike
Did you use microduoplex for the solid cup? I made the Lamina long ago and also found it quite comfy except by band elastic was scratchy so I rarely wore it and now need a different size anyway. It is a pretty quick sew and I really like the style of the band! Yours is very lovely!
LikeLiked by 1 person
Yes, the main cup is microduoplex from Bra Builders with the stretch lace overlay top and power net for the internal slings. I probably should have taken a picture of the slings since I haven’t used that before, but I will need to wait for it to come out of the wash first… 😅
LikeLike
I’m allergic to Spandex. I’ve despaired at the all-cotton bras I’ve ordered and I guess I have to make my own. This bra looks like the perfect one to try. Would it be possible to make channels for the elastic so no Spandex touches my skin?
LikeLiked by 1 person
Yes, it should be pretty easy to do that with this pattern. I think you would just need to extend the seam allowance so that you could fold it over to make the channel.
LikeLike
I’ve been looking forward to this post as I really like the Lamina. Yours turned out really lovely!
I made the biggest dart a little straighter to create more lift and also shortened the upper cup/strap attachment a bit (simply folding out a few centimeters). I think that helped with the shape, but it was years ago so I’m not sure. On me, it’s nicely rounded, though still a natural shape.
Hilde
LikeLiked by 1 person
Good suggestions! I’ll put them with my notes for next time. I do find I need I need to shorten the straps a lot compared to pattern instructions (for all patterns, not just LilyPAD), so maybe taking some off the cup height will help with the shape too.
LikeLike
Can’t argue with comfort! I love the little touch of adding lace around the hooks on the back band.
LikeLiked by 1 person