I will be honest that I’m sort of shocked that I’m writing this review. The Emerald Erin Black Beauty Bra is probably one of the better known bra patterns on the market, but it tends to cater towards the smaller size ranges. I didn’t think I would ever be able to fit, so I’d been ignoring the pattern in favor of other brands that extend into larger size ranges. However, because it is so popular, I decided to buy a copy to look at the shaping for the class I taught earlier this year, and I was pleasantly surprised to see that the largest size might work for me. My sister, who is in a smaller size pack, also wanted to try this pattern based on recommendations, so here we are with a bunch of end of the year Black Beauty patterns to round out the end of sewing in 2025.
I feel like the Emerald Erin patterns are super popular, and the Emerald Erin Black Beauty Bra may be the most well known in the pattern line. It’s definitely one of the more popular undergarment patterns I’ve seen on the internet. The pattern comes with two versions – a fold over elastic finish for the upper cup and straps, and a picot elastic finish that is meant to be used with lace, as well as options for a foam cup:
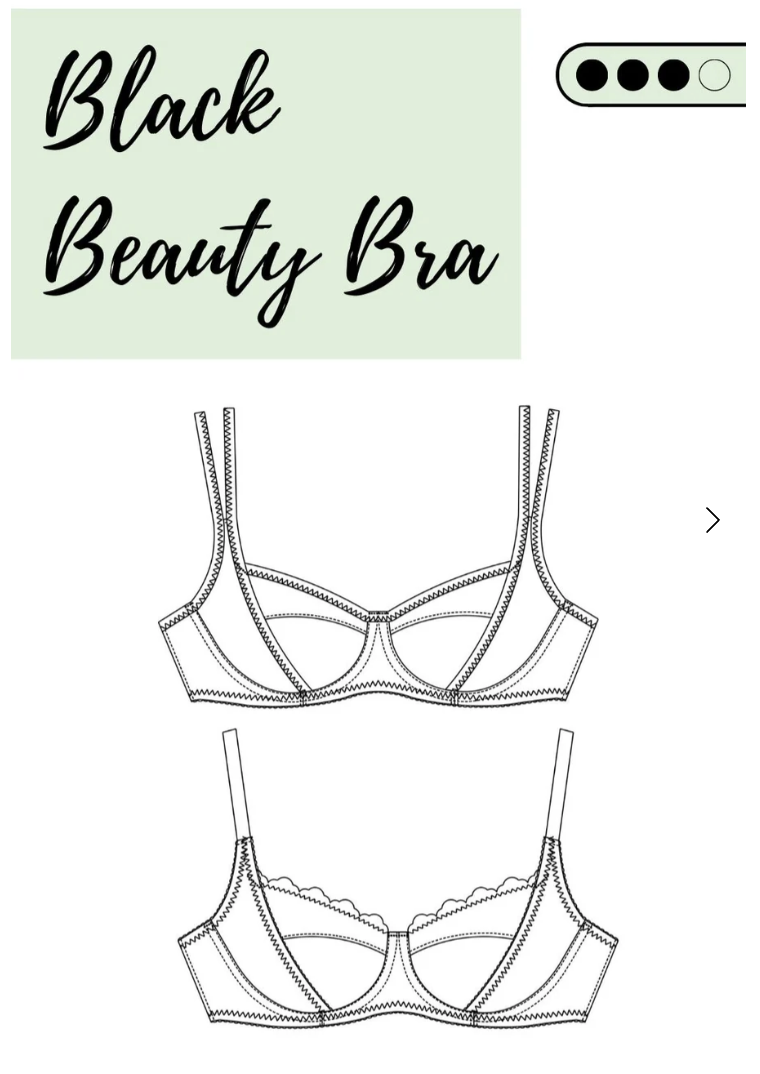
There are also a lot of great YouTube tutorials using this pattern from Liz Sews, so finding supplemental learning material and tutorials for altering the pattern is actually quite easy if you are more of a visual learner.
Since my sister and I were making this simultaneously, this was a really interesting opportunity to test this pattern at the extreme opposite ends of the size range. For my sister we used a combination of the 32C and 32D patterns from the smaller size pack, and I was a 36G from the larger size pack.
Getting my sister’s version to fit was primarily dealing with asymmetric cup sizes and altering the wire line to fit her preferred wires and the different cup sizes accordingly. Once we had that worked out we used a duoplex kit from Emerald Erin to make a first version, and my sister really likes how it fits.
The smaller size looks very much like the line drawing on the envelope, and the style is really cute. I expect my sister will be making quite a few more bras using this pattern.
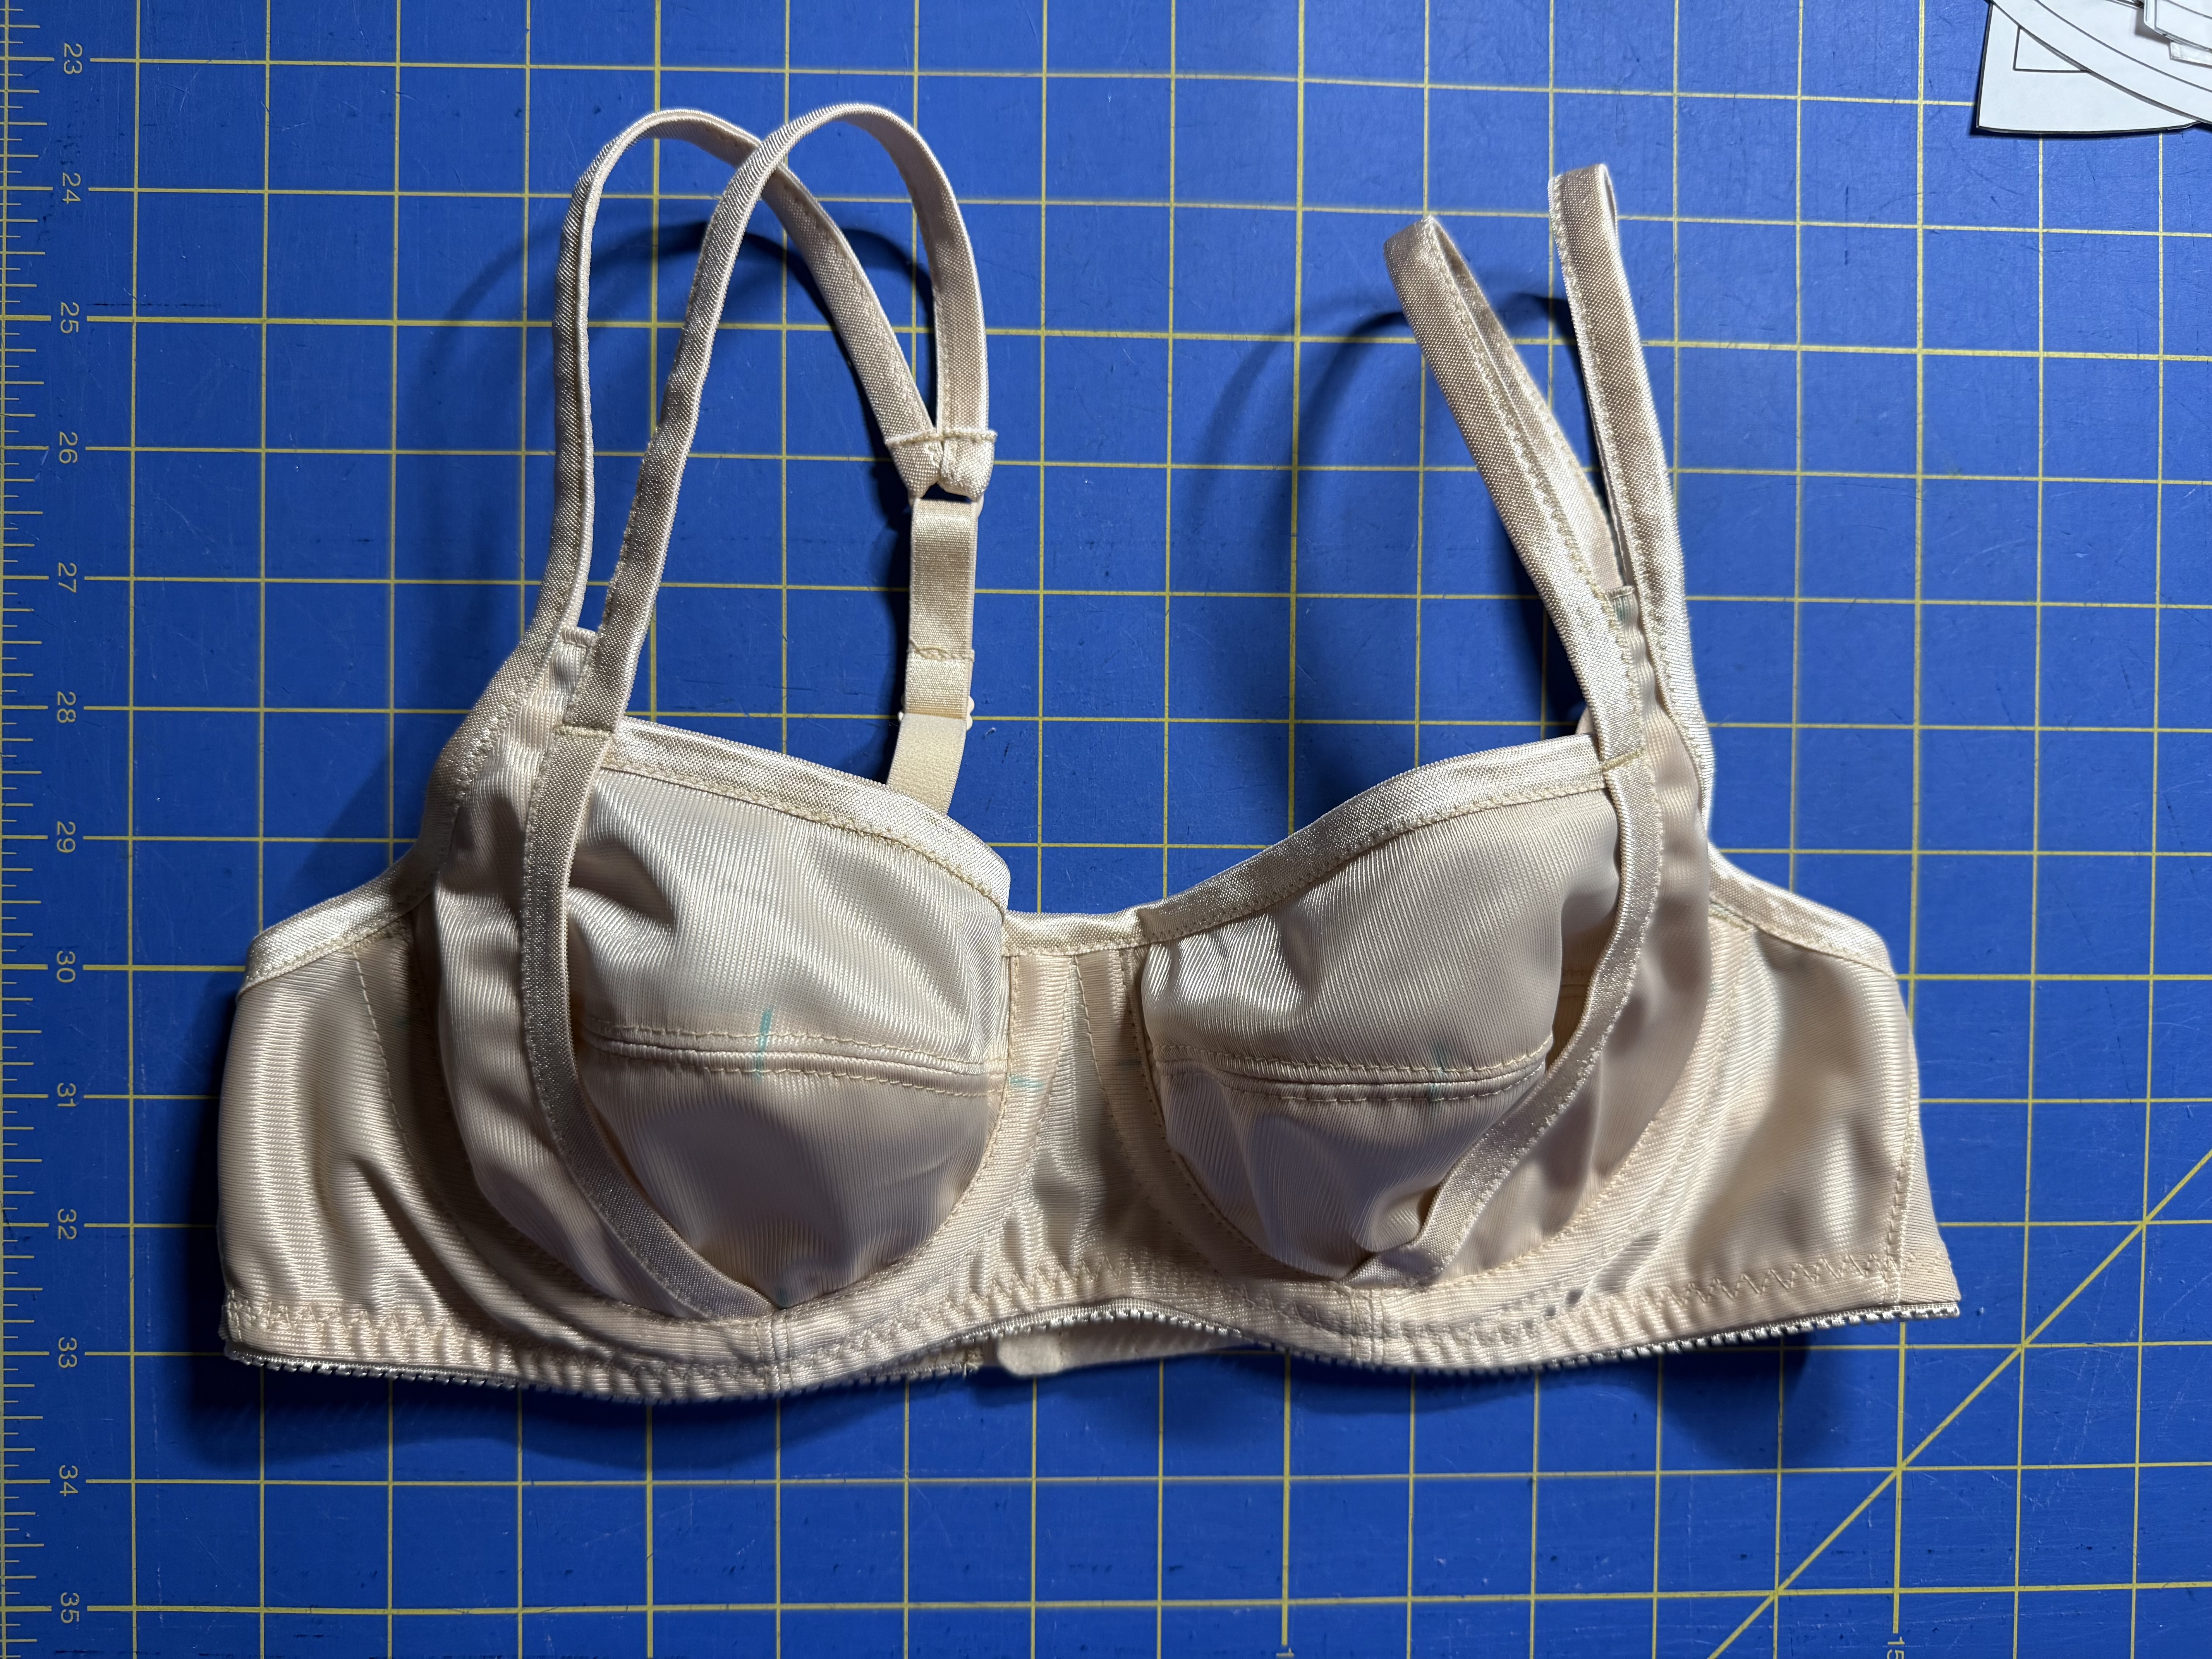
For the larger version, I had to do some different alterations. I didn’t find that I had to do much work to deal with asymmetry (sometimes I do and sometimes I don’t… it really seems to depend on the pattern). I did find that using the two piece cup as drafted was not quite enough volume in the cup though; it’s a bit too flat and pointed forward, which you can kind of see in my fitting test of the pattern.
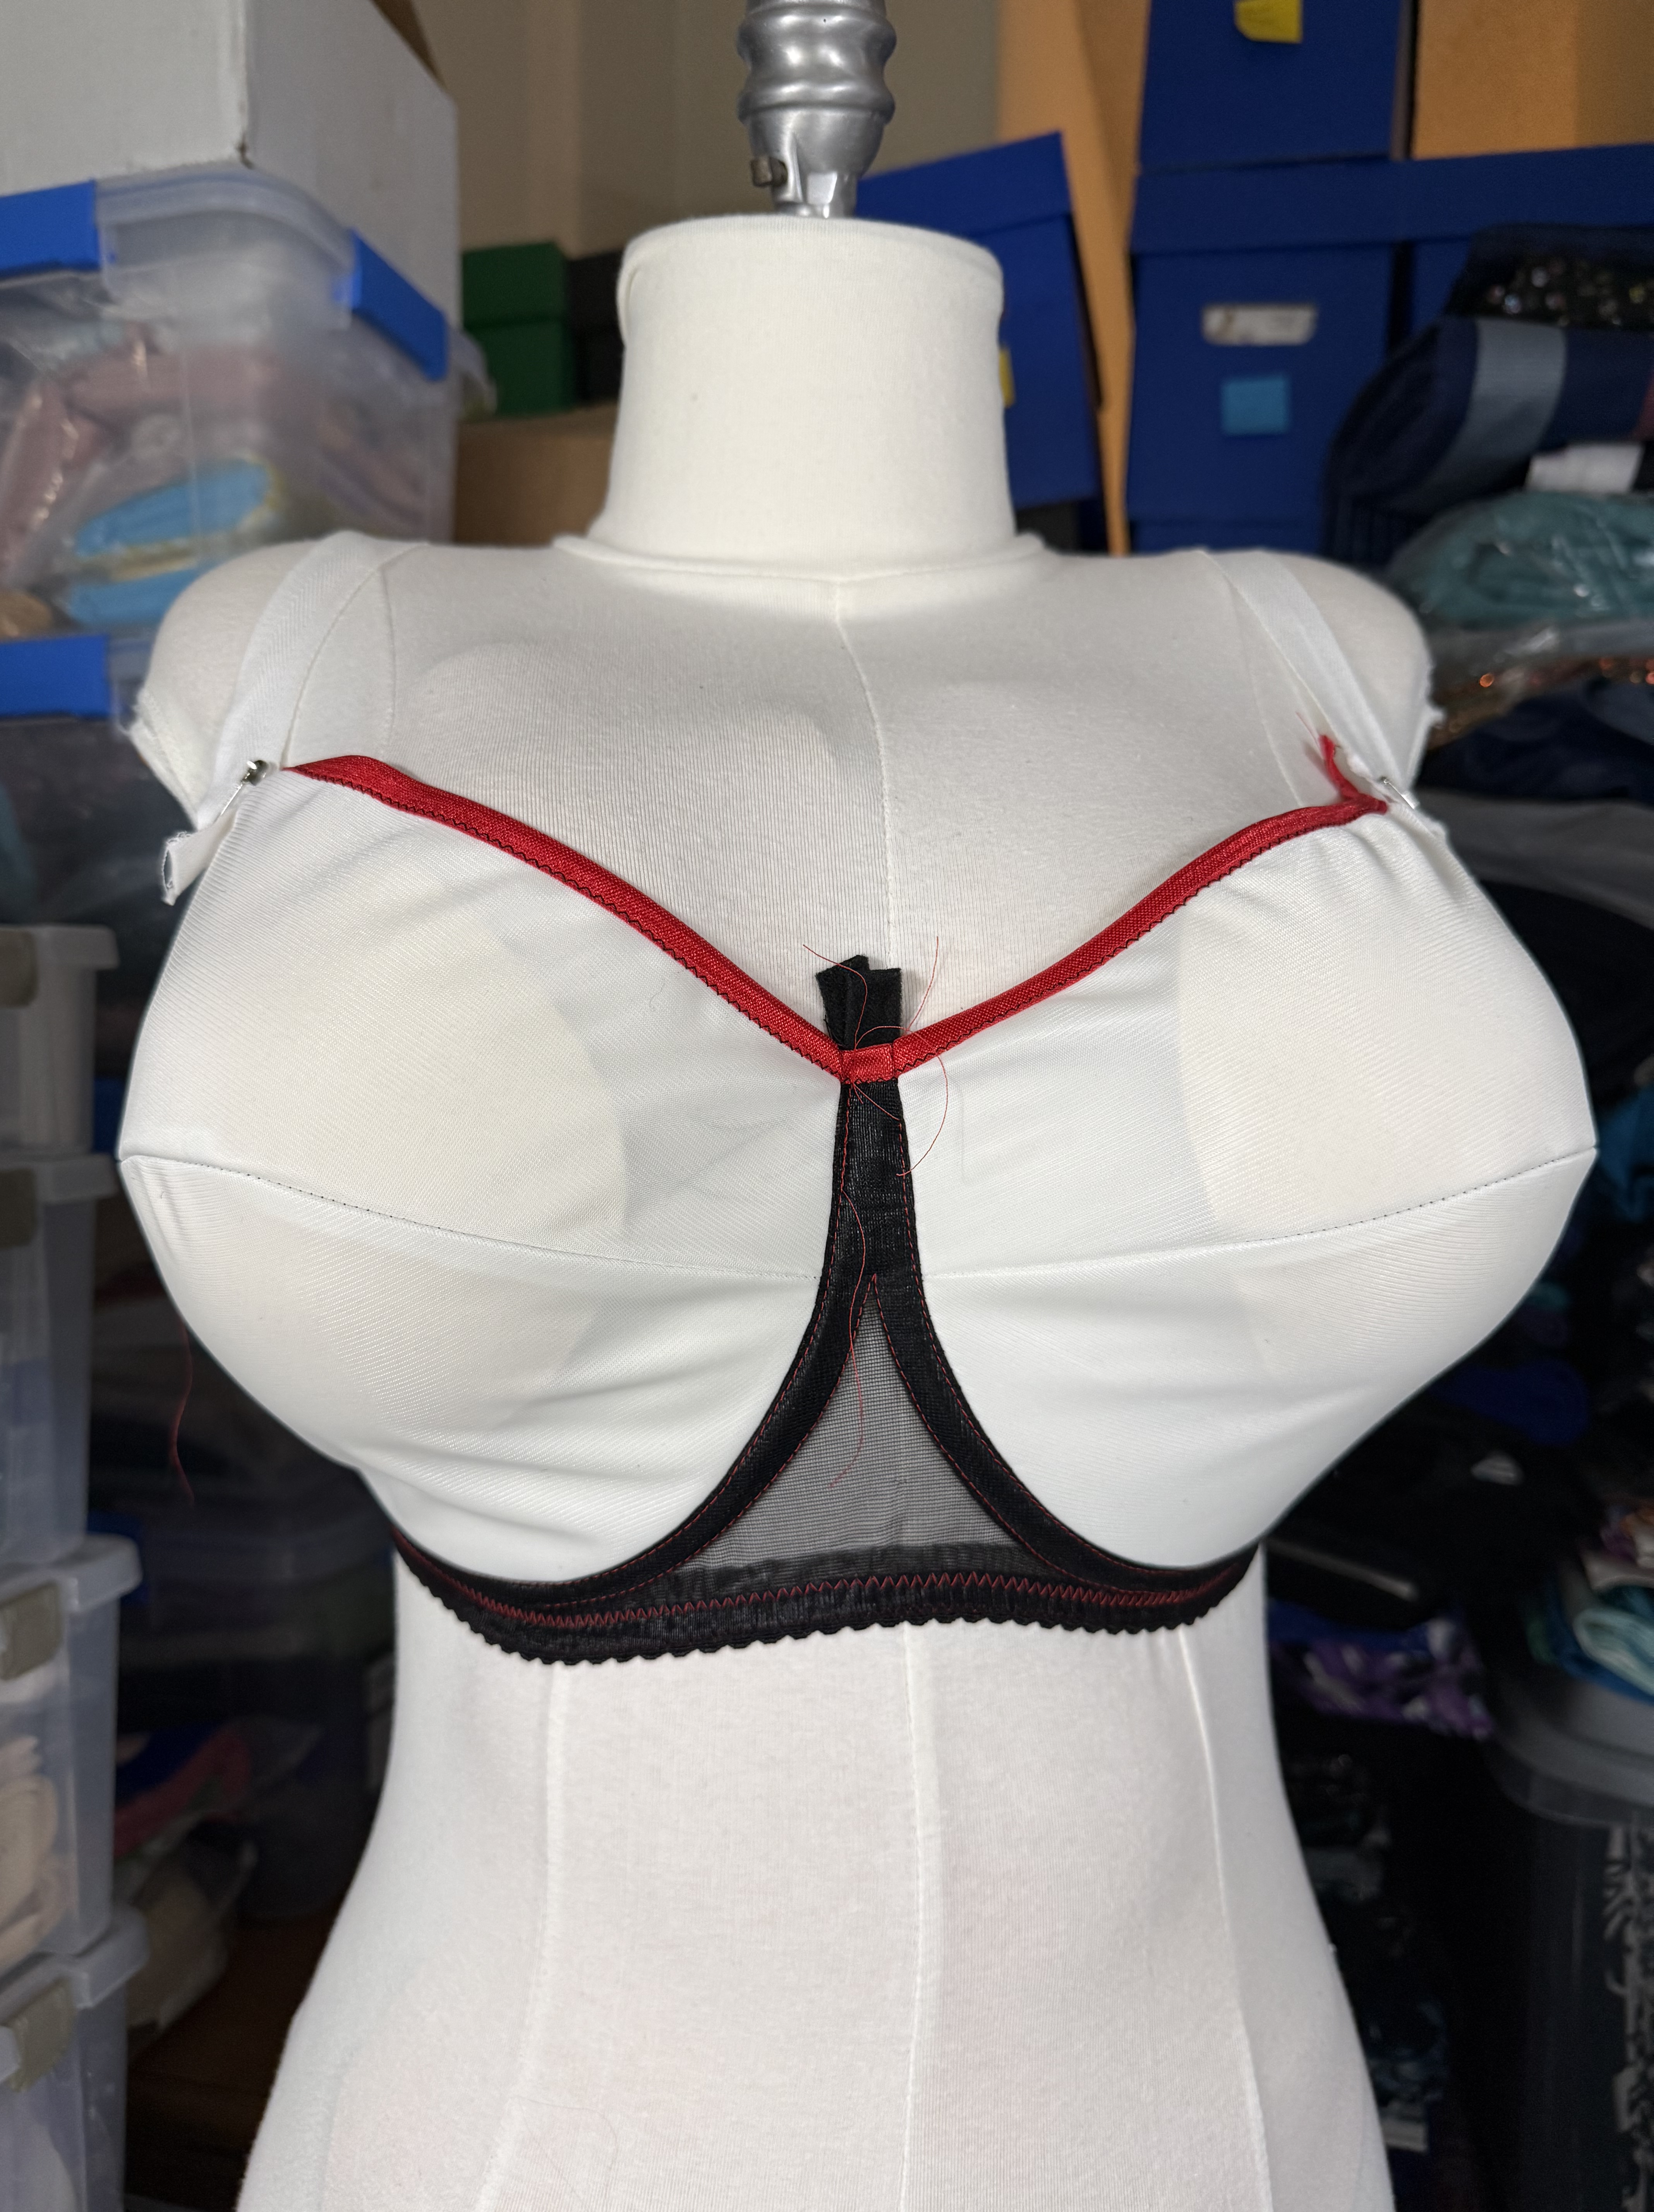
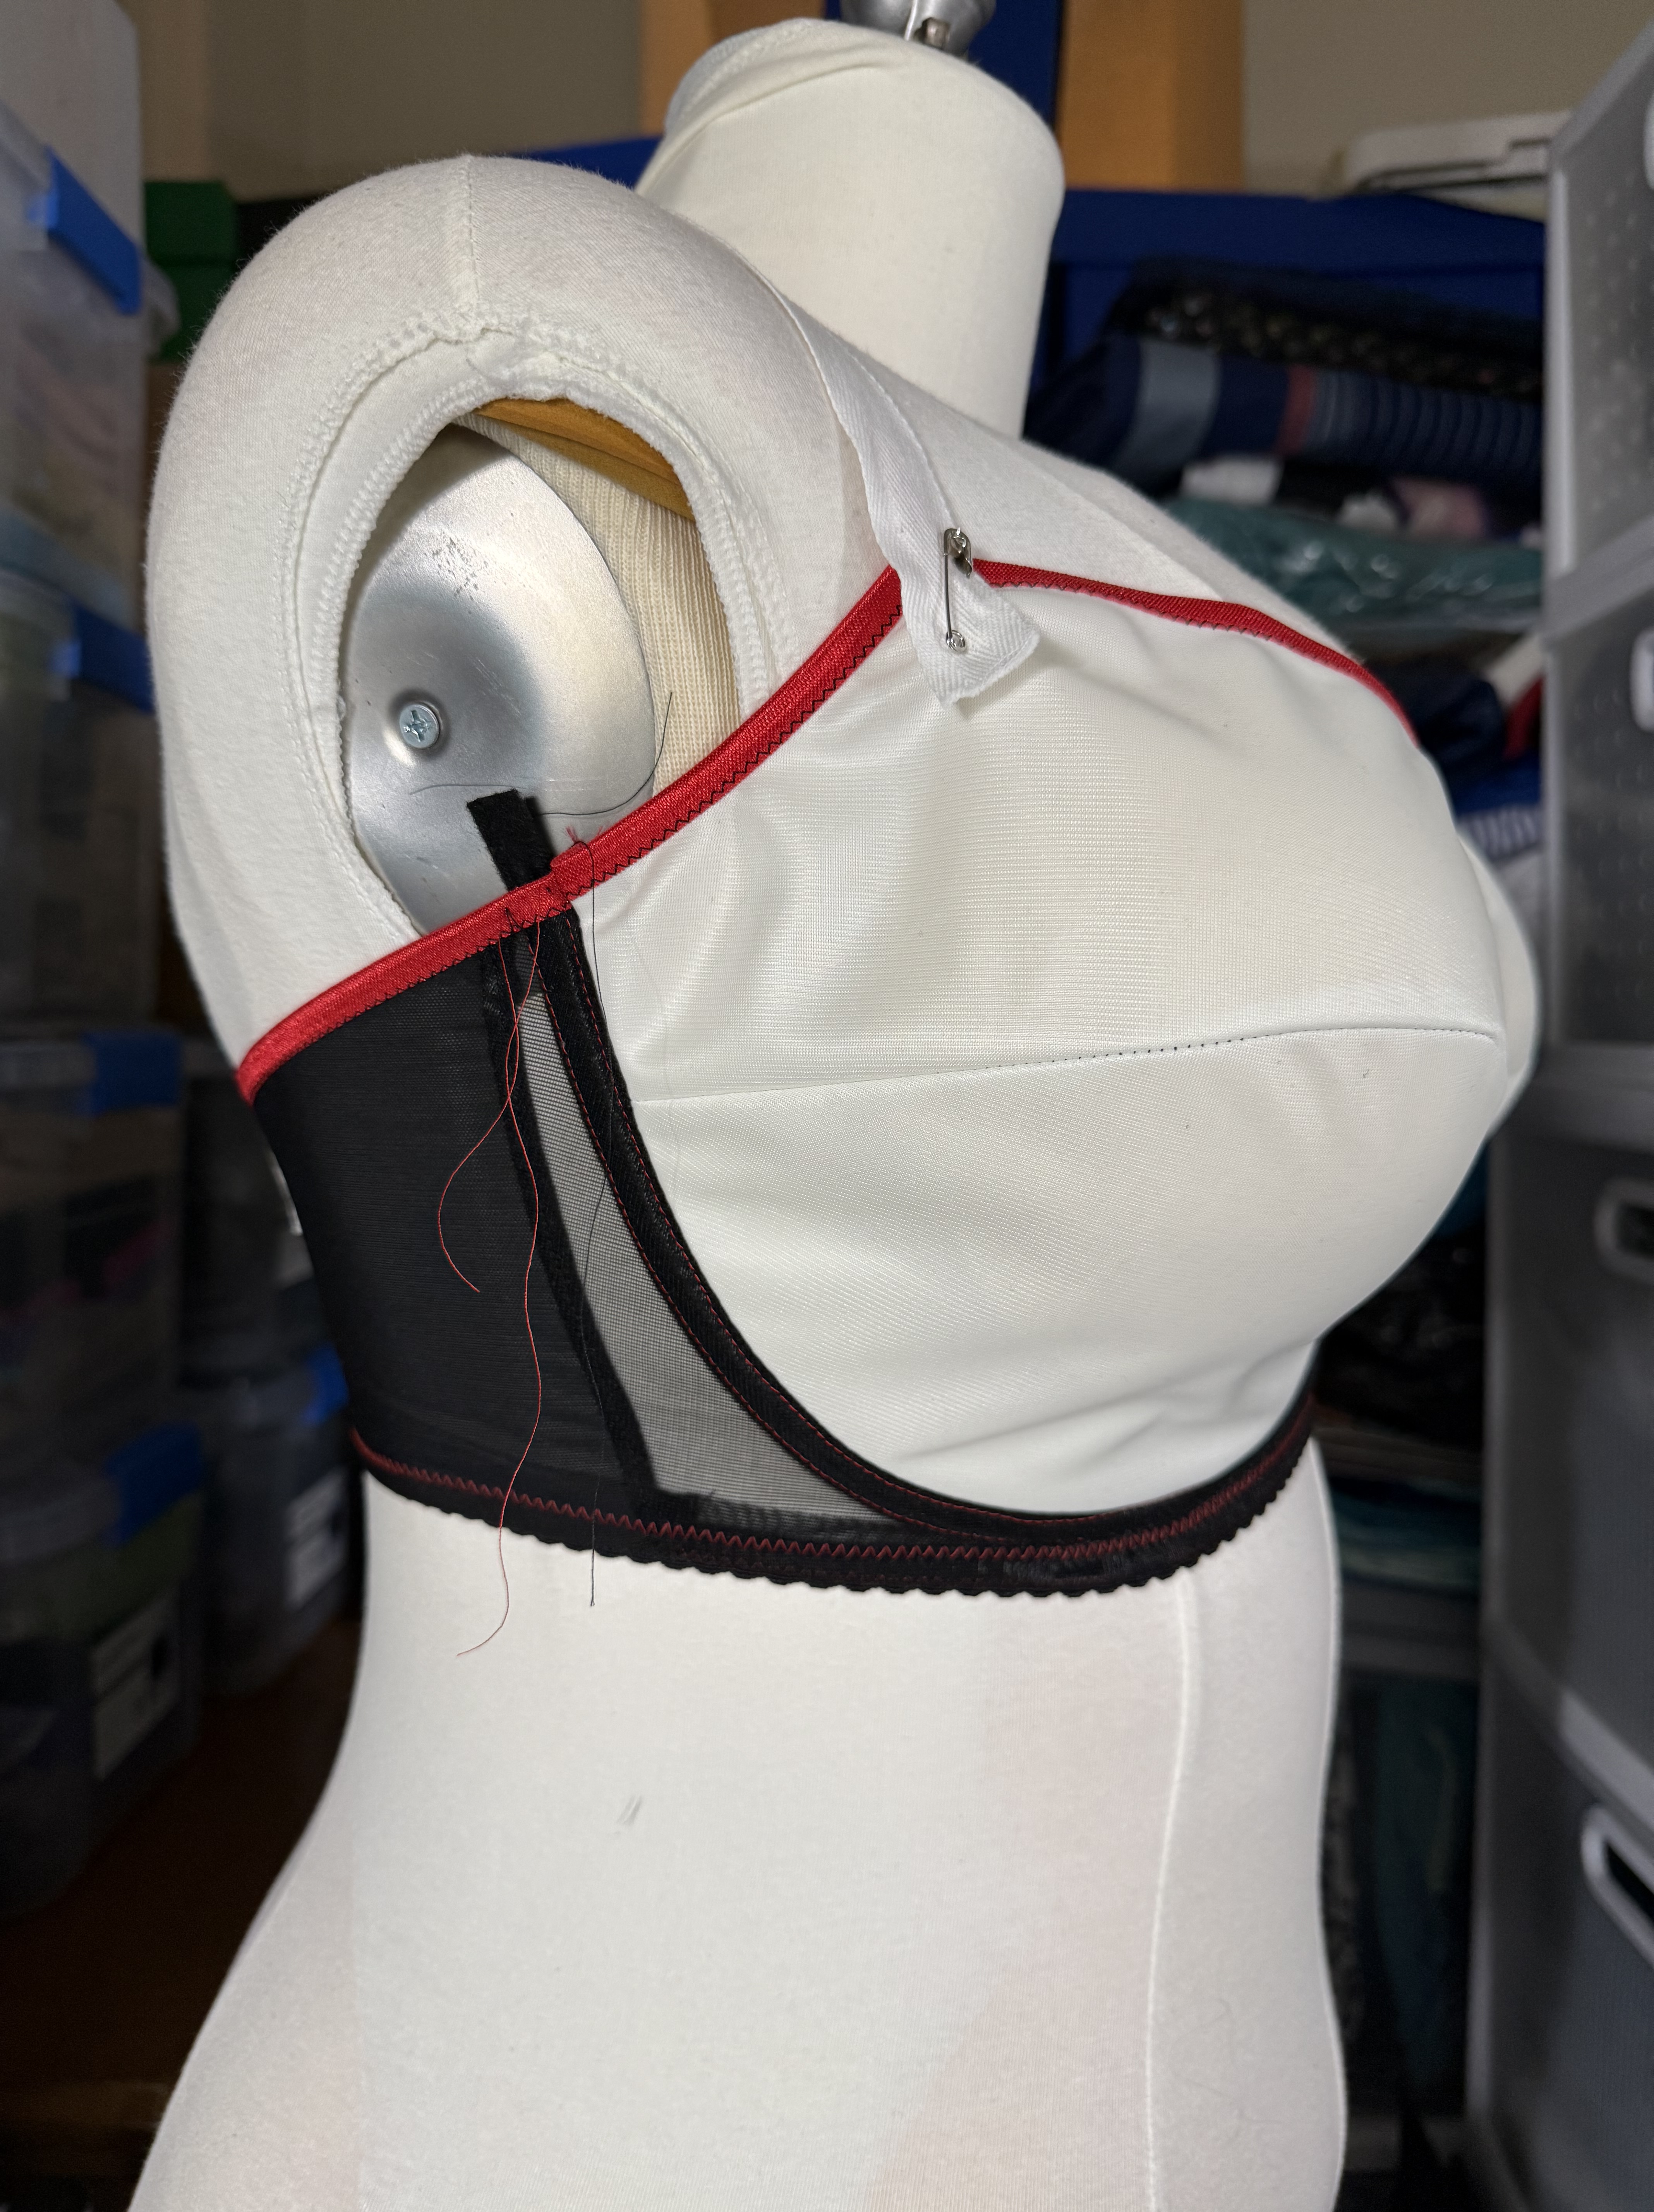
Even on the dressform you can see how awkward the fit is on the lower cup. To adjust for this, I split the lower cup, which resulted in a rounder cup shape and just a bit more volume from adding a curved seam at the split. This helped a lot in terms of the cup volume. You can also see from the sample that the band is intentionally drafted for overlapping channeling on the larger sizes. Because this is more of a balconette style and not as much of a full coverage style on me, this was too narrow in the bridge so I widened it to allow for side-by-side channeling. I only needed to add 1/4″ of width to the bridge to allow for this. I added a bit more width at the bottom of the bridge, but I think I’m going to take that back out and just keep the 1/4″ for the channeling for the next version.
Since I was ordering some wires from Emerald Erin, I decided to also get a few kits for our pattern testing experiment, so I also used a duoplex kit. But I wanted to add matching bottoms from some stash fabric, and I wanted to try and echo the double strap feature, so I went to Procreate to draw out a plan using My Body Model croquis.
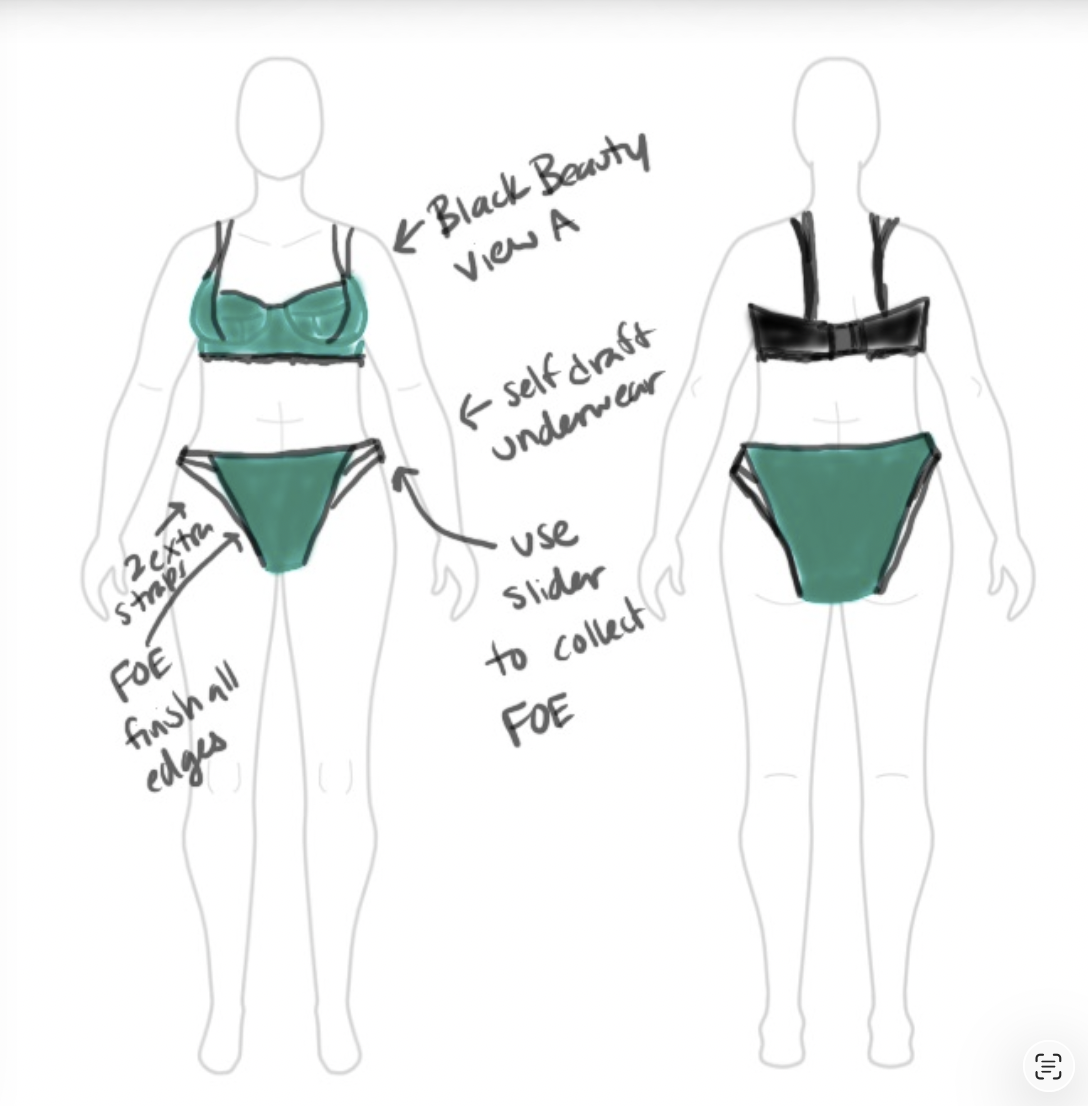
And here is what I made for myself:
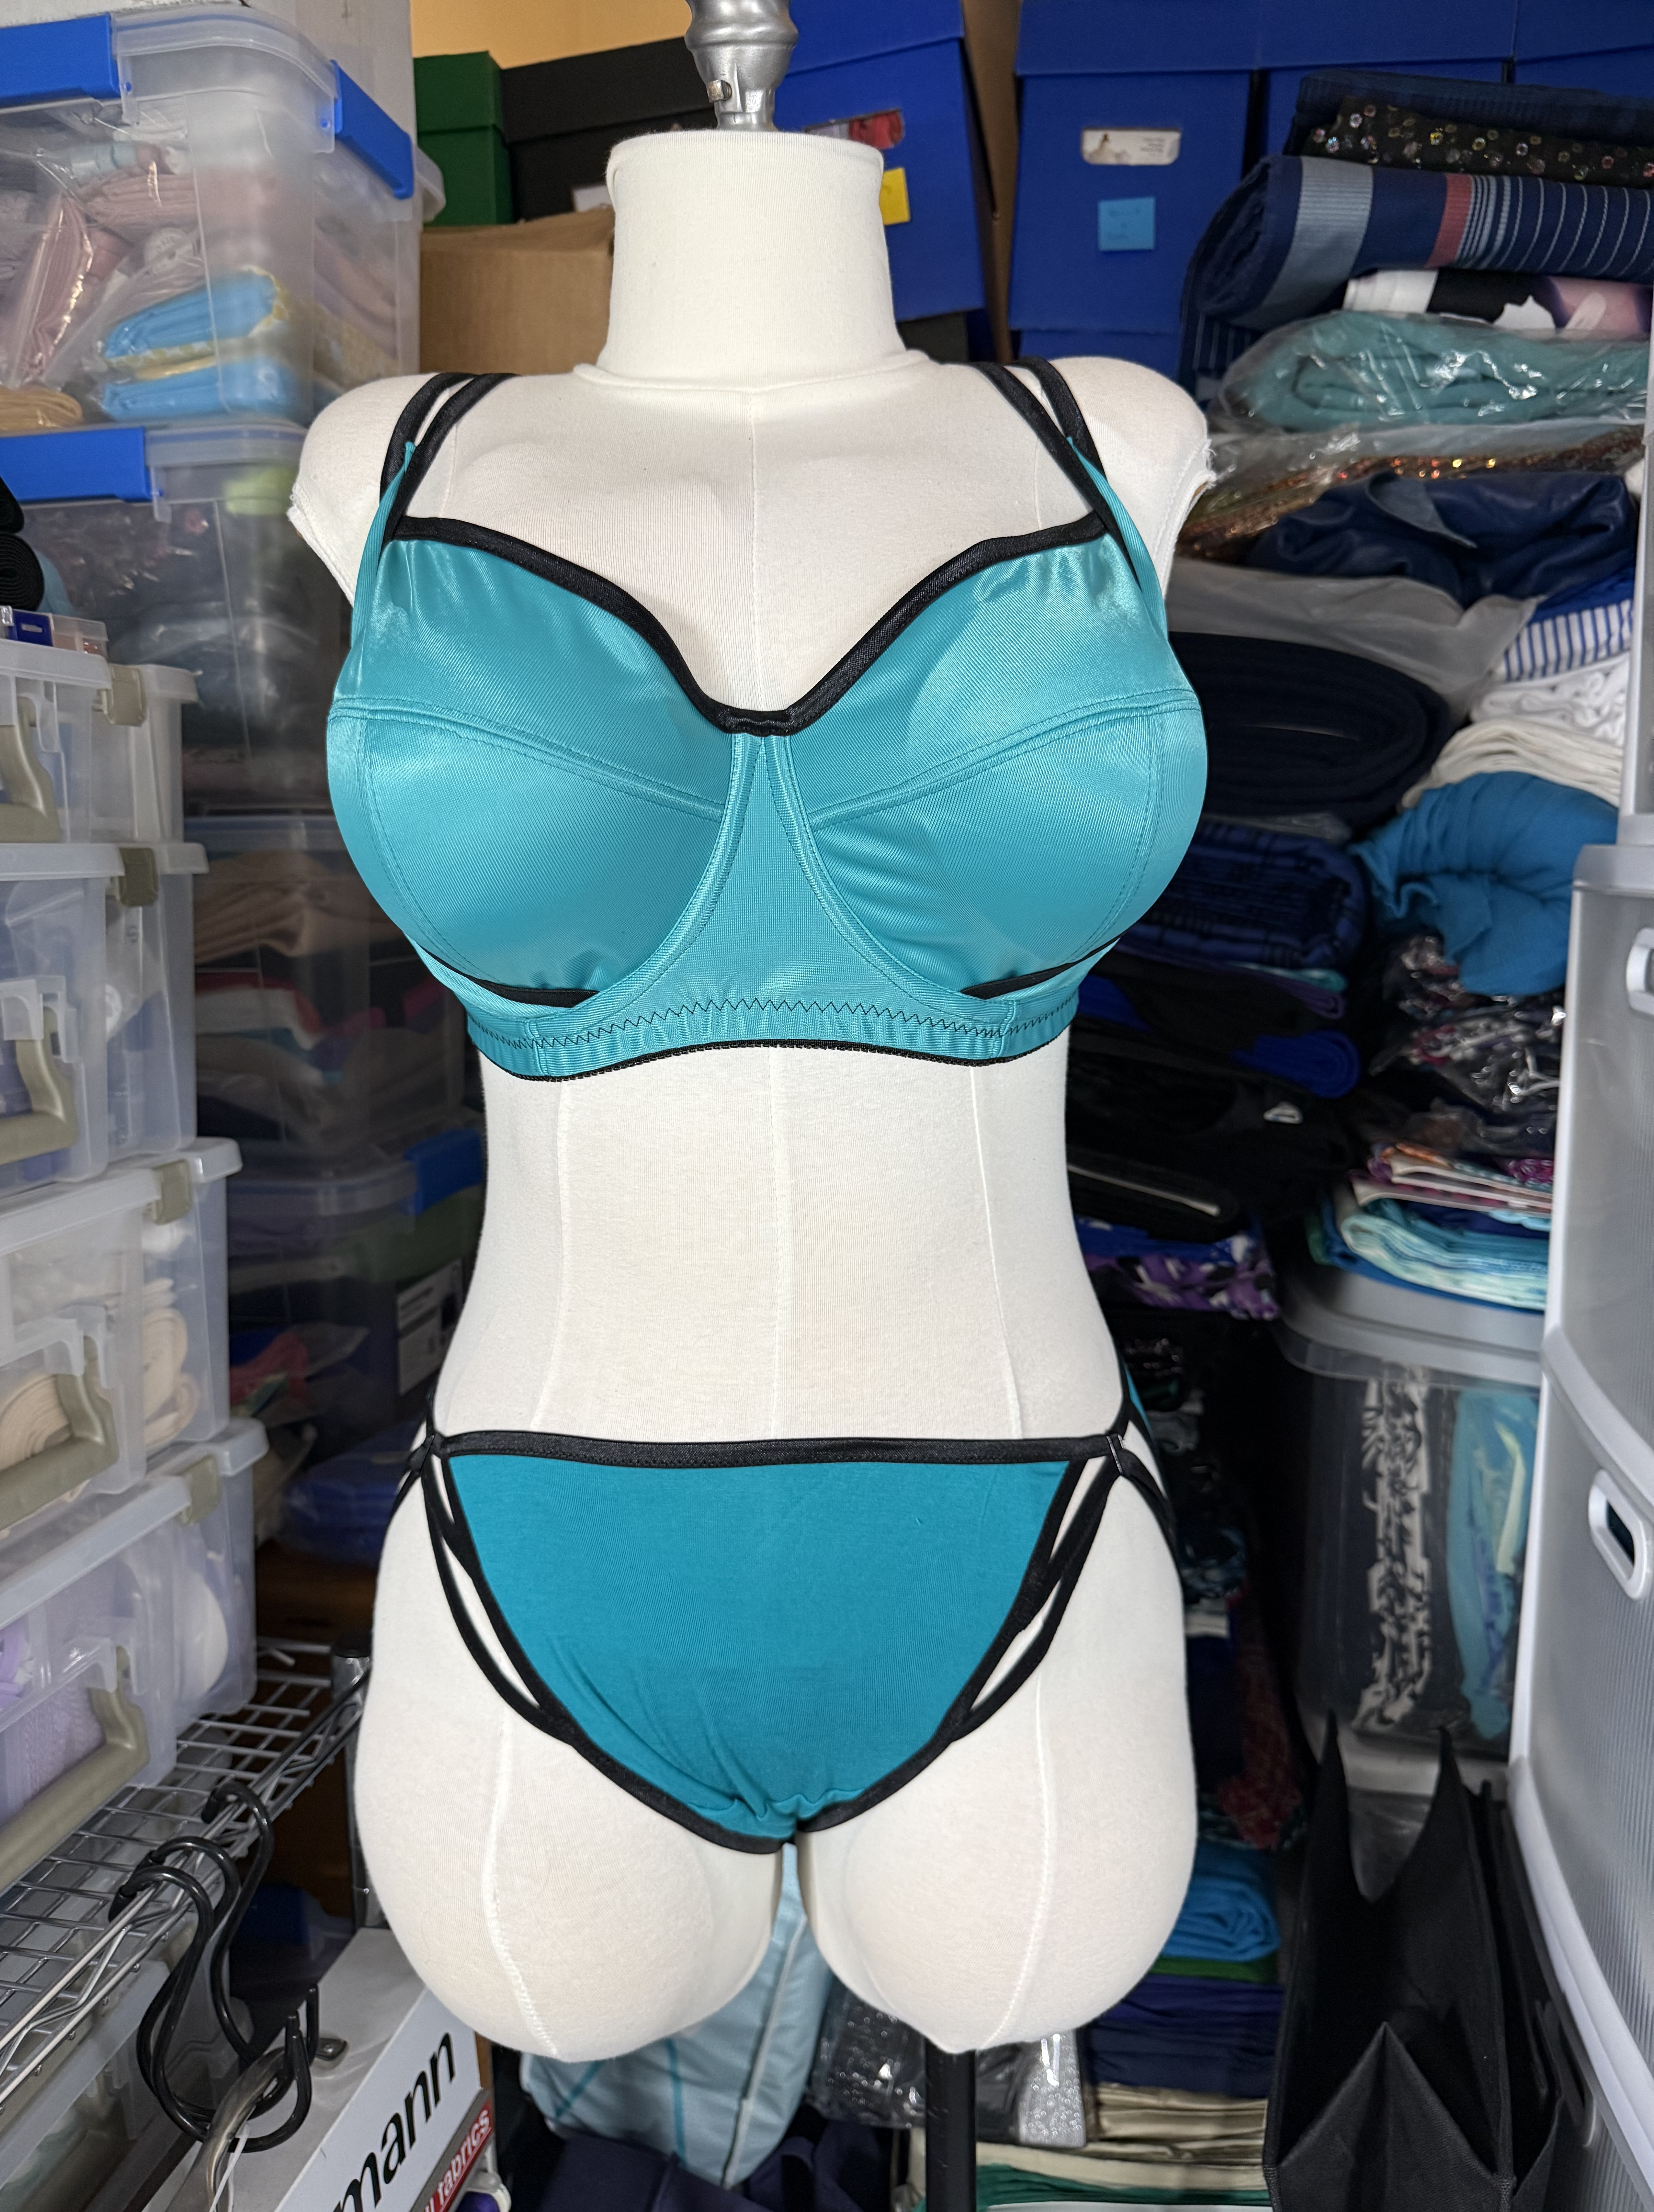

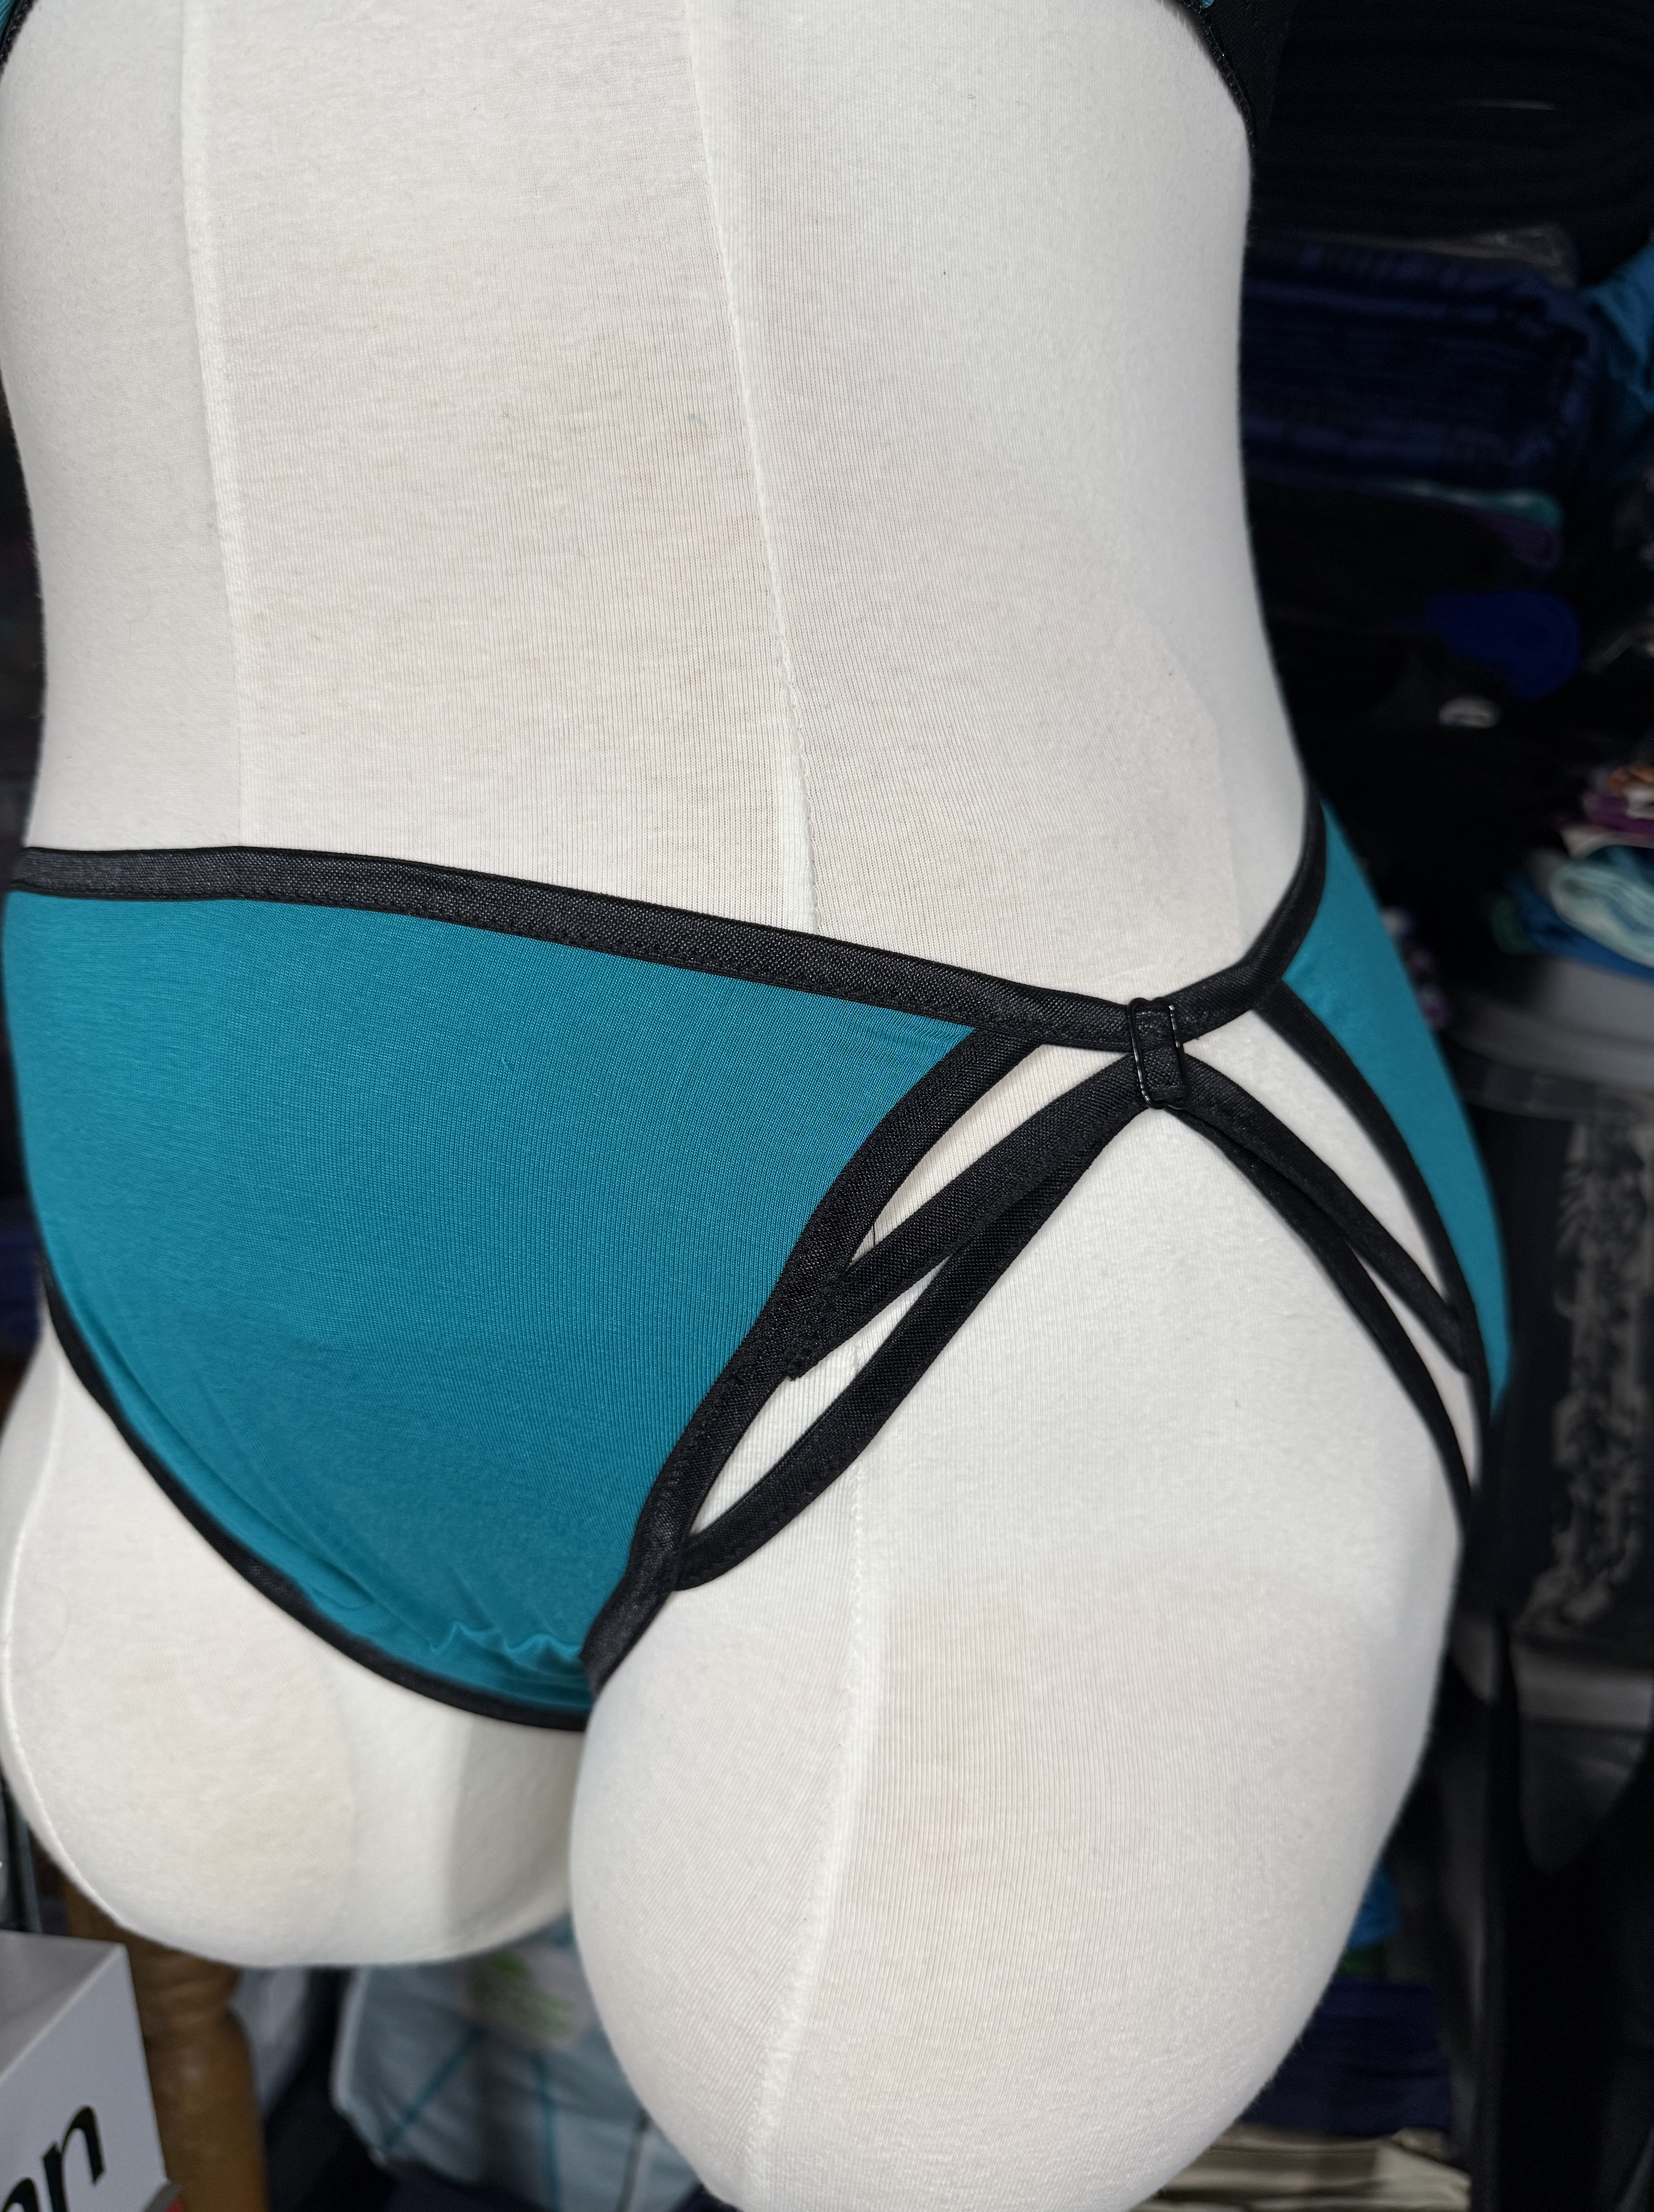
From the fit sample to the final version, you can see how much impact splitting the lower cup has on the shape of the cup; I’m much happier with the final version. I’m also really pleased with how well my stash fabric for the bottoms matches the overall look and colors of the bra kit. For the bottoms I modified the Kisa Knickers to incorporate the strappy side detail to echo the graphic lines of the black on teal of the top. I want to raise the attachment point of the middle elastic on the back slightly to give a better proportion of the negative space, but otherwise I’m really happy with how this turned out.
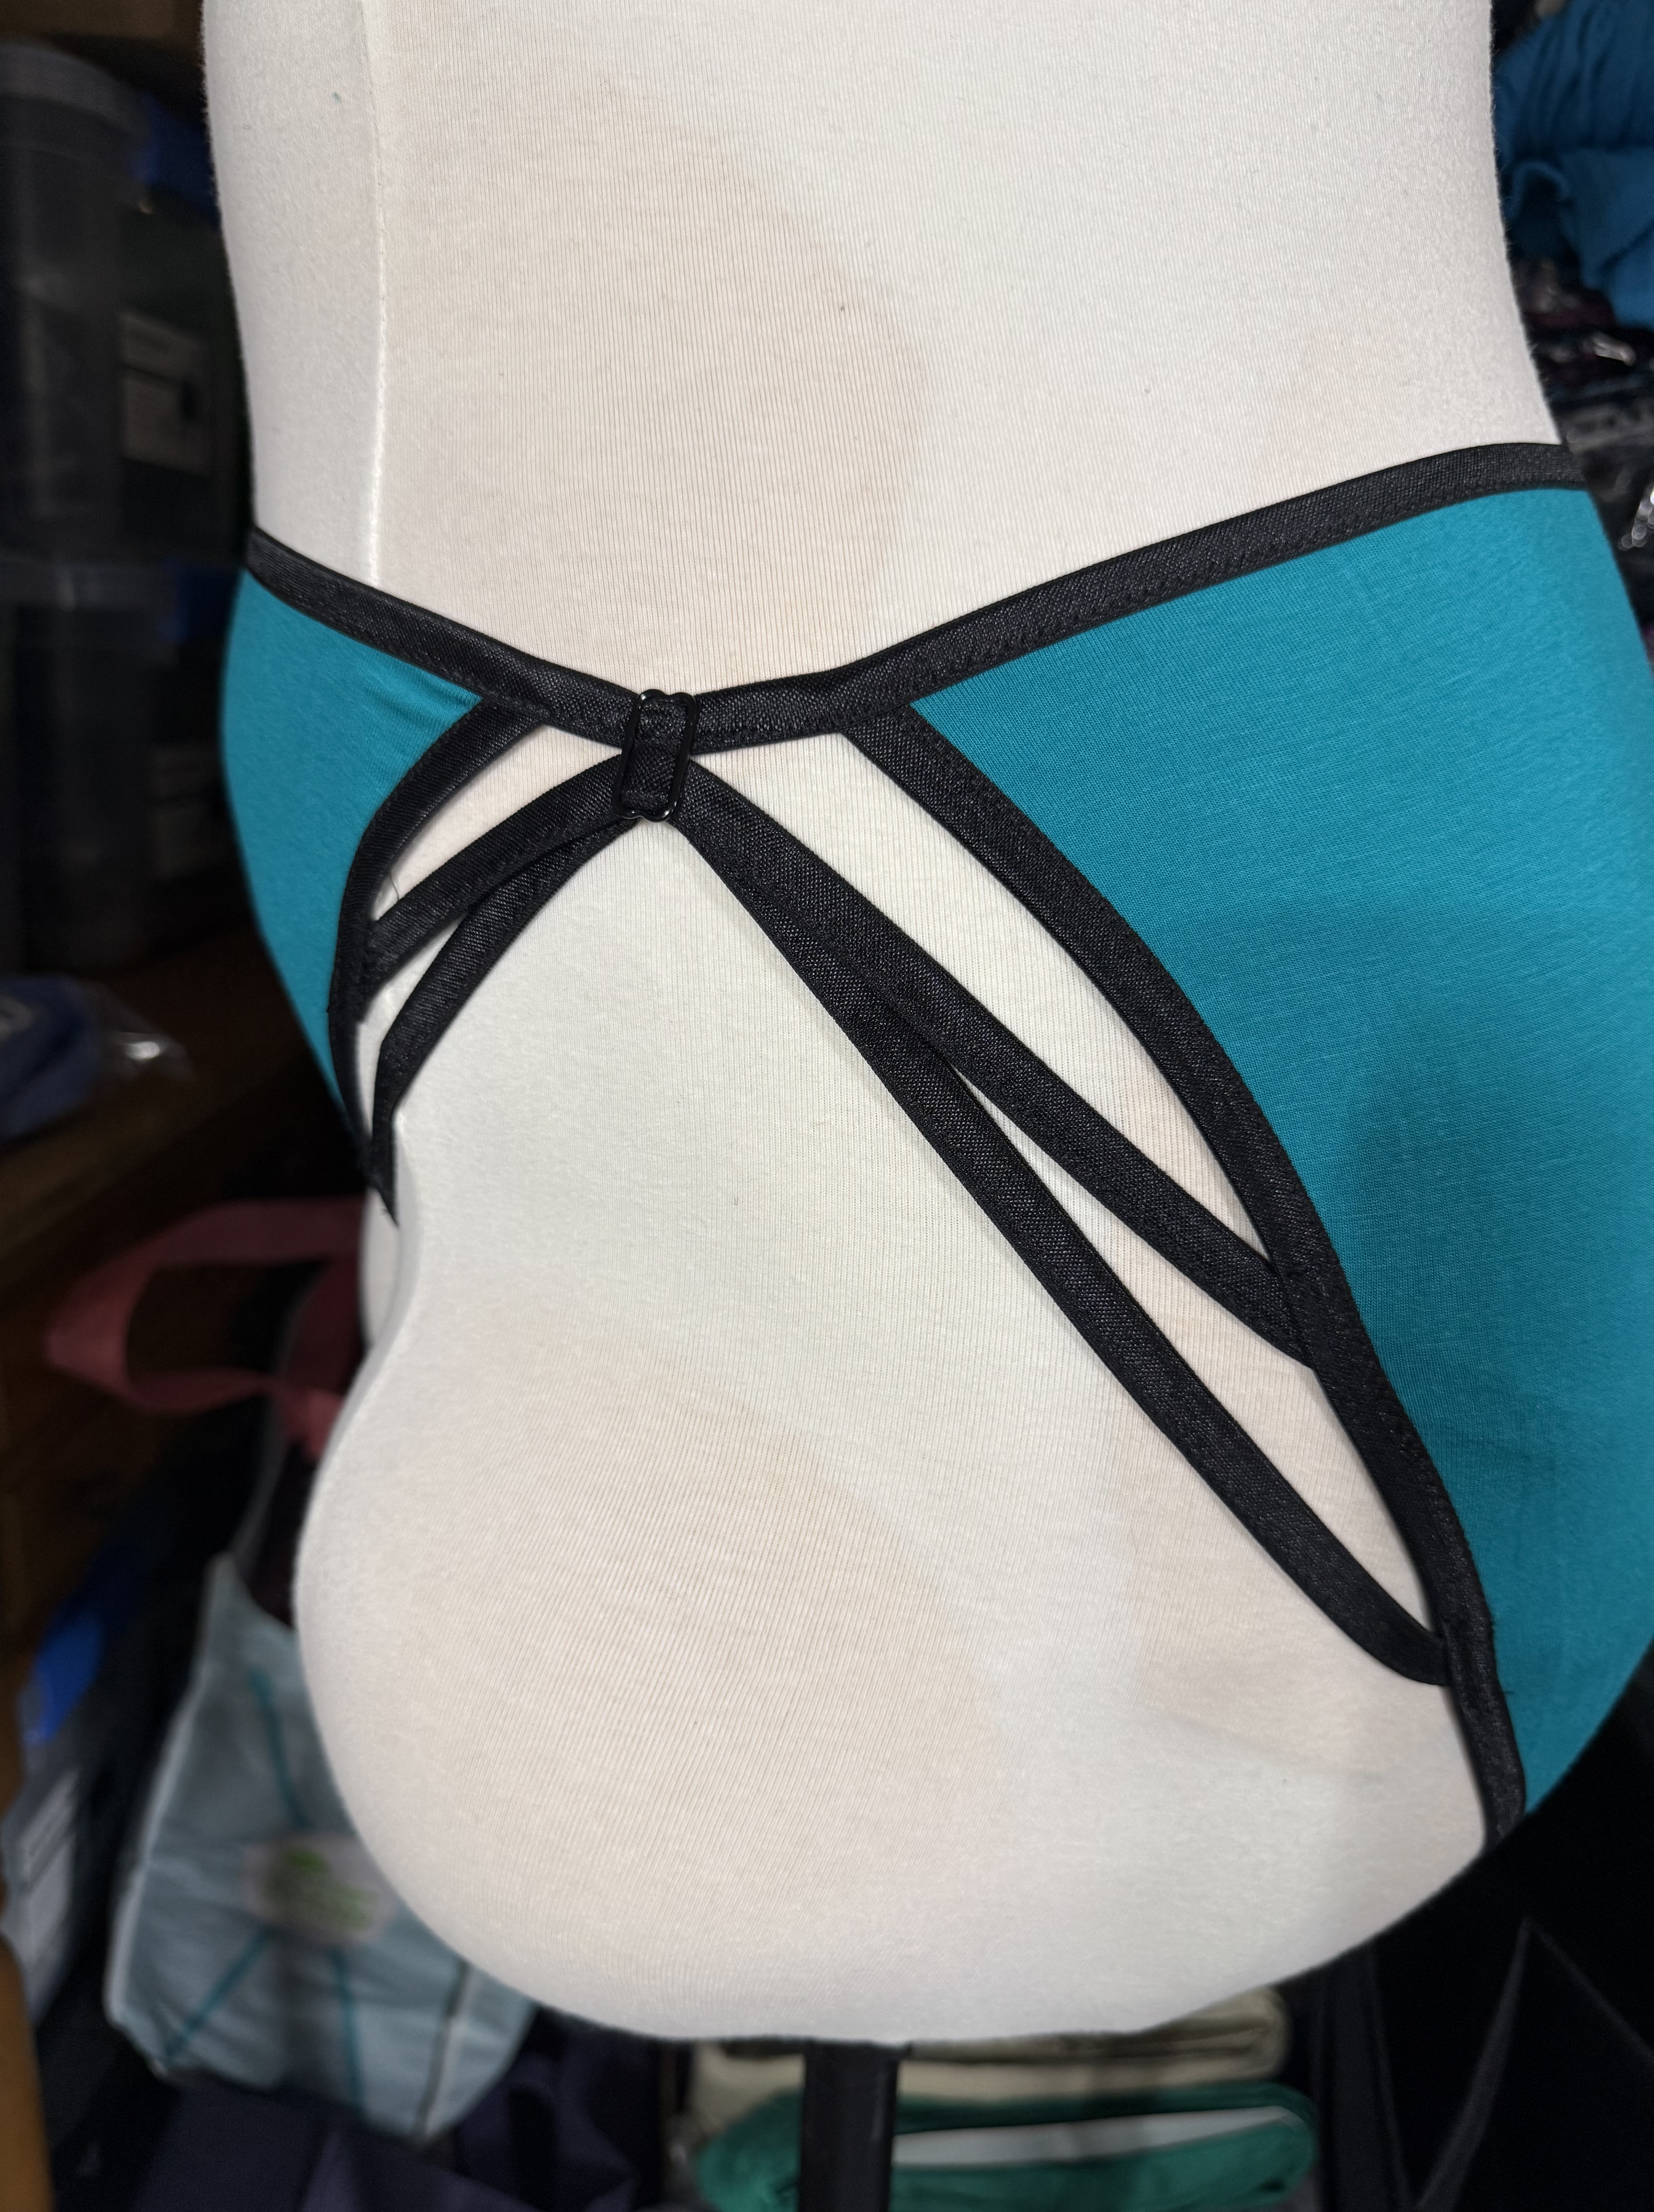
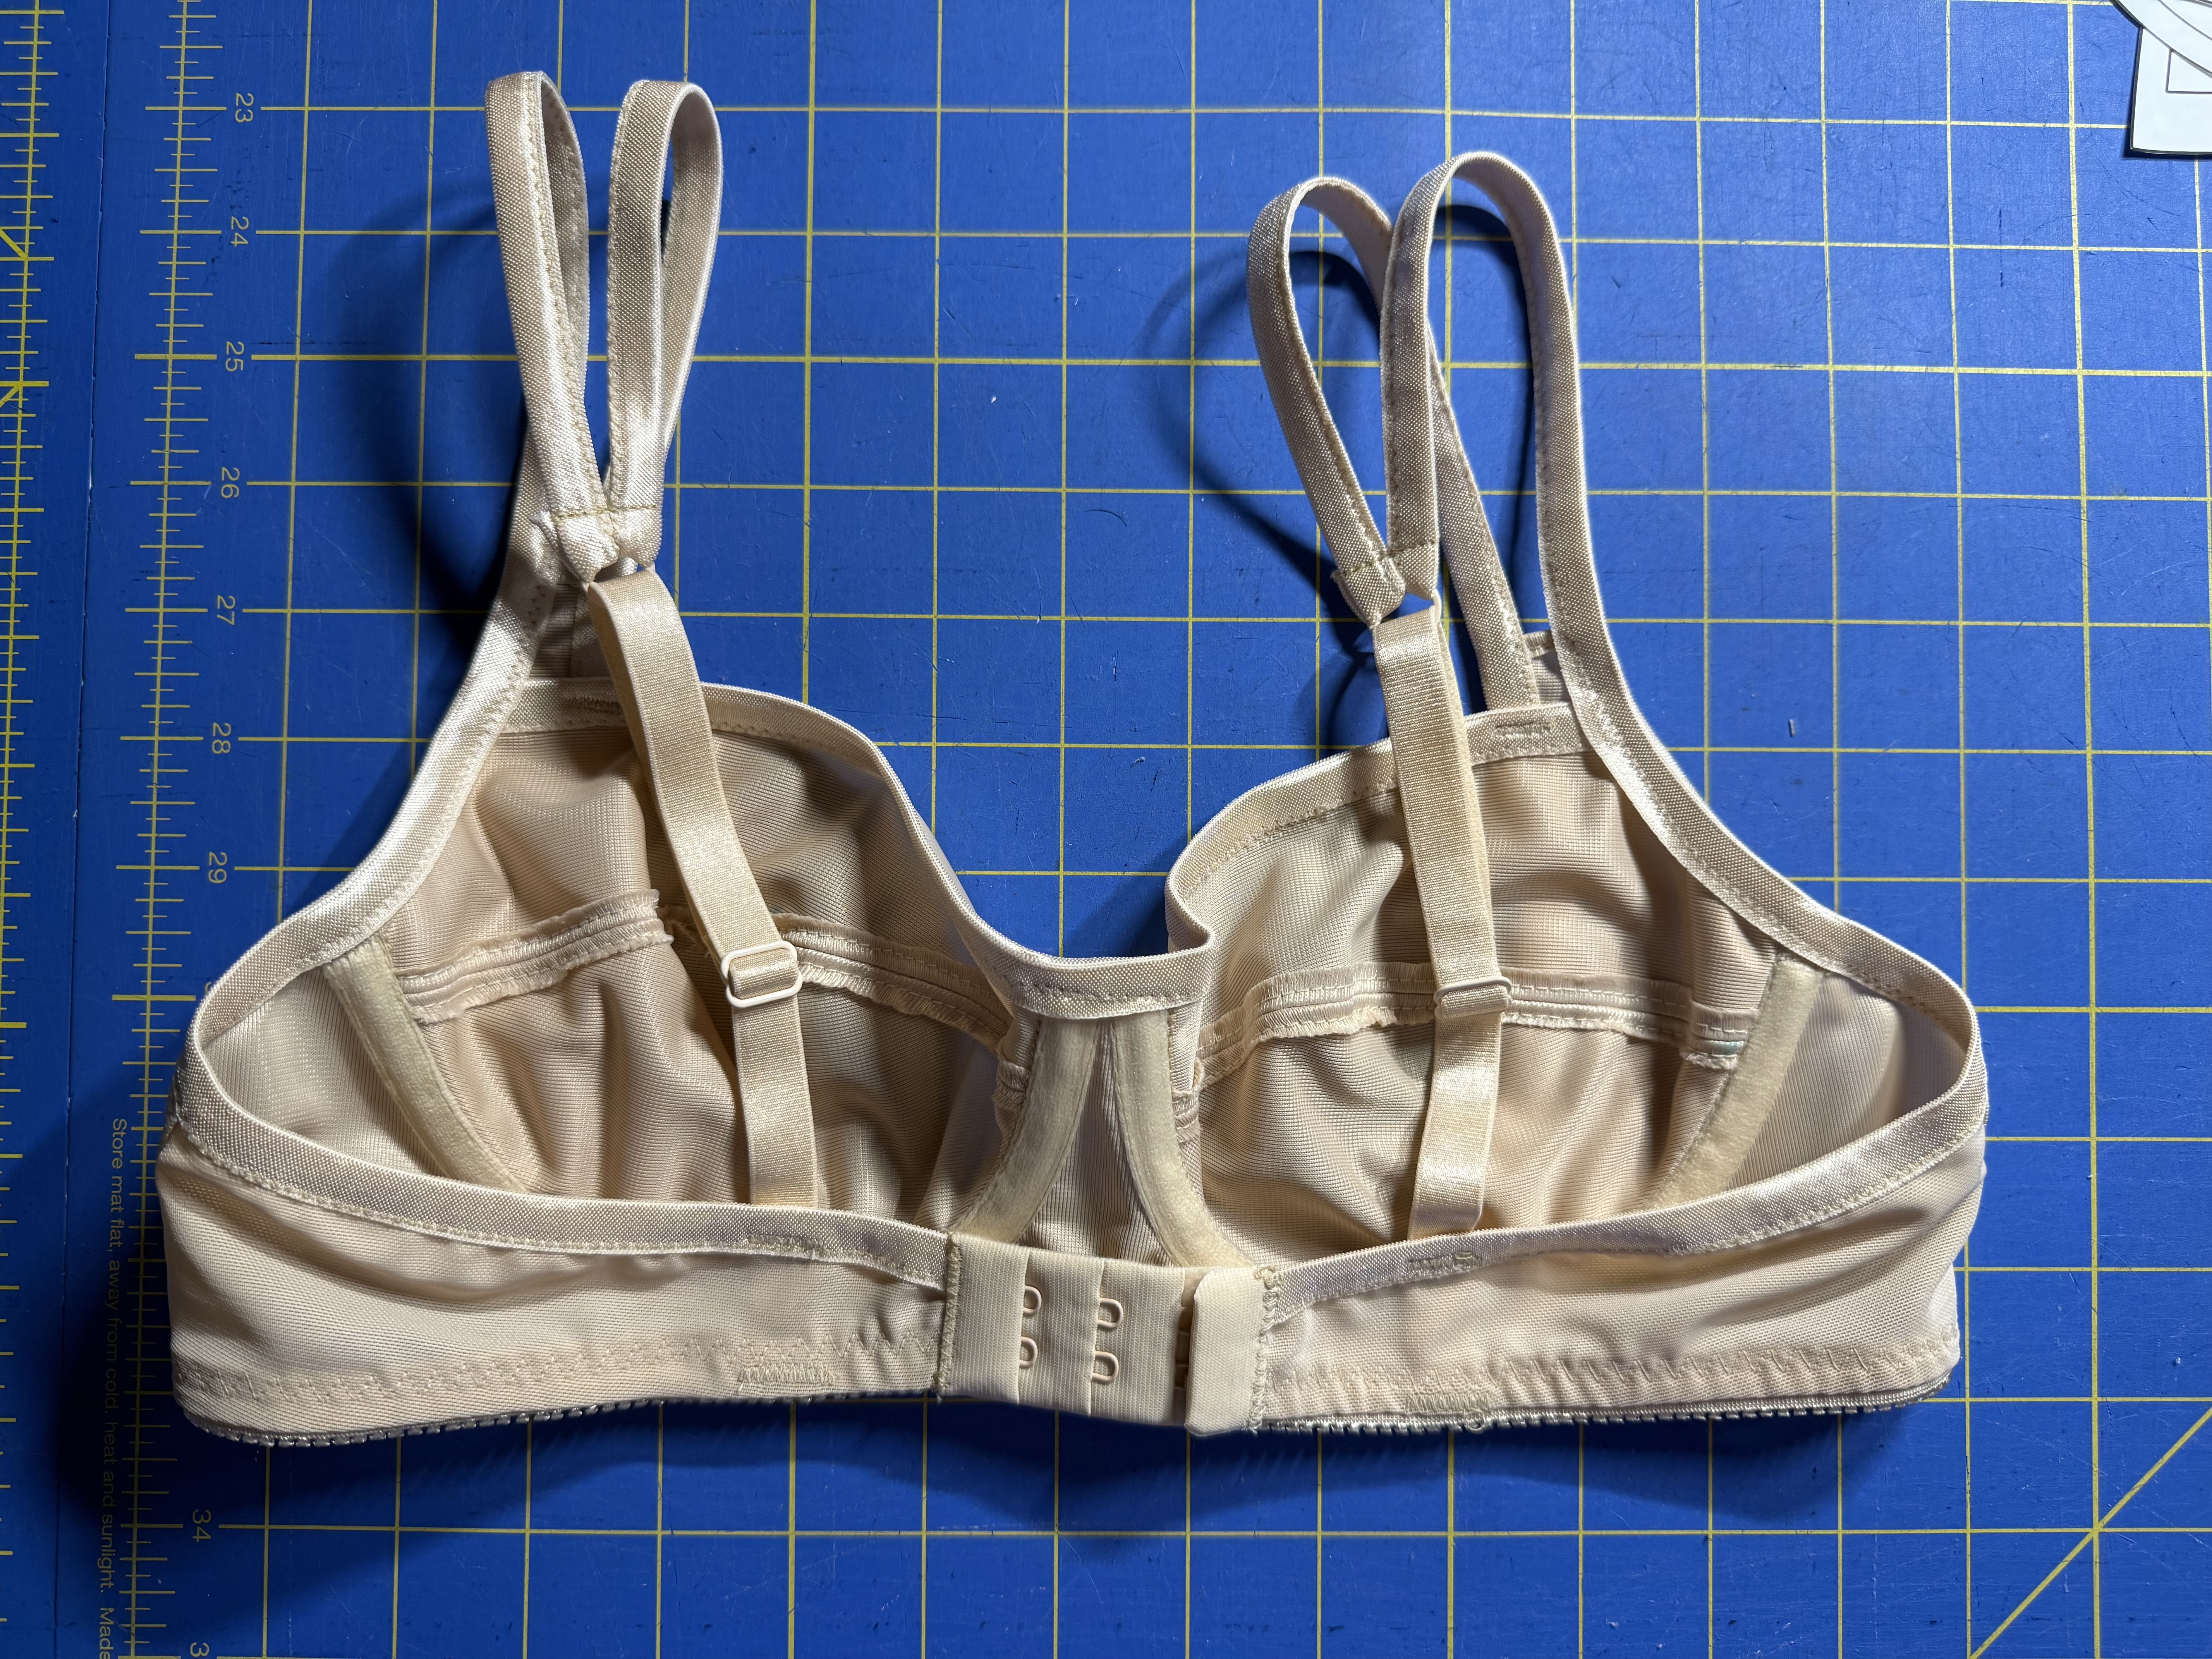
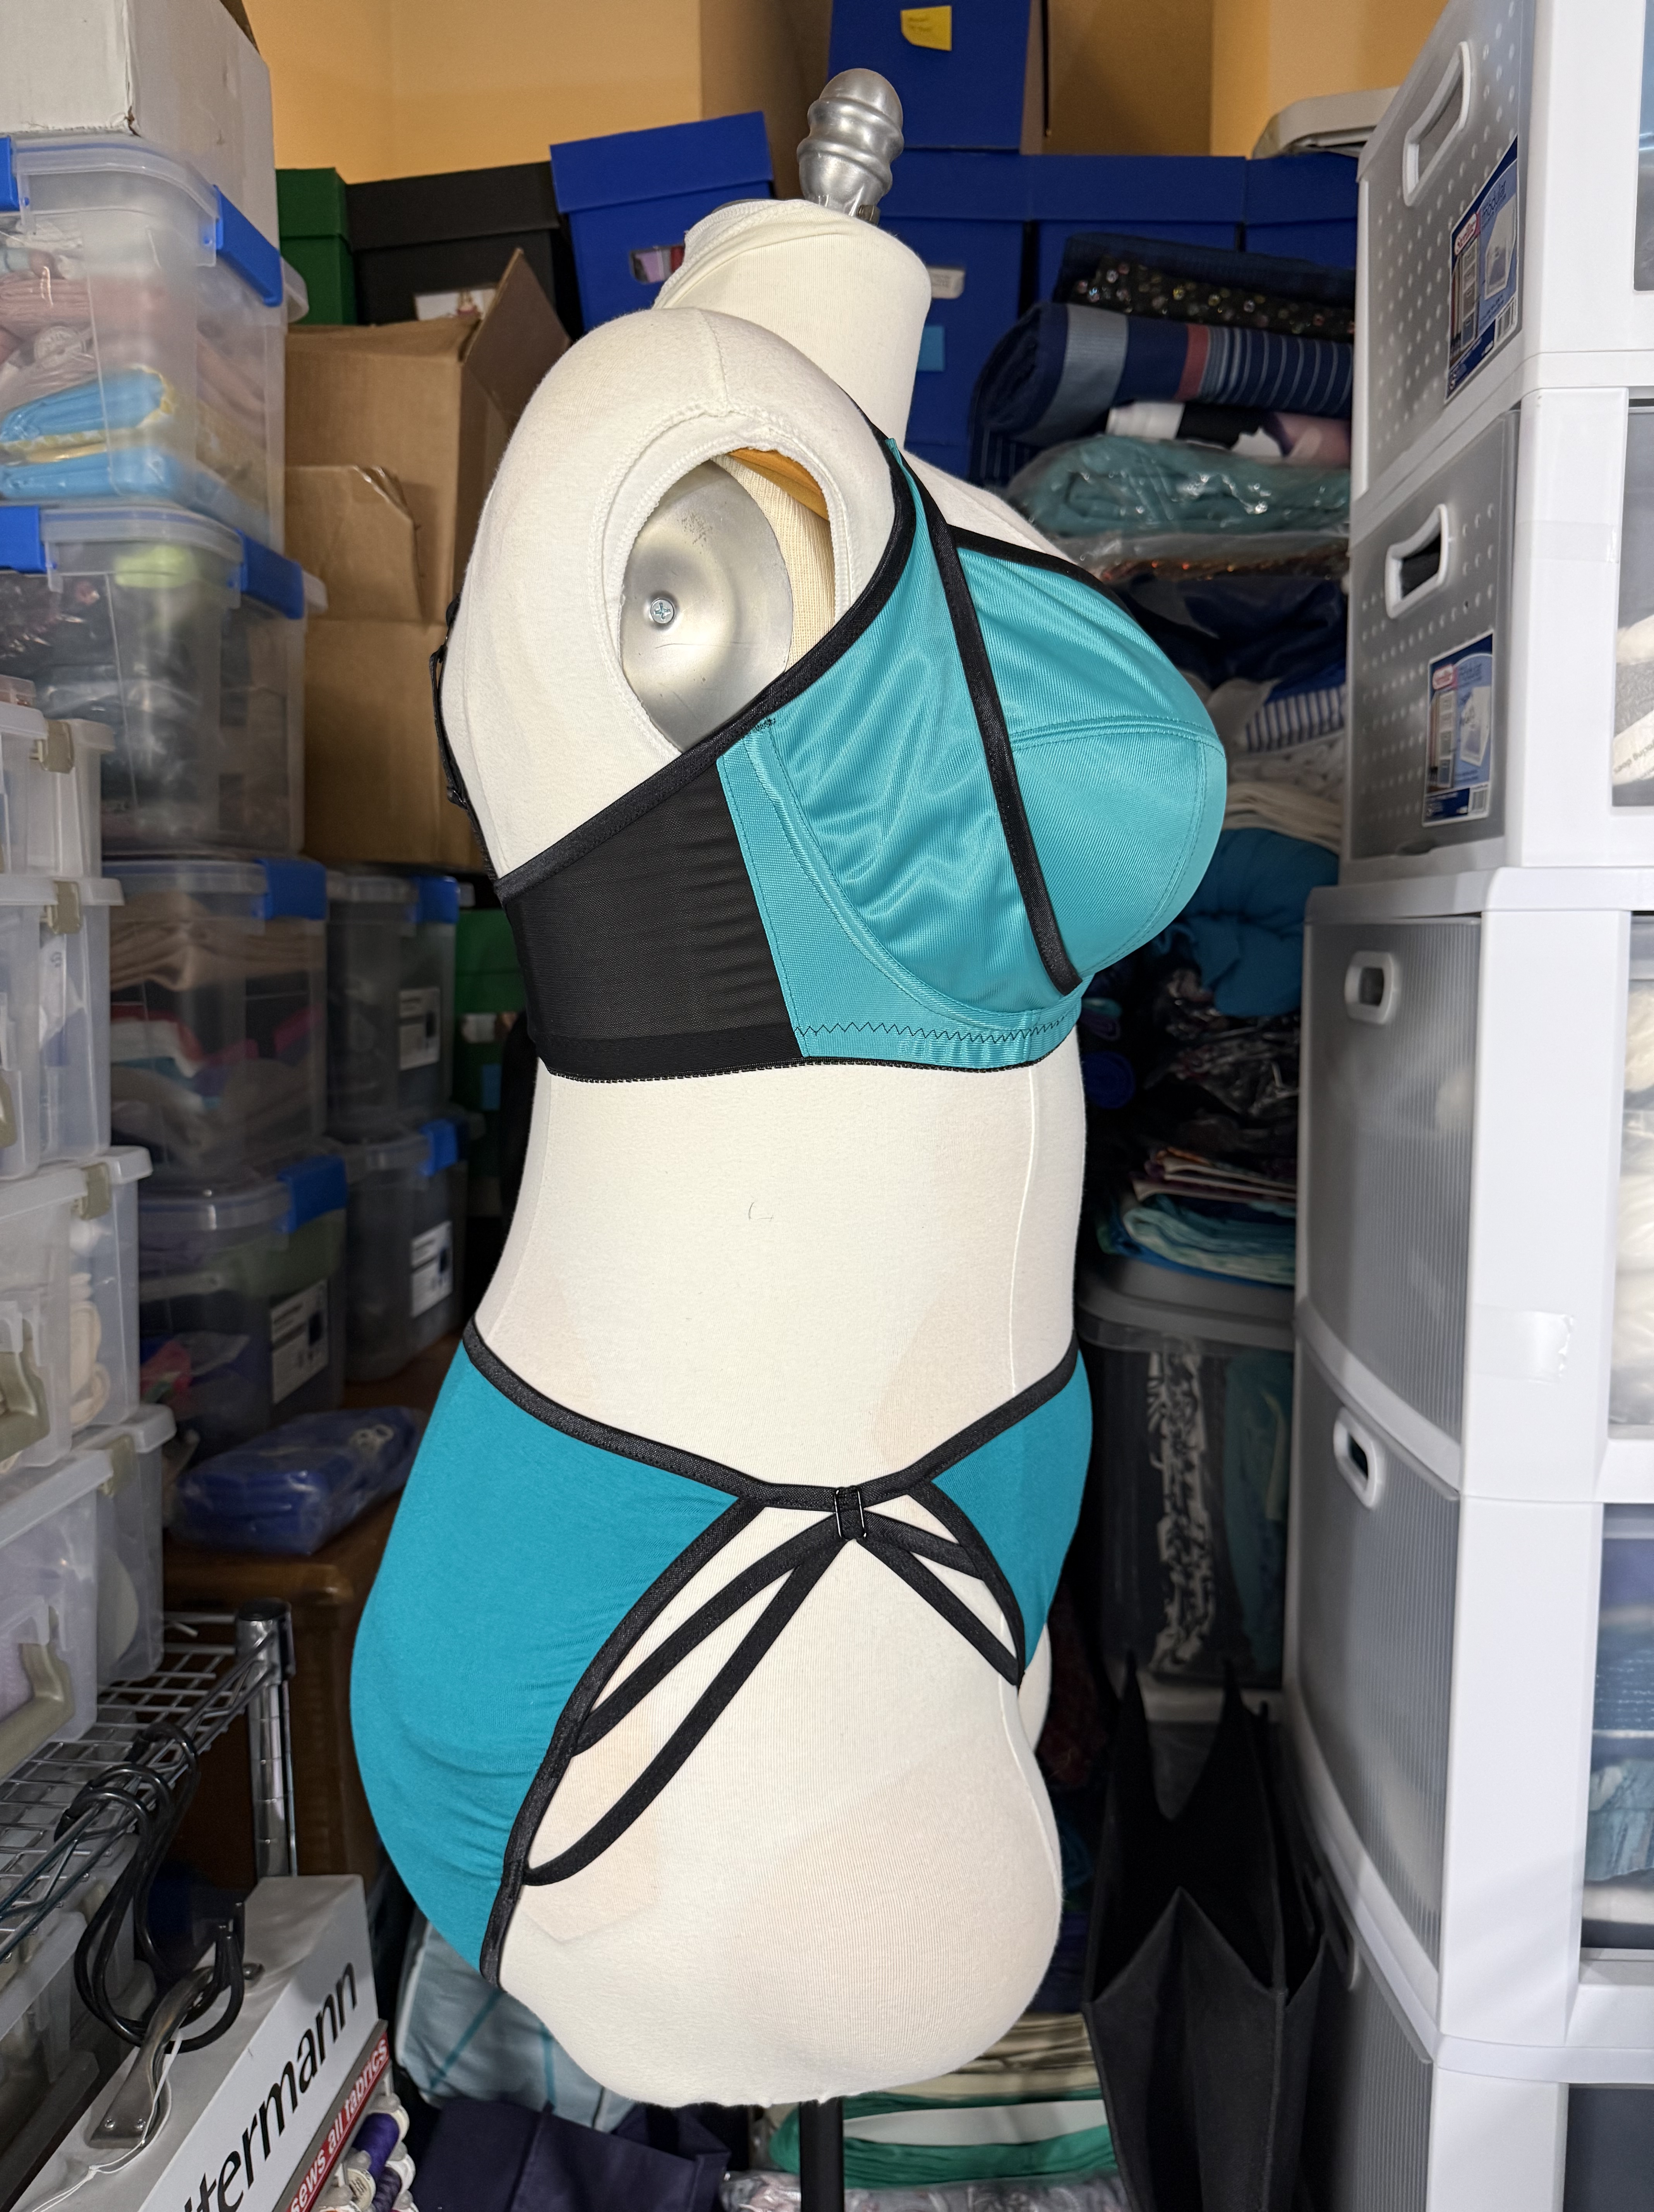
And just because I want to, here are a few close ups of the style and design lines.

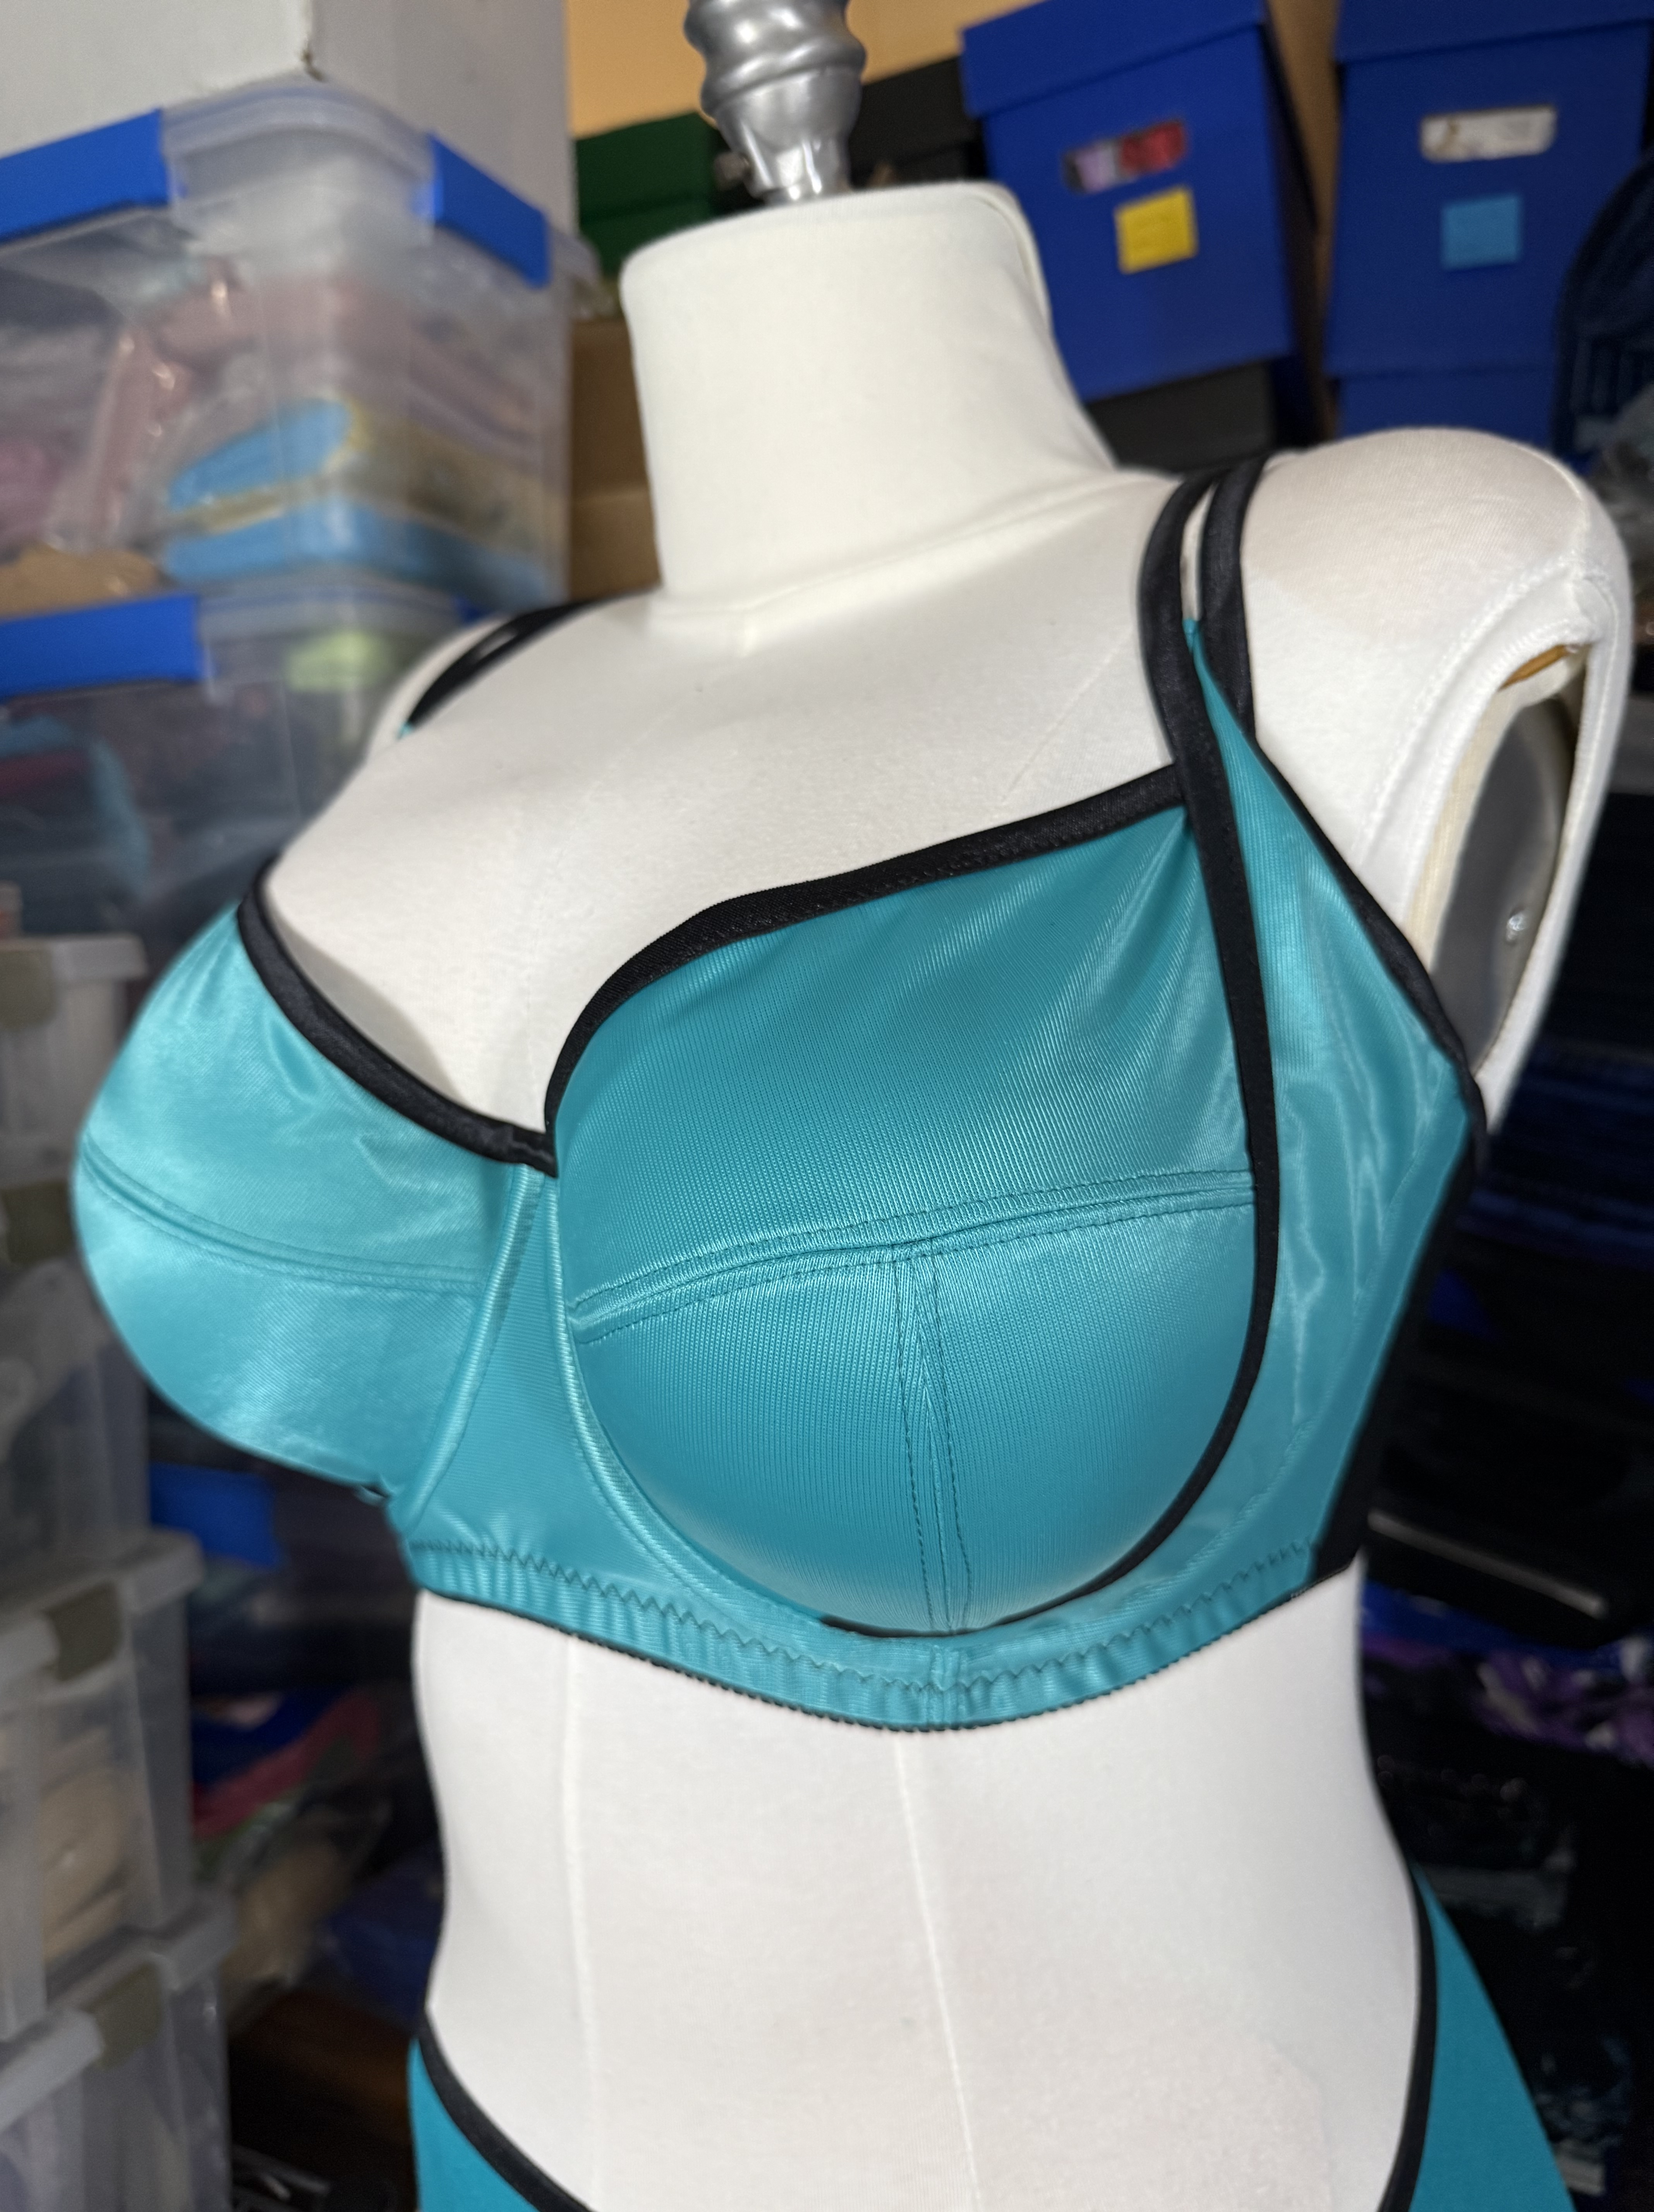
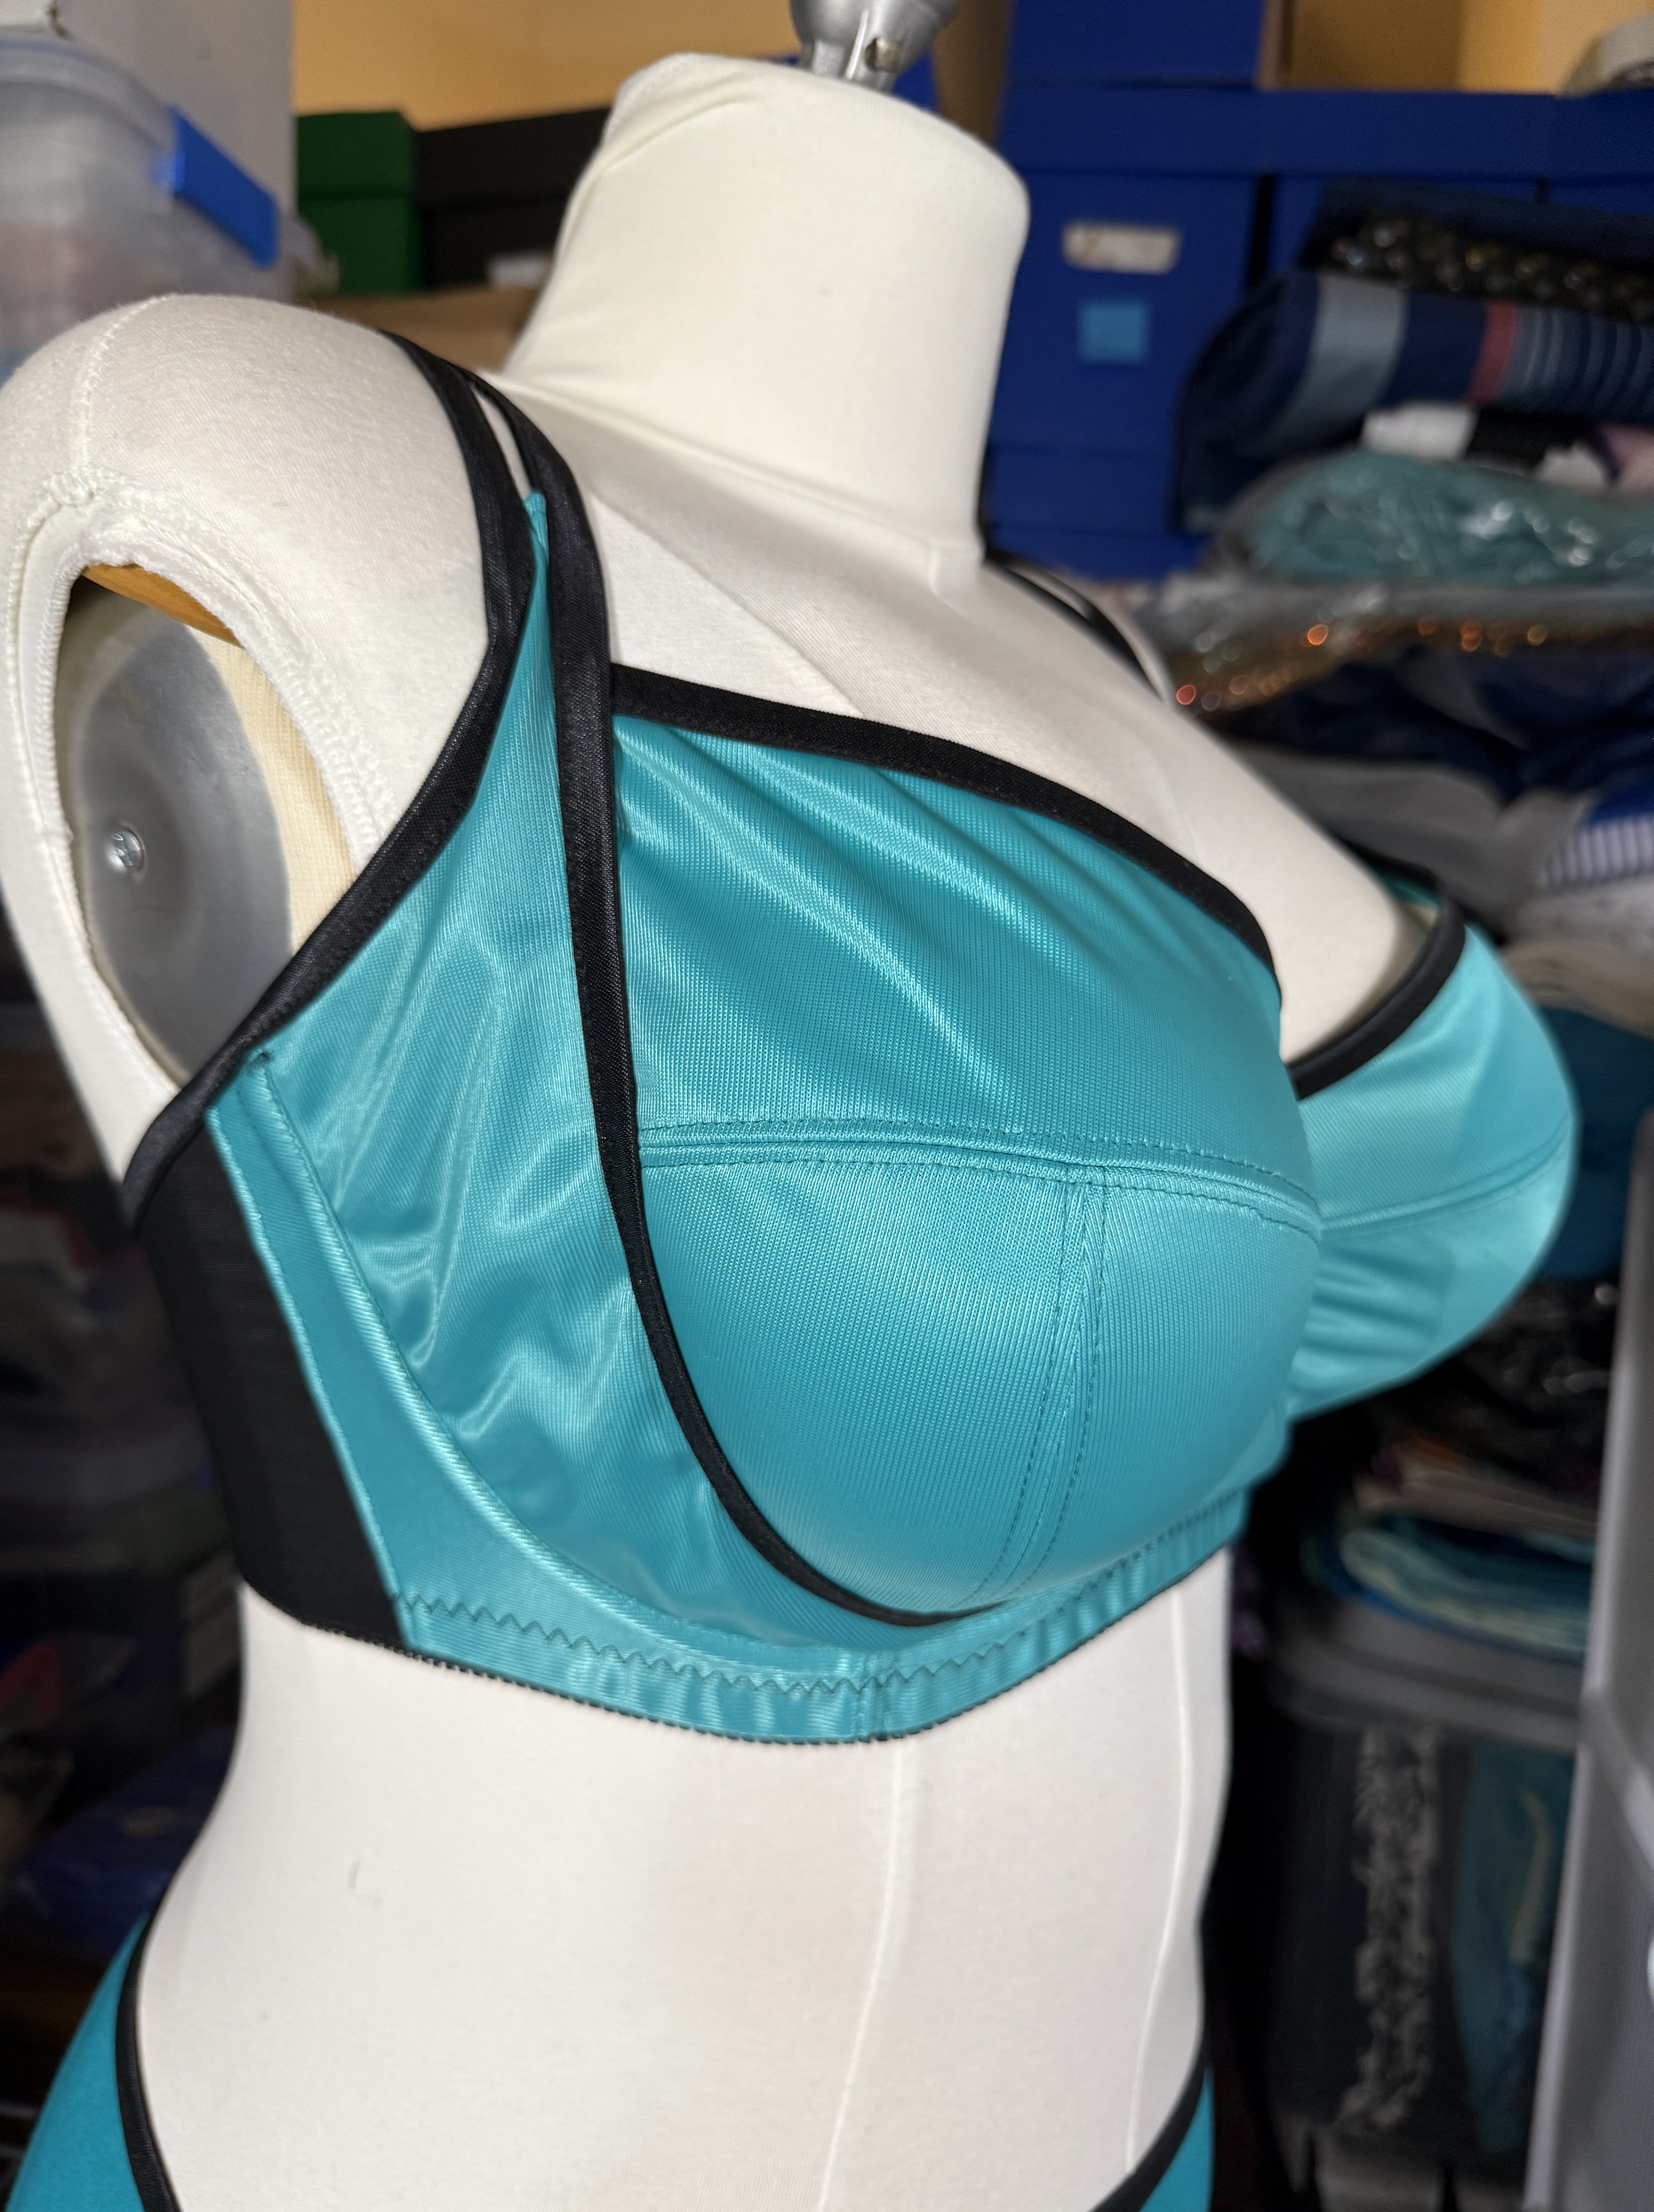
I do have a few things I want to tweak for the next version, such as moving the straps closer to the center back on the back, lowering the wire line so that it better matches the length of my 46 vertical wire and gives a bit more shaping around the underarm area, and adjusting the bridge and band slightly. I am also considering what to do about the power bar; on the smaller sizes it looks great, but on the larger size it is fairly hidden from the front view to allow for the projection of the cups, and sits a little awkwardly at the attachment point on the edge of the cup. I do plan to make another version, so I’ll report back if these adjustments help fix the minor fit issues I’m finding while wearing this first version.
Official Pattern Review
Pattern Description: The Black Beauty Bra is a underwire two piece cup with decorative power bar and options for fold over elastic or lace or picot elastic edge trim, as well as options for a foam cup. From the designer: “The Black Beauty bra is a classic medium coverage balconette style underwired bra. It includes a basic two-piece horizontal seam cup with an external powerbar/strap designed for extra support and shape. The Black Beauty pattern includes 2 View options: View A: all-fabric with fold-over elastic finishing and double front strap detail design and View B: a lace version with classic picot elastic finishings. Both views have additional pattern pieces and instructions for an optional foam lining.” I made View A without foam, but I plan to make more of this pattern in the future and try the other variations.
Pattern Sizing: According to the website, this pattern uses UK sizing and comes in two size packs: Band sizes: 28 – 40, Cup sizes: B-DD or Band sizes: 28 – 40, Cup sizes: E-G. I made a size 36G for myself, but also helped my sister make a 32 C/D (she needed asymmetric cup sizing) at the same time, so I was able to test the pattern at almost the extreme opposite ends of the size spectrum.
Were the instructions easy to follow? Yes, the instructions are great. I have a few things I move around in the construction order to get a slightly cleaner finish and because I already know my wire size, but otherwise these instructions are very good. The illustrations are clear and I really like that important construction steps that are specific to this pattern that would be easy to miss are highlighted in callout boxes.
Did it look like the photo/drawing when you were done with it? Yes, I think so. I will say that the smaller size range looks very much like the line drawing. In the larger sizes, the volume/projection of the cup does obscure the external power bar from the front view somewhat, so it doesn’t have quite the same visual impact.
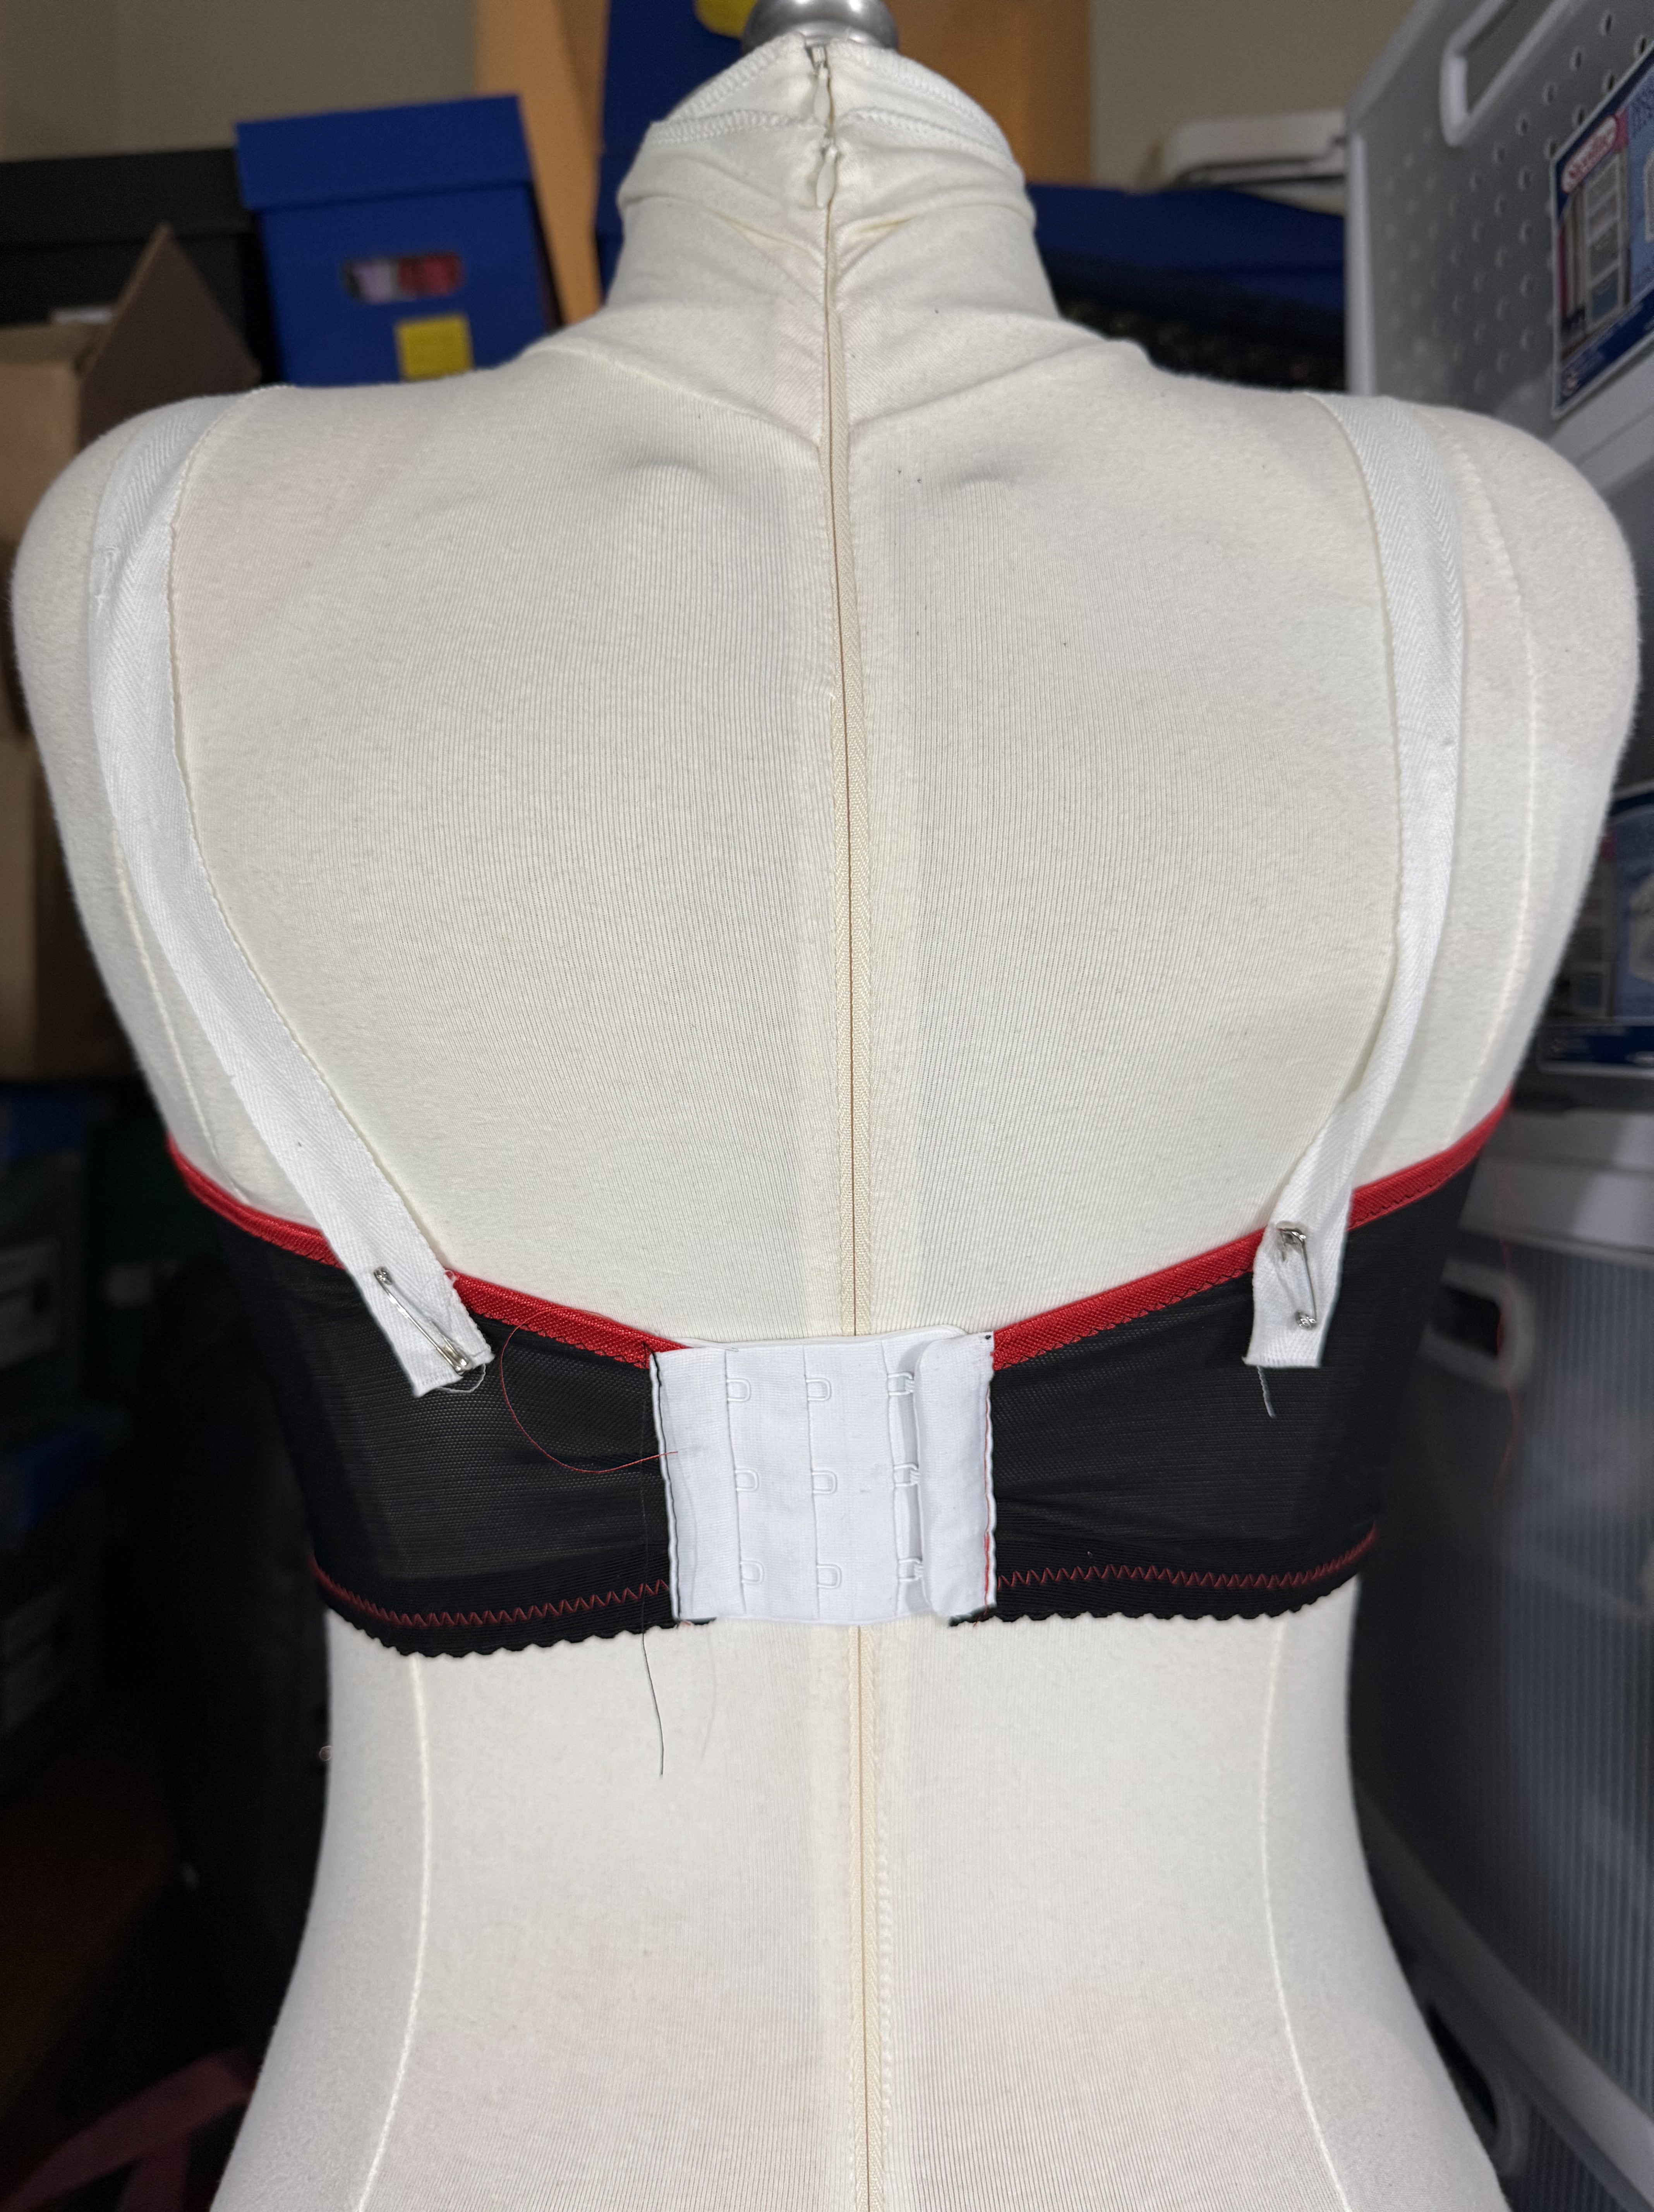
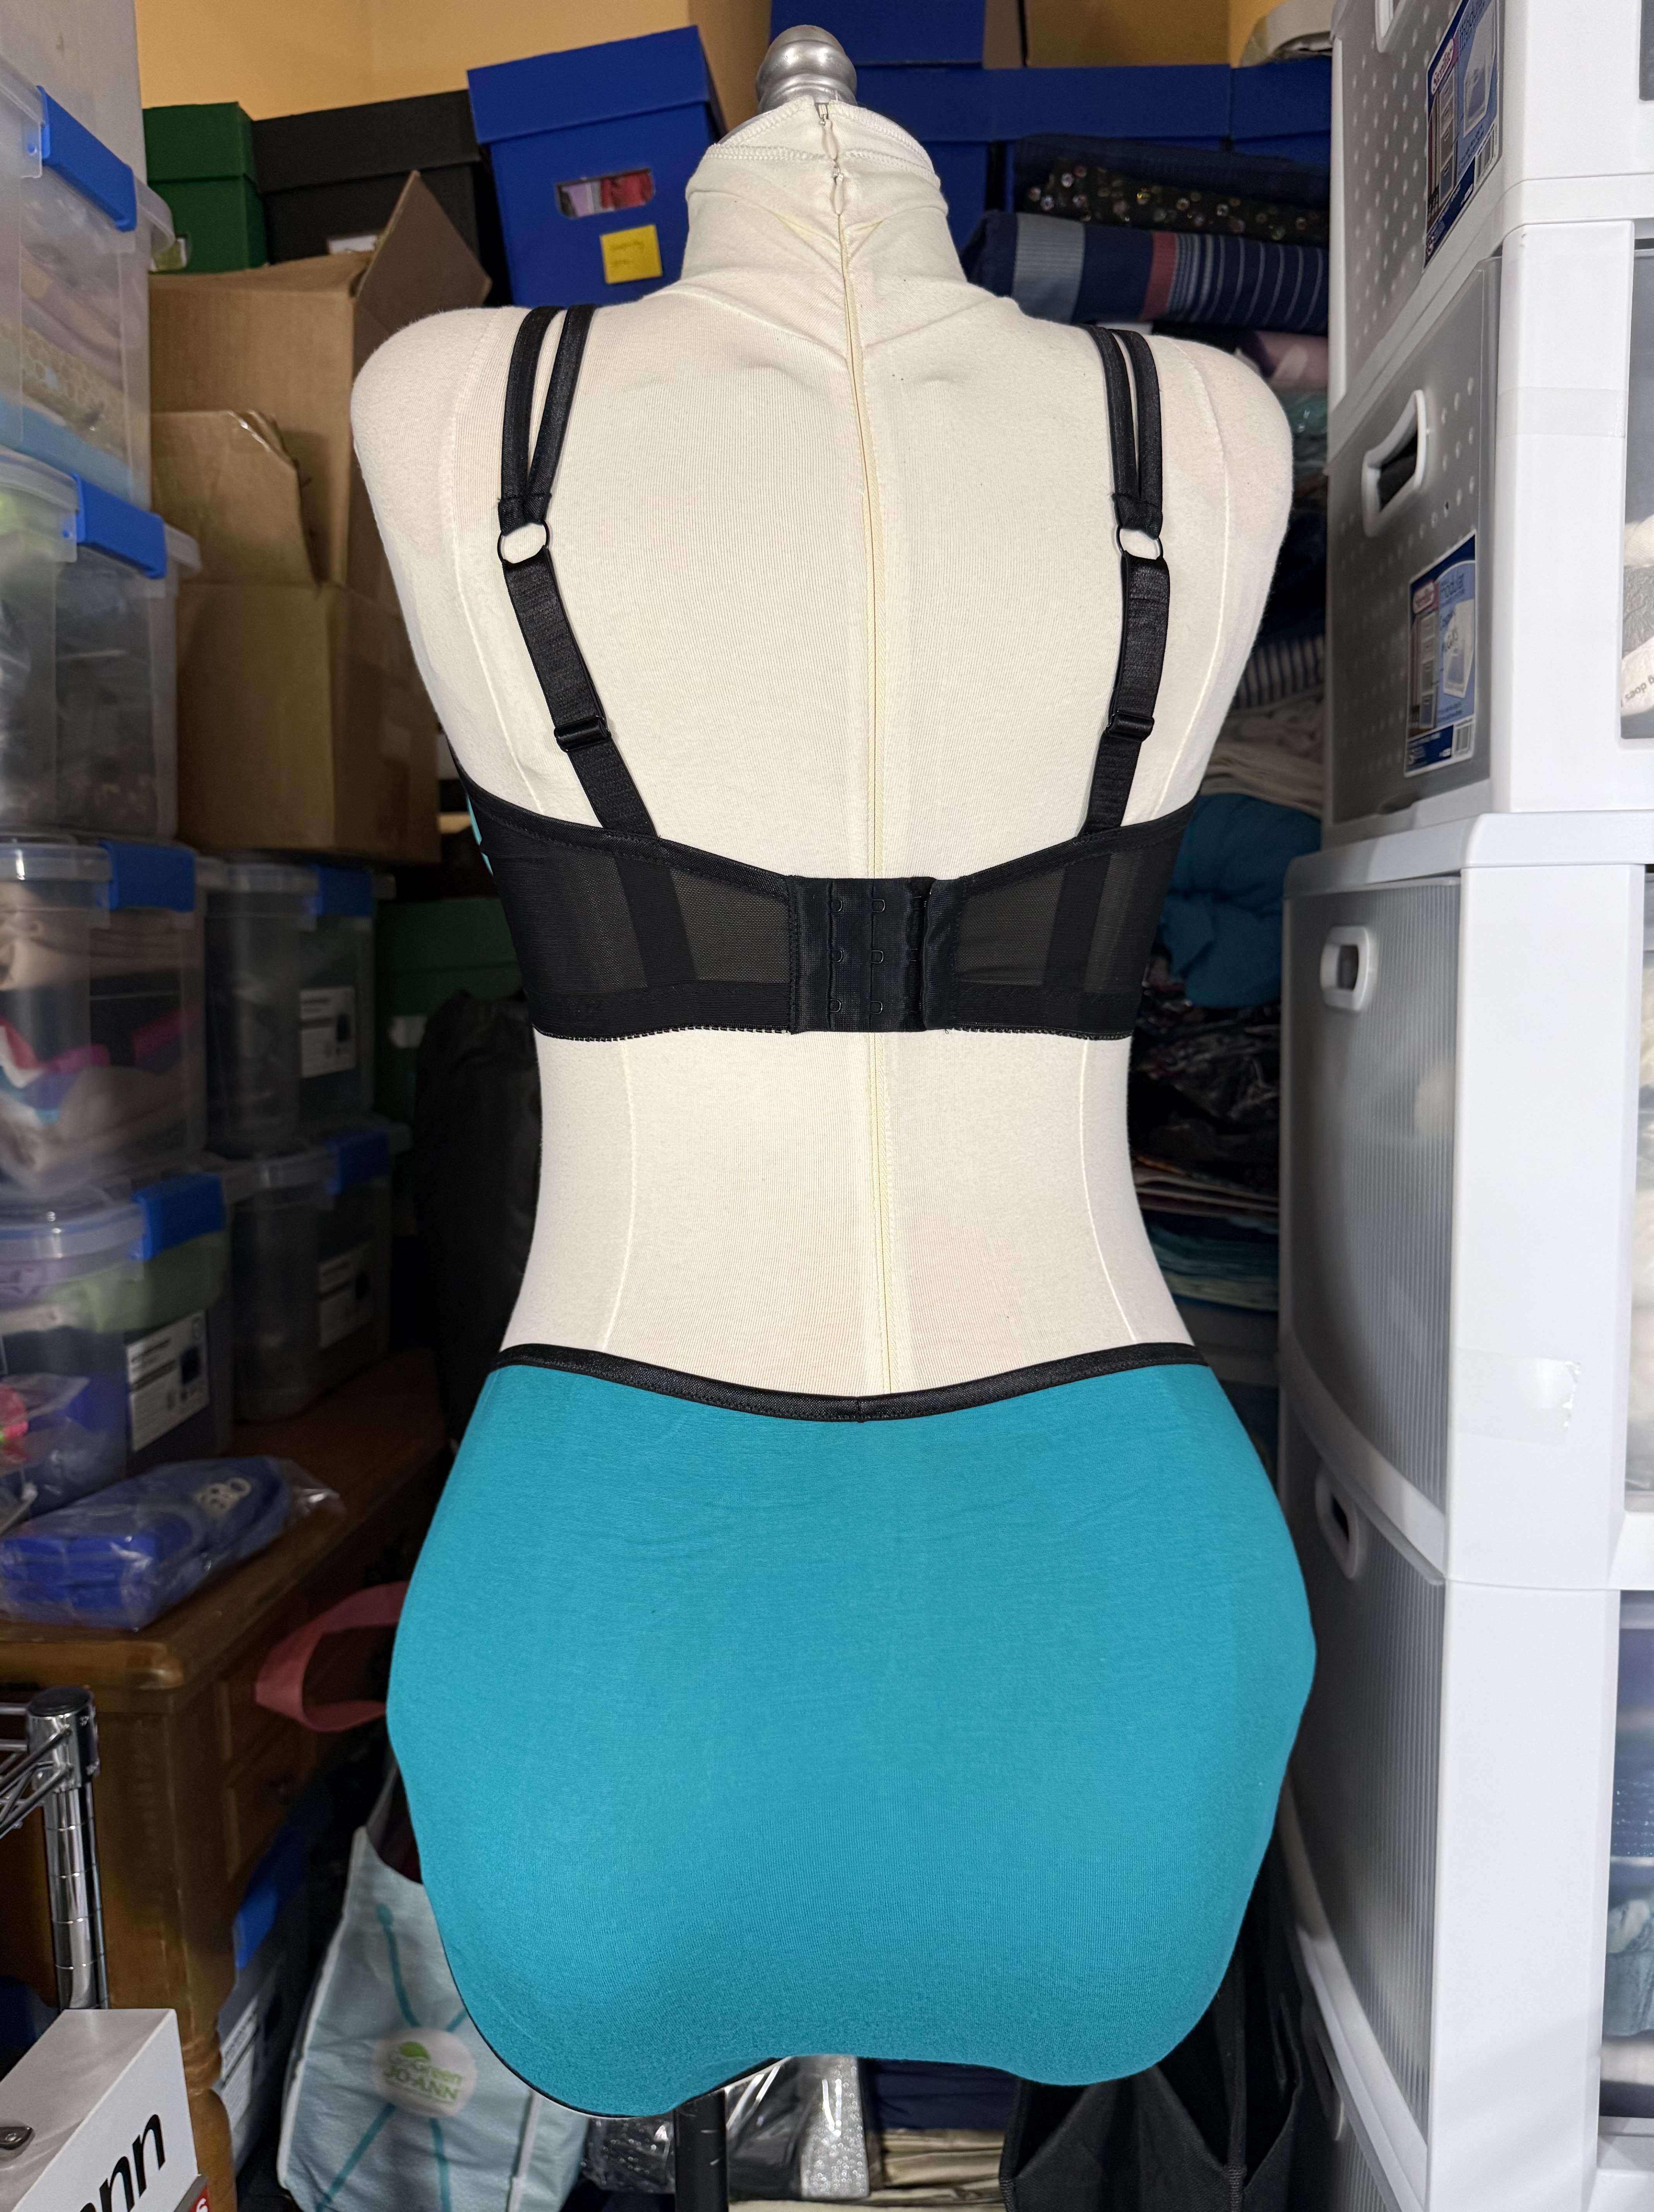
What did you particularly like/dislike about the pattern? I like the style with the external power bar and options for a fold over elastic or lace edge upper cup. I also like that this pattern comes with options for foam and different finishes because I think it can teach different techniques, and a lot of different styles of bras can be made from this one pattern. I’m usually not a fan of the T-back silhouette because it provides less back coverage, but I don’t mind it here as much as I thought I would. I may still change this in future versions to be a ballet back, and adjust it for a 4×3 Hook and Eye, which is my preferred style and closure. For a long time this pattern wasn’t even on my radar because it often wasn’t recommended for larger cup sizes. Since I was right on the border of it fitting, I wasn’t sure if it was worth buying the pattern. But I was teaching a class on bra shaping so I decided to get this pattern for comparison since it is so popular, and I’m really glad I did! I find the bra cups as drafted are a bit pointy in the larger sizes, but they do provide a lot of lift. I had to modify the lower cup to increase the volume slightly, which resulted in a more rounded shape but still kept the lift, so overall I was actually really happy with the final result in terms of fit and shaping. One criticism is that on the larger sizes the external power bar isn’t very visible, and it doesn’t really sit well at the top of the cup and wants to roll outwards, but this isn’t an issue on the smaller sizes that we used for my sister. In the future I am considering if I need to re-draft the shape of the power bar, or leave it off entirely. My only other dislike is the style of the back, but that is more personal preference. My sister actually really loved how thin the band was; she is rather petite and said that taller bands often rub under the arms uncomfortably.
Fabric used: For both versions I used a Black Beauty Bra Kit from Emerald Erin, which include duoplex for the main fabric, and power net for the back. I added some sheer cup lining to line and stabilize the band, and I used all of the elastics and findings that came in the kit. My sister plans to make a second version in bra tulle and I have a few lace kits I want to try as well.
Pattern alterations or design changes you made: I am in the largest cup size of the pattern (36G) and found the cups to be just a tiny bit small, so I split the lower cup and this helped a lot in terms of fit. It also created a slightly rounder shape to the cup, which I prefer. The pattern is also intentionally designed for overlapping wire channeling on the bridge for the larger sizes, however, I found that this was slightly too narrow for me since this is a lower balconette style, so I widened the bridge just enough to allow two side-by-side channeling strips in the front, which added about 1/4” in width. I widened the bottom of the bridge more than 1/4”, but I think I will take out the extra for future versions. I also want to make a few small tweaks for the width of the bottom band and adjust slightly to better fit my wire size. For my sister’s version, we used the 32C for the right cup and the 32D for the left cup, but took a small 1/4” dart out of the top of the left cup. The 32D was the better fit for the wire, so for the 32C I also extended the top of the cup slightly to match the wire line. My sister says this is now one of her best fitting bra patterns and is excited to make more. Honestly I was kind of shocked at how well this pattern fit each of us, despite being in very different size ranges, as the alterations needed were rather minimal and primarily to suit personal fit needs or style preferences. I can see why this pattern is so popular, especially for new bra sewists.
Would you sew this again? Would you recommend it to others? I think I will be sewing this again soon. I would like to make one of the fancier lace versions, as well as a foam cup version. I’m surprised at how much I like the fit of this pattern, and with a few additional fit and style tweaks I could see this being a TNT for me. We are already making a second version for my sister, and I know she also plans to sew quite a few of these now that the pattern fits her well. I would recommend this pattern to others with the caveat that the sizing isn’t the most inclusive, especially at the higher end of the size range. I would say it covers the smaller sizes and mid-range sizes pretty well, but does not include an option for very large sizes. I was able to make the largest size of the pattern work by increasing the volume slightly by splitting the lower cup, and I think that’s a good recommendation if you are also at the top of the size range and find the fit of the lower cup to feel a bit odd. This pattern uses the difference between full and under bust to recommend a measurement, but to help equate it to other patterns, I typically need something around a 5.75 BCD, so if you are larger than that, this pattern may run too small for you. However, if you are in the smaller size range I would highly recommend because it’s a really nice pattern and comes with a lot of options. It’s also a fairly easy pattern to use as a base to make alterations to become other styles.
Conclusion: Overall I’m a little surprised how much I like the results of this pattern and I’m looking forward to making a few more versions. I’m also excited to see how it fits with a few additional alterations and style changes, because I think this could be a pattern I come back to in the future.
Overall this was a great final project to complete in 2025, and I’m looking forward to seeing what projects I get to in 2026!

I am also shocked that this pattern worked at all in your size range. FWIW, it’s too pointy for me as drafted, too. It has a kind of frog face shape, so I had to tweak the fit of the cups several times before I was satisfied. I also always swap out the t-back for a ballet back with more hooks. But it’s a surprisingly versatile pattern. I like your panty solution!
LikeLiked by 1 person
Hi! I really am enjoying your in-depth bra sewing pattern review series 😊
I made a toile of the Black Beauty bra (also in a G cup) and also had to adjust the cups to allow for some more volume. I then found that the power bar was really tight and compressing the tissue and making a terrible dented shape — not a good look 😅
Do you have any advice on modifying the power bar after adding cup volume? I tried slashing and spreading across multiple point, but it really distorts the shape of the power bar too much…
LikeLike
The power bar was the piece I wasn’t 100% happy with in the larger size (it works great in the smaller sizes). I found that it was kind of narrow and got pushed towards the back, so I wonder if making it wider and lengthening the front edge slightly might help? I think the proper way to do it would be to overlap the upper and lower cup at the outer edge, and re-draw the power bar staying inside the area where the two pieces overlap. This should take into account the changes that were made to increase the volume.
LikeLiked by 1 person
Thank you so much — I’ll definitely give it a try to widen and lengthen the power bar piece this way! 💕
LikeLiked by 1 person