If you’ve been following the blog at all recently you know that I’ve completely gone down the rabbit hole of sewing bras and finding the perfect fit. At the 2023 International Bra Sewing Bee the Bravo Bra #2 was mentioned as being a pattern that might work well for my particular bust shape, so I thought I would give it a try. After several test fit bands I finally have a Bravo Bra #2!

One thing that all of the fitting advice emphasizes is making a foam-free bra to establish a pattern’s fit and help determine sizing. I’ve never particularly liked foam-free bras, but I also picked up on how many people were using sheer cup lining/stable tricot as the foundation of all of their bras to add stability. This also allowed for really nice interior finishes where all of the seam allowances are enclosed. I thought I would give that a try and it was really nice.
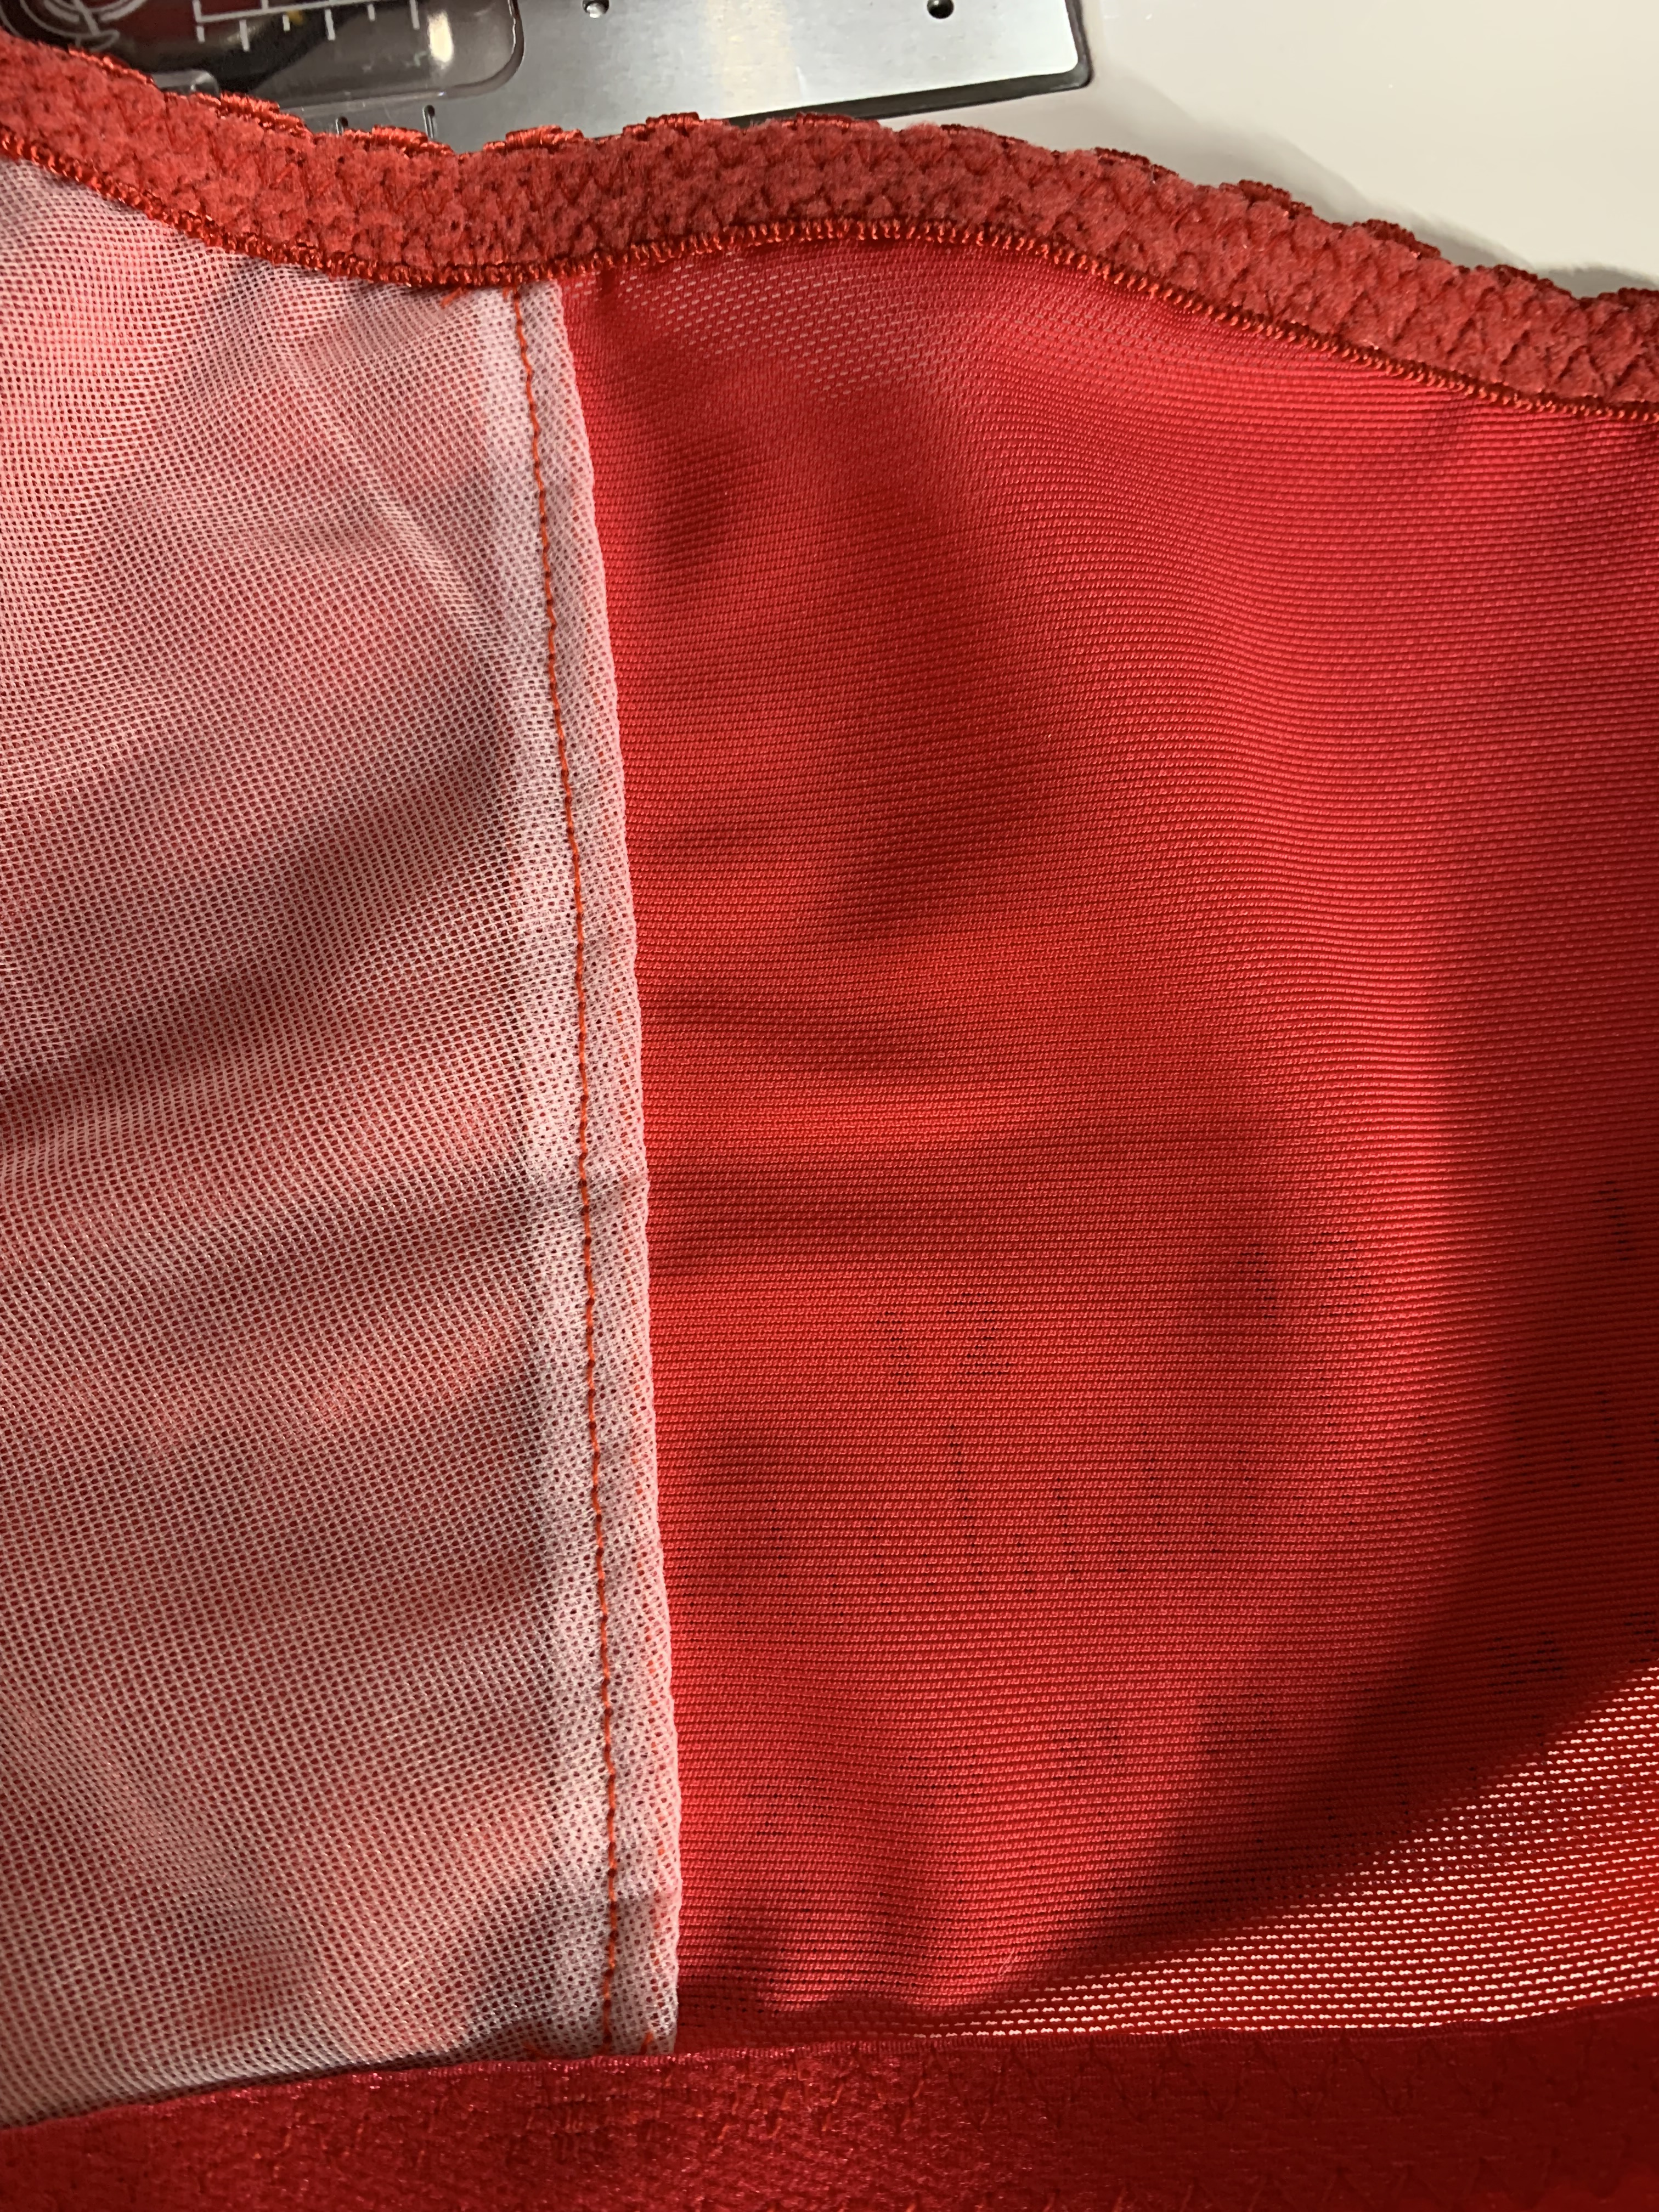
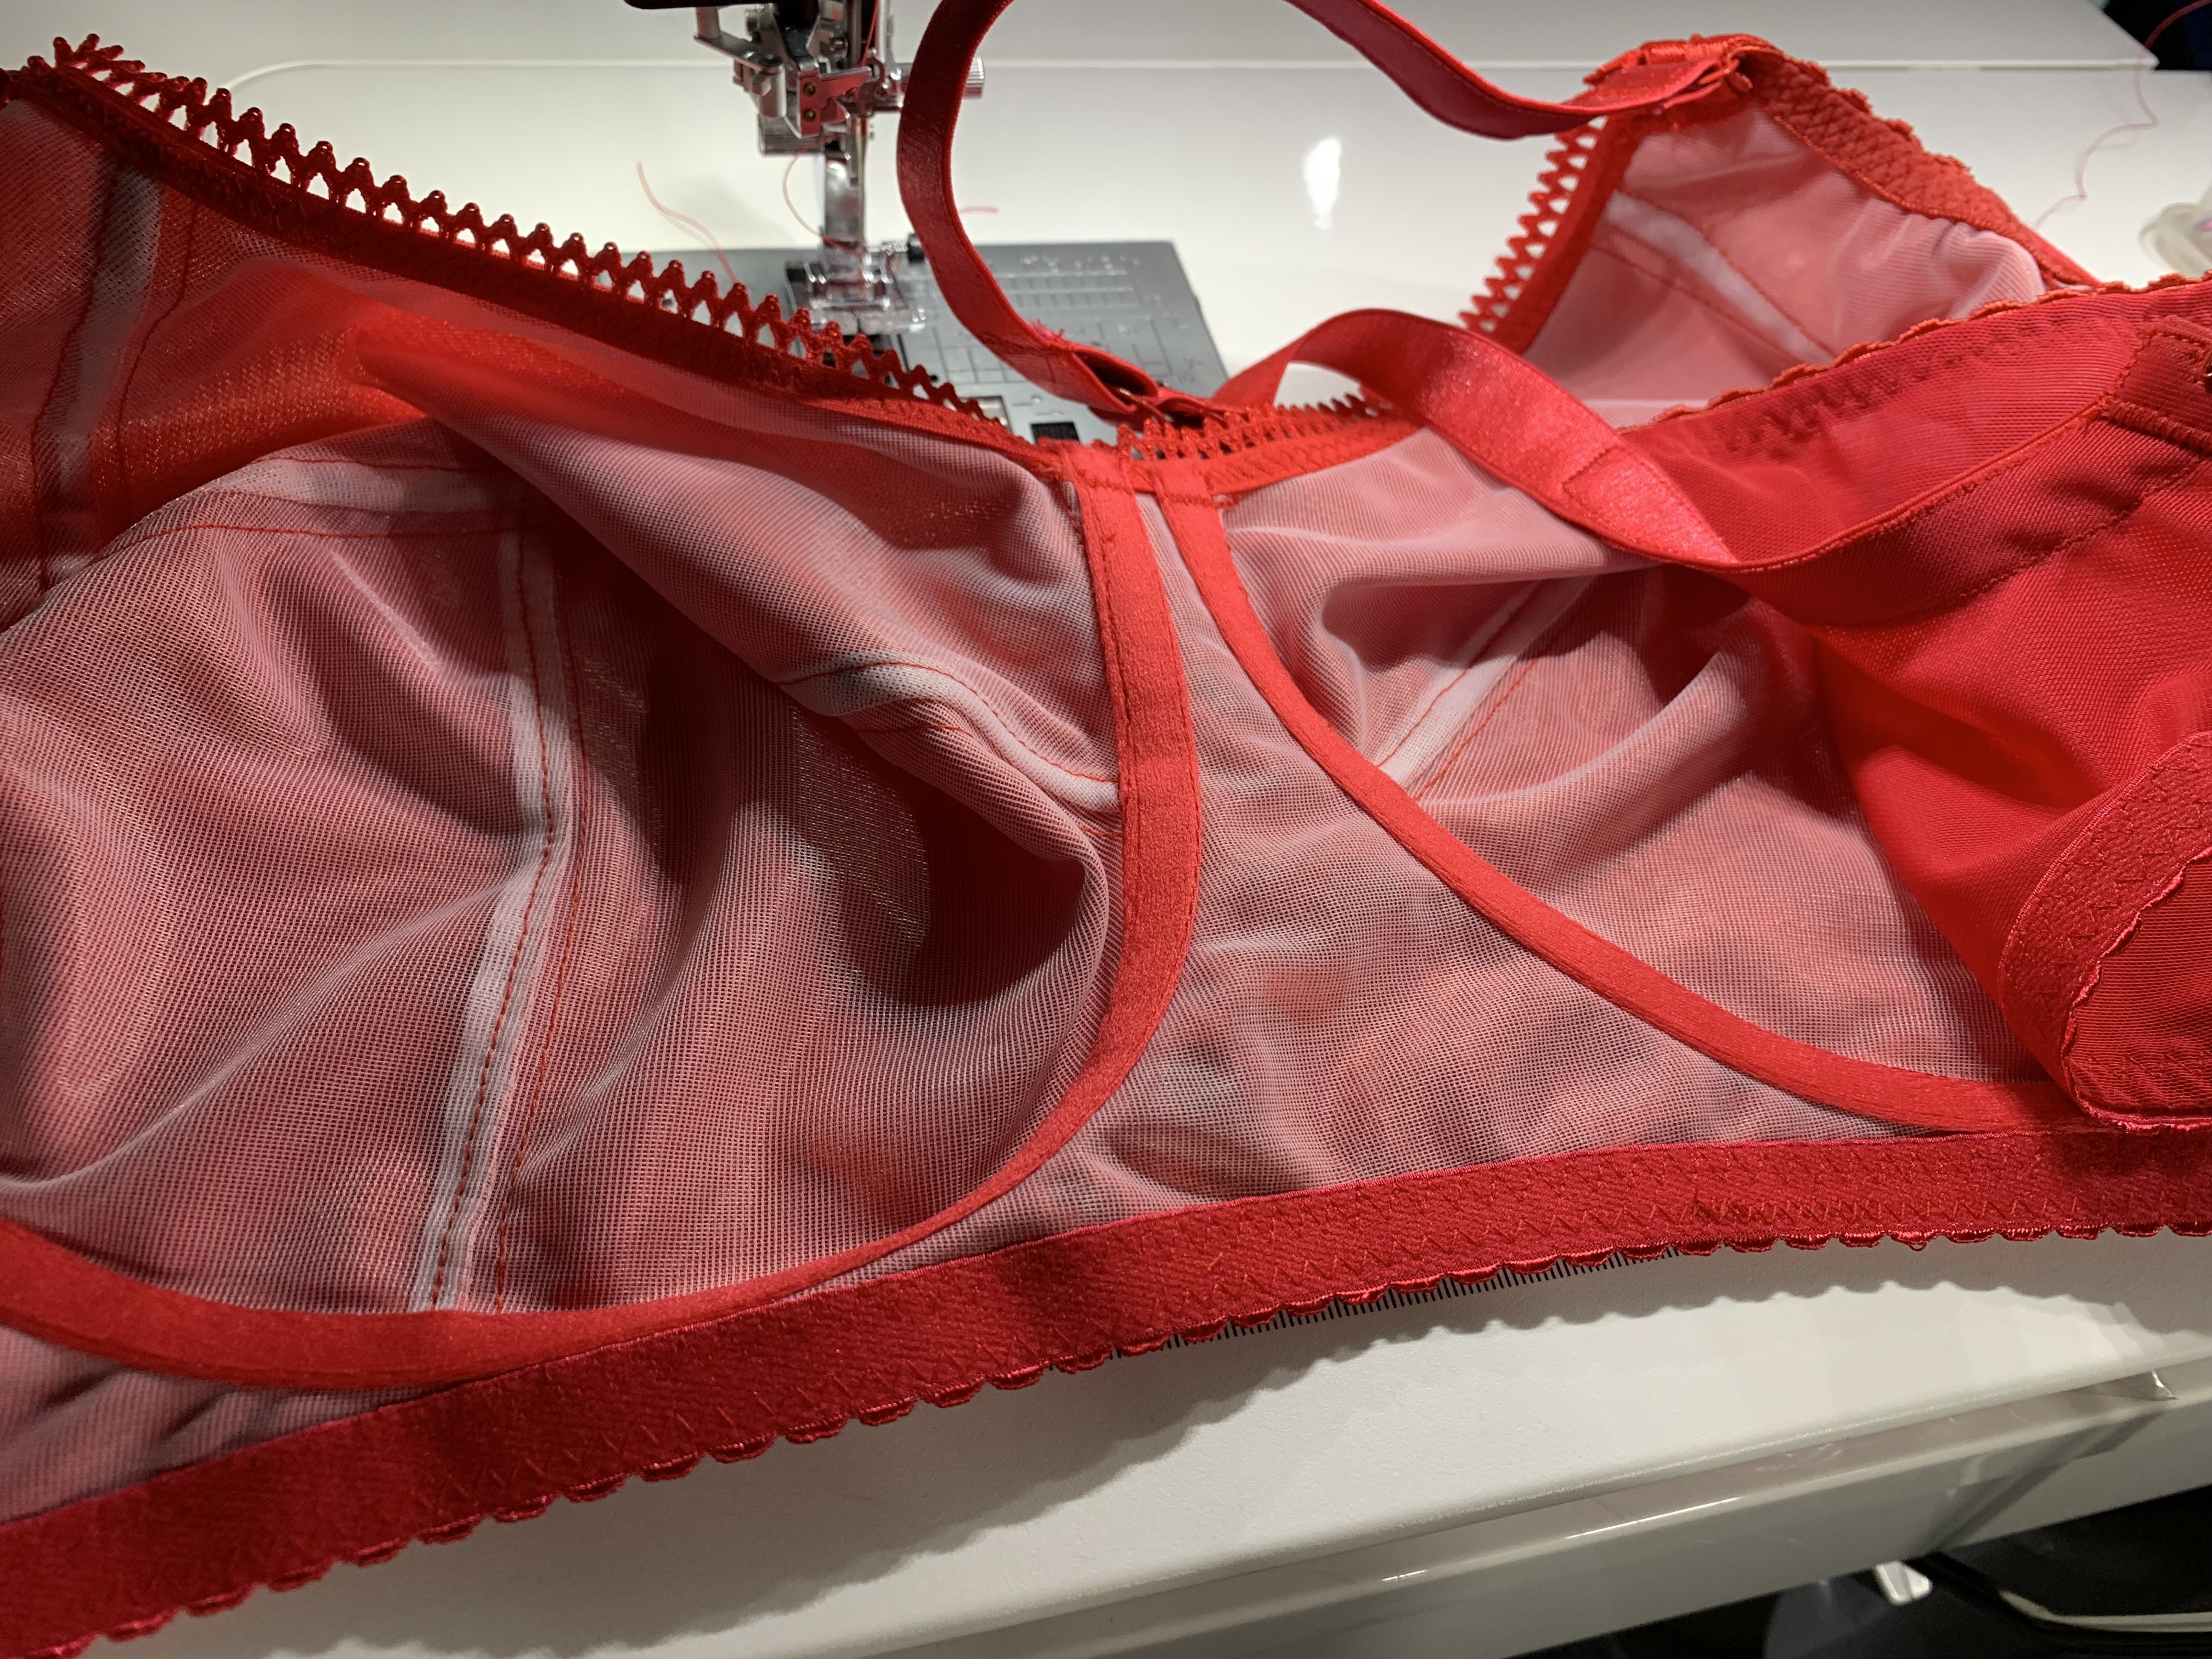
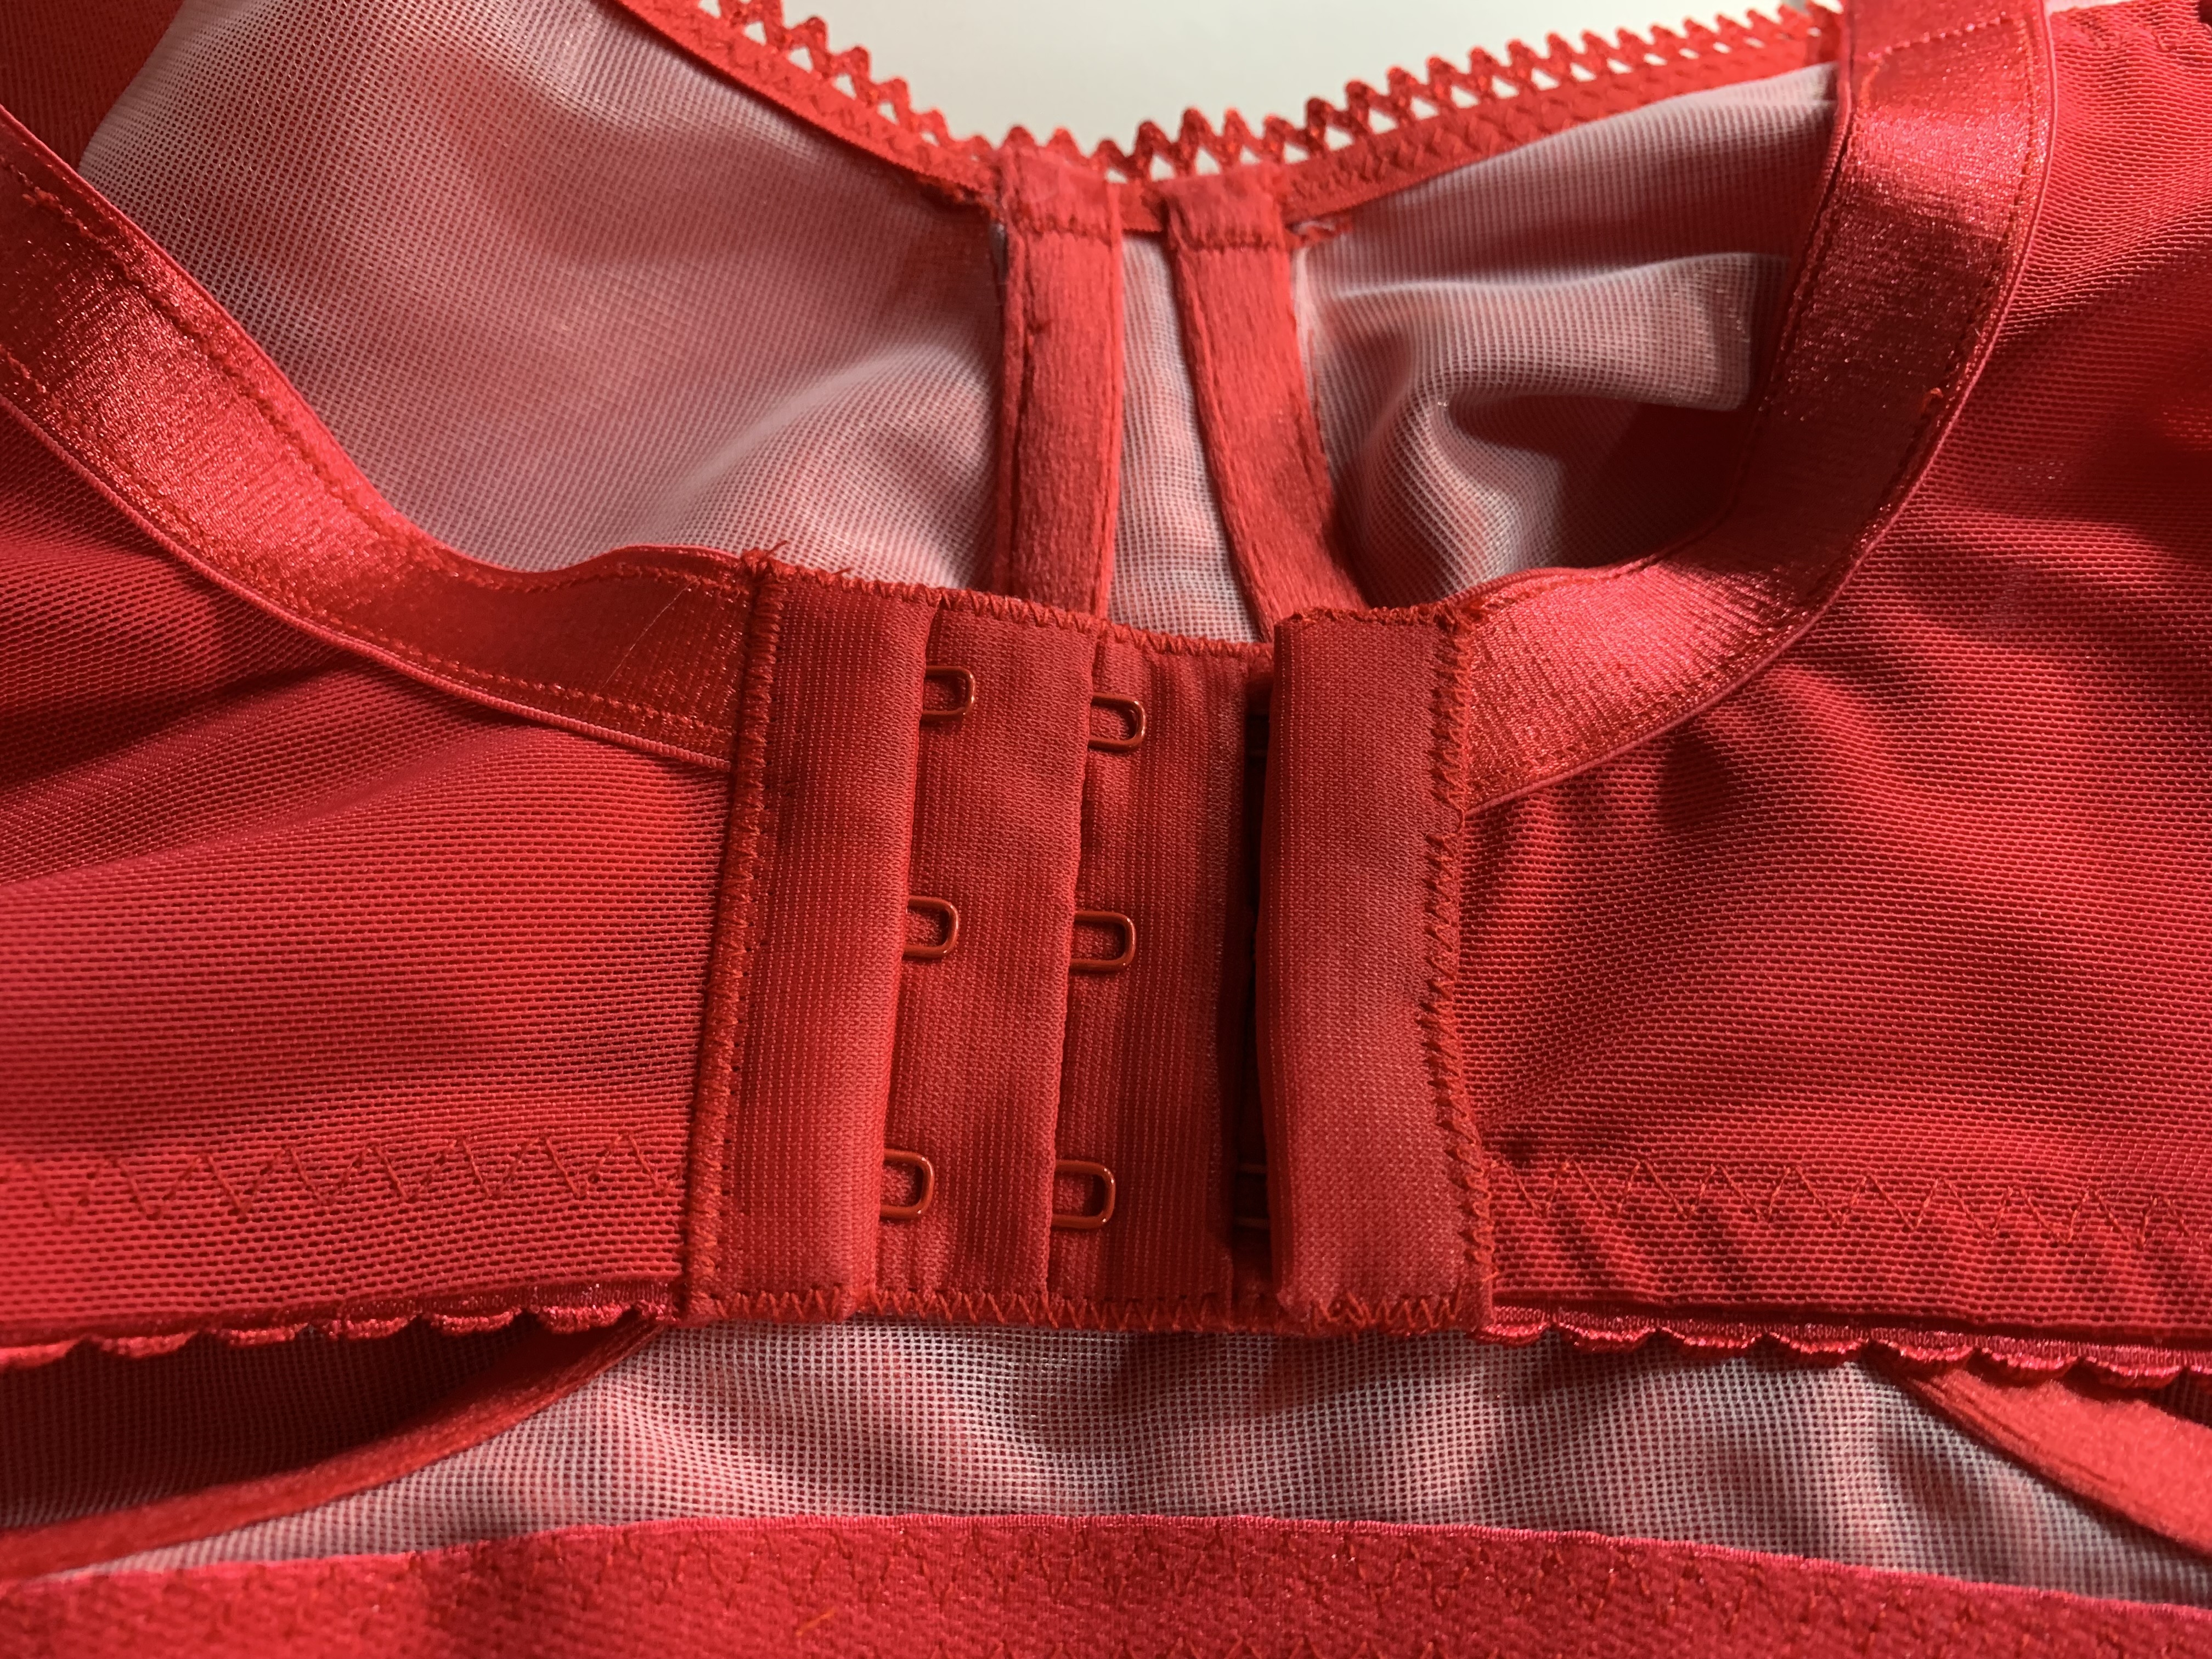
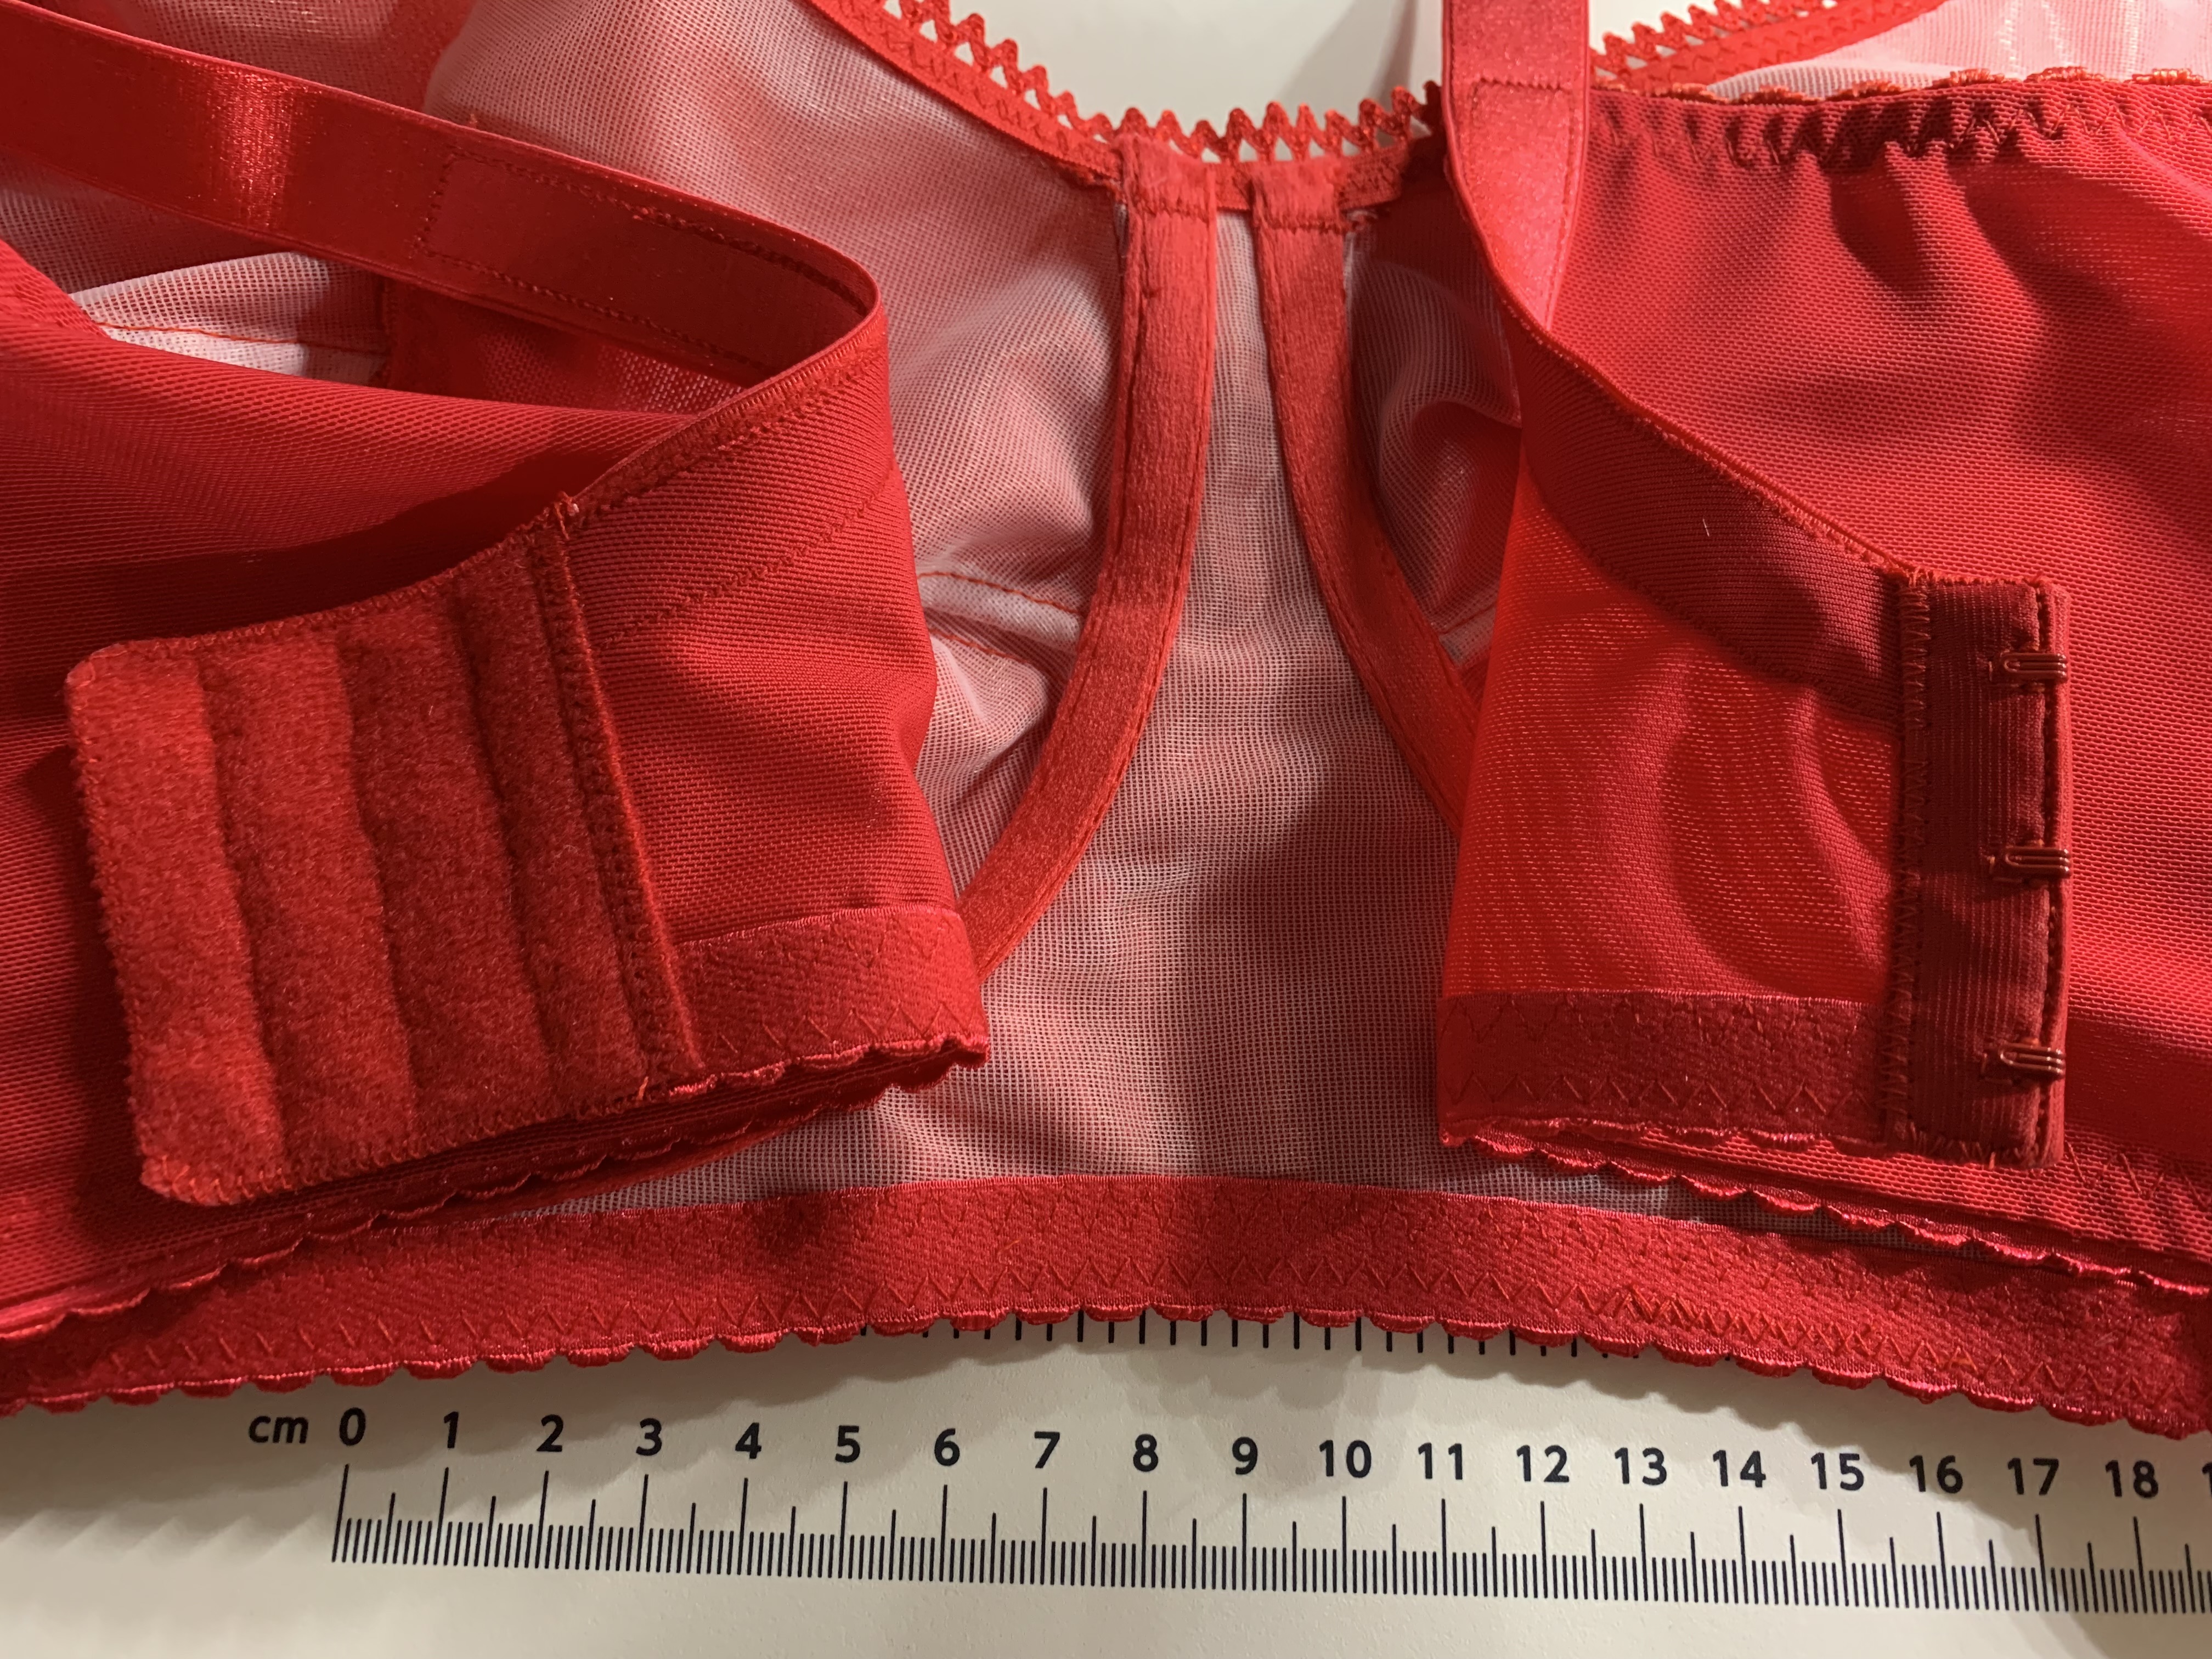
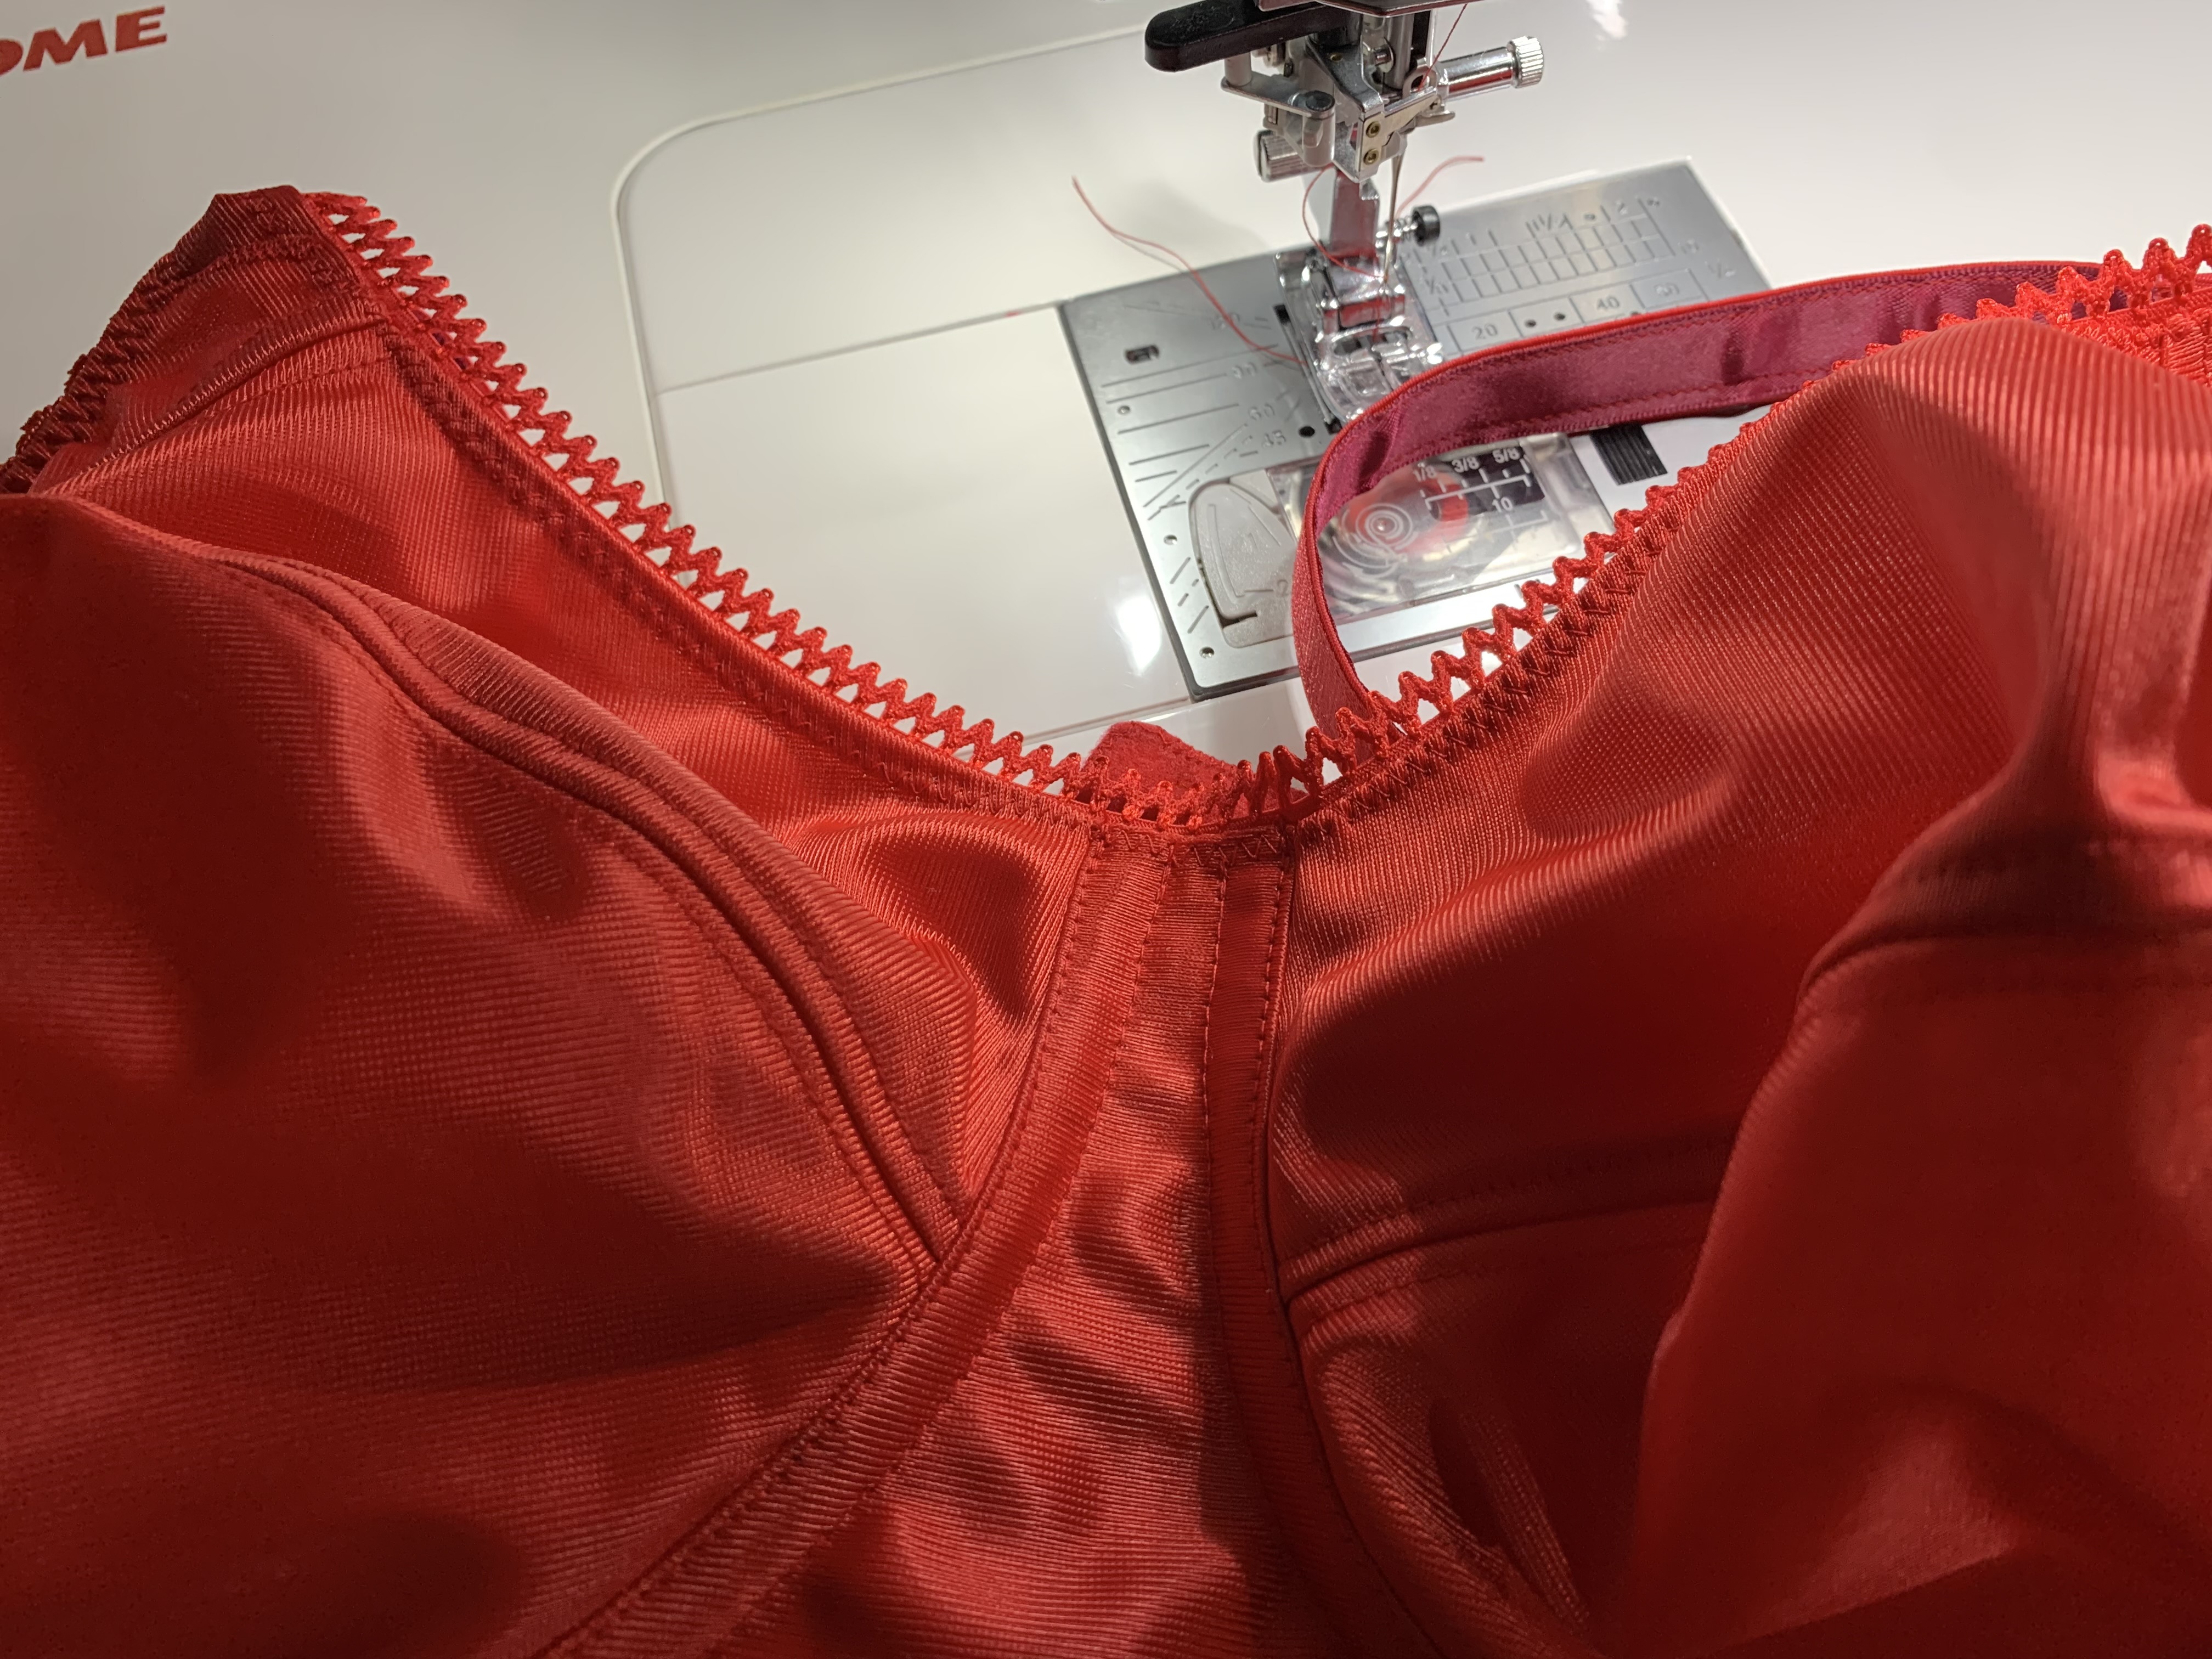
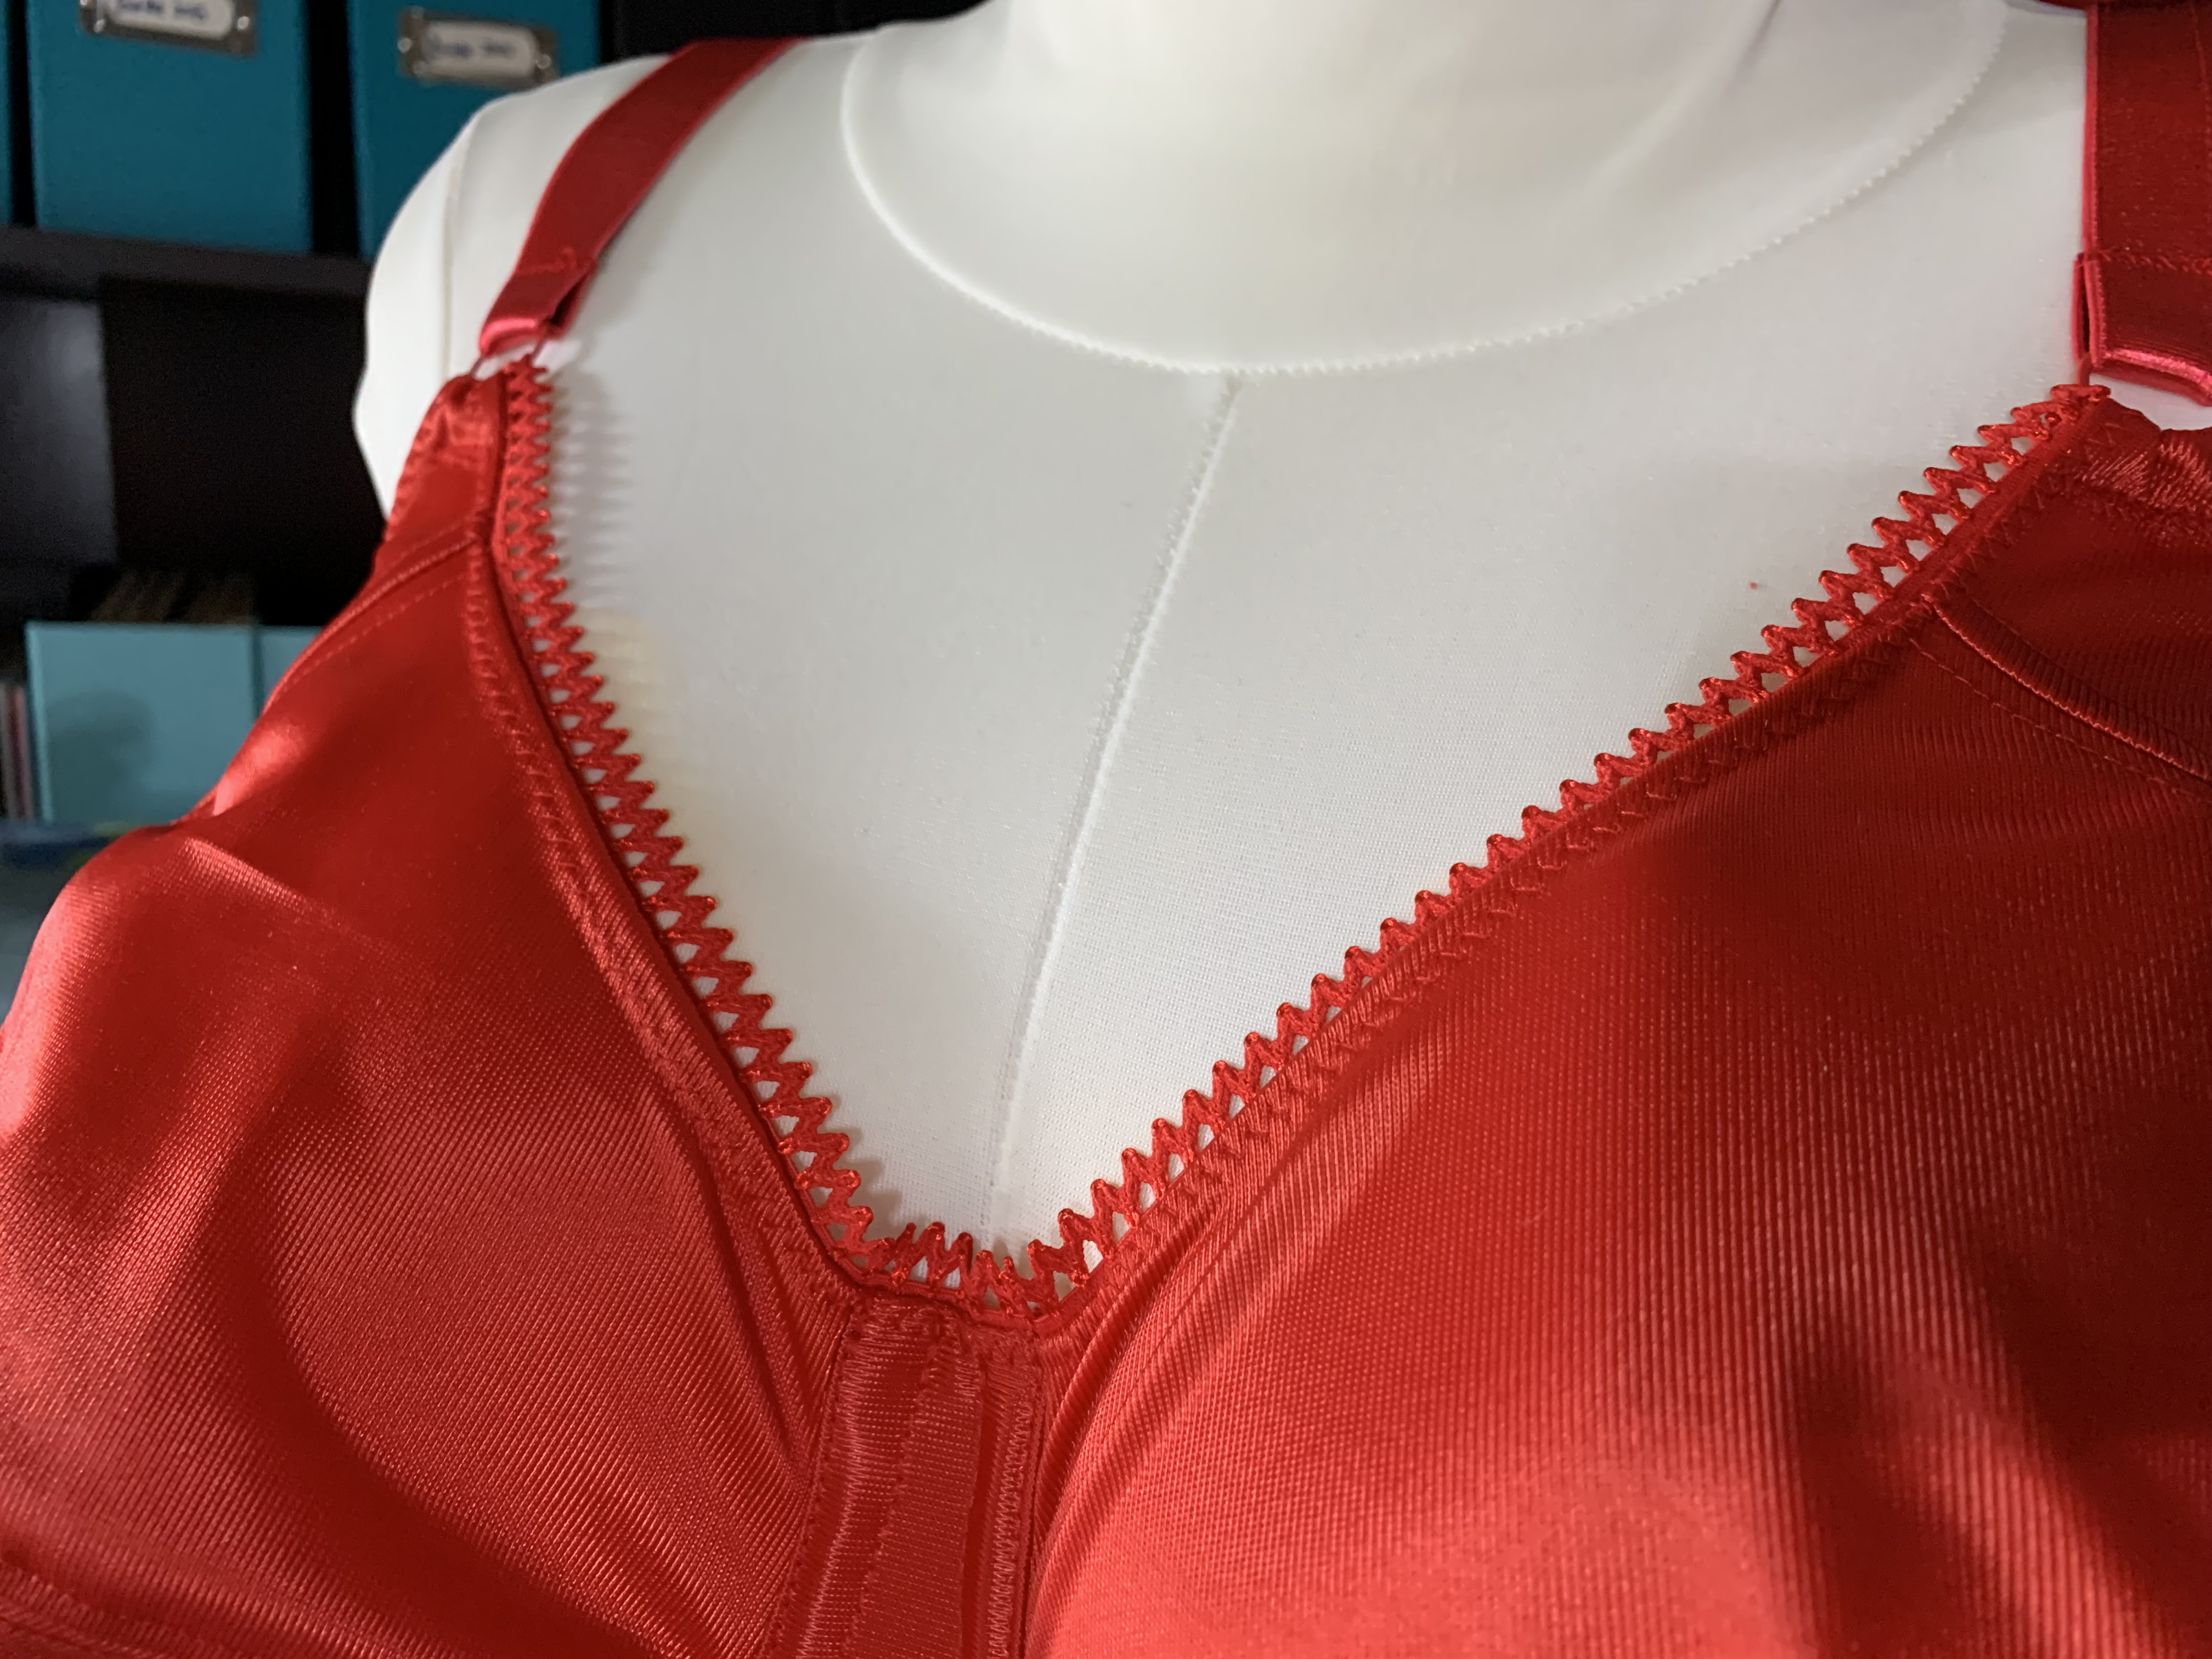
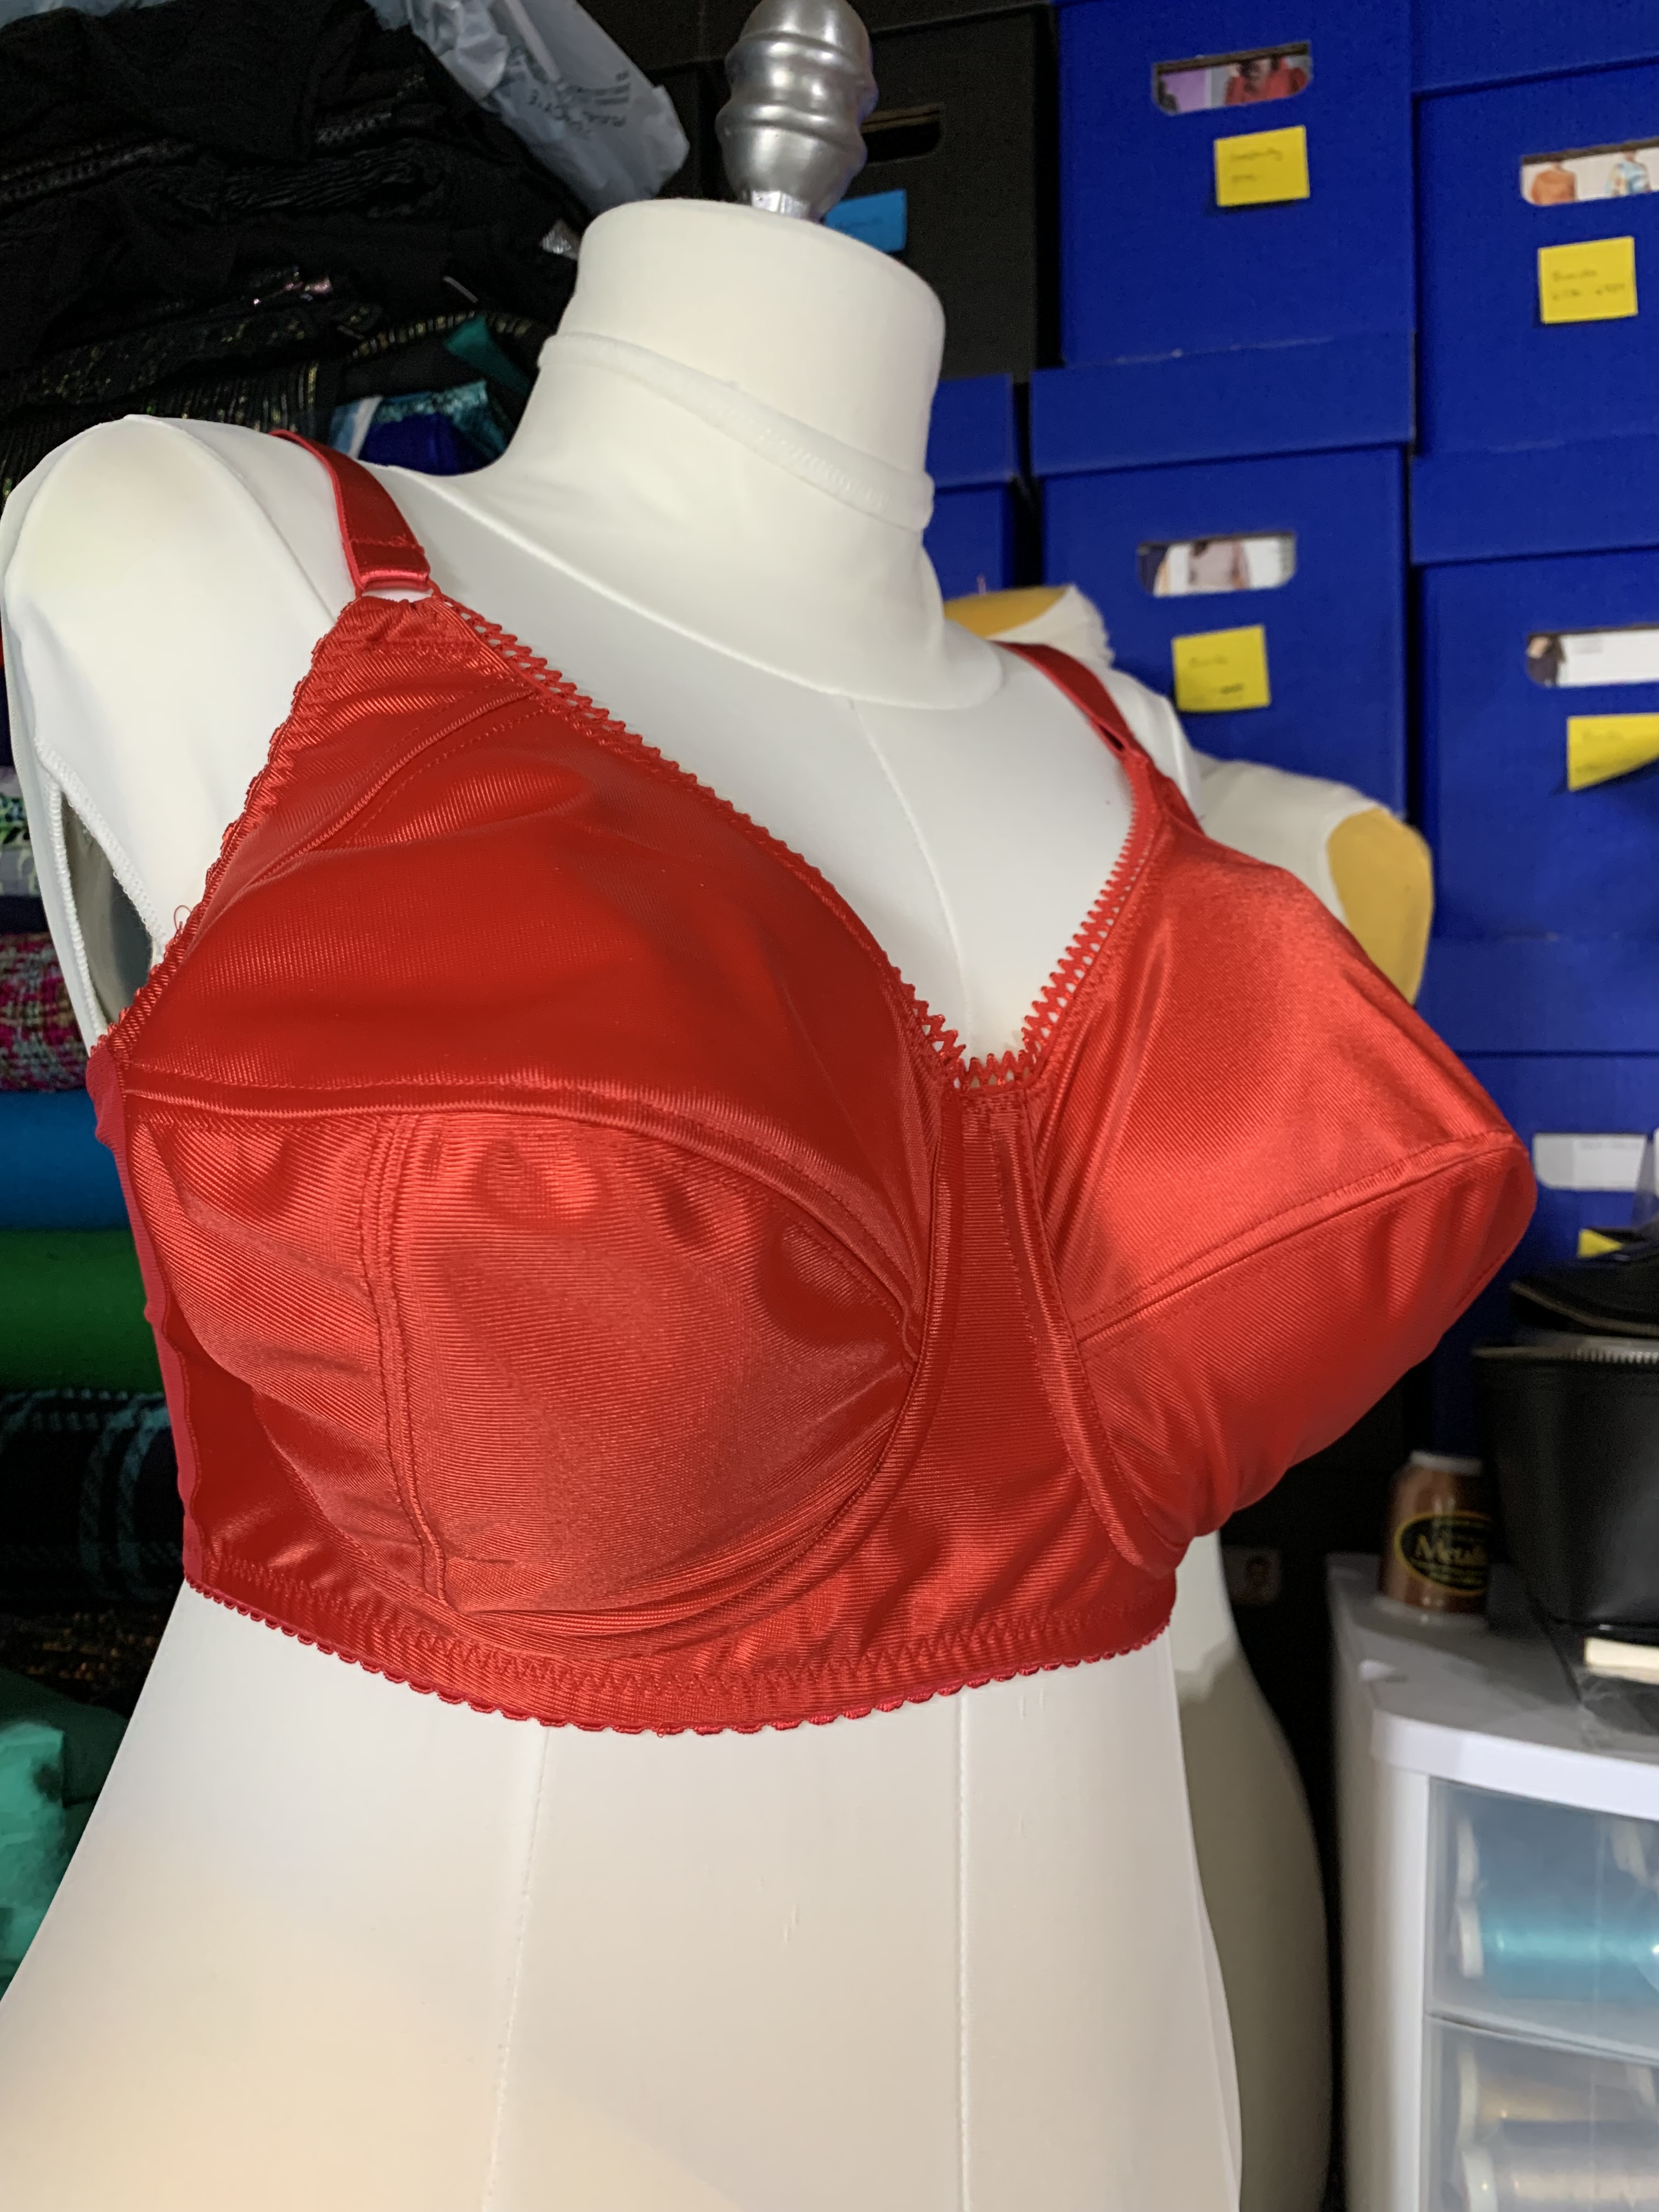
A few other construction changes I tried this time were to finish the neckline with fancy elastic, to stitch down the full width of the back elastic strapping, and to zigzag around the outside of the hook and eye to help prevent poking. I’m happy to report that the fancy elastic was a fun treatment and I think it looks super cute! The stitching on the strap elastic was a bit of a bust; in the Craftsy tutorials I learned construction from originally, Beverly Johnson stitches along the inside of the back elastic and then down the center, trimming off extra power net. One of the Bee instructors stitched down the inside and outside of the back elastic, so I thought I would give it a try. Unfortunately, this seemed to cause rippling/puckering of the elastic, so I think I will go back to my previous method of attachment in the future. Happily, though, the zigzag technique has produced a very strong back hook and eye and helps to prevent annoying pokes from any rough edges!

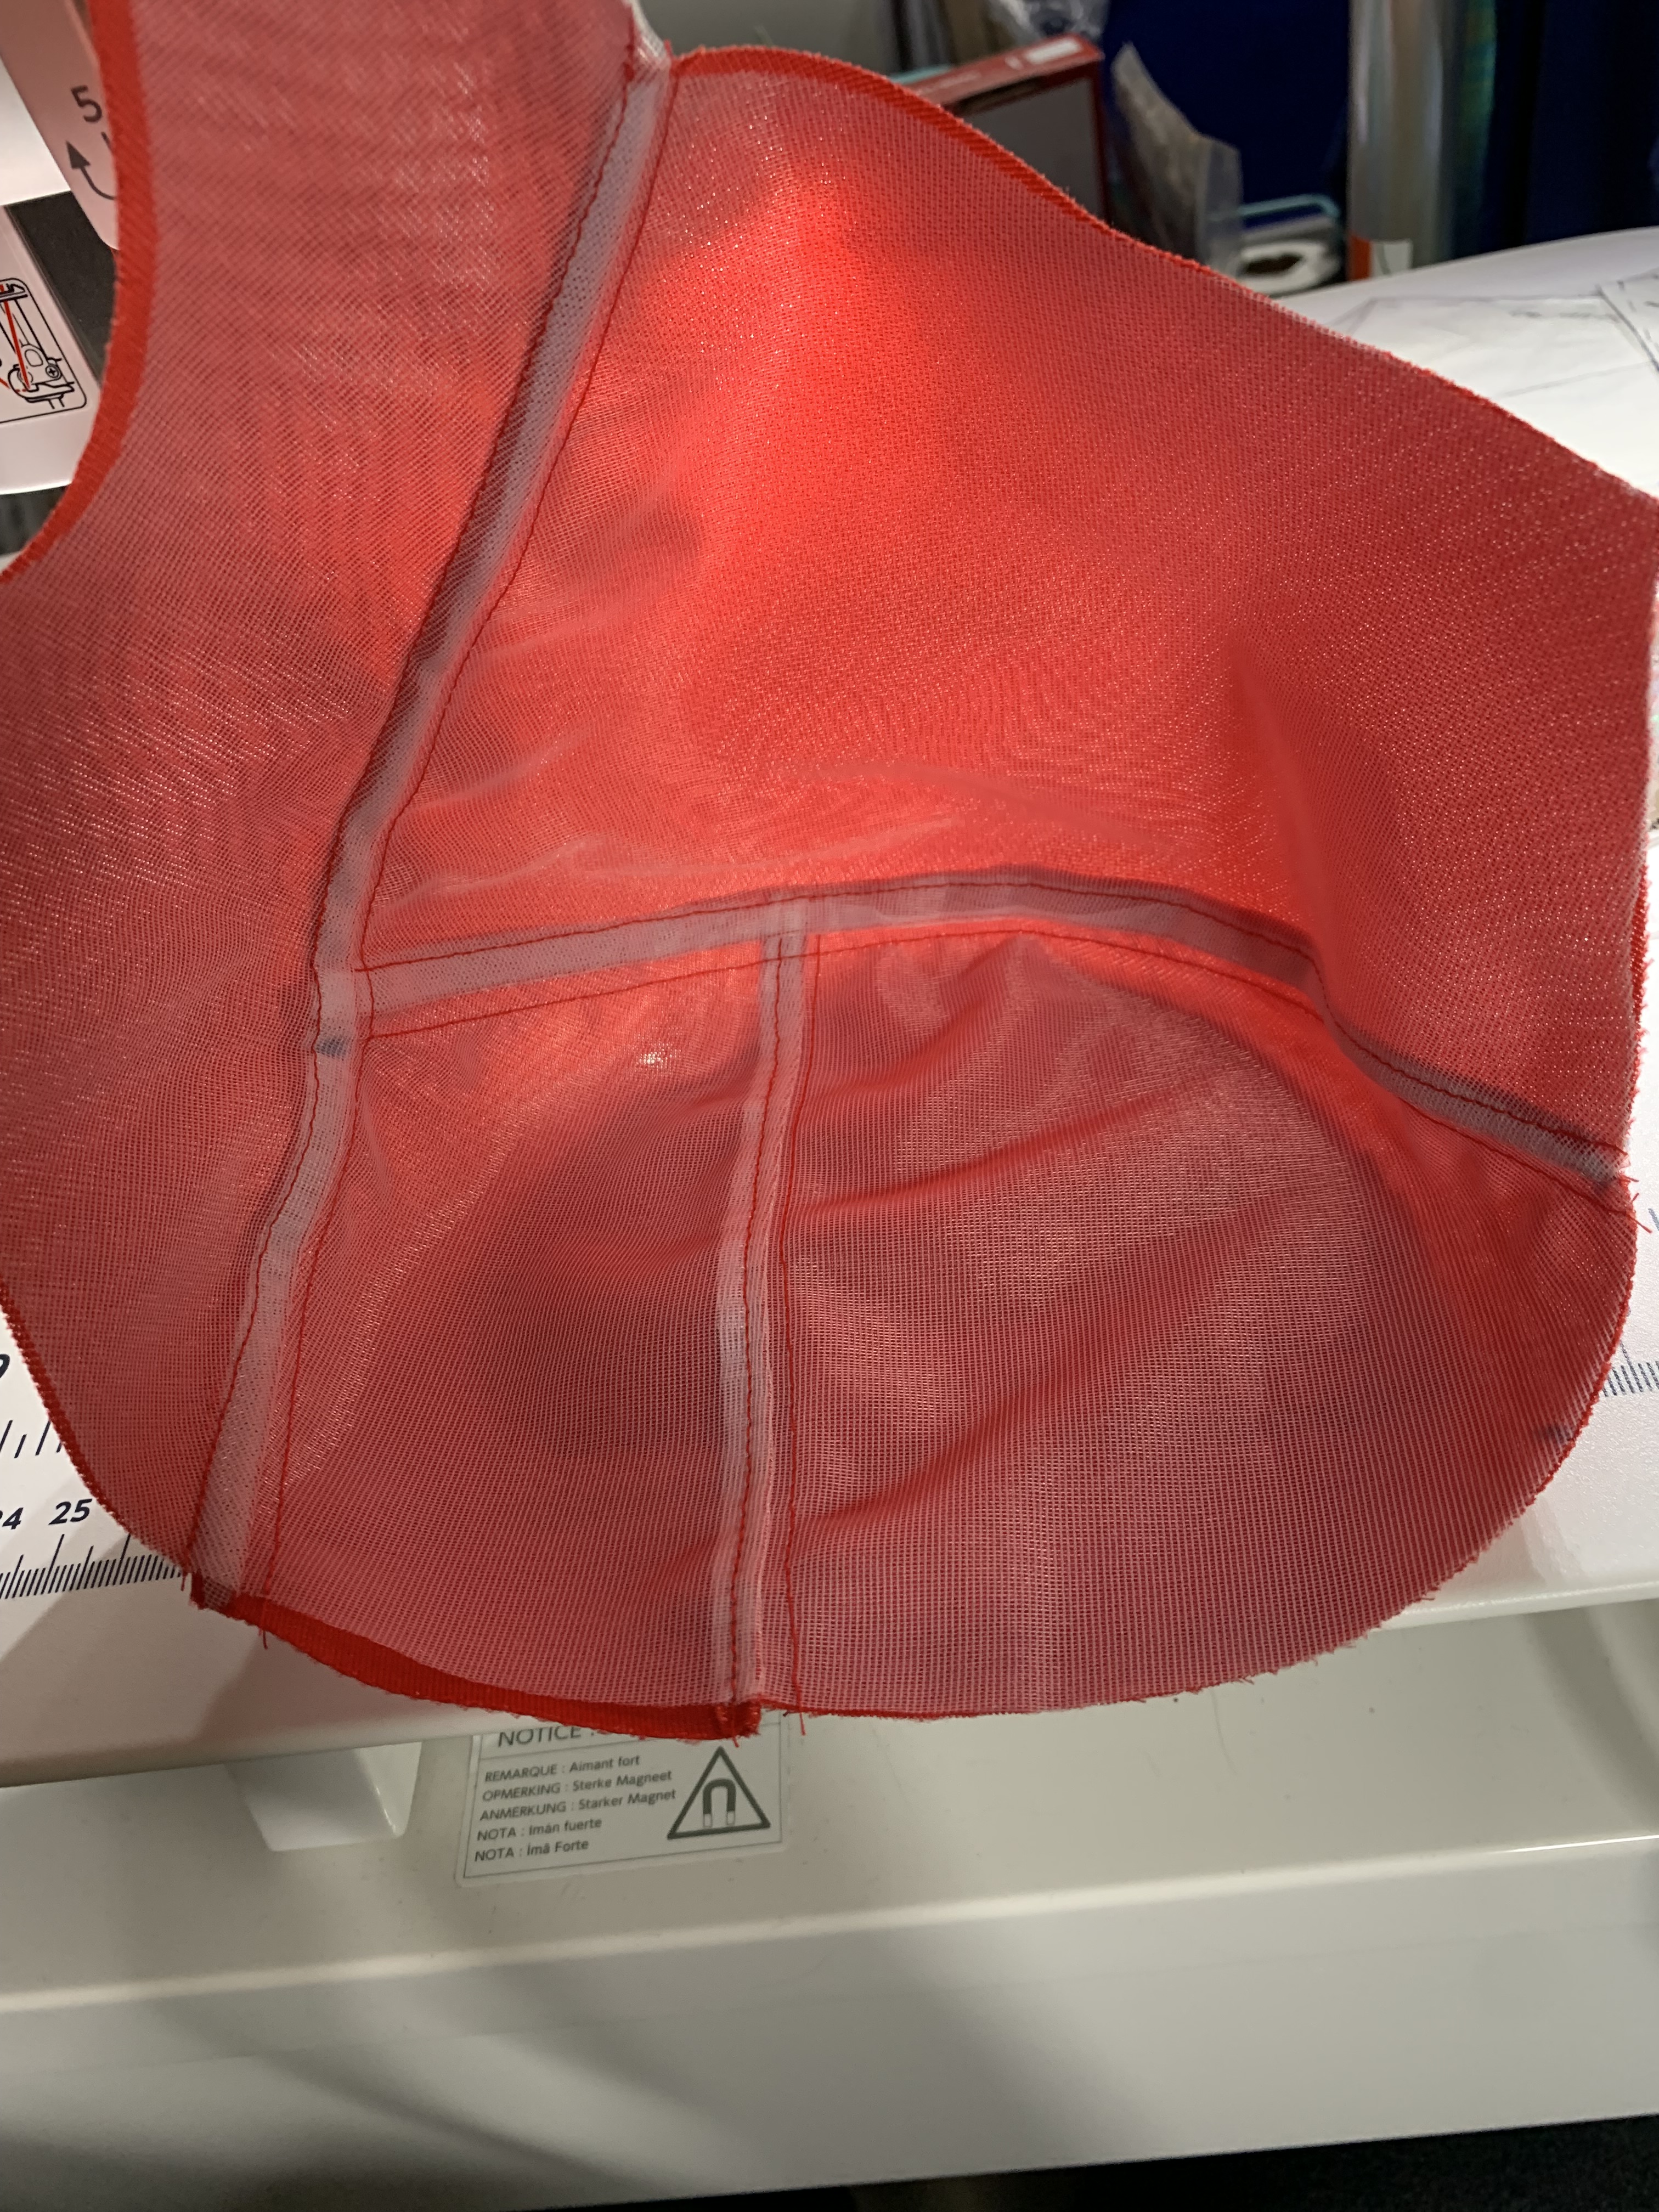
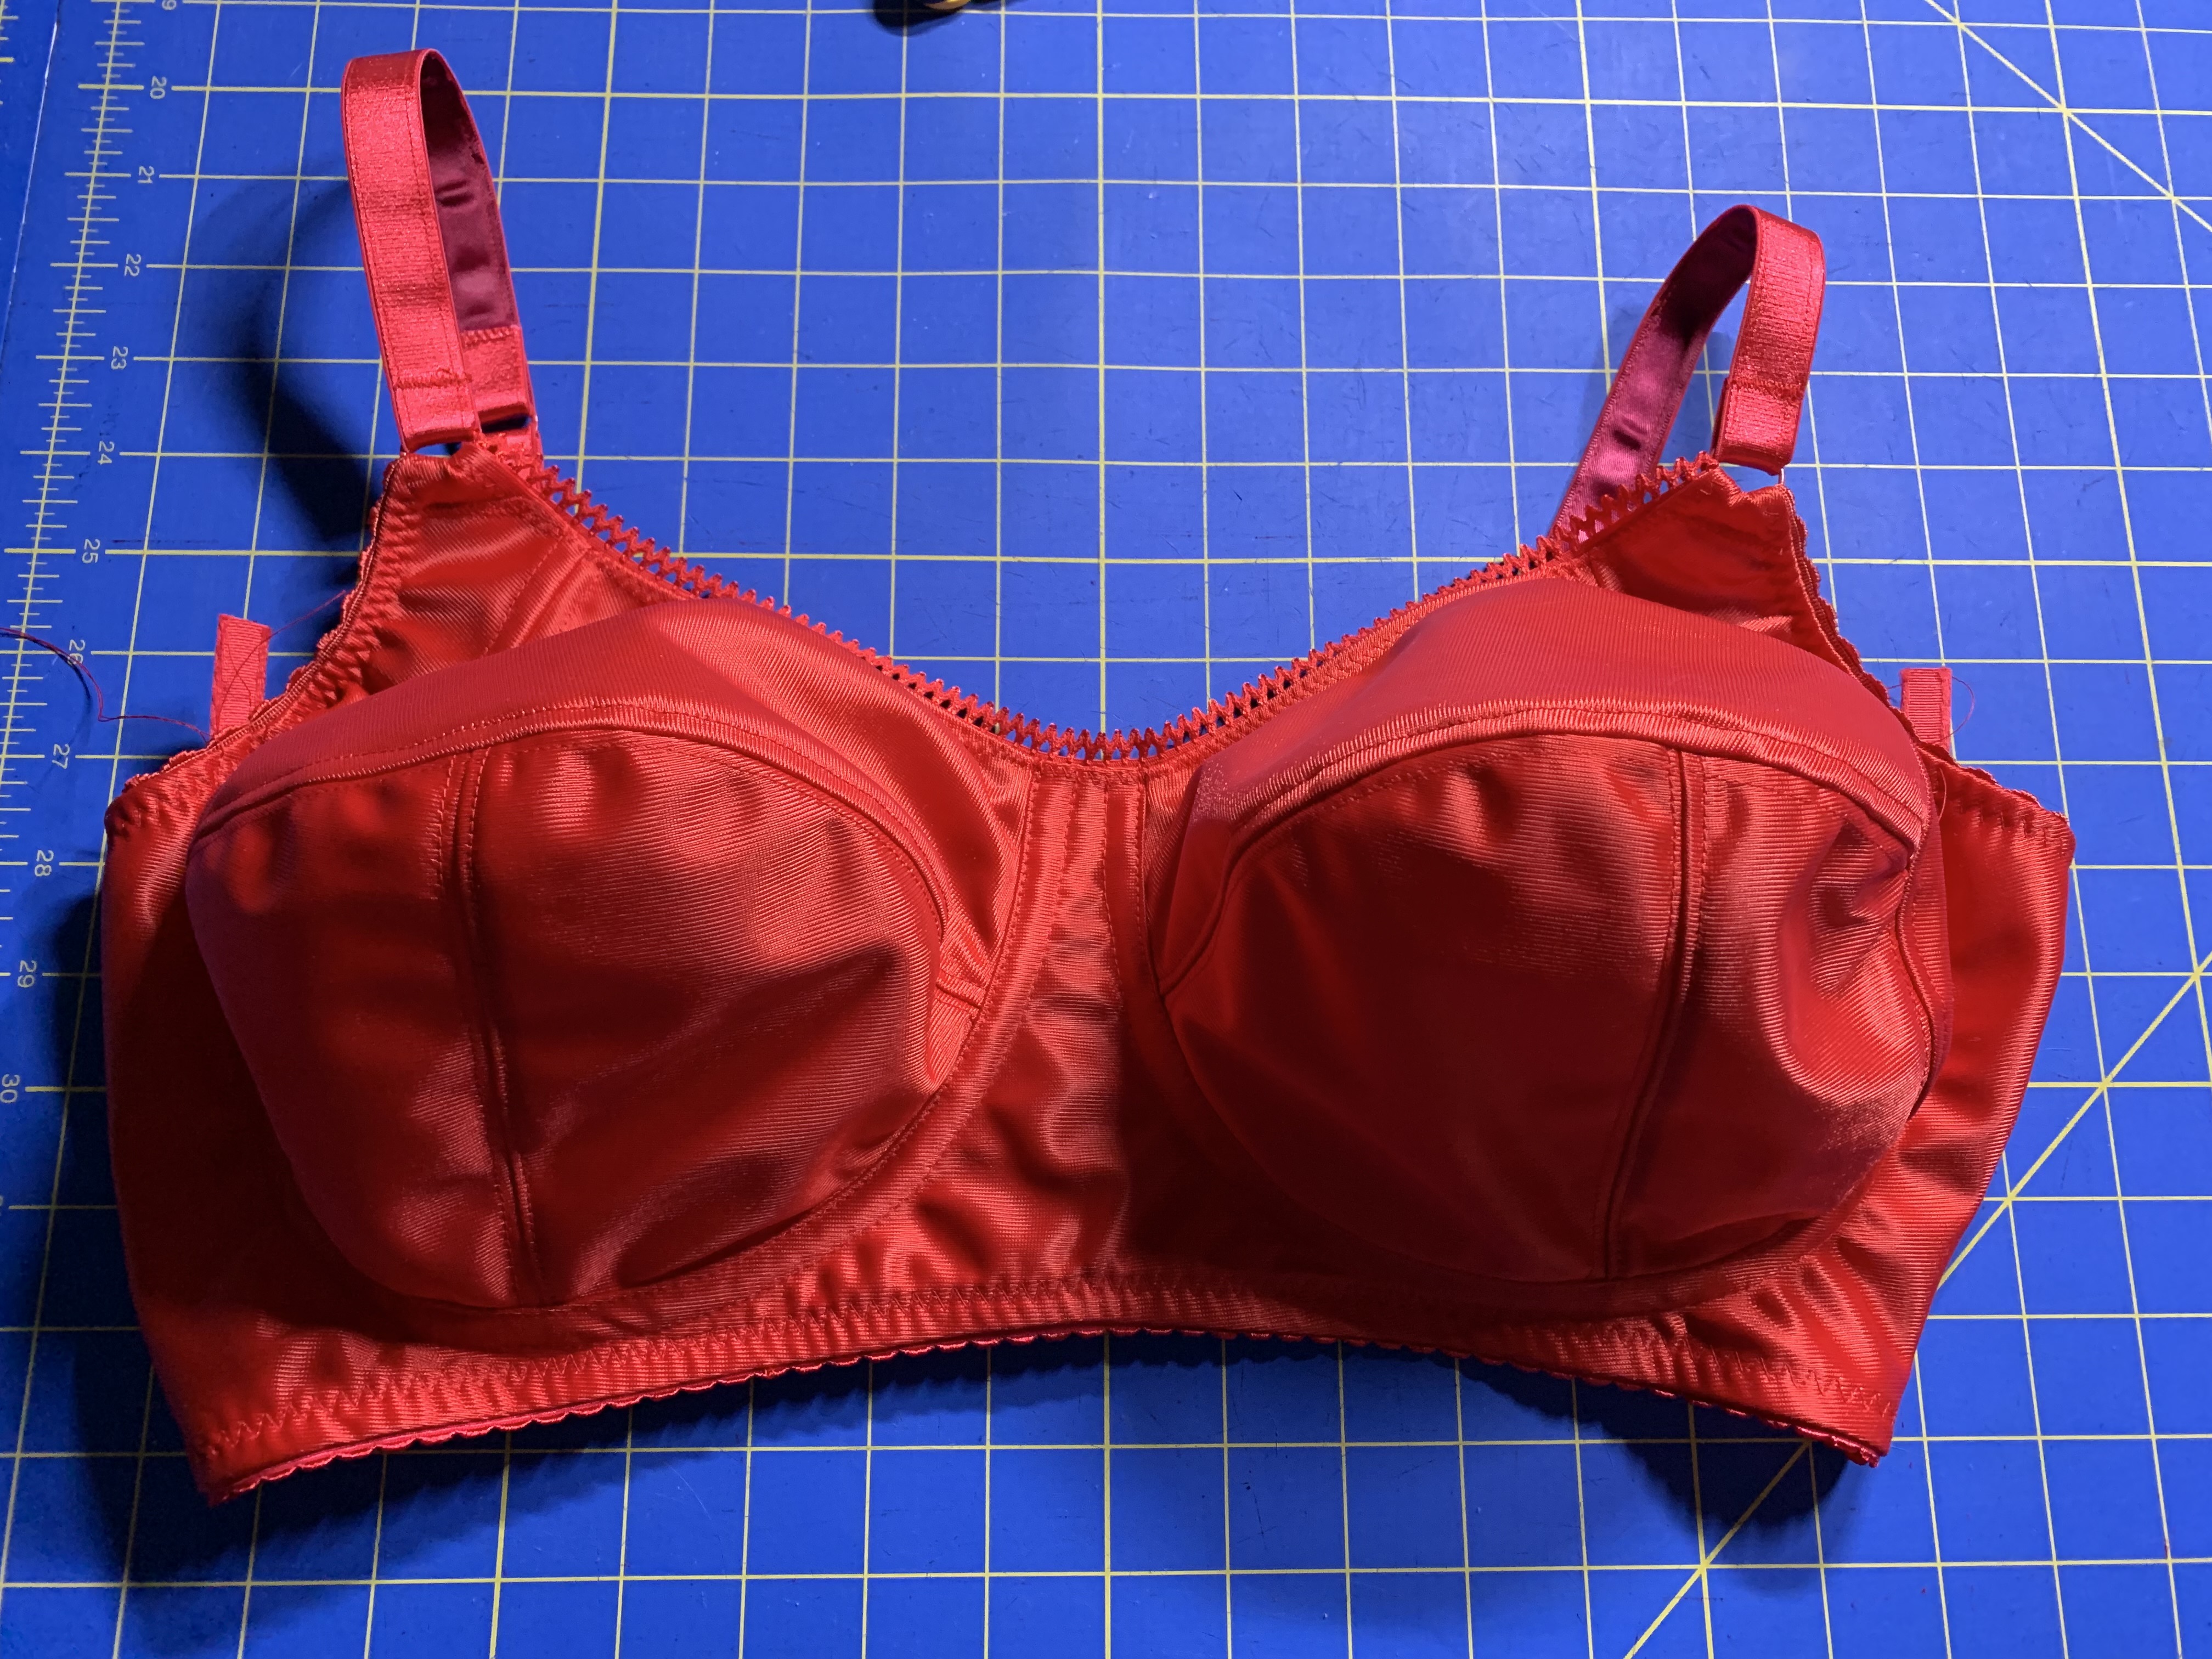
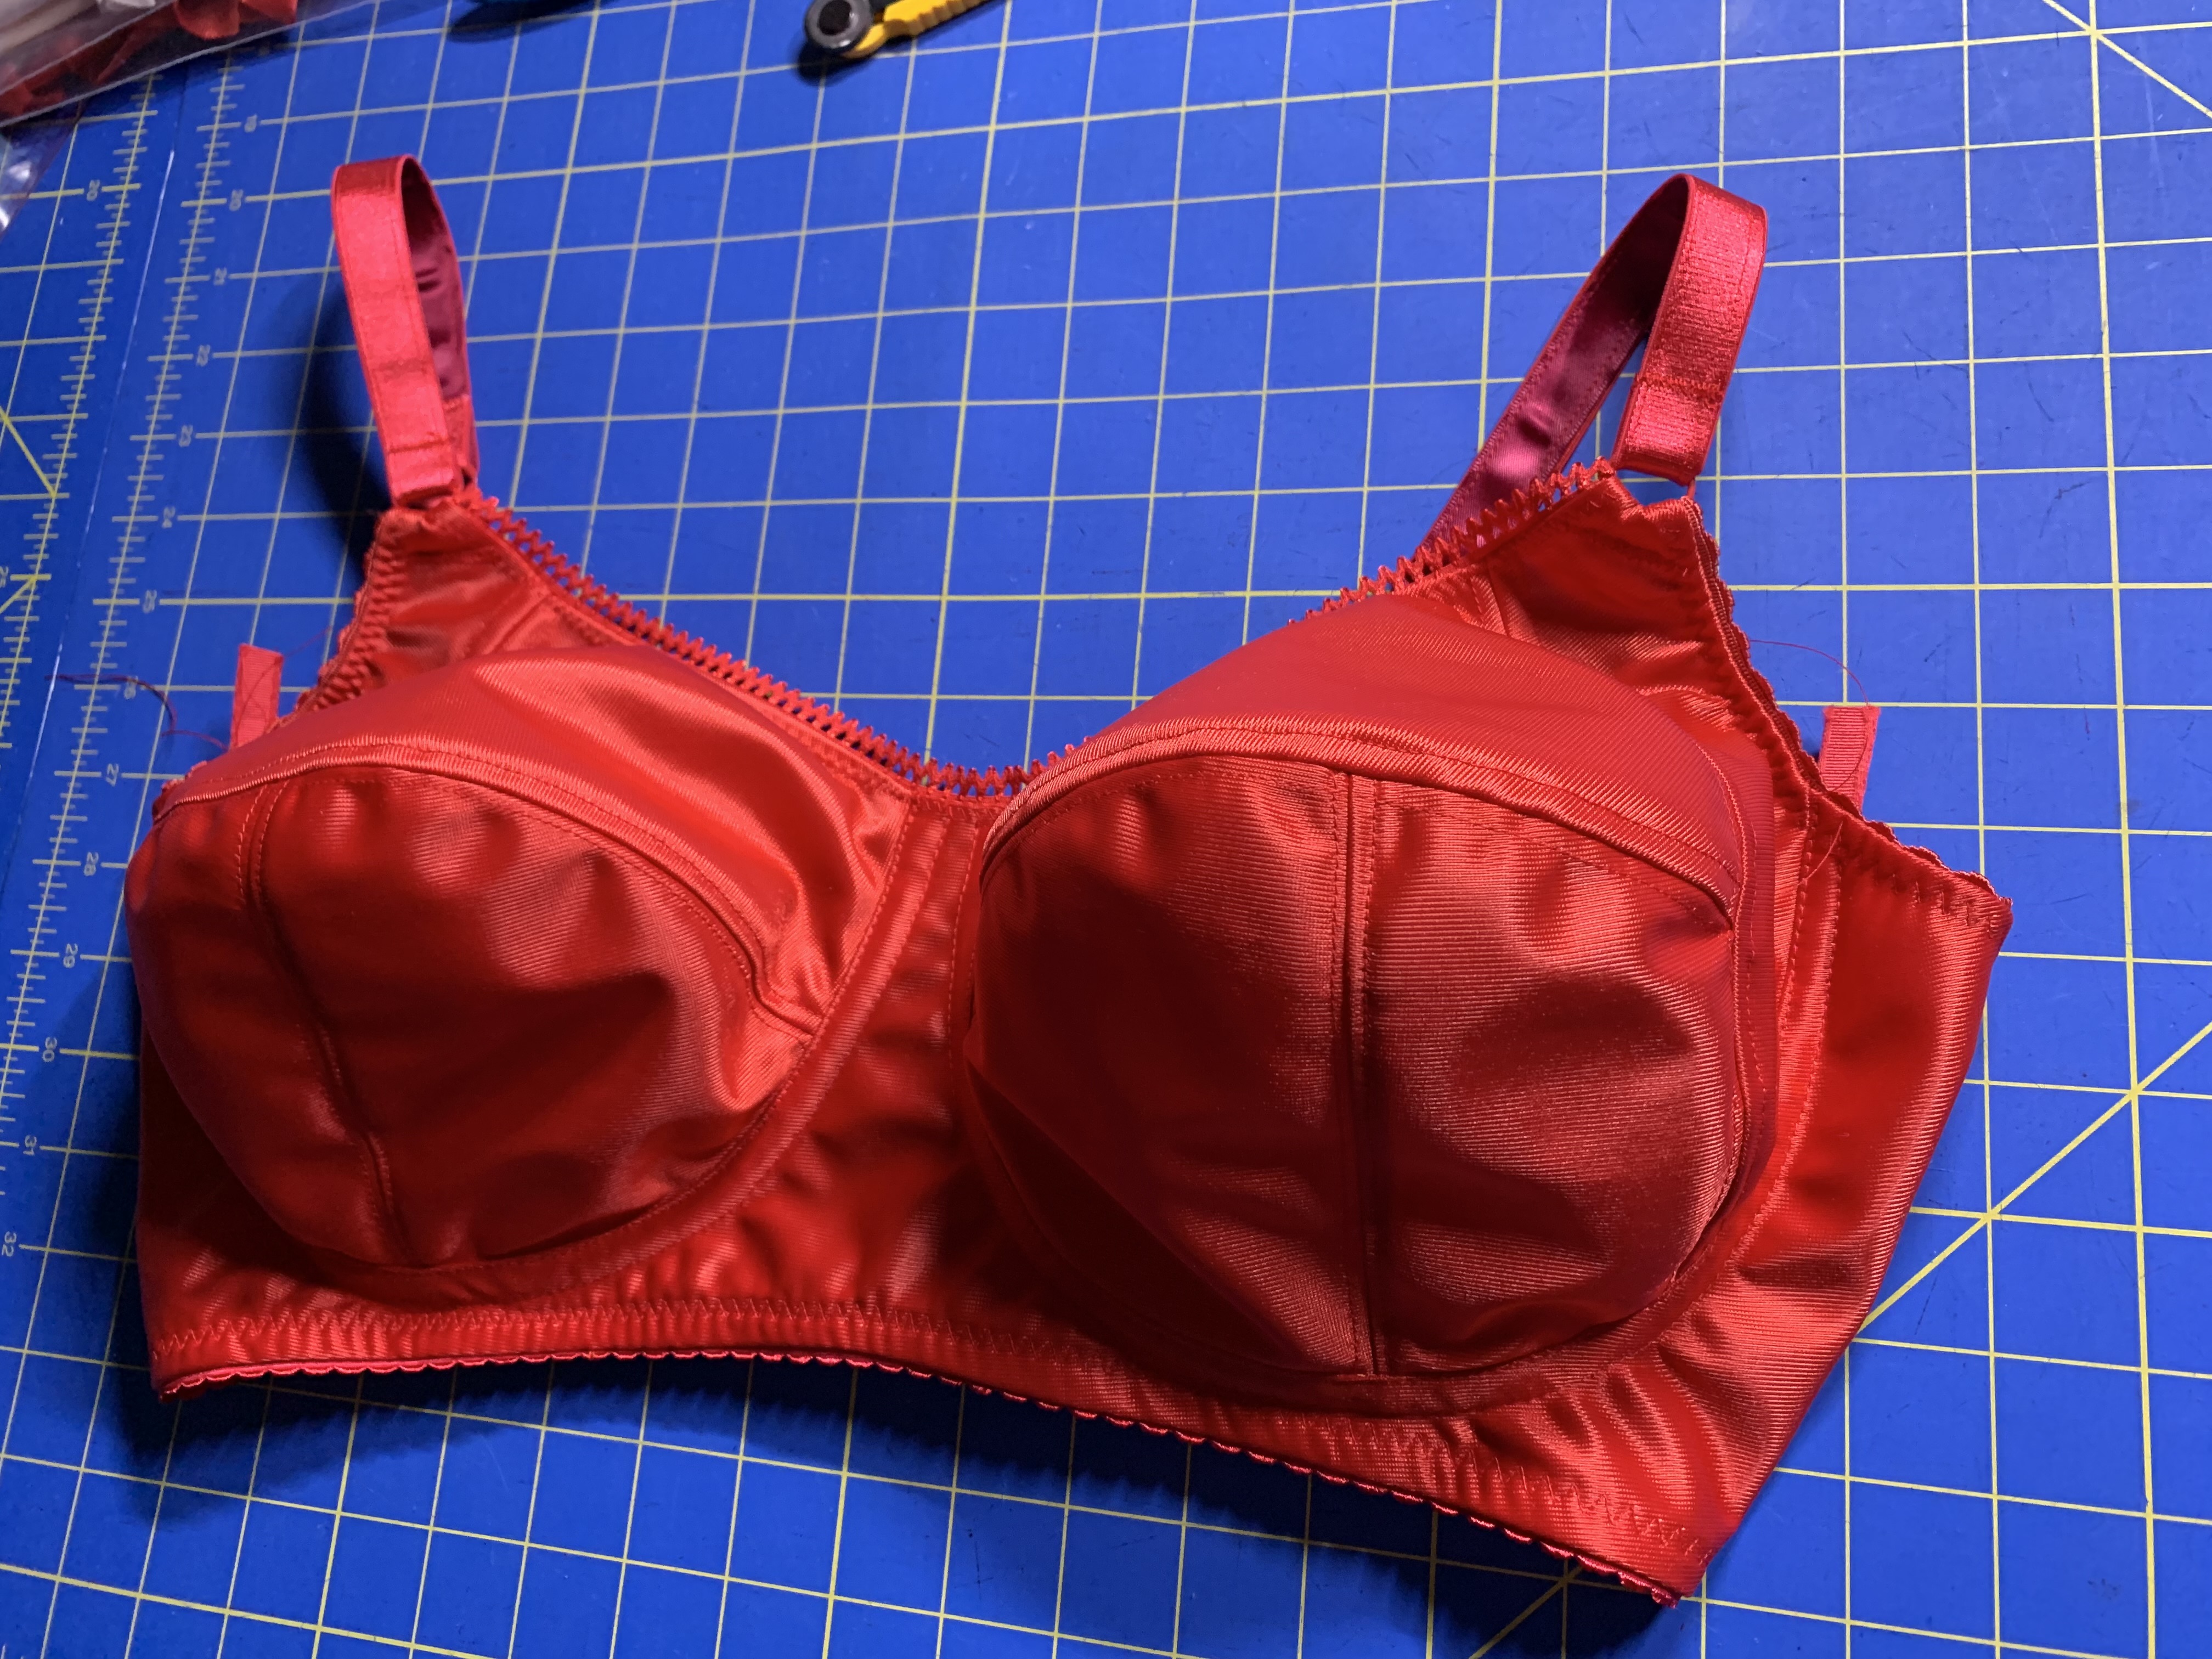
Generally speaking, I am very pleased with the construction on this bra. It isn’t very exciting design-wise, but I do think it is well made overall. The cups are a bit pointy for my taste, but I hope to round them out in future iterations of the pattern. They also tend to point outwards instead for forward; I’m not quite as sure how to modify this but I’ll do some research and see if I can find any advice on this.
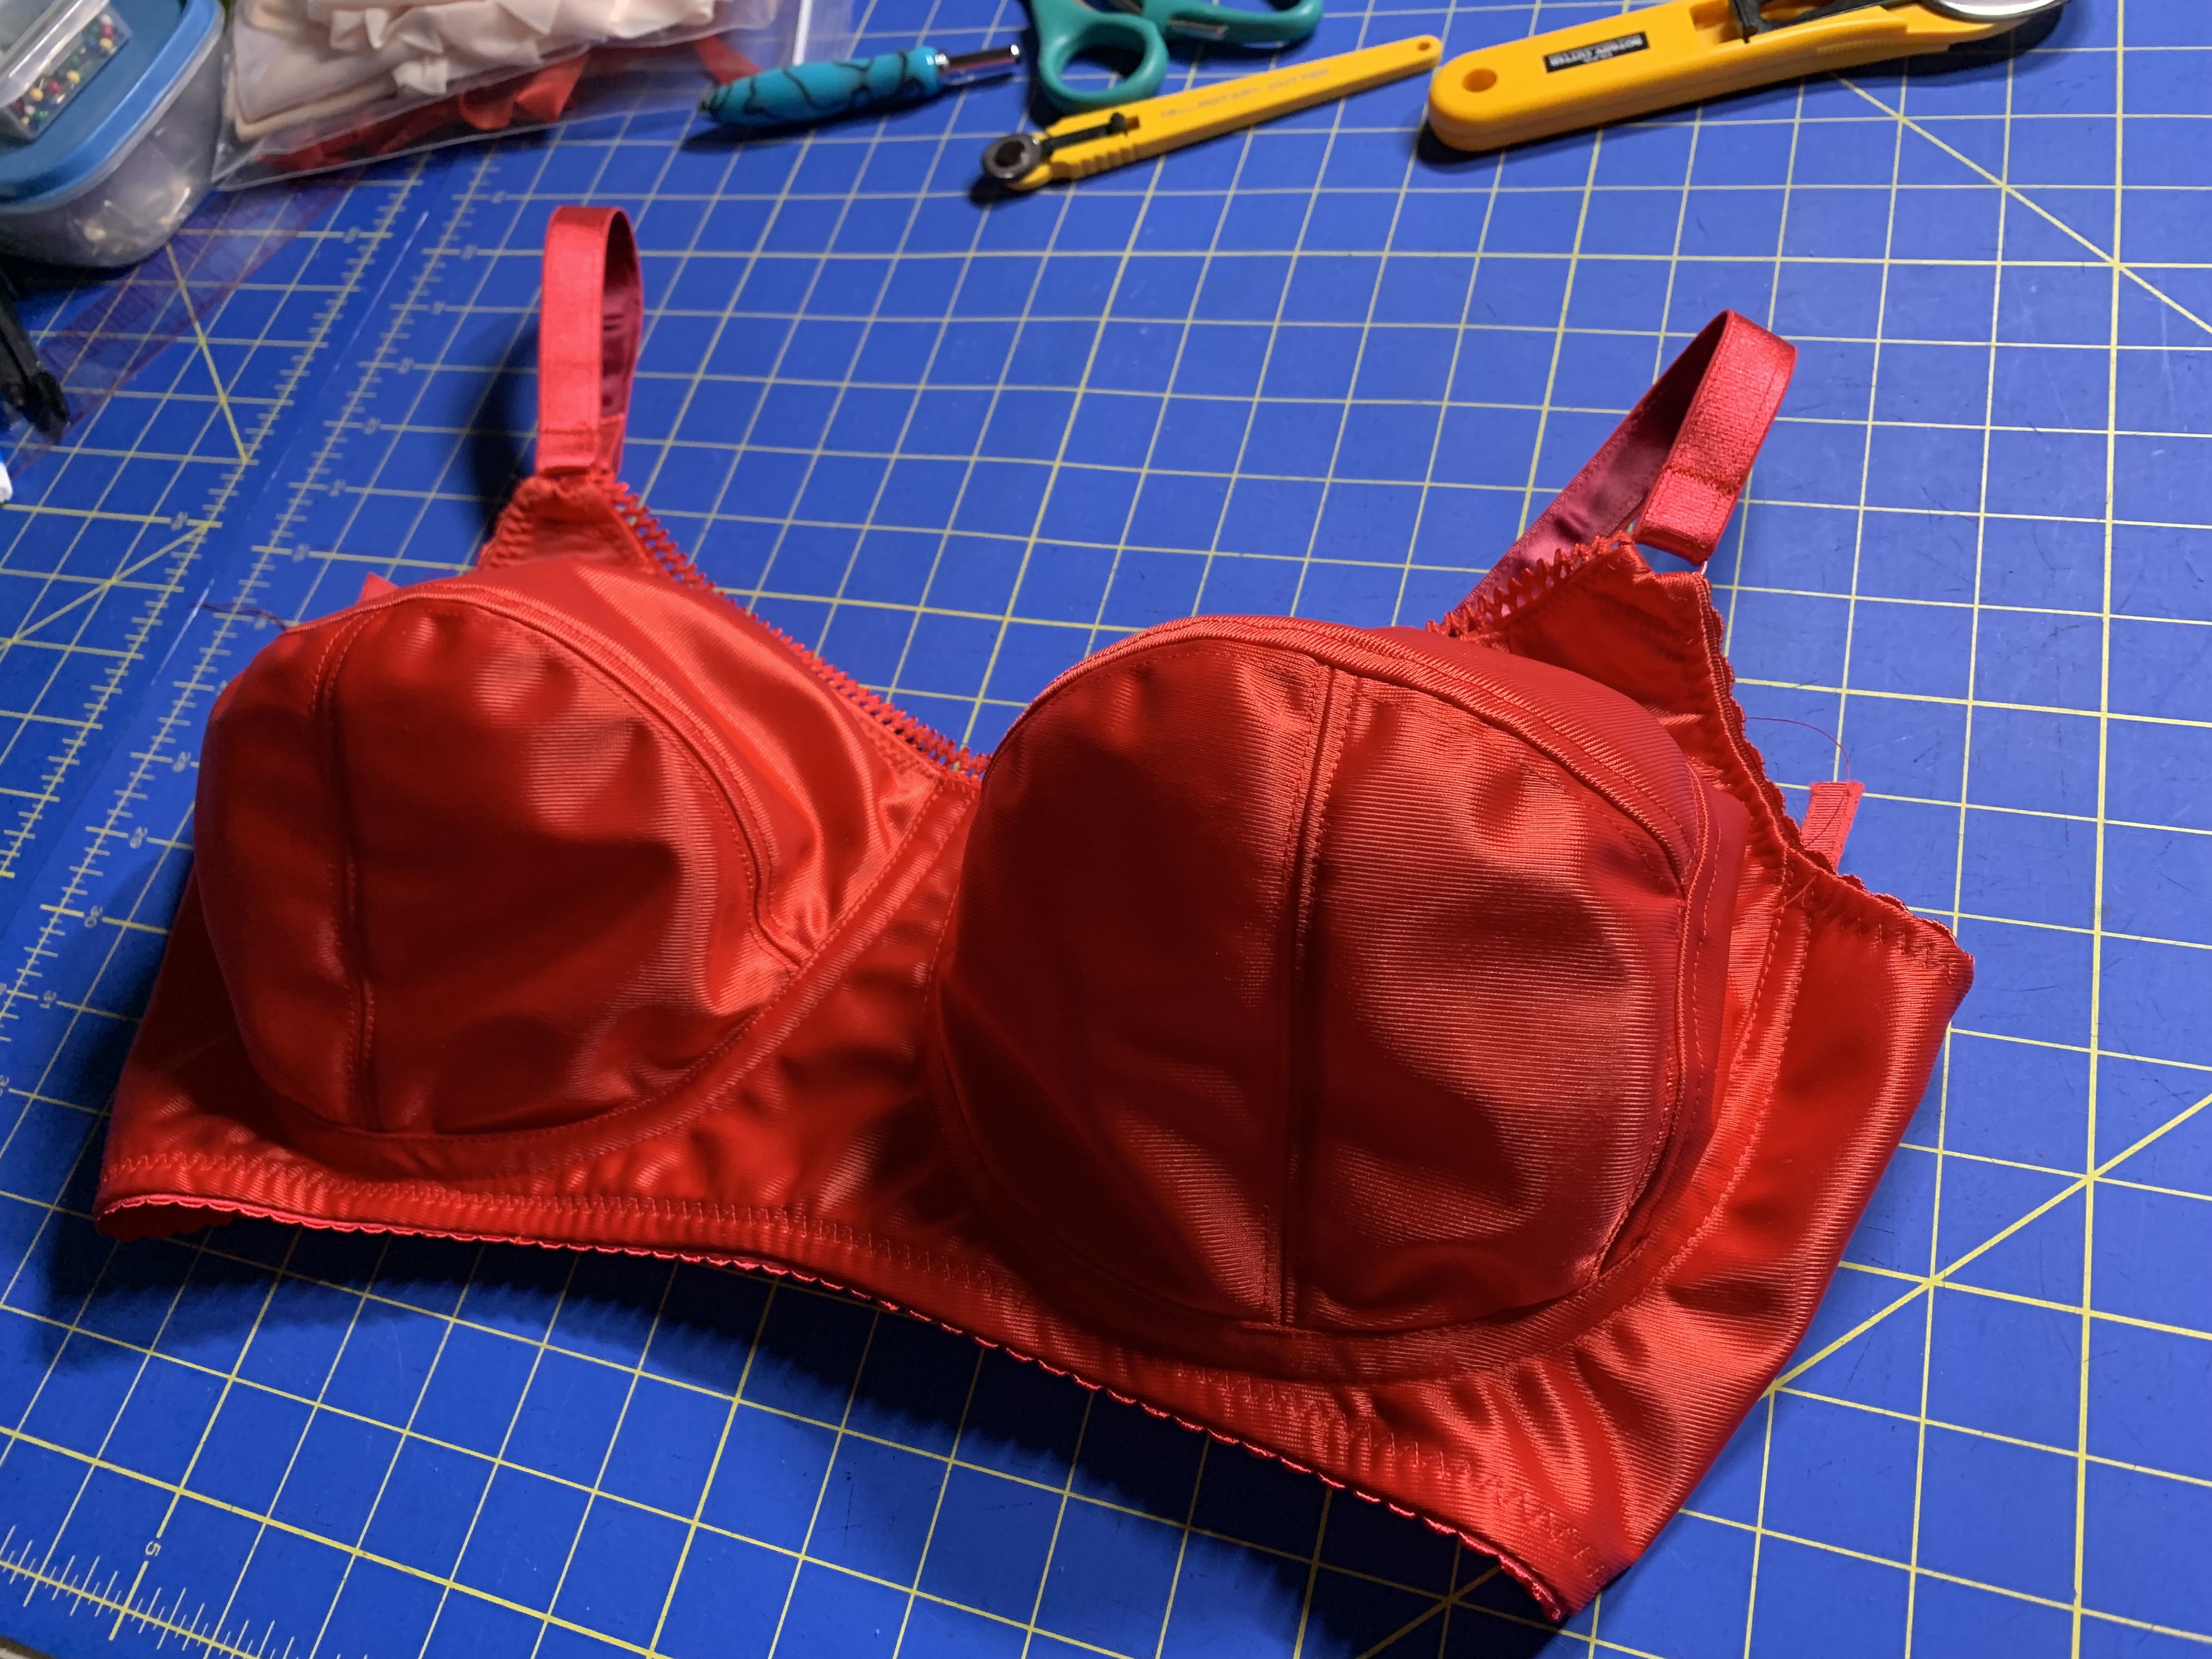

As far as the wire sizing goes, I tried the Porcelynne Vertical Long in size 40. Overall this felt pretty good but it might still be a bit large. It didn’t poke under the arms but it did slide down a bit. I’m going to try some of the Omega wires from Emerald Erin in my next bra, and also hopefully a 38 Vertical Long soon as well.
Official Pattern Review
Pattern Description: Full band underwire bra with 4-piece cup design and built in powerbar. The Bra Builders website description says it is particularly intended for rounder bust shapes.
Pattern Sizing: Band sizes 32-48, cup sizes D-I. I started with the size 40I by using the pattern’s instructions to add 4 inches to your underbust measurement and using the upper bust and full bust to calculate cup size. With this I was starting at the largest cup size in the pattern for my chosen band size, though I did have to take it in quite a bit (and re-shape the cup) so you may want to take that into consideration if you are looking to select patterns for a particularly large bust. I made further changes; they are detailed below.
Were the instructions easy to follow? The instructions were fairly straightforward, though this wasn’t my first bra so I made several construction changes to use other techniques I prefer. For example, I did not use zig-zag topstitching on the lower cup seam; I felt that regular topstitching looked better and provided similar amounts of reinforcement. I do think the instructions could be better at indicating seam allowances and some other basic sewing details up front; a lot of that information was sort of scattered through the instruction document. Also, the construction seemed to indicate a center-front seam, but the pattern seemed to indicate cutting on the fold. I cut on the fold, but I also made some changes to how I cut out the band pieces with regards to fabric and grainline (the pattern has you do a fully power net band cut on the bias; I did the front band in stable fabrics and back band in power net, so I used the proper grains for stability in the front and stretch in the back, which seemed to work fine in terms of overall fit.
Did it look like the photo/drawing when you were done with it? Yes! Despite how much I altered the pattern for fit (and how much I tried to round out the cups) it still turned out very much like the illustration and the final bra examples that were photographed in the instructions.
What did you particularly like/dislike about the pattern? The pattern itself is a photocopy of hand-drawn pattern pieces and I noticed that some edges weren’t really trued. The pattern itself tells you the notch marks won’t necessarily line up (for my size they didn’t). I wasn’t too put off by this, but I think it would be miserably confusing for someone newer to sewing, and especially newer to bra sewing. I was able to fix this myself with the tracings I took to make my pattern, but I think that in the sea of available bra patterns (especially on the indie scene) this one does not feel as “professional” in the presentation of the pattern, even if the draft itself provides a better starting point fit-wise than many others have for me. It seems like the pattern company is working to convert their pattern to a digitized format (it looks like they have done this with their Bravo Bottoms underwear patterns), so this may be less of an issue in the future. I also did not like that the pattern did not explicitly state if seam allowance was included. I made an assumption because it said to use 1/4” seam allowances for construction and never explicitly said to add them to the pattern, but it would have been nice to know. However, despite my complaints, I do really like that this pattern is drafted for a more narrow vertical type wire, even at larger sizes. I was able to use the instructions from the pattern to get a really good starting point to fit from, which I haven’t been able to do with any other bra pattern I’ve tried (I’ve had to do a lot more guesswork around wire lines and blending cup sizes in other patterns).
Fabric used: I used duoplex for the main outside fabric, sheer cup lining to line the stable parts of the bra, and power net for the back band. I used the usual 3/8” and 5/8” picot elastics with 3/4” strap elastics for finishing. Most of my materials were from Gigi’s Bra Supply, but I got the sheer cup lining from Bra Builders.
Pattern alterations or design changes you made: I darted out about 1” from the center horizontal seam and the power bar cup seam. I also added 3/4” to the bridge center front, and made the corresponding adjustment to the cup pieces. I also darted out about 1/4” from the top of the band side seam. After my first set of fit adjustments, I added about 1/8” of added curvature to each of the lower cup pieces to help reduce how flat the cup shape was. After doing a second fitting, I pinched out another 1/4” from the cup power bar seam, raised the under arm coverage by an inch, shifted the curvature of the center horizontal seam (my first adjustment made the outside too flat and the inside too round), took another 1/4” dart of the power bar section, and moved the band side seam back by about 1 1/4” so that the side seam would sit at my natural side. Because I was using leftover fabrics from another bra project, I did not have enough to make fabric straps as per the instructions (I barely had enough to cup my cup pieces!), so I used strap elastic for the straps. I reinforced the front strap with ribbon to stabilize, and I did a hook and slider treatment at the back for adjustability.
Would you sew this again? Would you recommend it to others? I made this in tandem with the Willowdale Bra pattern to experiment with different styles and fits. While the fit on this is great, I do not love the shaping of the bra cups. I feel like I may re-use the band, but I don’t know if I will re-use the cups in future projects; I just don’t love the super pointy shape, even though they are very comfortable. I will try to reshape them, but I’m pretty sure it will be easier to just start from using the Willowdale or another pattern where I had a better fit with the cups.
Conclusion: Overall I am very happy that I made this pattern. I feel like I learned a lot about bra fitting and I feel more bold in making pattern adjustments to bras without as much hand-holding or “permission” to make changes specified from a class or tutorial. I do have a comfortable bra, and I tried some different construction techniques, which I rather like. This is the first non-foam bra that I’ve worn that I feel has support! I don’t know if this will be my TNT pattern, but it will be nice to have a well fitted pattern to use for reference as I try other styles that I like a bit more.
Is this garment a “Triumph of Individual Style”? I don’t think I would call it that; I don’t love the bust cup shaping, and the red is a bit warm for me. However, I am very happy I went through with this project because I learned a lot and I now have something I can wear while I work on other projects and patterns.

The east west orientation of bras is covered in Beverley’s craftsty class I think – I had to do that alteration as well! Let me know if you want me to find out where it was, it has been a while since I did it
LikeLiked by 1 person
That’s helpful! I will go back and check her alterations section.
LikeLike
Beverly covers this fix in a craftsy class – called east west orientation I think?
What a gorgeous color and construction!
LikeLiked by 1 person