Ok…. so I haven’t been a very good seamstress so far this year. I haven’t been sewing many of the basics my wardrobe requires. I haven’t been getting much done for my clients. For the first month I hadn’t even been sewing much at all… And now I have gone and made myself a party dress. And not just any party dress; no I went and made a 1920s inspired party dress. 1920s, the decade of loose fits and dropped waists. Which, longtime blog readers may realize, are not exactly my thing. Nope, not my thing at all. In fact, if I had to pick any decade to avoid it would probably end up being the 1920s. So, astute readers, I am sure you are asking why would I then go ahead and make a 1920s inspired party dress? Well, because I was invited to a 1920s speakeasy themed party. And it was indicated that a lot of people would be dressing up for said party. And, let’s face it, given my pattern stash, my fabric stash, and a week’s worth of time how could I not rise to the challenge?
Of course, I tried to think of anything in my wardrobe that I could wear instead, but, well, the 20s not being my era I utterly failed. So I started flipping through my (virtual) pattern catalog and located several 20-ish patterns from Burda and Patrones. I debated between historical accuracy and using my time wisely on a dress I might wear again in the future. And I debated between the relative safety of English-instructions-and-I-sort-of-know-how-it-fits Burda versus the oooh-pretty-but-how-the-hell-do-those-pattern-pieces-fit-together-and-did-google-translate-just-tell-me-to-“insert it in the behind gender” Patrones. Not to mention I wanted to do this on the cheap, so I spent more than a few hours raiding the fabric stash and debating over my fabric selections. In the end I decided to go “1920s inspired” rather than the historically accurate route And settled on the Philosophy Dress from Patrones No. 249, style #4:
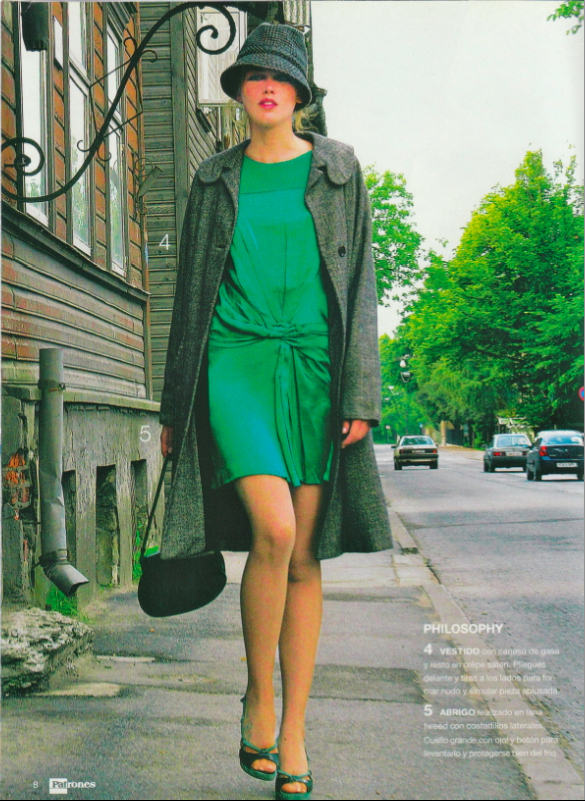 |
| Patrones 249-4 – Philosophy Dress |
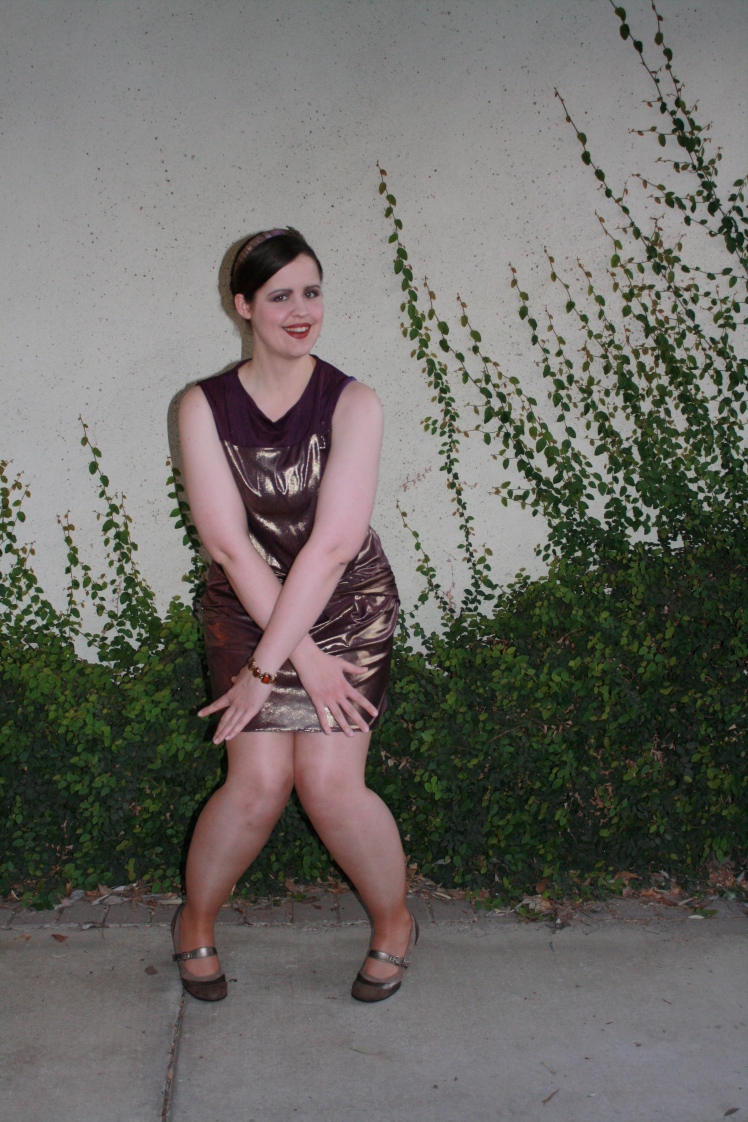
Hair and make-up hopefully added to the costume approach, but the dress itself could be worn present day without seeming out of place. Actually, between color blocking and metallics, the dress itself is right on trend! Or, well, would have been last fall. It isn’t really a very springy color. But that is ok. I also made a headband accessory to go with it. In the end, even though it isn’t my usual style, I am pretty proud of my dress:
 |
| 1920s inspired party dress. |
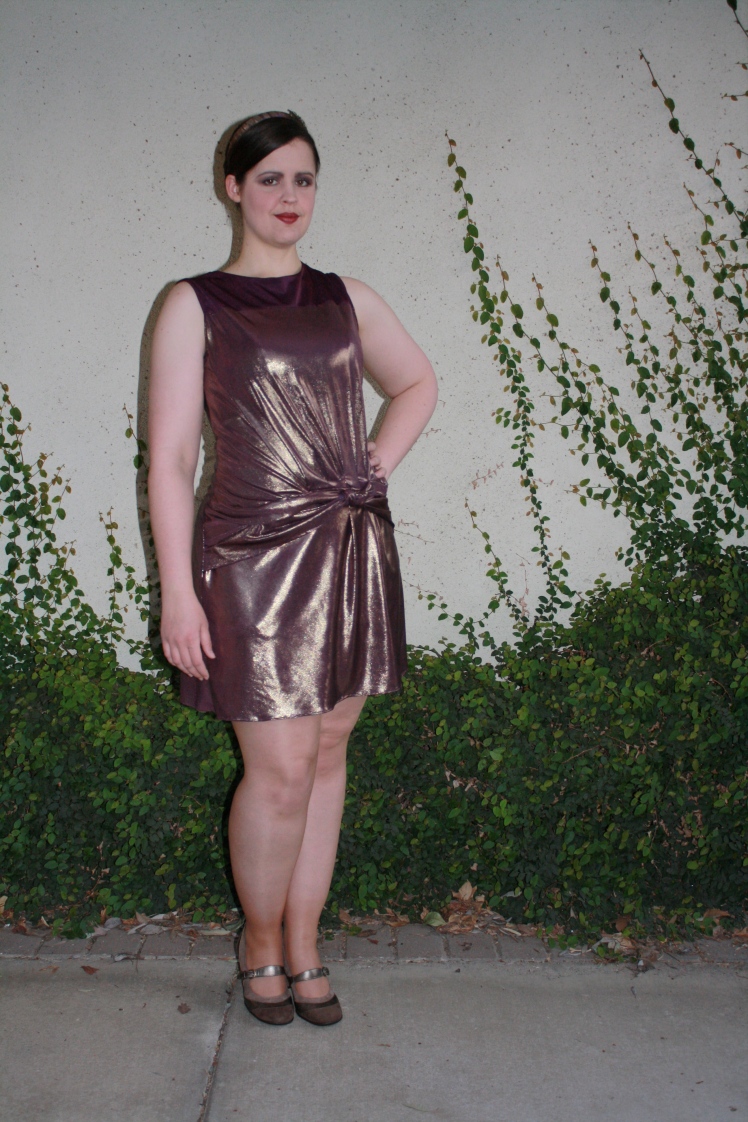 |
| I used some basic online tutorials to get a fairly accurate 1920s style of makeup. |
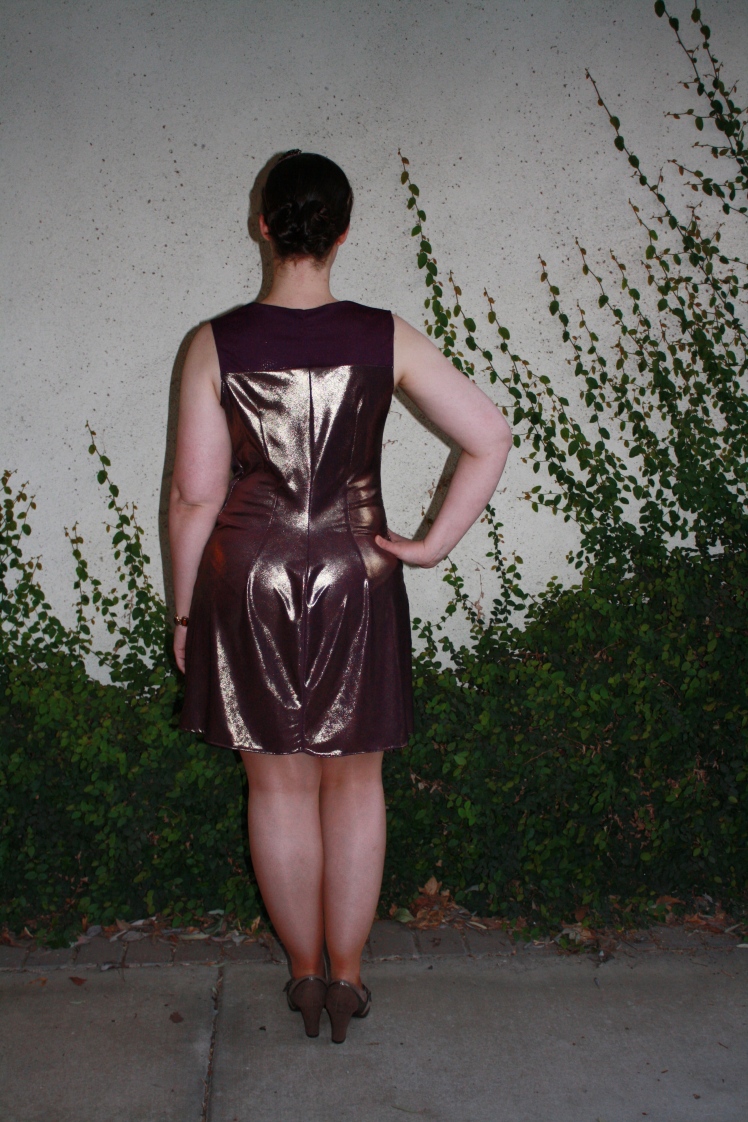 |
| The back has a center back seam and darts to add shaping. I used the wrong side of the fabric for the contrast yoke. |
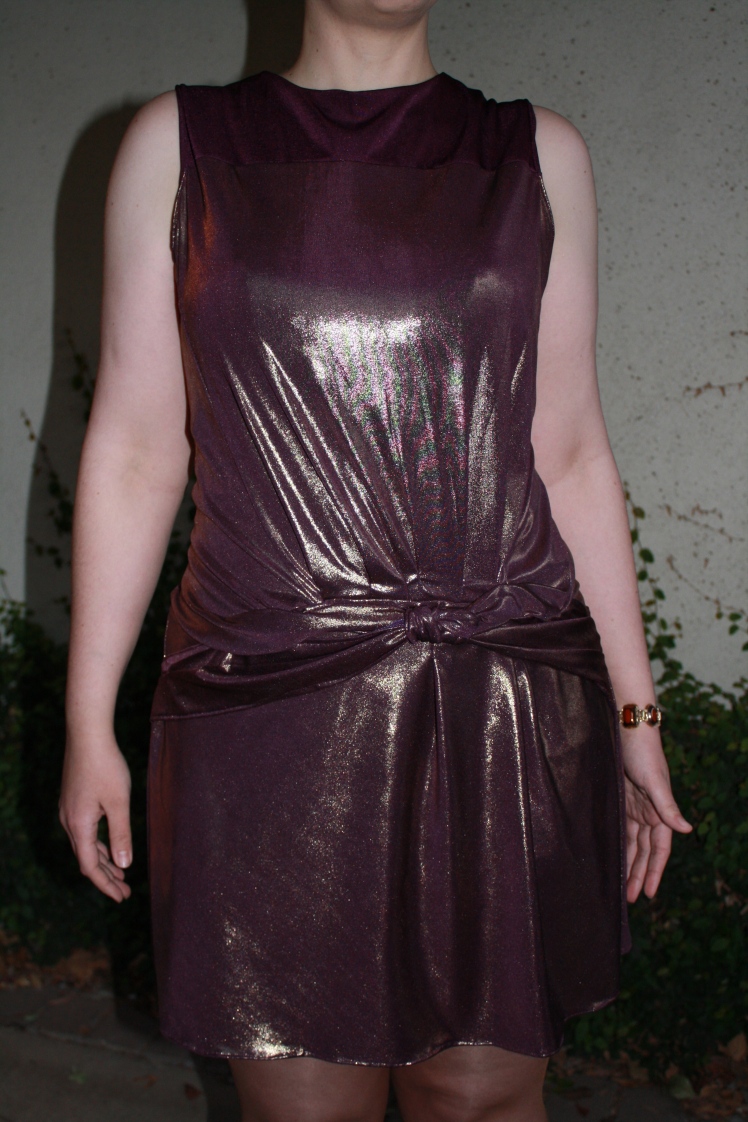 |
| Close up – the waist knot detail is an interesting mix of looking easy but actually being sort of complicated to construct. |
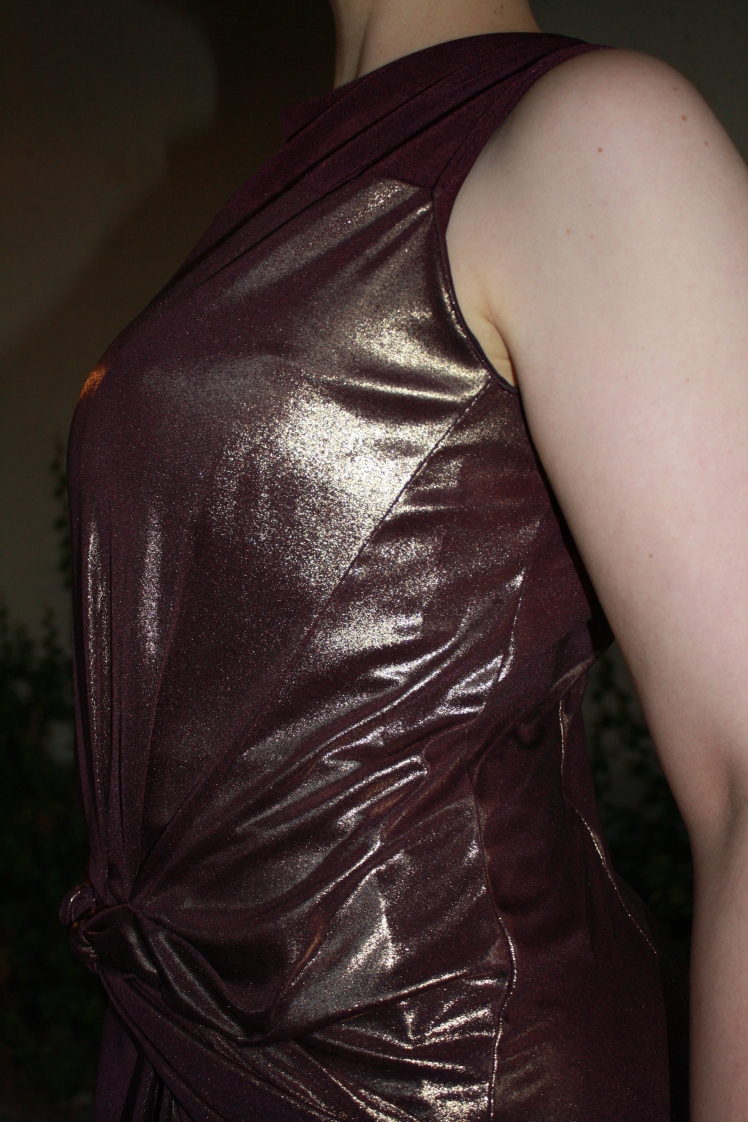 |
| You can see the side front panel seam here – but it is really hard to notice because it just looks like part of the gathers. |
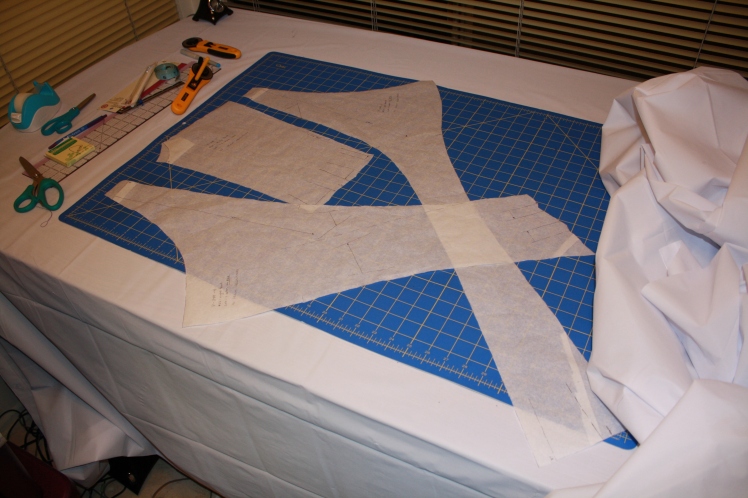 |
| Here is a look at how the front top pattern pieces sort of go together. (Note that the center piece is cut on a fold, so will be twice as wide in the actual dress.) |
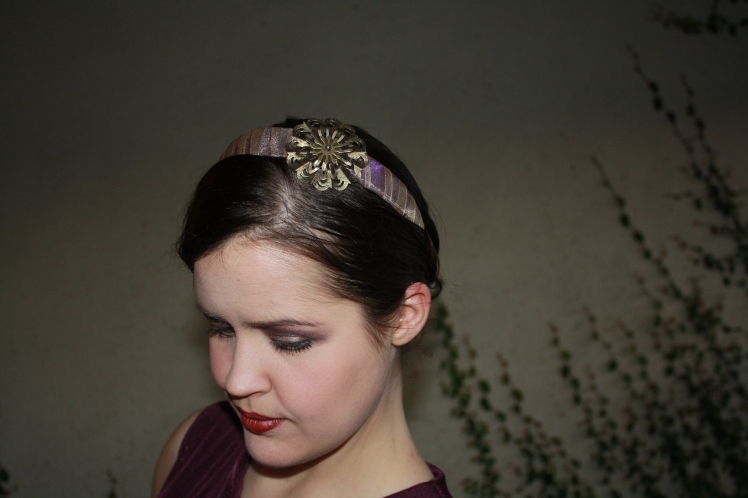 |
| I also made my headband to go with the dress. It isn’t exactly 20s, but a recent haircut left me longer than a bob, but short enough that I needed something there to keep it in place. I thought it looked decent at least. |
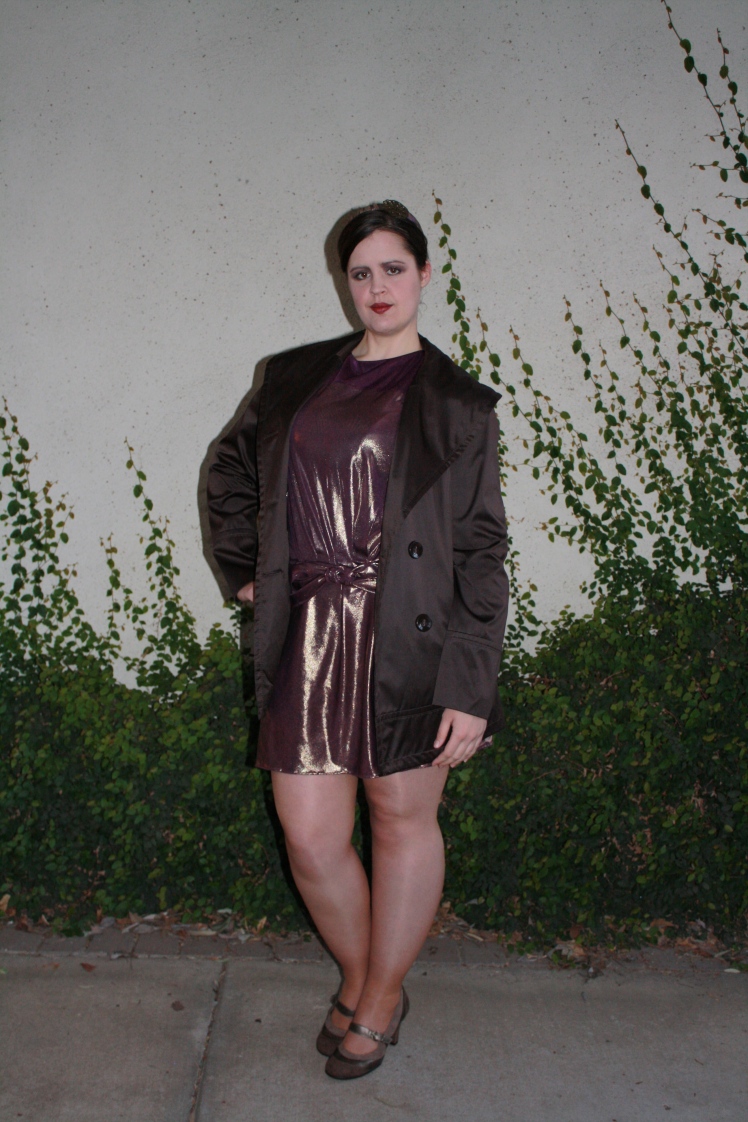 |
| I think the large collar on this jacket (not me-made) adds to the 1920s vibe. |
 |
| Charleston baby! |
Here is my official Pattern Review:
Pattern Description: Draped dress with contrast yoke and dropped waist. Back has zipper and darts for fitting. The magazine calls it the “Philosophy Dress” so I am assuming it is from the Philosophy brand.
Pattern Sizing: Patrones sizes 40-44-48. I traced a 44 and graded out to a 48 at the hip. For comparison I typically trace a 40/44 in Burda.
Were the instructions easy to follow? *giggle* *snort* Pardon me while I laugh… No. Not at all. With Patrones I typically know enough Spanish to figure out the instructions for which pieces to trace, and what type of fabric to use, but I often have to turn to Google Translate to attempt the construction instructions. Normally I would ignore the instructions but this dress was a real puzzel to figure out and I needed some idea of construction order to figure out what went where. I am glad I made a muslin – I had to rip out every seam I stitched on that and start over from scratch… Mostly because some of the pattern pieces weren’t fully marked as far as I know and I got super confused. It was sort of like being given the pieces to a Donna Karen Vogue pattern, missing half the markings, and with no instructions. Fun… Anyway, here is the best I can figure as far as instructions go:
- Sew shoulder yokes separately and attach one yoke piece to body front at mark A.
- Apply right and left side fronts according to marks B-C.
- Prepare the folds shown in the center of the front body and stitch about 2 inches. Press these about 20 cm. to be well marked. Baste like folds indicated in left selvedge along lines drawn in the pattern and press about 40 cm. so that they are well marked. Finish the draping waist sections on the left and right front sides with a rolled or narrow hem.
- Stitch the pleats of her skirt and join the skirt to top front according to center front line and mark E. Continue skirt attachment to both left and right side front pieces.
- Place the strip of right front across the body and attach to left side at mark X, baste. Form knot with opposite front passing over the strip on the right side and then cross over it and again under the right side to form several knots. Use hand stitches at several points to secure the knots and draping.
- Sew darts in back panels and attach to back yoke pieces.
- Sew side seams.
- Sew center back zipper and finish center back seam.
- Finish bodice armholes with bias strips.
- Apply yoke lining right sides together on the neckline, flip to inside, and attach to yoke/bodice seam allowance. Make hem, add hook and eye to neckline closure.
Did it look like the photo/drawing when you were done with it? Ummmm, yes? The photo itself is a bit over-saturated (a stylistic magazine shoot thing) so some of the details are hard to see, but I think my dress looks remarkably like the original, especially considering I was kind of making it up as I went along. The drafting is good (scratch that – the drafting is excellent), so once I figured out where things were supposed to connect it turned out pretty good.
What did you particularly like/dislike about this pattern? Likes: Ok, so I will preface this by saying that the whole baggy dropped waist style is NOT my favorite look, but I was making this for a 1920s themed costume party (but I wanted to make an updated dress I could wear again and not just a costume, so this is more “1920s inspired” than historically accurate). However, that being said I have to say I love how much shaping there is to this dress. The back panels have darts and a nice curve over the hips, and the front and side panels for the top also add shape to a dress that could easily have been a sack. This dress has made me really appreciate how much subtle fitting goes into a loose-fitting dress. I love the gathers at the dropped waist too – confusing as all get up, but pretty. And figuring it all out made me feel super smart, so I guess that is a point in its favor? Dislikes: It is confusing to make! The instructions are not good…. Or, well, they don’t translate well. And the center top pattern piece lacks the “B” indication mark, which would have made figuring out the pattern piece puzzel much easier. Oh, and this was the orange pattern. I don’t often complain about tracing magazine patterns, but I hate tracing the orange patterns. Very difficult to see. So I guess it is possible I missed a few marks that might have been printed? The pieces all seemed to cross each other at inconvenient locations on the pattern sheet as well, which only made it worse. So, not my favorite pattern to prepare. Also, because many pieces need to be cut on the bias (some so they will hang on a straight grain and others so they hang on a bias… trust me it works) so it is a bit of a fabric hog. At least considering you are making a relatively short dress that seems minimalistic (but really isn’t).
Fabric used: I used a metallic polyester knit that had been sitting in my stash for over 4 years. Originally I had bought it for a skating costume, but my mother was not a fan of the color, so it sat and waited. Of course, after I made this dress my mother was surprised I didn’t use the fabric for skating. Sigh. I think it is happier being a party dress anyway. The original pattern calls for a gauze (for the yoke) and crepe satin (for the dress) combination. I had considered some satin-like fabrics in my stash, but I thought they were all too heavy weight. I wanted to make sure the draping looked easy and effortless, and not too tortured or stiff, so I went with my knit instead. I think this would be perfect for a silk knit or silk chiffon/silk charmeuse combo though.
Pattern alterations or design changes you made: Well, I made a muslin out of some terrible $1 poly terrycloth like material that looked way better online than in person. I am glad I did because I ended up (1) taking in the width of the upper back by 1″ (2) increasing the width of the back skirt by 1″ (3) raising the underarms by 1″. I also cut 5/8″ hem allowance on the skirt, but did a narrow hem, so I probably added 1/4″ in length? I might have done well to add half an inch more. As far as the design goes, the only real difference was not using a zipper back because I used a knit instead of a woven fabric. Oh, and I used the backside of the fabric as the yoke contrast, rather than using a gauze fabric (I would have used a stretch mesh, but I didn’t have any color matches on hand. Oh well, at least now I can wear a regular bra under it…). Also, I don’t know if I followed the instructions exactly right (due to difficulty with translation) so there may have been some unintended alterations. I have a dress though, so at this point… meh. Whatever I did, it worked.
Would you sew this again? Would you recommend it to others? I don’t know if I would sew it again, mainly because it is such a distinctive dress, not really suited to every day casual use, and also not my favorite style to wear. If I did sew it again I would get some really sumptuous silk charmeuse though and try it in a woven. I think it would be gorgeous. And I would make the skirt slightly longer. I would recommend this pattern to others if they like the style and are up for a challenge. The dress itself did not take long to make (though my using a knit sped things up a bit there, I am sure), but figuring out how the pieces went to together and tracing them took nearly twice as long as actual dress construction. The pattern is very well drafted and a fun puzzel to figure out, but you have to be adventurous and determined to get it to work.
Conclusion: I don’t often give a “Great for Advanced Sewers” rating to a pattern, but I think this one deserves it. While I feel like there are alternative resources for construction advice for things like pants, jackets, and shirt, this was a very unique dress pattern from Patrones, so it really took me quite a bit of head scratching to puzzel it out. The line drawing isn’t very helpful, the photograph is over saturated to the point of blurring the details of the dress, and some of the pattern indication marks may or may not have been printed on the pattern sheet (again, the orange is difficult for me to trace and easy to miss things). I am very happy with my resulting dress though, and I am more than a bit smug at figuring out how the pattern pieces twist themselves into a dress. I love that though this is a loosely fitted dress, it still has plenty of shaping in the back and on the side seams. It looks simple and easy, but it comes from subtle but fantastic drafting that is actually quite complex. All in all I have to say it is sort of a brilliant pattern, if you are willing to put the time into figuring out how it works. Super happy with my results!

It may not be your usual style, but it's actually very flattering on you. Well done figuring out such a tricky pattern!
LikeLike
What a great dress, I bet you are the sensation at the party. Very nice make up too.
I actually have a similar fabric as the one in patrones magazine, I wish I had that issue, because after watching your results I would totally make it!
LikeLike
Very pretty! I like that you didn't go historically accurate. Instead, you made a dress that you'll be able to wear again. I like the shiny knit. The bronze-y color looks good on you.
LikeLike
It's perfect for your party, but also very modern! 20's is not my era either, but you really pulled it off nicely! Love the dripping in metallic look!
LikeLike
“I bet you are the sensation at the party” …. Ahahaha! You have no idea.
LikeLike
As in yeah, I sort of was. Way more than I intended. Ooops.
LikeLike
Love your dress. So pretty! I am going to a 20's gala in May and am going to make my dress too. 🙂
LikeLike
Great dress. I’m looking forward to making my own version of it.
LikeLiked by 1 person