Continuing my theme of posting projects that I completed in time for June, I thought next I would show my most disappointing project: the Burda 8292 coat. Now, I don’t think my disappointment stems from the pattern itself, but rather my poor choice of fabrics and impatience to make this coat in time for the wedding. I really wanted something that would match my dress, not be too heavy, and not have too many details. In doing so, I may have made too many pre-emptive fit corrections and been hasty in choosing polyester shantung as my fabric. In any case this was my first Burda envelope pattern, Burda 8292.
 |
| Burda 8292 |
I chose to make view A – the peter pan collar style coat. It features in seam pockets and the wonderful Burda 2 piece sleeve. Truly, I love the Burda drafting, but the project did sort of turn out a mess. Allow me to present the evidence:
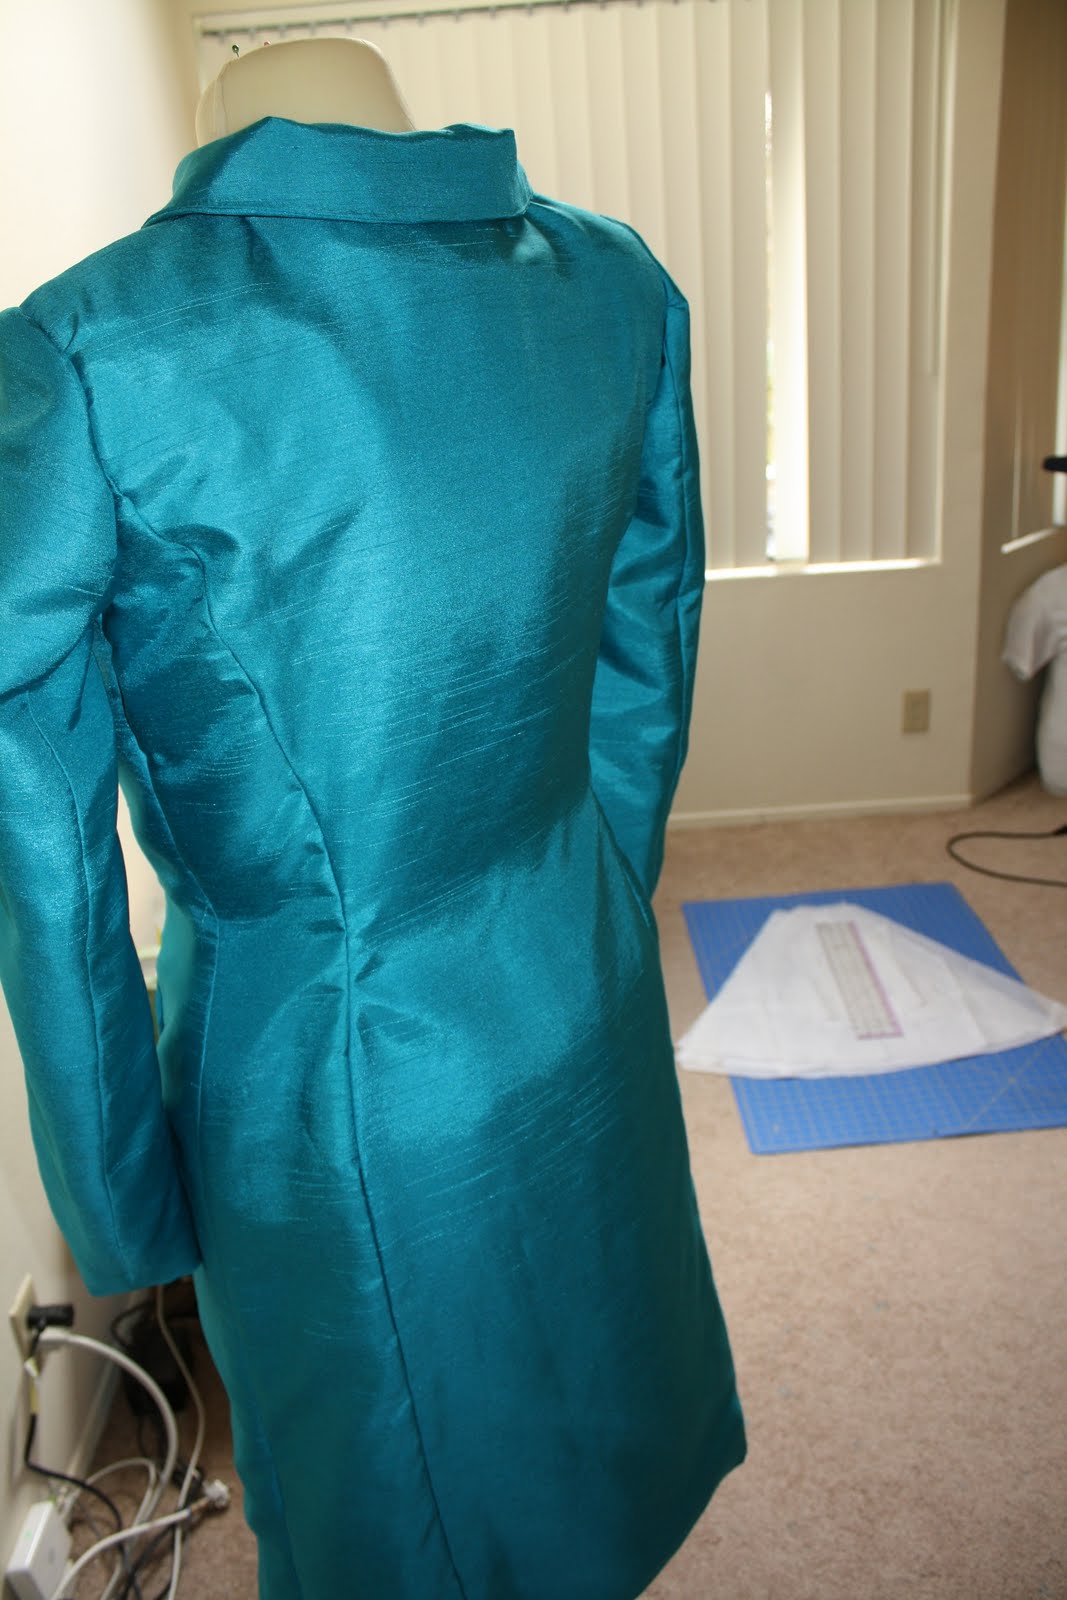
 |
| Messy! |
This project was an exercise in bad fabric choices. Originally, I had wanted to make the coat out of a silk shantung or silk dupioni. However, I was unable to locate silk fabric in an acceptable color for less than $25/yard in time to start the project. This was before I started to consider the internet a valid source of fabric. I resigned myself to working with polyester, but I couldn’t bring myself to use silk organza as underlining for a polyester fashion fabric. Hindsight says I should have used cotton batiste, but after reading about the wonders of organza I had really really wanted to try it as an interlining. Refusing to use silk, and deciding to ignore all published sources and conventional wisdom, I thought to use polyester/nylon organza instead. This was a BAD idea. Very, very bad. While the poly organza did give better body to the fashion fabric, it was NOT happy being pressed. Not one bit. Hence the awful racking and puckering of the seams. The heat didn’t do a darned thing to the organza, but it was too much for the shantung. Sigh. The seams were better before I pressed them, and I even used a muslin press cloth to diffuse the heat. Didn’t help. Ugh.
 |
| Messy back! |
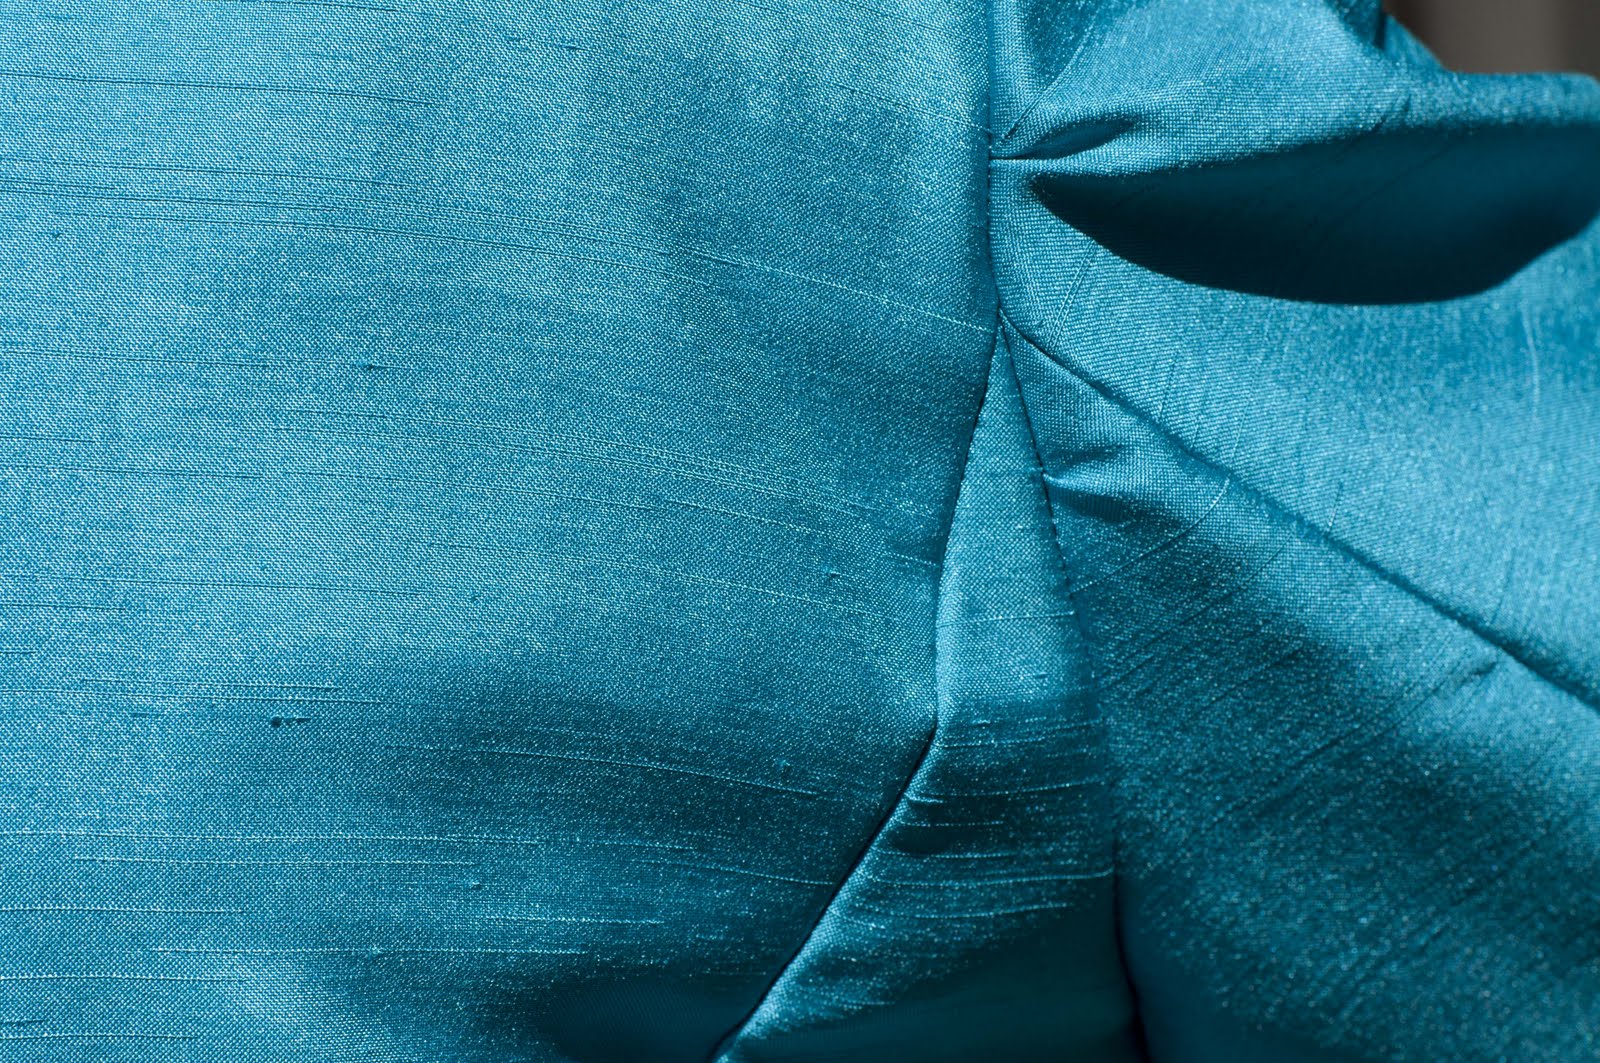
The other great atrocity of this pattern – my epic fail at bound buttonholes. It would stand to reason that if the fabric doesn’t press well to begin with, pressing tiny square opening to make buttonholes would be a bad idea. It was. But darned it all if I wasn’t going to try to make them. I measured, re-measured, cut, pressed, re-pressed, pressed some more. Didn’t help. They ended up a huge mess. So bad, I am not even going to show you. The hideousness would blind you. I couldn’t stand it. So, I covered them up. I cut little fabric squares which I patched over the mess that was the buttonholes to make a slightly smaller mess on top of them. I used my machine to create the button holes, which is what I should have done in the first place. It was still a mess, but at least the hideousness wouldn’t blind passer-bys.
 |
| The patchwork job. |
The other thing I did wrong in my hastiness – I over corrected for fit problems. Being used to the Big4, and after my recent bout with the Burda Style 04-2011-109 dress, I assumed that Burda also sized for B cups. Apparently, I was wrong. After making the coat, come to find, the consensus is that Burda sizes for C cups, they just like really, really low necklines. Oh. So for a coat which should cover to the neck, I really shouldn’t have to make an FBA, since, as I pondered previously, sewing cup sizes depend on the upper bust to full bust ratio, not the under bust to full bust ratio. Sadly, I did not realize this until after I had gone and done my usual FBA. This made the fit on the front and under the arms a big too big.
 |
| The front – slightly a bit too big |
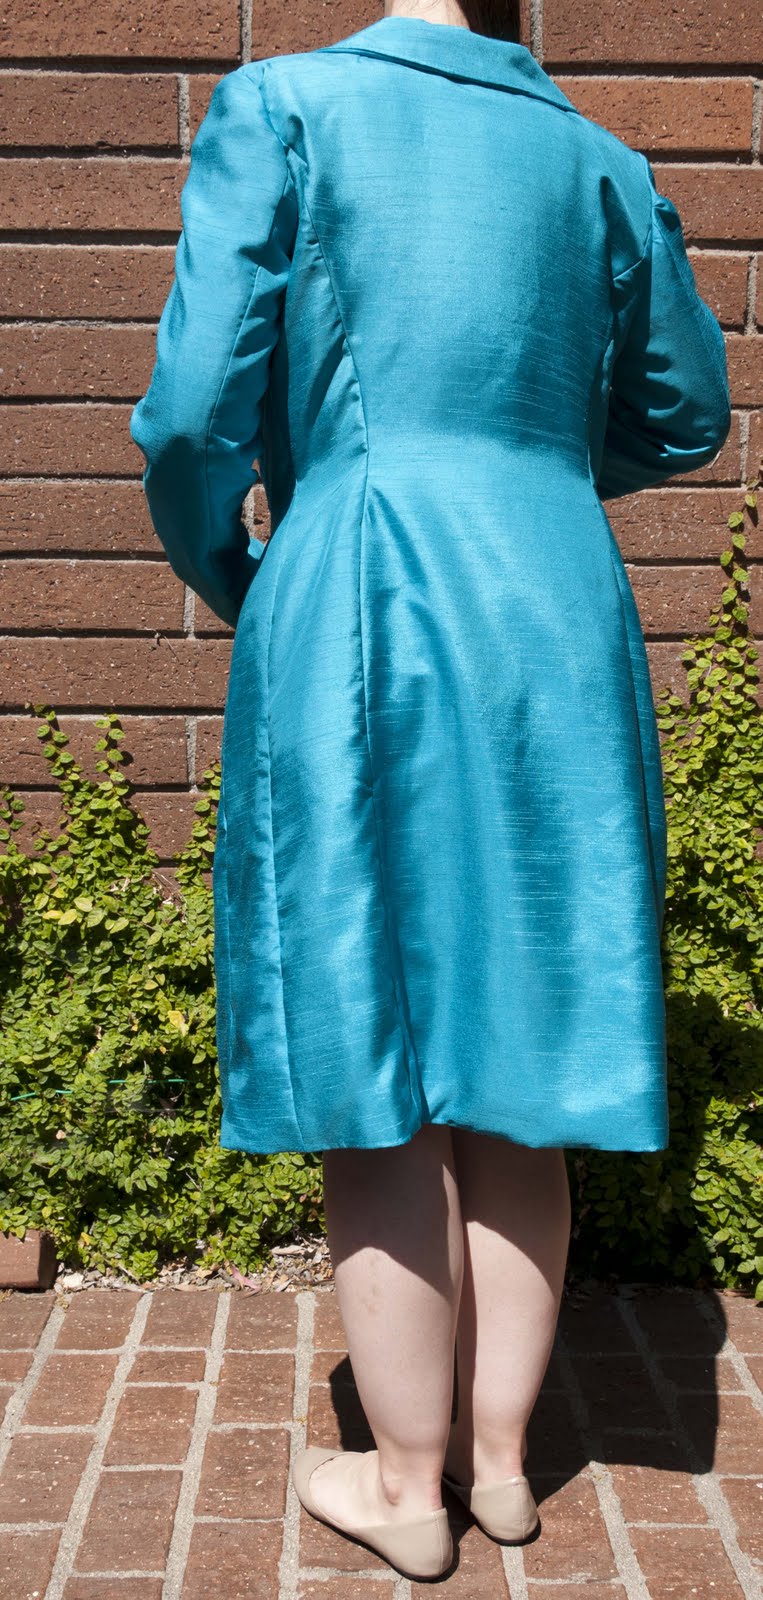
I did a swayback adjustment here as well. There are two swayback adjustments I use – one wedges out the fabric from the center back to the side seam, and one is a vertical slash/slide type adjustment for patterns without a center back seam. Here I used the slash/slide method, which doesn’t work as well as a pattern with a center back seam for adjustments, but is still much better than RTW fabric pools on the backside.
I also adjusted the width across the back, which actually did make this coat very comfortable to wear and move around in. I made a Butterick coat last winter (review to come), and my one fit complaint is that it is tight across the back. No such problems here. I think I will probably increase back width on coats in the future, as I really like the ease of movement. This was often a complaint with RTW coats for me as well, so another win for the home seamstress.
 |
| The back! I think the swayback adjust is pretty good. |
Ok, so while the project did end up a total mess, I wore it to the wedding anyway. Well, I brought it to the wedding, and put it on as close to dark as possible. Since it is polyester, it did its job and kept out the night chill, but, well, I don’t know how soon I would wear it again. I really am disappointed with the outcome of this coat, although I know it is all due to poor fabric choices and impatience. I may keep it around to scavenge the buttons though, since I do like them.
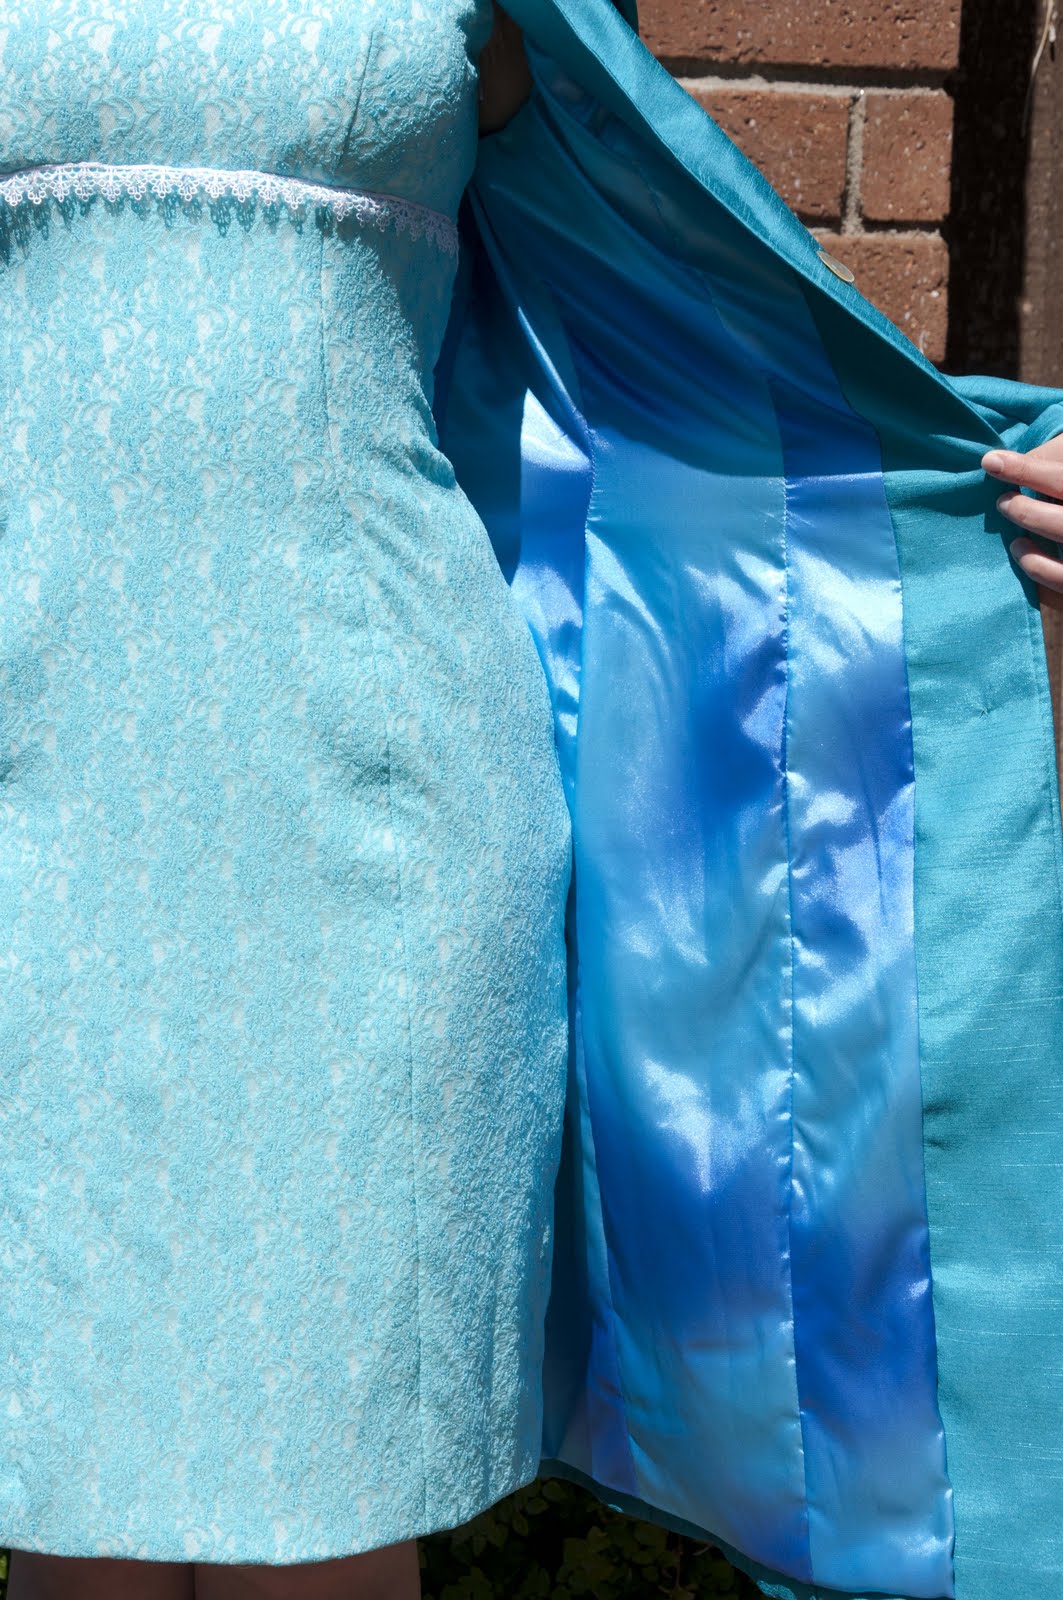
A few more pictures, including the lining:
 |
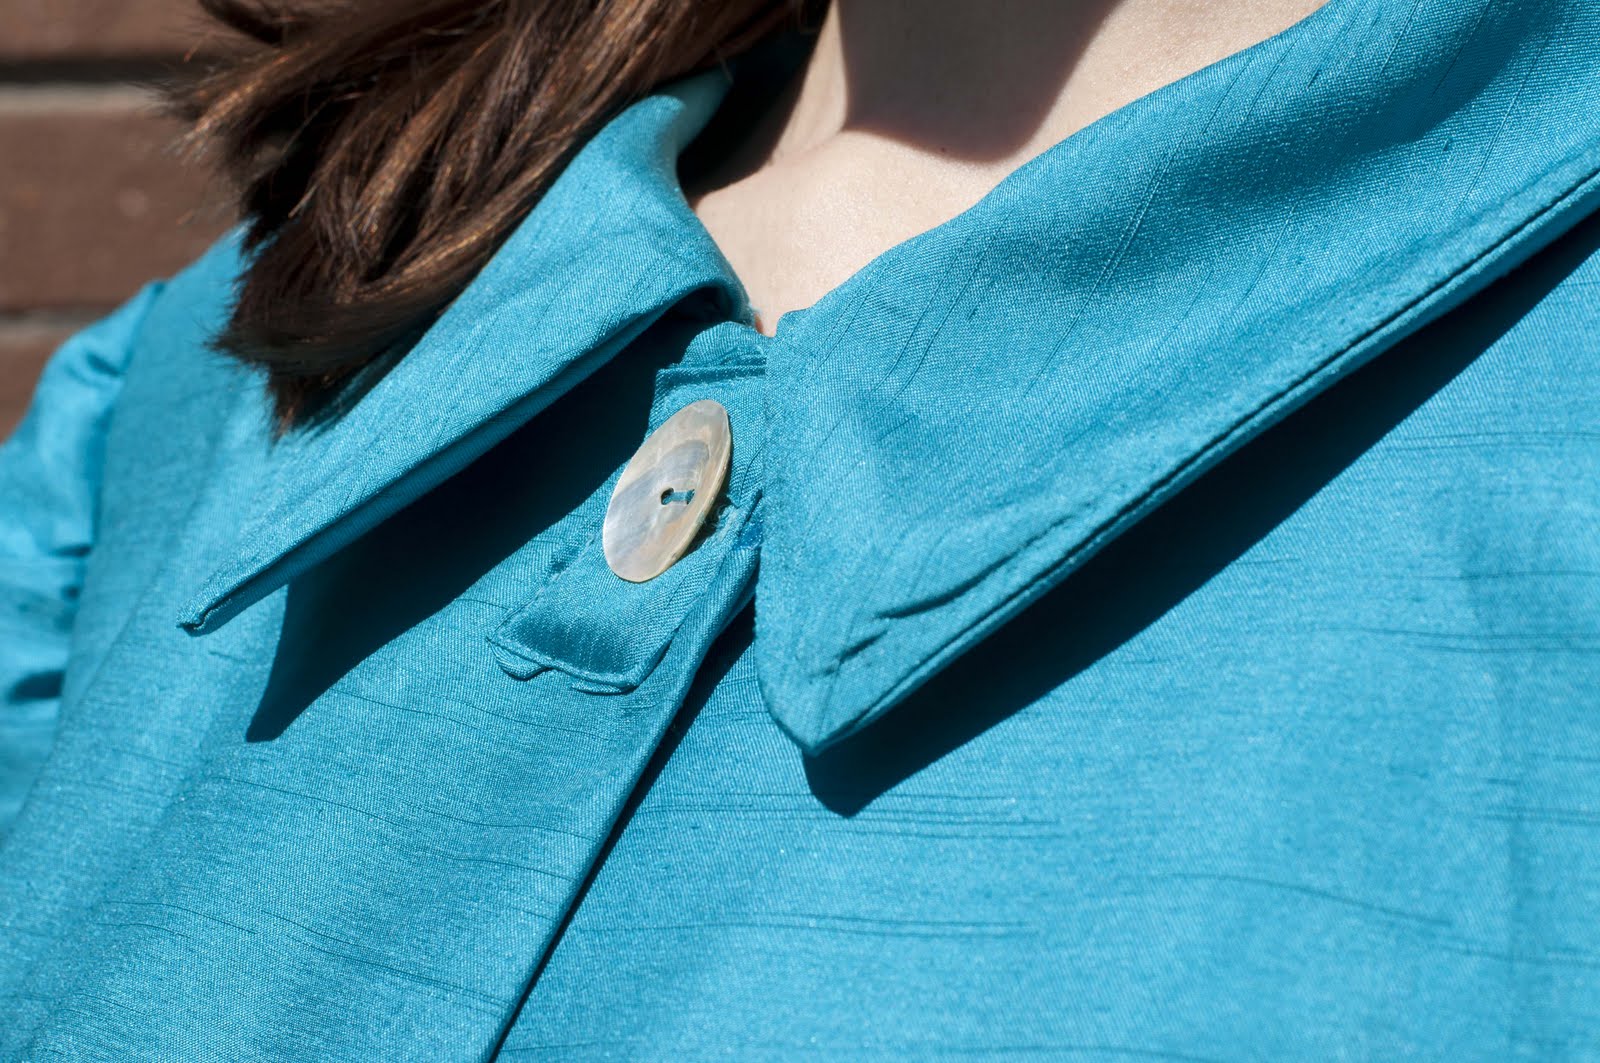
| I do like the shape of the collar. Mine needed more interfacing. |
 |
| Check out the matching sleeve seam lines – the wonders of Burda drafting. |
 |
| In seam pockets. |
 |
| The lining. |
 |
| Another lining shot. |
So, although I have basically rambled on at length about my issues with the coat, here is the official pattern review:
Pattern Description: Coat with length, button, collar, and pocket options. I made view A – the long coat with peter pan collar, in-seam pockets, and 5 buttons.
Pattern Sizing: Burda sizes 36 – 48. I used a size 40 up top, and graded out to a size 42 around my thighs.
Were the instructions easy to follow? I thought so. I know a lot of people don’t like Burda instructions, but the envelope patterns seem to have much better instructions than the magazine does (these were more like Big4 instructions, although some of the terminology was a bit different). I think envelope patterns might be good for people who want to try Burda, but don’t want to deal with the tracing or crazy instructions. I also know some people have previously had problems with the collar, but if you look at the pictures, I think it is not too difficult to figure out.
Did it look like the photo/drawing on the envelop once you were done with it? Erm, sort of. My coat suffers from poor choice of fabric and underlining materials, so it didn’t turn out too well. This isn’t a fault of the pattern, just bad choices on my part. If you ignore the fact that it isn’t well made, the coat does look very much like the envelope.
What did you particularly like or dislike about the pattern? I love that all of the pattern sizes come together in one envelope. In the Big4 I often find that I fall between the size cut-offs for their patterns, but since Burda comes all together I can adjust sizing to my heart’s content. I love the collar – it is so cute! I also like the in-seam pockets and the length options. I am also a huge fan of the Burda 2 piece sleeves. Burda drafting is top notch. Dislikes: I think the in-seam pockets bags are a bit too small.
Fabric used: Here is where I ran into trouble. I wanted a lightweight coat to match my dress for an outdoor wedding. I had seen a silk coat on a sewing blog and really wanted to make one, however, I was unable to find the right weight of silk in the right color at the right price before I started the project, so I settled for polyester shantung. It was a little bit too drapey, so I thought to underline it with organza. Only, I couldn’t bring myself to spend more on silk organza underlining than on the fashion fabric. So I used polyester/nylon organza. This is a VERY VERY BAD idea. Do not do this. Nylon organza does not press. It did give the necessary body to my fashion fabric, but it caused the seams to pucker like crazy AFTER I pressed them. I should have used muslin or cotton batiste. Lesson learned the hard way. In the future I will put more thought into the materials I am going to use before I start the project. I used a polyester charmeuse for the lining, which, actually, I really did like. I used the Palmer/Pletsch lightweight interfacing for the front and the collar, but I would use a more heavy weight, or multiple layers of interfacing in the future to make the collar a little more stiff. The lightweight stuff worked well for interfacing the front pieces of the coat.
Pattern alterations or any design changes you made: Here again I caused myself trouble. Since I was sewing on a deadline (I wanted this in time to wear to the wedding), I thought it would be faster to make my “usual” alterations and sew stuff up. Umm, yeah. Not the best idea since this is only my 3rd Burda pattern (first Burda envelope pattern). I didn’t know that Burda was sized for a C cup, so I made too much of a FBA, which caused fit issues on the front, which I am sure wouldn’t be there had I just left it well enough alone. I lengthened by 2″ and made a 1.5″ swayback adjustment, which did help the fit. I also added 1/4″ to the shoulder blade area which made it very comfortable to move about in. I think I want to try making a muslin straight from the pattern, then adjusting the fit next time, because I am sure it would turn out better than me scrambling through the fitting process. I also, for some reason, stubbornly decided I wanted bound button holes. This is dumb if your fabric doesn’t press, because it is very hard to get nice perfect openings when the fabric keeps trying to unfold. So I patched over them and used machine button holes, but it doesn’t look too pretty. Again, a fault of the fabric, not of the pattern.
Would you sew it again? Would you recommend it to others? Yes, I want to make this again! I really do like this pattern, and I want to make it out of fabric that will allow it to achieve it’s true potential. I think the collar is super cute, and I love the sleeves. I think I might try to make view D/E next time (the shorter style coat) because I think I could get more wear out of it than the long version. I think I need to reconsider some of my alterations before I make it again, however. I would recommend this pattern, but make sure that you don’t use too flimsy a fabric and that you use a decent amount of interfacing in the collar.
Conclusion: I really like this pattern. I have really liked all of the Burda patterns I have used so far. This project is a flop due to over-adjusting the pattern and poor fabric choices, but I think the pattern is a win. Even with the ugly problems, I still brought the coat to the wedding (although I waited until as close to dark as possible before putting it on). I don’t think I will wear it much in the future however. I think I need to re-start with a muslin straight from the pattern before making adjustments next time, and I really should use better quality fabrics in my future projects. This coat took too much effort to deal with lousy materials that didn’t want to behave. I don’t know that I will make another right away (lot’s of other projects and patterns I want to try first), but I do want to try this pattern again in the future.
So there you have it! The Burda 8292. It is very much the opposite problem of Simplicity 4014. With the Simplicity dress, I was very proud of my fitting and construction, but I hate the pattern. Here I love the pattern, but I hate my coat. Sigh. This seems to be the year of the wadders.


Thanks for posting this! Honestly, I wish more folks would post problem projects, that’s where you learn! I’m planning to make this coat and this was a very helpful review in terms of understanding the pattern!
LikeLike
Good luck! It’s a good pattern, I just made all the rookie mistakes when I sewed it. Glad you found this helpful.
LikeLike